


Likes
Comments
Share

@DogDoctorOfficial
Follow
🌱 Animal Mints — Week 3 VEG Report
12/12 from seed | Vegetative phase ongoing
General Overview
Week 3 of vegetative growth closes with Animal Mints standing out for exceptional leaf detail, natural structure, and active branching behavior. Both plants are thriving, each expressing itself according to its own timeline, yet sharing the same healthy rhythm seen across the room.
This is one of those cultivars where detail becomes the story.
⸻
Growth & Structure
• Stage: Vegetative
• Flowering signs: None confirmed
• Pre-flower: Possible very early indication on one plant (not yet definitive)
Plant A — with prior vegetative period
• Veg history: ~15 days under 18h light
• Node count: ~8
• Size: Significantly larger (as expected)
• Branching: Strong and active
• Leaf size: Large, dominant, highly detailed
On this plant, light leaf bending / leaf tucking has begun.
Large fan leaves are gently tucked or repositioned underneath the canopy to:
• Improve light penetration
• Encourage lower branch development
• Balance apical dominance
• Promote a more even structure
This is not aggressive training — no topping, no tying, no stress.
It’s a soft, observational approach, simply guiding leaves out of the way so the plant can express its natural branching potential.
⸻
Plant B — 12/12 from seed
• Node count: ~4
• Size: Smaller, as expected
• Branching: Surprisingly active for its size
• Training: None
Even without any intervention, lower branches on this plant are already reaching upward naturally, showing excellent hormonal balance and structural intent.
⸻
Leaf Expression & Detail
Animal Mints truly shines in leaf morphology:
• Extremely fine serration detail
• Subtle curves along each leaf finger
• Clean edges, no deformation
• Deep, lush green coloration
The level of detail is remarkable — almost sculptural — and clearly genetic rather than environmental stress–related.
⸻
Training Status (Clarified)
• Leaf bending / tucking:
• Applied only on the larger, vegged plant
• Gentle, non-stressful
• Focused on opening the canopy
• No other training performed:
• No topping
• No LST
• No defoliation
The goal remains support, not control.
⸻
Veg vs 12/12 Comparison
This folder offers a clear and valuable comparison:
• The plant that received a veg period is larger and more developed
• The plant run 12/12 from seed is smaller, but structurally similar
• Both show strong natural branching
Notably, the vegged plant is still not flowering, despite already spending three weeks under 12/12. This suggests the plant is still prioritizing structure and energy storage.
⸻
📸 Photo Documentation
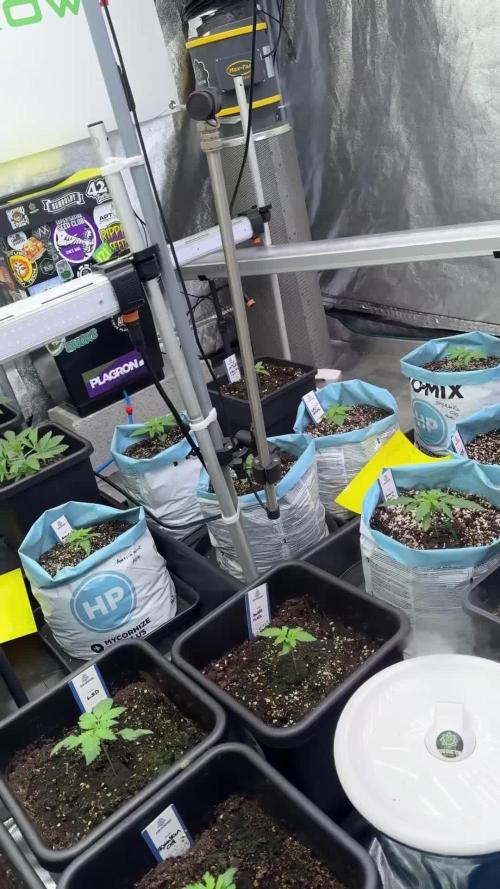
This week includes studio-style photos, including images of the plants held close during documentation.
One of the photos features the Plagron jacket, included as a natural thank-you for the nutrition program and gear used throughout the grow.
⸻
Environment — Room Conditions (Week 3)
• Photoperiod: 12/12 from seed
• Day temperature: ~26 °C
• Night temperature: ~18 °C
• Relative Humidity: 60–65%
• VPD: In optimal vegetative range
• Airflow: Gentle, constant, non-stressful
• Solution temperature: ~21 °C
• Substrate temperature: ~21 °C
Environmental stability remains consistent across the room.
⸻
💡 Lighting
• PPFD: ~600–700 (plant-size dependent)
• Plants growing naturally into the light
• No stretch, no light stress
⸻
💧 Watering & Nutrition
• Watering method: Hand-watered
• pH: 6.0
• EC: 1.0
Nutrient program:
• Plagron Terra Grow
• Power Roots
• Pure Zym
• Sugar Royal
Foliar:
• Vita Race
• Used selectively and intentionally
⸻
🔍 What to Expect / What Not to Expect (Next Week)
What to expect:
• Continued vegetative expansion
• Stronger lower branch response on the vegged plant
• Possible clearer pre-flower signals
• Increased structural definition
What not to expect (yet):
• Full flowering
• Explosive stretch
• Need for aggressive training
⸻
Final Thoughts
Animal Mints closes Week 3 as expressive, detailed, and naturally structured. Leaf morphology and autonomous branching are already setting the tone, while gentle leaf tucking is helping guide the canopy without disrupting the plant’s rhythm.
No forcing.
No shortcuts.
Just support, observation, and respect for the process.
FOR DISCOUNT CODES AND MORE JUST FOLLOW THE LINK https://website.beacons.ai/dogdoctorofficial
📲 Don’t forget to Subscribe and follow me on Instagram and YouTube @DogDoctorOfficial for exclusive content, real-time updates, and behind-the-scenes magic. We’ve got so much more coming, including transplanting and all the amazing techniques that go along with it. You won’t want to miss it.
GrowDiaries Journal: https://growdiaries.com/grower/dogdoctorofficial
Instagram: https://www.instagram.com/dogdoctorofficial/
YouTube: https://www.youtube.com/@dogdoctorofficial
⸻
Explore the Gear that Powers My Grow
If you’re curious about the tech I’m using, check out these links:
🔆 Lighting & Environmental Control
• Future of Grow — Advanced LED lighting technology
https://www.futureofgrow.com/
DISCOUNT CODE: DOG20
• Lumiflora — Under-canopy LED lighting
https://lumiflorade.com/
• TrollMaster — Environmental controllers and automation gear (past collaboration)
⸻
Genetics
• Zamnesia Seeds — Genetics used in this project
https://www.zamnesia.com/
⸻
🌱 Soil, Substrates, Boosters & Root Support
• Plagron — Substrates, bio mixes, and supportive products
https://plagron.com/en/
⸻
🎒 Storage, Curing & Preservation
• Grove Bags — Curing and storage solutions
https://grovebags.com/
⸻
📸 Photography Equipment & Tools
(Not sponsors, but part of my creative toolkit)
• Sony A6700
• Sony full-frame macro lens + few more
• Stacking photography workflow - learning
• iPhone (for behind-the-scenes shots)
We’ve got much more coming as we move through the grow cycles. Trust me, you won’t want to miss the next steps, let’s push the boundaries of indoor horticulture together!
As always, this is shared for educational purposes, aiming to spread understanding and appreciation for this plant. Let’s celebrate it responsibly and continue to learn and grow together.
With true love comes happiness. Always believe in yourself, and always do things expecting nothing and with an open heart. Be a giver, and the universe will give back in ways you could never imagine.
💚 Growers love to all 💚
📸 P.S. – The Eye Behind the Lens
All photos in this diary (for now — except for the ones showing the camera, which I took with an iPhone) are taken with a Sony A6700 paired with a Sony full-frame macro lens and a few more.
Photography is part of the story — it’s how we share the fine textures, the glow, and the quiet details that words can’t always capture.
I’ve also started experimenting with photo stacking — a technique where multiple images, each taken at a slightly different focus point, are layered together to create one perfectly sharp image from front to back.
It’s not digital enhancement or AI; it’s pure photography — a way to reveal the plant’s beauty in microscopic depth, from trichome to petal.
You’ll even see a few shots of "ghost me" capturing the shots — camera, lens, setup — because every grow deserves not just to be cultivated, but documented like art.
FOR DISCOUNT CODES AND MORE JUST FOLLOW THE LINK https://website.beacons.ai/dogdoctorofficial
NEW DISCORD - Official Server Invite Link : https://discord.gg/ksjAkA5T74

Likes
5
Share


@RoyColt
Follow
Always R.O Water
Watering the plant 3 times for per week
1st Watering with nutriens.
2st Watering with nutriens.
3st Watering with only R.O water & CalMag

Likes
12
Share


@Siriuz
Follow
We started week. 10
Hey there guys I've been super busy
Day 64
Check video
Fed them 1670ppm
Followed by water with lil runoff
Day 65
Check video
Day 66
Outdoors for 3hrs
Rested for 6hrs no lights
Because of blackout
I know it sucks
Humidity 60%
Day 67
Humidity 45%
Got some vids and pics for you guys
She's all good
Buds fattening up
Day 68
Water them a lil bit
0.5l each
Temp 24C
RH 45%
Day 69
Outdoors for a day since we didn't have electricity from 10am til 7pm
Good thing we have sun light right?
And it's very bright but very hot as well
Temp reached 33 Celsius but we had her on sprayed mist until it dried out completely than refresh her again and so
She didn't stress at all shes good
After thar electricity came back and we turn on the setup grow lights ac and all stuff
Back to normal again
Day 70
Same stuff than 69
Nothing wrong all is good
Temp reached 33 then dropped to 24 at night time
Coming up next week last meal nutes


Likes
5
Share


@DazeDreamer420
Follow
Flushed with flawless finish on Monday. Ran through 26L. Ppm was initially 3300 and at the end was down to 1750ppm
Tuesday flushed with 16L of just 6.5pH tap water that was dechlorinated. Initial run off was 1200ppm and got it down to 767ppm.
Let her dry out for 3 days
Flushed again but this time with RO water, 20L at 12ppm. My tap water is anywhere from 285-360ppm.
Letting her dry again for 3 days. After will return to the normal 3L watering every 2-3days until harvest.

Likes
38
Share


@TrueNorth
Follow
Bud ignitor in full affect. Same with the bud candy. Both from Advanced Nutrients. Amazing change daily. Super happy with the frostyness. Can not wait to see the final. Lollipop lollipop oh lolli lollipop!


Processing
Likes
5
Share


@Mr_nugs_lover_David
Follow
She looks very healthy, sticky nuggets, exact same aroma as her sisters, very citric and lemony. Let's see how she keeps developing


Likes
5
Share


@Ieiogrow94
Follow
Eccoci qui!!!
Tutto procede per il meglio, i pistilli sono usciti e ora si va dritti dritti alla maturazione, NE VEDREMO DELLE BELLE!!!
La piccola cresce molto vigorosa ed in salute, chissà cosa ne verrà fuori intanto possiamo solo ammirare questa bellezza!!
Grazie a tutti per il supporto ❤️🔥🌲

Likes
16
Share


@KcKoolaidMan
Follow
Loved this plant will have a smoke report soon. It really responded well to feedings and heavy feedings at that. The buds packed on weight and frost. This was by far my favorite of this run!


Likes
4
Share


@iopiopiop
Follow
Day 1 of week 14: No water
Day 2 of week 14: 250/250ml distilled/tap water
Day 3 of week 14: 250/250ml distilled/tap water

Likes
22
Share


@bypado_farm
Follow
Day 29:
Watered each plant with 0.75L with nuts
1485 ppm, 3150 us/cm, 3.1 EC
Day 32:
Watered each plant with 0.8L with nuts
Day 35:
Watered each plant with 0.8L with nuts
1616 ppm, 3438 us/cm, 3.4 EC


Likes
4
Share


@pzwags420
Follow
On day 1 week 4 flower the girls are bulking up smelling great and some pistils are turning orange. The trichomes are still mostly clear with some milky trichomes starting. On day 3 one of my blumats had a runaway I believe from fertilizer sediment all I can do this late in the game is to lower the flow rate and hope that will solve the problem. It is strange that this is the same blumat that flooded when I went on vacation earlier on in the grow. I will inspect the blumat closer when I finish the grow. I tightened the carrot down 1.5 carrots. Except for the minor flood the girls are doing very well, even though they are too close to my grow lights :). On day 6 almost all the buds are starting to have a second growth spurt with some small white pistils showing, the trichome concentration is visibly growing and I expect to harvest the girls between week 8 and 9 of flower.
Likes
73
Share


@Rwein93
Follow
Ciao ragazzi e bentornati qui per i nuovi aggiornamenti della Mimorange 🍊
Settimana fantastica!💪
Le sorelle all arancia mi sorpendono giorno per giorno. Oltre alla super altezza di 160 cm, ormai raggiunta da quasi tutte e tre, i buds sono sempre più grassi ora misurano 2,5 cm quelli secondari e le apicali 3/3,5 cm.
Questa settimana si saranno allargati di 1 cm abbondante. Sbalorditivo😍
L odore è buonissimo. Un forte profumo dolce di mandarino pervade il naso appena apro il loro lato della tenda.🤤
Ho defogliato loro nel giorno 67 e ho allargato la numero 1 con un po di Lst nel giorno 70. I nuts rimangono invatiati.👍
Eh niente! Anche questa settimana è giunta al termine ragazzi.🤙
Grazie a tutti per aver guardato e restate sintonizzati per nuovi aggiornamenti.🙏
Buona settimana e felice crescita 🌱 🌱 🌱

Likes
18
Share

@LueRootsGrowGermany
Follow
Hallo Liebe Community!
Leider gab es einen Nacktschneckenbefall den ich feststellte als ich am Samstag von meinen unvermeidbaren Terminen wieder kam.
Zum Glück wurde Sie bisher verschont.
Seitdem bin ich jeden Tag auf der Hut und habe den Untergrund der Untersetzer ein wenig Schneckenuntauglich gemacht.
Ehrlich gesagt wollte ich los und was gegen Schnecken besorgen aber bisher scheint es gut zu funktionieren.
Aber nu so ist es halt mit der Natur :-)
Zum Wachstum
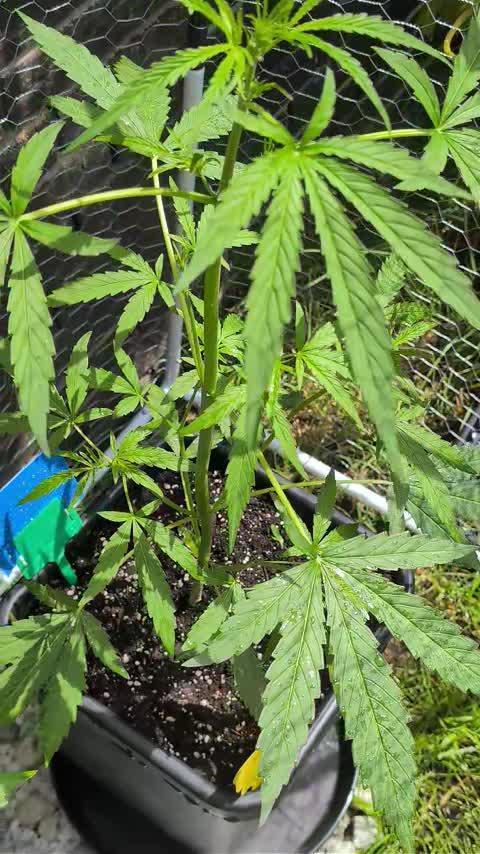
Stamm und Blattwuchs machen sich gerade echt super, Seitentriebe entwickeln sich ebenfalls. Sie hat einen ordentlichen Sprung in die Höhe gemacht.
Dünger
Da Sie etwas empfindlicher ist auf der Düngeebene, hab ich sie vorsichtiger gedüngt.
Sie befindet sich auch gerade in der Vorblüte. Ab dieser Woche geht es dann langsam mit Kalium und Phosphor los.
Ich freue mich auf die Kommende Woche!
Das Wetter ist aktuell eher grau und es regnet wirklich nicht wenig. Die Zugabe von Additiven im Outdoor Bereich sind durch das Wetter aktuell nur schwer umsetzbar. Ich hoffe sehr, dass jetzt bald mal wieder mehr Sonne kommt!
Somit, euch noch eine angenehme und Erfolgreiche Woche gewünscht!
Viele Grüße an die Community und Kollegen!
LueRootsGrowGermany!


Likes
12
Share


@Kakui
Follow
Veg3, día de riego, van creciendo bien.
Veg5, riego con 0.9 EC y pH 6.2, great white en el sustrato.

Likes
9
Share


@2Stones1Bird
Follow
Start of week 3 flower - days 29 to 4 October/November
Light is at 100w and it will remain on the top of the tent for the entire grow.
--------------------------------------------------------------------
30/10/2020 - Increased the light to 115w.
4/11/2020 - Watered #2 added Bud Candy 1ml/L and Great White.
