Likes
Comments
Share
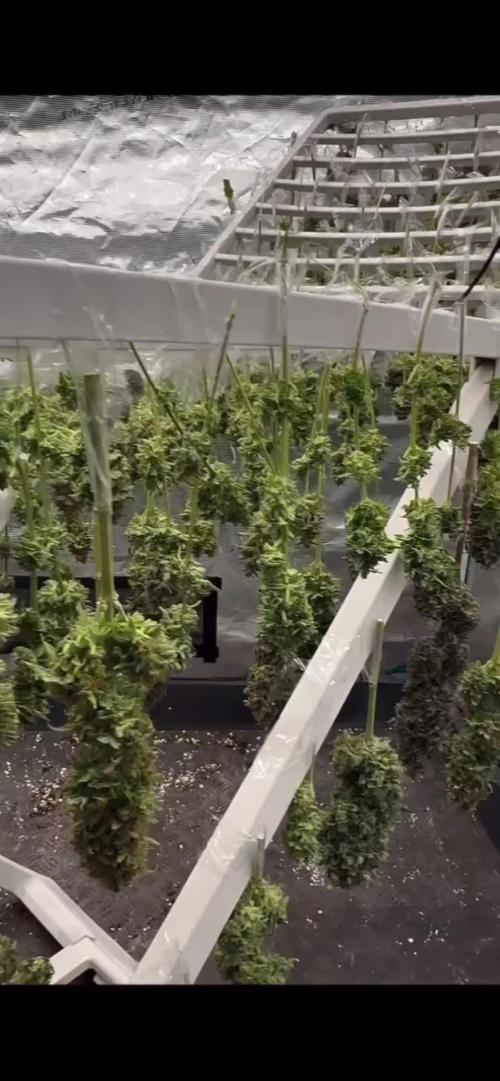
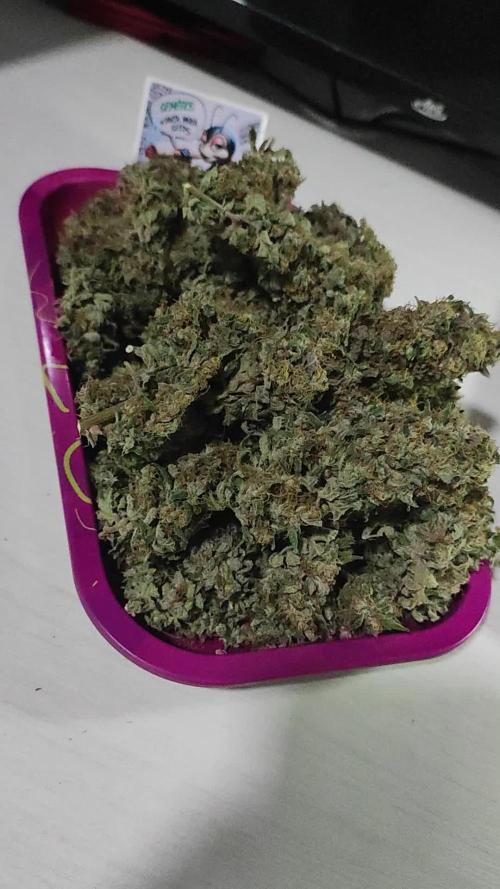
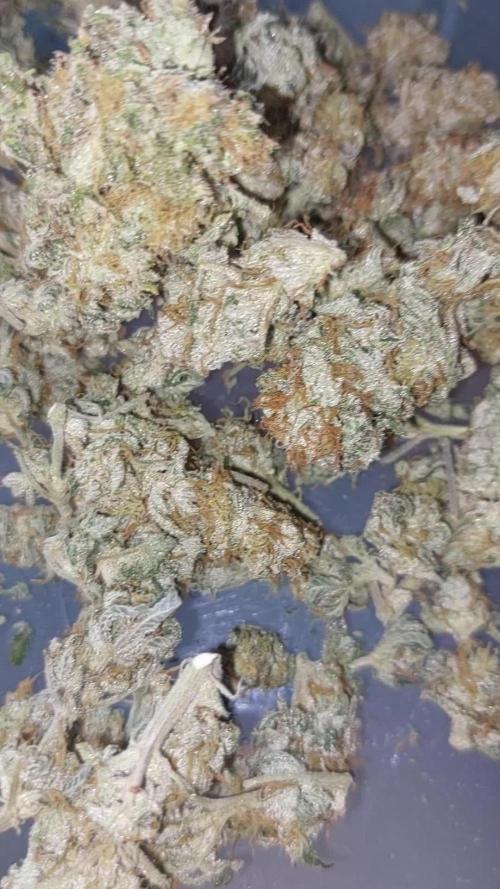
They’re already drying, so now it’s time to wait for what one has been looking forward to so much. It hasn’t taken very long, and it’s been a good return. What I like least about everything is trimming the buds.
Likes
90
Share
23rd of July - Attempting to let the soil get “dry”. See what Mother N has to say about that. Day 3 w/no rain ! The Soil is still very moist - Last fed on the 20th - Foliar Spray in the a.m. just to tease - boy does the audio sound bad on the phones Video !! Kinda historic, sorryboutthat 24th, - added some Epsom Salts to todays feed, magnesium and sulfate for the Soil. GOOD READING AVAILABLE... - went ahead and fed on day 5, iffy weather all around. GO - only 2 gallons used 25th, - killer day finally after more rain lst nite - re-positioned two questionable side-branches, down low and in front. Whole plant is open. Not a leaf to remove. Anybody thats done this style of grow, let me know if theres a hole in the program. *** smoked some of the Beaver Seeds; Maui Wowie Autoflower that I recently grew, you know, while tending the plant today… well laugh at the fact that the 15% thc of the famous dope truly kicks Butt; seriously good weed - “next” Meal posted above, beginning the transition to bloom nutrients ! - activity at the Bud-sites is picking-up 26th, - amended the plant base w/ 2 cups of liquid phish-poop lol - next proper meal posted above ~eta 30th or 31st - anxious to get the Bloom nutes in & running 29th - big, long, burp, after sliding 3 gallons of “transition-food” into Jack - Meal is posted above with no Molasses today; TDS 1400ppm - started a MONTHLY inclusion of dissolved Epsom Salts. I will be including it in Foliar applications as well, w/ Fulvic Acid.
Likes
4
Share
@Growbody
Follow
Tag 28: Die CBD Auto 20:1 von FastBads reagiert sehr gut auf LST. 2 Blätter entfernt.
Likes
19
Share
Let’s Go Day 67 from seed !! So this week went real great! 2 Ogreberrys an Bruce Banner started getting flushed! The rest will follow up and start flush next week ! Today the 3 will continue getting flushed while the 3 others get there dose of nutrients, PHd at 6.5! Let’s grow lil ladies let’s grow!!! You all have an amazing productive day as well as a a great safe week !! Peace love and positive vibes to y’all Cheers 😶‍🌫️💨💨💨💨🤙🏻If there’s any questions please ask, I’ll be opened up to answer at best of my knowledge! Thank you all have a dank day !!
Likes
21
Share
@yzaet
Follow
8th week of flowering starts now. Flowers are very big and sticky, a few trichs have that milky tint and I already noticed ambered ones. I started flushing but I’m facing issue to remove the runaway water from cups. 7 plants for that size was a bit too much for a first. But that’s a lesson for future grows ! Humidity is also very hard to keep under control as I live in a very humid area. Flushing doesn’t help and I definitely have to invest in a good dehumidifier for next grow. A few small buds, with skinny stem started to bend because of buds weight.
Processing
Likes
3
Share
@StonyHemp
Follow
Week 4 and buds are beginning to fatten up nicely, I’ve changed the position of the gelato and one of the Zkittles to improve light penetration into the canopy as the leaves have began to defoliate themselves from the plants. This being said all plants are looking green and healthy and show minimum environment stress. Hopefully this change in the canopy will allow each of the strains to grow to their full potential with the limited space that I have.
Processing
Likes
14
Share
@mrekansh
Follow
Plant seems to like the support i was off for a week ot two but dozed them with 1 ml nutes and 1 ml greens of (city greens) concentrated in 1 lt water plant seems ready to flower now as the growth is tending towards the stems and they have started to turn more purple 🔥 please comment
Likes
46
Share
@Capo420
Follow
Been an awesome week 😎 Lots of things going on last week.. We started LST, made a few adjustments, gave the ladies a haircut, and further refined the nutes👍 Looking forward to seeing some signs of flowering this week. 🙏 I had believed that I was a man of patience 😅 Stay tuned for pics and videos throughout the week.🙌 Happy Growing! 🤙💚💪🌱😎🌱💪💚🤙
Likes
8
Share
@BlossomB
Follow
The Perfect Student & My First Topping ​🌿Unstoppable Perfection🌿 Die Tropical Chimera ist seit Tag 1 mein absoluter Musterschüler. Sie ist das Paradebeispiel für eine wunderschöne, perfekt symmetrische und kerngesunde Pflanze. Ganz ehrlich: Wenn ich es nicht besser wüsste, würde ich glatt behaupten, sie ist eine Kunstpflanze – so makellos steht sie da. Sie wächst, und wächst, und wächst... einfach unzerstörbar! 🌿​A Heartbreaking Milestone: First Topping🌿 ​Diesen Samstag war es so weit. Da sie meine erste photoperiodische Pflanze ist, hatte ich durch sie auch mein „erstes Mal“ beim Toppen. Ich muss gestehen: Es fiel mir wahnsinnig schwer, mein Baby zu „köpfen“ . Ich trauere dem entfernten Kopf immer noch ein bisschen nach... 🌿 ​Aber die Chimera? Die ist aus Stahl! Während ich noch trauere, zeigt sie absolut null Anzeichen von Stress. Sie hat sich keine Sekunde hängen gelassen, keine schlaffen Blätter, nichts. Sie ignoriert den Eingriff einfach und wächst munter weiter, als wäre nichts passiert. Wahnsinnige Vitalität! 🌿​Pure Vitality – No Additives🌿​ Auch hier bleibe ich meiner Linie treu: Kein Dünger, absolut nichts. Sie ist so gesund, vital und tiefgrün, dass sie offensichtlich alles hat, was sie braucht. Am liebsten würde ich sie einfach ewig weiterwachsen lassen und unendlich viele Klone von dieser perfekten Genetik ziehen.
Likes
5
Share
@seth
Follow
Week 11😎 This mutant by the way is huge , unlucky its mutant😭 I will use flowers to make kief so i will freeze them after drying process. More or less 1 week and harvest PH 6.8 PPM 200
Likes
46
Share
Week 7 Flower — Sundae Driver (Grow Diaries Report) Quick recap for new readers From seed to here, this run has been a careful dance between living soil, precision feeding, and adaptive training: • Seeds germinated with Aptus support, then transplanted directly into 11L fabric pots of enriched soil. • Minimal veg — early switch to flower under 11/13 schedule. • One tall “moon-shot” top supercropped early in flower to control height and redirect hormones → result: knuckle healed beautifully, more bud sites formed. • Feeding has been a Plagron + Aptus combo, alternating between soil-driven nutrition and steering solutions, keeping EC and pH carefully managed. • By Week 6, we saw resin pouring in, trichomes swelling, pistils still pushing white, and strong aroma developing. Now, in Week 7, we are right in the heart of bulking. ⸻ Environmental update • Outside: brutal heatwave (temps up to ~45°C / 110°F). • Grow space: thanks to AC, canopy temps hold around 28°C with the lung room at ~21.8°C. • Humidity: still high, ~62%. Ideally we’d want 45–55% at this stage, but the girls are adapting beautifully — no visible signs of mold or rot, airflow and plant vigor are keeping them safe. • Tools: Trolmaster and Spider Farmer apps logged to share transparent data. ⸻ Feeding & recipe this week You’ve reintroduced the All-in-One liquid into the Plagron + Aptus recipe, pushing EC slightly higher again for an extra boost: • Plagron PowerBuds, Sugar Royal, Green Sensation → stacking, sugars, and bloom density. • Aptus Regulator + CalMag Boost → structural strength, stress resilience, mineral balance. • All-in-One liquid → full-spectrum nudge to keep driving flower bulking. This “soil-first, solution-steering” approach works perfectly here. The soil still holds a strong base load (your earlier EC readings confirmed this), and the solution acts like an accelerator without overloading. ⸻ Plant performance & structure • Bulking: Both Sundae Drivers are filling out massively — flowers are swelling, colas thickening, side branches almost unable to hold themselves upright. • Support: You’ve improvised by tying branches to each other, preventing collapse. This is a classic late-flower “good problem”: weight means density. • Supercrop site: completely healed, producing solid flower along the bent top and nearby branches. A textbook example of how to redirect growth without losing yield. • Color: Leaves still lush green, minimal fade — showing balanced feeding and no major deficiencies. ⸻ Trichomes & pistils — where we stand • Trichomes: Frost is stacking heavy — from sugar leaves to outer calyxes, a shimmering coat is spreading. Under magnification, most heads are clear-to-cloudy, with some areas beginning to lean more cloudy. Amber not yet common — perfect for Week 7. • Pistils: Still plenty of white hairs, but we’ll begin to see darkening and curling soon as calyxes mature and resin production peaks. • Meaning: Plants are still actively in the bulking/resin-factory stage. Harvest is not yet — but we’re entering the critical monitoring phase. ⸻ What Week 7 means (technically) This is the late bulking / mid-ripening window. • Calyxes expand → actual bud density increases. • Terpenes develop rapidly → strong smells, unique cultivar expression. • Resin pathways peak activity → cannabinoids build, but need 1–2+ more weeks to fully mature. • Risk window for botrytis → high humidity + dense colas = careful airflow essential. ⸻ What to expect next week Expect: • Noticeable increase in aroma — terpenes often “pop” around Week 8. • Trichomes shifting more to cloudy; a few ambers may begin depending on genetics. • Pistils starting to darken and recede, giving buds a more “finished” look. • Possible leaf fade (yellowing from the bottom up) as mobile nutrients are pulled into flowers. Don’t expect (yet): • Full amber trichome maturity — too early. • True “final swell” — that’s more Weeks 8–9+. • Safe humidity window — continue to monitor closely, as the dense colas can surprise you. ⸻ Practical checklist for Week 7 • Support colas: stake, tie, or net if branches keep falling. Weight will only increase. • Dehumidify if possible: even a small drop to ~55% would reduce risk of bud rot. • Airflow: max canopy circulation; keep oscillating fans moving air through colas, not just over them. • Microscope/loupe checks: continue logging trichomes daily or every other day — aim for a clear photographic timeline. • Smell watch: sudden changes in aroma (musty instead of fruity/sweet) can be early warning of mold. • Continue balanced feeding: don’t pull nutrients too early — Week 7 is still active bulking. ⸻ Reflection — the beauty of Week 7 Both Sundae Drivers are now showing their full potential: heavy colas, strong resin, vibrant health despite high heat and humidity challenges. This week is less about intervention and more about careful support: holding up branches, keeping airflow right, and letting the plants finish their masterpiece. The photos and videos (especially the behind-the-scenes “hands and camera” shots) add a human touch to the diary, it’s not just about the plants, but about the grower’s relationship with them. That connection, plus the technical details, is what makes our journey so special. ⸻ Gratitude & closing Week 7 is a turning point, the moment where patience pays off, where you get to watch the plants finish their story. Thank you to Plagron and Aptus for the tools, and thank you to the community who reads, comments, and shares this journey. We are almost there, but not yet. The best is still coming. 📲 Don’t forget to Subscribe and follow me on Instagram and YouTube @DogDoctorOfficial for exclusive content, real-time updates, and behind-the-scenes magic. We’ve got so much more coming, including transplanting and all the amazing techniques that go along with it. You won’t want to miss it. • GrowDiaries Journal: https://growdiaries.com/grower/dogdoctorofficial • Instagram: https://www.instagram.com/dogdoctorofficial/ • YouTube: https://www.youtube.com/@dogdoctorofficial ⸻ Explore the Gear that Powers My Grow If you’re curious about the tech I’m using, check out these links: • Genetics, gear, nutrients, and more – Zamnesia: https://www.zamnesia.com/ • Environmental control & automation – TrolMaster: https://www.trolmaster.eu/ • Advanced LED lighting – Future of Grow: https://www.futureofgrow.com/ • Root and growth nutrition – Aptus Holland: https://aptus-holland.com/ • Nutrient systems & boosters – Plagron: https://plagron.com/en/ • Soil & substrate excellence – PRO-MIX BX: https://www.pthorticulture.com/en-us/products/pro-mix-bx-mycorrhizae • Curing and storage – Grove Bags: https://grovebags.com/ ⸻ We’ve got much more coming as we move through the grow cycles. Trust me, you won’t want to miss the next steps, let’s push the boundaries of indoor horticulture together! As always, this is shared for educational purposes, aiming to spread understanding and appreciation for this plant. Let’s celebrate it responsibly and continue to learn and grow together. With true love comes happiness. Always believe in yourself, and always do things expecting nothing and with an open heart. Be a giver, and the universe will give back in ways you could never imagine. 💚 Growers love to all 💚 P.S. 🌱✨ For those of you who are afraid of trying out super cropping, this diary is living proof that it works. The bent stem bounced back stronger, healed into a solid knuckle, and rewarded us with extra bud sites and bigger flowers. Don’t fear new techniques. If your plant is stretching too much, or if you want to unlock more yield, super cropping is a safe, effective way to train her. Trust your plants, trust the process, they’re stronger than you think.
Likes
8
Share
I learned a lot this grow. The plant survived which lends to its resilience. It smells mostly skunky with some hints of rubber. Mistakes: 1. Overwatered seedlings 2. Ran unfamiliar nutes 3. Ran an unfamiliar feed method (fertigated instead of top dressed) 4. Gardened based on web description instead of what the plants were communicating to me. 5. Got a seed Successes: 1. They didn't die! 2. Got climate dialed in well 3. No fungus gnats or other pests! 4. Got 2oz total of good dry bud!
Likes
8
Share
@Miketama
Follow
Quasi giunti al termine, questa bellezza produce grappoli di cime dall'odore di grappoli d'uva fragola e una nota floreale alla lavanda, oltre ad avere un aspetto bellissimo con colorazioni violacee di fiori e tricomi, il caldo delle settimane passate le ha causato foxtailing che mi avrà fatto perdere qualche grammo, ma mi ha regalato cime dalla forma insolita a mio parere molto belle da vedere. Lei come le altre piante del ciclo sta bruciando i tempi e oggi al giorno 73 sono in procinto di tagliare non facendomi trarre in inganno dai pistilli bianchi usciti dai calici del foxtailing, se aspettassi che diventino bruni loro, la pianta che già ha un massiccio effetto narcotico di per sé diventerebbe troppo matura. Completamente innamorato della genetica opium di @DivineSeeds grazie mille! Al prossimo round andrò a coltivare la opium auto originale! manca solo lei e non c'è due senza tre!
Likes
42
Share
@rhodes68
Follow
Four plants in all eventually 1/31 First of the Bond harvests, Pussy Galore first of the FFT-7s, two more follow. Pussy Dry weight 312 grams 3/5 Holly 665 grams wet into dry - dry 98 grams Two more F7s to go 3/25 Pussy-1 clone yields 1107 grams wet in dry --- dry yield 181 grams One FFT-7 Remains Pussy-2 buds look a bit larger 3/28 Pussy-2 wet weight 1295 grams in dry. 242 grams dry. This concludes the FFT-7 harvests
Likes
73
Share
i looked awesome all growcycle...i streched alot & i noticed it drank alot more then the other plants while growing...had a good yield, i´m very happy overall
Likes
155
Share
@deFharo
Follow
Bienvenidos cultivadores de marihuana clandestinos y también a los que tienen la fortuna de no serlo!🖐️👨‍🌾👍 Este es un diario donde semanalmente explico algunas de mis técnicas de cultivo y preparados orgánicos, los cuales llevo experimentando dos años en cultivos de marihuana interior. • Hay dos componentes absolutamente necesarios para cualquier cultivo y de los que no se puede prescindir: La luz y el agua... hoy toca hablar de agua, homenajear al agua que la montaña y el cielo me regalan para mis plantas de marihuana!! 💧💧💧 Tengo que decir, que hasta el momento, nunca he usado agua con cloro en mis cultivos, mi interés por el agua pura de manantial ya venía de antes, pues yo mismo la consumo habitualmente, el cloro es añadido al agua corriente para hacerla potable y acabar con posibles bacterias o patógenos, pero no distingue entre buenos y malos. Siempre he creído que el consumo de agua pura, ayuda a mantener la micro biota de nuestro sistema digestivo, os podría hablar de las ventajas palpables, pero voy a obviar comentarios escatológicos. En el caso de mi modo de cultivo, donde baso toda mi técnica en el mantenimiento e inoculación masiva de Microorganismos de Montaña (MM) en el sustrato, el uso de agua pura sin cloro es obligado. El 03 de julio de 2020, publiqué lo siguiente: GROWING TIP: Agua!! Mineralizada, viva y estructurada. La importancia de la calidad del agua para el cultivo es vital para mi, he recorrido los manantiales, ríos y arroyos de mi zona con el medidor de EC y el de PH para conocer las aguas que me rodean, recojo siempre que hay oportunidad agua de lluvia de la terraza de un vecino, nunca me falta agua pura, desecho regar con agua del grifo. Para mi, y actualmente, la mejor mezcla de agua que puedo ofrecer a mis plantas es agua de lluvia 75% con otra de un manantial de montaña de agua alcalina (Carbonato cálcico PH: 9.2) y muy mineralizada (EC: 0.85), esta agua yo mismo la consumo regularmente, consigo una mezcla de agua pura con un EC alrededor de 0.19, me garantizo así el aporte de calcio y otros minerales. En épocas donde no llueve uso agua pura de manantiales y arroyos con EC de 0.3. Estas aguas las filtro y almaceno a obscuras en mi casa, la cuestión es que el agua parada pierde oxígeno y también desordena su estructura molecular haciéndola caótica. Para poder recuperar esta estructura y oxigenación, el agua debe estar en movimiento como en la naturaleza, yo me ayudo de un agitador magnético para volver a tener agua viva, el agitador crea un vórtice implosivo que en 10 minutos pone las cosas en su sitio y carga de oxígeno nuestra agua, una vez hecho este proceso voy añadiendo los nutrientes uno a uno y sigo agitando hasta el final. El agua tratada con esta técnica, mejora la asimilación de nutrientes porque favorece el intercambio catiónico e inunda de oxígeno nuestro sustrato y raíces, también con esta técnica se pueden bajar las concentraciones normales de EC en un 30% y conseguir los mismos resultados, prueba y verás!! ------ Hoy tengo algunos comentarios nuevos sobre los diferentes tipos de agua que uso y usé. - Agua de río: Comencé recogiendo agua de los dos ríos caudalosos que cruzan mi pueblo, buena agua, no hay industrias en su cauce, pero sin embargo las aguas fecales de los pueblos acaban en él. Por lo que, ante la duda, deseche el uso de este tipo de agua. - Agua de lluvia: Como comenté antes, recogía agua de lluvia desde el desagüe de la terraza de un vecino (PH: 7, EC: 0.07), mucho trabajo, exposición vecinal y explicaciones surrealistas a los transeúntes que me preguntaban, como decir que recogía el agua para mi perro que no podía tomar agua con minerales por tener tendencia a la formación de piedras en la vejiga, en otras ocasiones, respondía con entusiasmo que era la mejor agua para cocinar alubias!! 🤷‍♂️😎 Definitivamente dejé de recoger agua de lluvia de ese lugar, pues el agua que explico a continuación ya viene con los niveles de EC que yo busco... - Agua de montaña: Manantial permanente a 700m de altitud, el PH varía según la época del año, cuando en otoño, invierno y primavera hay más lluvia, el PH está en 7, y el EC en 0.25, en verano el PH sube a 8 y el EC a 0,5, esto es debido a que la carga de minerales es mayor cuando no hay lluvias. Según la geología de la zona, rocas cálcicas, arcillas y basalto principalmente, este agua mineral contiene suficiente mineral (Ca, Mg, Si, Al, Fe, K...) para no tener necesidad de usar aditivos como CalMag. Esta, es el agua que más uso para riegos. - Agua de manantial alcalino: Casi a nivel del mar, muy mineralizada, con menos variación de PH y EC en épocas de lluvia: PH entre 8 y 9.2, EC entre 0.5 y 0.9. Esta agua la uso de varias maneras: a) Es el agua que yo bebo. b) El café y la comida la hago con esta agua. c) Por su nivel de alcalinidad la uso para los diferentes fermentados anaeróbicos, compensa la extrema acidez de estos preparados y aporta minerales ya solubilizados. d) Este invierno la he usado para riegos mezclada con agua de des-humificador al 50%, obteniendo agua con un EC de 0,25. e) Las raras ocasiones en que riego sólo con agua, uso ésta si el cultivo va bien, y si necesitara hacer un lavado de sustrato por sobre fertilización, uso el agua de des humificador: PH: 7, EC: 0.09, que al no contener minerales el poder de disolución es mayor. - Agua de des humificador: Este invierno debido a las bajas temperaturas, alta humedad relativa y aparición de oídio, me vi obligado a tener funcionando permanentemente un des humificador, y para hacer de la necesidad virtud, he estado recogiendo esta agua exenta de minerales, mezclándola al 50% con las aguas del manantial alcalino, de esta manera me he he ahorrado algunos viajes al manantial de montaña. Recientemente medí el consumo de este aparato, y casi me caigo de espaldas al comprobar un consumo de 140w, lo he tenido encendido más de 3 meses las 24h del día y en ocasiones he tenido funcionando dos des humificadores! y yo, engañosamente, pensé que no consumían más de 50w... bueno, después del disgusto de saber el despilfarro de vatios, yo, que me he esforzado mucho en los últimos cultivos, acarreando macetas del interior al exterior, por consumir el mínimo de luz eléctrica y que me ha supuesto obtener unas cosechas medio bajas para lo que estaba costumbrado, ahora, en mis nuevos 4 cultivos la luz no va a ser el obstáculo, ya que ahora los des humificadores están guardados, y voy a alumbrar estas plantas con todo lo que me quepa en la carpa, la media de vatios por planta de mi última temporada de cultivos fue de 40w/planta, esta temporada voy a llegar a los 100w por planta... más luz es igual a más masa floral!!🌲🌲🌲🌲 - Agua de mar (for nerds): Yo no me he atrevido a usarla para riegos, pero con el agua de mar preparo Ormus casero con agua del mar Cantábrico, donde separo el sodio y hago precipitar los minerales: Publicado el 10 de julio de 2020 a) Fuente principalmente de Magnesio, Azufre y calcio para todo el cultivo. El Ormus contiene de un 30 al 60% de magnesio. Yo lo uso sistemáticamente en todos mis riegos, las dosis van desde el 1% al 2%. b) Contiene más de 70 minerales, la mayoría en modo monoatómico que mejora el intercambio catiónico y la asimilación de nutrientes. c) Al ser un producto alcalino se puede usar para subir el PH del riego cuando se necesite. Aumenta muy poco la carga de EC. d) Forma parte de mis componentes en la solución acuosa que preparo para germinación y establecimiento de semillas. e) Almacenado a obscuras el producto no tiene caducidad conocida. • Agua de coco (for nerds). Producto natural rico en azúcares, vitaminas, proteínas y aminoácidos, enzimas citocininas (División celular, crecimiento), ácido giberélico (Estimulación de raíces) y minerales (Ca, Fe, P, Mg). - Los momentos clave de más demanda de enzimas citocininas comienzan en la mitad de la primera etapa de germinación y establecimiento de la plántula, y al comienzo de la etapa de floración/reproducción. En la última etapa de los cultivos es innecesaria. - Los momentos clave del ácido Giberélico comienzan también en la primera mitad de la primera etapa de cultivo y las últimas semanas de crecimiento vegetativo, después de estas etapas la necesidad del ácido decae hasta hacerlo innecesario en las últimas semanas del cultivo. - Yo uso el agua de coco, alternándola con otros nutrientes, sólo en las primeras etapas de la planta y hasta la preflora. - Las dosis dependen de la carga de EC que se prefiera. Como mínimo aconsejo una carga en disolución de EC de 0,4 o PPM 200. - El agua de coco natural se debe guardar en el refrigerador, como máximo 4 días, pues fermenta con mucha facilidad. y esto es todo por hoy... tengo sed! 😁 Hasta la próxima semana... SALUDOS CULTIVADORES!!🖐️👨‍🌾💧💦🌞💡 =================================