Likes
Comments
Share
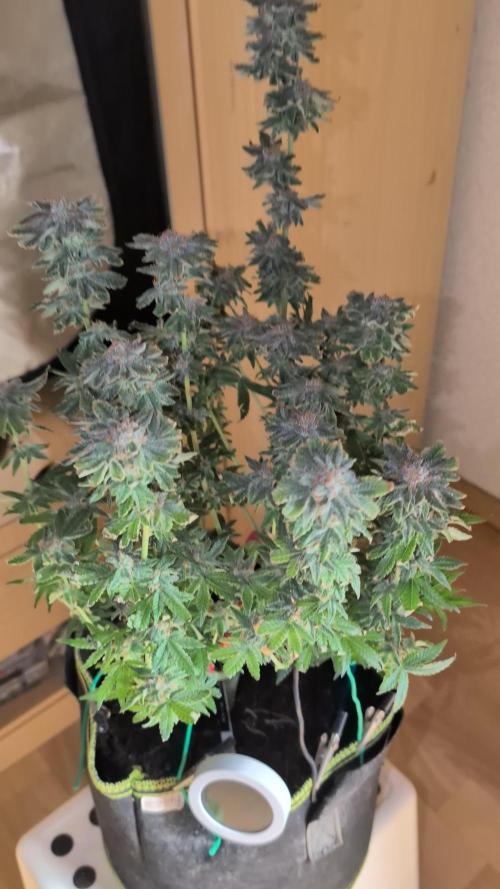
Sie wird als erste fertig sie schließen schon die Blüten sie riecht unglaublich floral süß!!!! Unfassbar gut !!
Likes
13
Share
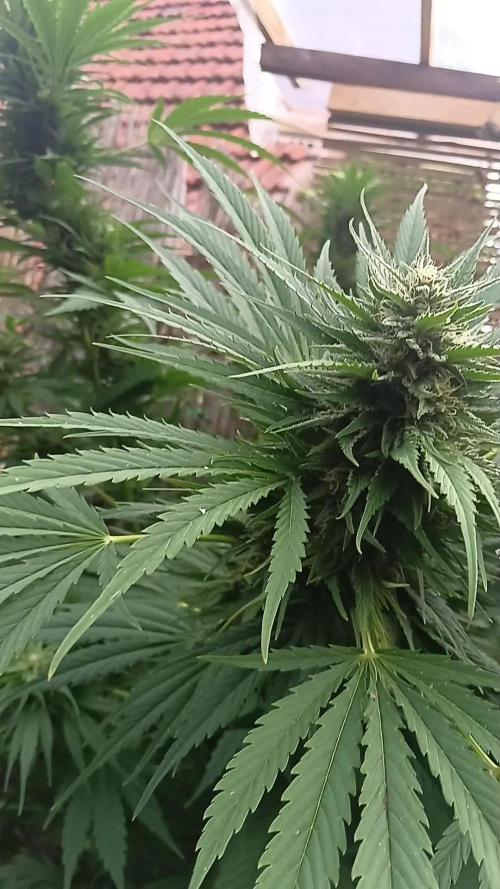
Petite mise à jour ! La canicule commence à vraiment se faire sentir. Je vois que les plantes cherchent l'eau... Je leurs ai donné 4 litres d'eau + engrais par plante aujourd'hui. C'est bien d'avoir un point d'eau proche dans ce cas ! (rivière) Un Orage serait vraiment bienvenu pour recharger le sol argileux en eau/humidité, prions ensemble...🕯️😊 Les sativas Nigerian ralentissent leurs croissance par manque d'eau. Les floraisons ne sont pas vraiment enclenchées, même si on distingues les pistils femelle d'une sur trois. Les Frosty's Freak continuent leurs floraisons. Celle en extérieur commence à se teinter en violet. Celle sur la terrasse arbore de jolies buds compactes et lourdes, yum yum yummy ! Les deux plantes sont odorantes ! Peace, bon grow !
Likes
7
Share
Day 20 since time change to 12 / 12h. Hey everyone ☺️. This week she continued to develop very well 🤗. It absorbs the nutrients from Green Buzz Liquids very well. I am very thrilled . otherwise there is nothing more to report this week 🙈. I wish you a nice week, stay healthy 🙏🏻 and let it grow 🍀 You can buy this Strain at https://thecaliconnection.com/original-sour-diesel.html You can buy this Nutrients at https://greenbuzzliquids.com/ Type: Original Sour Diesel ( Clone ) ☝️🏼 Genetics: Fem seeds- Original Sour Diesel to Original Sour Diesel BX3 RVSD Male Reg seeds- Original Sour Diesel x Original Sour Diesel BX3 Male 👍 Vega lamp: 2 x Todogrow Led Quantum Board 100 W 💡 Bloom Lamp : 2 x Todogrow Led Cxb 3590 COB 3500 K 205W 💡💡☝️🏼 Soil : Canna Coco Professional + ☝️🏼 Fertilizer: Green Buzz Liquids : Organic Grow Liquid Organic Bloom Liquid Organic more PK More Roots Fast Buds Humic Acid Plus Growzyme Big Fruits Clean Fruits Cal / Mag Organic Ph - Pulver ☝️🏼🌱 Water: Osmosis water mixed with normal water (24 hours stale that the chlorine evaporates) to 0.2 - 0.4 EC. Add Cal / Mag 2 ml per l water every 2 waterings . Ph with Organic Ph - Pulver to 5.8 .
Likes
170
Share
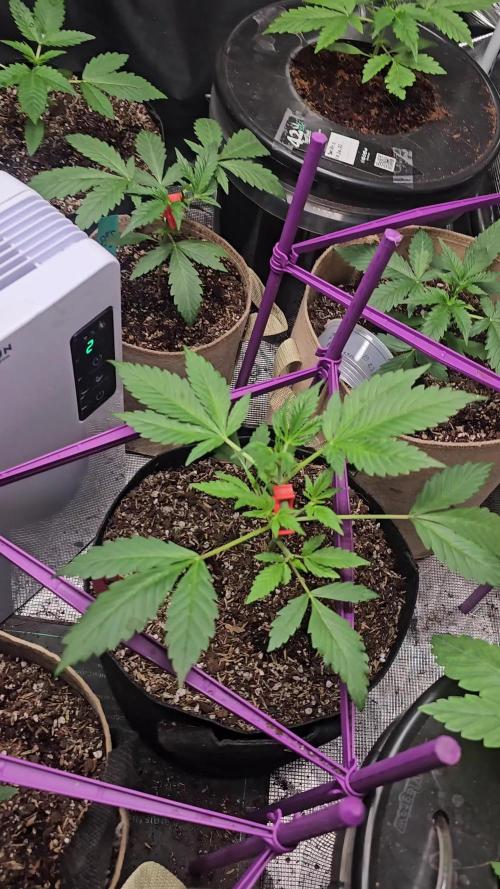
Bonjour à tous les padawans et les maîtres jedis Jour42 ma plante entre bien en floraison je pratique sur elle une defolliation pour permettre aux têtes de prendre la lumière La floraison des plantes de cannabis La plante de cannabis passe par différentes étapes de vie avant de parvenir à la récolte. Ces étapes sont : la germination, la pré-croissance, la croissance et la floraison. Pour les autofloraisons il n'est pas nécessaire d'avoir de changer le cycle de lumière elle entre en floraison automatiquement voilà d'où elle tient son nom "d'autofloraison" L'origine de l'auto-floraison vient de la sous-espèce "cannabis sativa ruderalis" , qui à l'origine produit de très faibles niveaux de THC. C'est en croisant cette variété de marijuana avec d'autres qui produisent des niveaux de THC plus élevés qu'à vu le jour ce magnifique compromis que sont les variétés auto-fleurissantes avec des taux de THC très satisfaisants. En parallèle, cela a permis d'améliorer la production de ces variétés, qui initialement étaient exceptionnellement basse. Pour des résultats optimaux, en culture Outdoor (extérieur), je recommande que la germination des graines de marijuanaAuto-flo se fasse entre avril et août. En culture Indoor(intérieur), la photopériode idéale que ce soit pour la croissance comme pour la floraison est de 20h de lumière. N'oubliez pas que ces graines ne sont pas tributaires de la photopériode pour passer en floraison. Il est préférable d'utiliser des pots d'une capacité de 10 à 20L dès le début, étant donné que leur cycle de vie est réduit, les auto-flo n'ent pas besoin de plus de volume pour se développer. Vu sa petite taille (et la discrétion) elle fait l'objet d'un bon choix pour la culture de cannabis sur balcons. La première variété de Lowryder auto-floraison a été créé à partir de cannabis indica sativa croisé avec des génétiques de cannabis sativa rudelaris par la banque de graines de marijuana "The Joint Doctor". Puis vinrent la White Dwarf de "Buddha Seeds", la Roadrunnerde "Dinafem", l' Auto Stoned d' "Autofem", la Speed Devil de "Sweet Seeds" , la Maxi Gom de "Grassomatic", la Flash, la Gnomo de Kannabiaet bien d'autres. Jour42 defolliation (video) Avant toute chose n'oublions pas de bien désinfecter ses outils et bien ce laver les mains. Quesque la defolliation ? LES CULTIVATEURS AMATEURS, PRENEZ GARDE, MAIS NE PRENEZ PAS PEUR La défoliation consiste à retirer les feuilles des plants de cannabis en intérieur afin d'accroître le rendementfinal. Le cultivateur amateur doit faire preuve de vigilance lorsqu'il commence à appliquer cette technique de taille. Malgré le débat sans fin entre ceux qui prônent cette technique et ceux qui la dénigre, il n'y aucune raison pour qu'un amateur ne s'y essaie pas afin de voir si ça lui convient ou non. COMMENT DÉFOLIER Que vous tailliez les feuilles ou les branches des plants de cannabis, il vaut mieux utiliser un sécateur stérile qui est confortable en main. Arracher des feuilles à la main manque de finesse et engendre souvent par accident, l'arrachement des couches d'une tige en plus de la feuille. L'objectif principal de la défoliation est de permettre une meilleure pénétration de la lumière et de promouvoir la production de plus grosses têtes. Les feuilles éventails qui font de l'ombre doivent être retirées. Tailler la tige principale et/ou les pousses secondaires n'est pas de la défoliation. La règle d'or lorsque vous donnez à vos plantes un rafraîchissement est de commencer avec les feuilles nourricières les plus grandes et les plus larges, en taillant du bas vers le haut. Il est important de retirer les feuilles stratégiquement et non pas au hasard. Pensez également qu'il vous faut limiter votre rafraîchissement à approximativement 10 à 20 % des feuilles totales de votre pied. Il est très facile de s'emporter durant la taille et de se retrouver avec des plantes chauves. Un excès de taille de feuilles empêchera la photosynthèse et paralysera vos plants. QUAND FAUT-IL DÉFOLIER Il est assez rare d'appliquer la défoliation comme seule technique pour obtenir un fort rendement. La taille des feuilles est généralement associée à d'autres méthodes de tailles et de palissage pour un meilleur rendement telles que le topping ou étêtage, le FIMming, le LST, le manifolding, le supercropping et le ScrOG. Les cultivateurs utilisant la méthode ScrOG auront besoin de retirer toutes les croissances inférieures ainsi que les feuilles et les tiges se trouvant sous le filet. Les plants de cannabis peuvent être défoliés dès lors qu'ils sont passés de la phase de plantule vers la phase de croissance végétative. Cependant, il est recommandé aux cultivateurs amateurs de laisser aux plantes 1 à 2 semaines de croissance végétative avant de s'attaquer à la défoliation de celles-ci. De plus, certaines variétés sont plus sensibles à la taille que d'autres et de ce fait, seront plus stressées par la taille des feuilles. Surveillez minutieusement le comportement de vos plants après la taille. Une période de convalescence de minimum 3 à 7 jours avant de recommencer la défoliation est fortement recommandée pour éviter trop de stress aux plants. Les cultivateurs peuvent également défolier pendant la phase de floraison, ce qui permettra à l'énergie de la plante d'être concentrée vers la production de têtes tout en limitant l'ombre et l'excès d'humidité. Néanmoins, il est important de ne pas défolier trop tard sous peine de simplement blesser ses plants inutilement. LES AVANTAGES DE LA DÉFOLIATION Évidemment, l'avantage numéro un de la défoliation, c'est l'augmentation du potentiel de rendement de cette technique de taille pour tous types de cannabis allant de la photopériode aux variétés autofloraison. Ce n'est pas un secret que les fleurs qui reçoivent plus de lumières deviennent plus grandes et larges que celles dissimulées dans l'ombre des feuilles. De plus, retirer les feuilles intérieures des plants touffus aide à prévenir toutes menaces de moisissure. Les plants très feuillus avec un feuillage intérieur dense produiront une quantité importante de têtes pop-corn. Dans le pire des cas, les branches de têtes et les têtes qui sont denses succomberont au pourrissement. Si vous observez des gouttes d'eau se former sur la surface des feuilles, il est grand temps de penser à faire de la défoliation. Libérer la zone inférieure et médiane des feuilles est un excellent moyen d'améliorer la circulation de l'air. LES DÉSAVANTAGES DE LA DÉFOLIATION Les plants de cannabis en intérieur bénéficient de la défoliation pour deux raisons. La première est parce qu'ils reçoivent la lumière d'une source stationnaire au-dessus d'eux, et la deuxième est parce que les conditions environnementales sont contrôlées par le cultivateur et non Mère Nature. Les plants d'extérieurs eux, n'y gagnent pas beaucoup, car les cas échéants se vérifient pour eux. Le soleil traverse le ciel, illuminant sur sa route, différentes portions de la plante de son lever à son coucher. Les cultivateurs en extérieur n'ont pas besoin de manipuler les plantes afin qu'elles se développent en adoptant une structure plate puisque le soleil est infiniment plus puissant que n'importe quelle lampe de culture et qui plus est, il est toujours en mouvement. Tailler les feuilles des plants extérieurs les rend également plus vulnérables aux conditions humides et brise leurs barrières naturelles contres les nuisibles. De nombreux cultivateurs d'intérieur peuvent, et malheureusement, c'est souvent le cas, réduire le rendement final à cause d'une défoliation faite au mauvais moment et/ou excessive. Tailler les plantules n'est pas conseillé et engendre souvent des plants nains. Scalper les plants matures est encore pire, et au lieu d'obtenir de longues branches de têtes, vous obtiendrez probablement encore moins de fleurs. De même, tailler des plants malades ou en mauvaise santé à n'importe quelle période de la croissance risque de paralyser la croissance plutôt que d'encourager la formation de fleurs denses. Jour44 Arrosage une fois sur 2 topmax de biobizz Jour46 arrosage avec de l'eau ph6.3 à laquelle j'ajoute 0.8g par litre d'eau de feeding enhancer greenhouse. Jour47 léger arrosage. Jour48 léger arrosage
Likes
17
Share
The 3 plants were trained in different ways on day 63 and as you can see from they pictures they all took the training very well, can't see an obvious difference between them. Plant 1: Schwazzing Plant 2: Light Defoliation Plant 3: Lollipopping Switched the lights to 13/11 on/off on day 62 and to 12/12 on day 63 this is day 70 (actually posting this couple weeks late) after a whole week of flowering schedule. Made some aerated compost tea today and watered the girls with it yesterday Tuesday. Each pot got 2L of watered down aerated compost tea and 2L of water with aloe vera powder and malt barley.
Likes
120
Share
Hi all the happy people here in GrowDiaries. This is my second cultivation ever and it will be fun to try a bigger space than my closet grows First, I'm just going to say I'm done with the construction of my new growroom. I put some pictures on the construction here in week one. The room is 2.14 meters by 1.7 meters and has a ceiling height of 2 meters. It provides a floor area of ​​3.6 square meters. I use a 54 Watt Lightwawe T5 for germination and 2 Pcs 400 Watt HPS lamps. I have a channel fan that replaces the room air about 40 times an hour to get a comfortable theme in the room, the air enters a fresh air intake from the outside. The air is purified through a carbon filter to then leave the room to the rest of the basement. Then I use that heat to heat the rest of the basement. I will use 8 pcs 15 liter Autopots to grow with and a 100 liter water tank that supplies the pots of water and nutrition. I will grow completely organically in soil and will watercure my buds to get the best possible medicine for me. But there are no cultivation rooms to be displayed here, so I continue with what is most important. I am very excited to see how the new growroom will work and how this CBD Fast Eddy plant from Royal queen seeds will turn out. CBD Fast Eddy Automatic is combining Cheese x Juanita la Lagrimosa x Ruderalis, Fast Eddy is a rapid growing, flavourful, and CBD-rich auto strain that goes from seed to harvest in 8-9 weeks, produce generous yields, and induce a clear, mellow, and most importantly, functional high. THC: 9% CBD: High Yield Indoor : 400 - 450 gr/m2 Yield Outdoor: 80 - 130 gr/plant Height Indoor: 60 - 100 cm Height Outdoor: 80 - 120 cm Flowering: 6 - 7 weeks Harvest month: 8-9 weeks after sprouting Genetic Background: Cheese x Juanita la Lagrimosa x Ruderalis Type: Sa 50% In 40% Ru 10% Effect: Clear, Painrelief Climate: Mild ----------------------------------------------------------------------------------- 2017-09-18. Week 4 starts and she is in flower. She is 36 cm high and looking really healthy. --------------------------------------------------------------------------------------------------------------------------------------------------------- 2017-09-19. 2 new fans is installed in the grow room. Added pic and video. --------------------------------------------------------------------------------------------- 2017-09-20. Kl 10.00. New video. The girl is 38 cm high and doing great. Kl 23.00. Did some massive defoliation, added video and pics ------------------------------------------------------------------------------------------------ 2017-09-22. The girl have recovered well after my massive defoliation. She is 39 cm high now and have received 2 liters of water and nutrition today.
Likes
9
Share
Likes
4
Share
Week 3 shows good growth and showing signs of needing food. The organic purple lemonade is starting to smell. Next week feeding will begin, starting with a compost tea.
Likes
12
Share
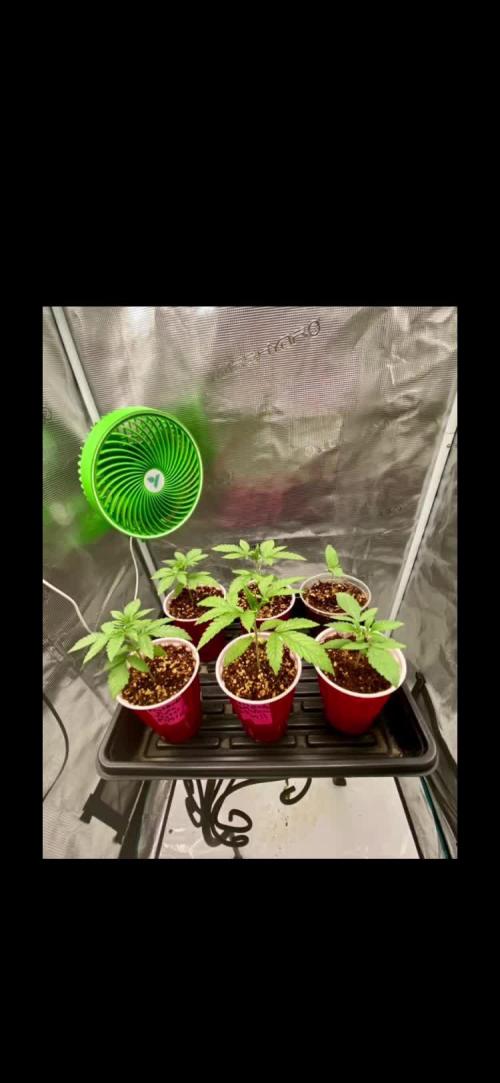
Seedlings 🌱 are doing great! They are looking very healthy and happy. Routine this week was was just checking the humidifier every morning, and spritzing with my spray bottle x2 daily (very small amounts) starting at the base of the plant, but also making sure to get the exterior edges to allow those roots to be searching for water. Changed the light cycle to 18/6 around day 7, and also adjusted my BloomPlus BP 2500 to have 140 watts at the wall. Didn’t lower the light as the increased wattage seemed to slow down the stretch they initially had. Still using my small 250 watt heater behind my intake fan to draw some heat in and keep the tent nice and cozy, even during lights out (about 75-76 *F) By day 14, I started to water with a measuring cup, still using my 1 ml of Sensi Cal/Mag plus. Watering only about 1/4 cup of water all around the pot, and will wait until the soil is dry’ish (the old finger poke) before I start to increase the watering amount gradually. Sometime around day 21 is when I will begin to introduce some nutrients, I will be using the Advanced Nutrients- Grow, Micro and Bloom along with the Sensi Cal Mag plus. Happy Gardening 🇨🇦❤️🌱😎💨
Likes
14
Share
@BudXs
Follow
Looking for thenelusive polyploid s1. Started cumming all iver itsslf at day 71, cut the poly at day 92. Looking fine as fuck, need those seeds tho
Likes
1
Share
@c1note
Follow
06.11 Woche 6 Blüte Tag1 Umstellung auf 12/12 nach 24 Stunden Dunkelheit. Dli 28- 30. 2L mit Ec1.72 5.8 ph so wie immer. VPD 1.1
Likes
3
Share
June 28: Tropicana Cookies FF is progressing nicely and well timed for the end of June. Supercropped (HST) the two main stems to bring the outer growth tips to the same elevation as the four inner ones. Taped with floral tape to stabilize after supercropping. watered with about 0.5 tsp/gallon of Extreme Blend which is half strength. June 29: plant looks very happy today and it’s warm and sunny. July 2: did final (third?) round of topping to get from 8 to 16 colas. Unlike some others I’ve grown, this plant is nicely symmetrical which should be easy to manage. Fairly tall which is fine.
Likes
3
Share
2025-07-09 Holy moly, the Gaia F1 is as wide ( horizontal) as high( vertical) she is she looks like Dome i took away some leaves, because of her bushy structure. lovely flowers are to see, and starting to get bigger. xxxxxxxxxxxxxxxxxxxxxxxxxxxxxxxxxxxxxxxxxxxxxxxxxxxxxxxxxxxxxxxxxxxxxxxxxxxxxxxxxxxxx Gaia F1 has taken its place in the pantheon of F1 hybrid cannabis genetics. Our breeders created these seeds by starting out with parent genetics New Breed Auto, Black Domina, and Sin Tra Bajo. From here, they conducted an extensive breeding project that culminated in crossing three highly pure inbred lines. The result? A potent and fast-growing autoflower F1 hybrid that boasts incredible uniformity and impressive pest and disease resistance. Named after the Greek goddess of Earth, Gaia F1 features a chemical profile that will have you feeling at one with the world around you. After a few hits, you’ll feel the urge to head out and bathe in nature. During your contemplative stroll, you won’t see soil, but a living matrix of millions of microbes; not mere trees, but living and breathing organisms standing tall and proud. Gain a newfound appreciation for the natural world with every inhalation. xxxxxxxxxxxxxxxxxxxxxxxxxxxxxxxxxxxxxxxxxxxxxxxxxxxxxxxxxxxxxxxxxxxxxxxxxxxxxxxxxxxx Growing Environment Setup & Specifications Lighting System Model: Sanlight EVO 5-150 Quantity: Up to 5 units Power Output: 320W per unit Maximum Total Output: 1600W Environmental Control Management Unit: Growcontrol Growbase Pro Humidity Management: Dedicated Humidifier Dedicated Dehumidifier Temperature Control: Primary: System-controlled Secondary: Additional Radiator for supplemental heating Air Management Air Circulation: 2x Stand Fans Air Extraction: Exhaust Fan with Filter System Irrigation System Primary: Autopot XXL Pot System Water Storage: Flexi Tank Root Zone Aeration: Airdomes Dedicated Air Pump Growing Medium Type: TERRA PRETA MJ-Mix Nutrients System: BIOTABS Method: "Just Add Water" Strategy Type: Organic-based feeding
Likes
1
Share
@cangrowz
Follow
Bisher sieht es sehr gut aus, ich hoffe die Buds nehmen noch ein bisschen zu ^^ Aber ich denke mal schon.
Likes
45
Share
2nd net is up. Early bud formations are promising. holding up to the extremes pretty well, some leaves taking minor damage, but overall, she is holding up, gave her 1 night at 50F see how she would react, stressful. Not advised as it messes with her metabolism, but I want to see if it triggers any anthocyanin response. Love to see her purp up but no signs yet. Remember, For every molecule of glucose produced during photosynthesis, a plant needs to split six molecules of water. This process provides the hydrogen needed for synthesizing glucose and other organic compounds, while oxygen is released as a byproduct. Homework. If Rubisco activity is impaired and it cannot properly function or regenerate its substrate, the plant's leaves are likely to turn a pale green or lime green, a condition known as chlorosis. Essentially, Rubisco activity is highly regulated and susceptible to various environmental and metabolic factors that can cause it to become inhibited, leading to an apparent failure in RuBP regeneration due to a lack of consumption. Rubisco regeneration is intrinsically linked to nitrogen supply because Rubisco is a major sink for nitrogen in plants, typically accounting for 15% to over 25% of total leaf nitrogen. The regeneration phase itself consumes nitrogen through the synthesis of the Rubisco enzyme and associated proteins (like Rubisco activase), and overall nitrogen status heavily influences the efficiency of RuBP regeneration. RuBisCO is a very large enzyme that constitutes a significant proportion (up to 50%) of leaf soluble protein and requires large investments in nitrogen. Insufficient nitrogen supply limits the plant's ability to produce adequate amounts of RuBisCO, thereby limiting the overall capacity for photosynthesis and carbon fixation. Maintaining the optimal, slightly alkaline pH is crucial for the proper function and regeneration of Rubisco. Deviations in either direction (too high or too low) disrupt the enzyme's structure, activation state, and interaction with its substrates, leading to decreased activity and impaired RuBP regeneration. (Lime/yellowing) Structural Component: Nitrogen is an essential building block for all proteins, and the sheer abundance of the Rubisco protein makes it the single largest storage of nitrogen in the leaf. Synthesis and Activity: Adequate nitrogen supply is crucial for the synthesis and maintenance of sufficient Rubisco enzyme and Rubisco activase (Rca), the regulatory protein responsible for maintaining Rubisco's active state. Nitrogen deficiency leads to a decrease in the content and activity of both Rubisco and Rca, which in turn limits the maximum carboxylation rate, Vmax, and the rate of RuBP regeneration Jmax, thus reducing overall photosynthetic capacity. Nitrogen Storage and Remobilization: Rubisco can act as a temporary nitrogen storage protein, which is degraded to remobilize nitrogen to other growing parts of the plant, especially under conditions of nitrogen deficiency or senescence. Nitrogen Use Efficiency (NUE): The allocation of nitrogen to Rubisco is a key determinant of a plant's photosynthetic nitrogen use efficiency (PNUE). In high-nitrogen conditions, plants may accumulate a surplus of Rubisco, which may not be fully activated, leading to a lower PNUE. Optimizing the amount and activity of Rubisco relative to nitrogen availability is a target for improving crop NUE. Photorespiration and Nitrogen Metabolism: Nitrogen metabolism is also linked to the photorespiration pathway (which competes with carboxylation at the Rubisco active site), particularly in the reassimilation of ammonia released during the process. To increase RuBisCO regeneration, which refers to the process of forming the CO2 acceptor molecule Ribulose-1,5-bisphosphate (RuBP) during photosynthesis, the primary methods involve optimizing the levels and activity of Rubisco activase (Rca) and enhancing the performance of other Calvin-Benson-Bassham (CBB) cycle enzymes. Biochemical and Environmental Approaches: Optimize Rubisco Activase (Rca) activity: Rca is a crucial chaperone protein that removes inhibitory sugar phosphates, such as CA1P (2-carboxy-D-arabinitol 1-phosphate), from the Rubisco active site, thus maintaining its catalytic competence. •Ensure optimal light conditions: Rca is light-activated via the chloroplast's redox status. Adequate light intensity ensures Rca can effectively maintain Rubisco in its active, carbamylated state. •Maintain optimal temperature: Rca is highly temperature-sensitive and can become unstable at moderately high temperatures (e.g., above 35°C/95F° in many C3 plants), which decreases its ability to activate Rubisco. Maintaining temperatures within the optimal range for a specific plant species is important. •Optimize Mg2+ concentration: Mg2+ is a key cofactor for both Rubisco carbamylation and Rca activity. In the light, Mg2+ concentration in the chloroplast stroma increases, promoting activation. •Manage ATP/ADP ratio: Rca activity depends on ATP hydrolysis and is inhibited by ADP. Conditions that maintain a high ATP/ADP ratio in the chloroplast stroma favor Rca activity. Enhance Calvin-Benson-Bassham (CBB) cycle enzyme activity: The overall rate of RuBP regeneration can be limited by other enzymes in the cycle. •Increase SBPase activity: Sedoheptulose-1,7-bisphosphatase (SBPase) is a key regulatory enzyme in the regeneration pathway, and increasing its activity can enhance RuBP regeneration and overall photosynthesis. •Optimize other enzymes: Overexpression of other CBB cycle enzymes such as fructose-1,6-bisphosphate aldolase (FBA) and triose phosphate isomerase (TPI) can also help to balance the metabolic flux and improve RuBP regeneration capacity. Magnesium ions, Mg2+, are specifically required for Rubisco activation because the cation plays a critical structural and chemical role in forming the active site: A specific lysine residue in the active site must be carbamylated by a CO2 molecule to activate the enzyme. The resulting negatively charged carbamyl group then facilitates the binding of the positively charged Mg2+ion. While other divalent metal ions like Mn2+ can bind to Rubisco, they alter the enzyme's substrate specificity and lead to dramatically lower activity or a higher rate of the non-productive oxygenation reaction compared to Mg2+, making them biologically unfavorable in the context of efficient carbon fixation. The concentration of Mg2+ in the chloroplast stroma naturally increases in the light due to ion potential balancing during ATP synthesis, providing a physiological mechanism to ensure the enzyme is activated when photosynthesis is possible. At the center of the porphyrin ring, nestled within its nitrogen atoms, is a Magnesium ion (Mg2+). This magnesium ion is crucial for the function of chlorophyll, and without it, the pigment cannot effectively capture and transfer light energy. Mg acts as a cofactor: Mg2+ binds to Rubisco after an activator CO2 molecule, forming a catalytically competent complex (Enzyme-CO2-Mg2+). High light + CO2) increases demand: Under high light (60 DLI is a very high intensity, potentially saturating) and high CO2, the plant's capacity for photosynthesis is high, and thus the demand for activated Rubisco and the necessary Mg2+ cofactor increases. Mg deficiency becomes limiting: If Mg2+ is deficient under these conditions, the higher levels of Rubisco and Rubisco activase produced cannot be fully activated, leading to lower photosynthetic rates and potential photo-oxidative damage. Optimal range: Studies show that adequate Mg2+ application can enhance Rubisco activation and stabilize net photosynthetic rates under stress conditions, but the required concentration is specific to the experimental setup. Monitoring is key: The most effective approach in a controlled environment is to monitor the plant's physiological responses e.g., leaf Mg2+ concentration, photosynthetic rate, Rubisco activation state, and adjust the nutrient solution/fertilizer to maintain adequate levels, rather than supplementing a fixed "extra" amount. In practice, this means ensuring that Mg2+ is not a limiting factor in the plant's standard nutrient solution when pushing the limits with high light and CO2. Applying Mg2+ through foliar spray is beneficial to Rubisco regeneration, particularly in alleviating the negative effects of magnesium (Mg) deficiency and high-temperature stress (HTS). While Mg can be leached from soil, within the plant it is considered a mobile nutrient, particularly in the phloem. Foliar-applied Mg is quickly absorbed by the leaves and can be translocate to other plant parts, including new growth and sink organs. Foliar application of: NATURES VERY OWN MgSO4 @ 15.0g L-1 in a spray bottle. For those high-intensity workouts when 1 meal a day is just not enough! Foliar sprays are often recommended as a rapid rescue measure for existing deficiencies or as a supplement during critical growth stages, when demand for Mg is high. Application in the early morning or late evening can improve absorption and prevent leaf burn. The plant was getting a little limey yellow in the centre. Shortly thereafter, she was back in business, green mostly regenerated. The starting point [of creativity] is curiosity: pondering why the default exists in the first place. We’re driven to question defaults when we experience vuja de, the opposite of déjà vu. Déjà vu occurs when we encounter something new, but it feels as if we’ve seen it before. Vuja de is the reverse—we face something familiar, but we see it with a fresh perspective that enables us to gain new insights into old problems. Confidence is evidence... nothing more. You are confident because you have driven 10,000 times, you are confident because you have spoken 10,000 times. People think confidence is a feeling, but it's not. If you want more confidence, then you need to create evidence, take more shots, collect more data, build more experiences, take more risks; fail, confidence doesn't come first; it is the reward you get for doing the work. no one else wants to do.
Likes
12
Share
@Zer0xKira
Follow
Pre flowers started on my soil grow. Just started seeing one or two white hairs on my hydro girl. Starting to clear up that calcium deficiency as well.