




Likes
19
Share

@LueRootsGrowGermany
Follow
Hallo liebe Community
Aus Organisatorischen nicht vermeidbaren Gründen war ich nicht vor Ort und daher auch jetzt erst das kurze Update zu der Veg. 4 Woche.
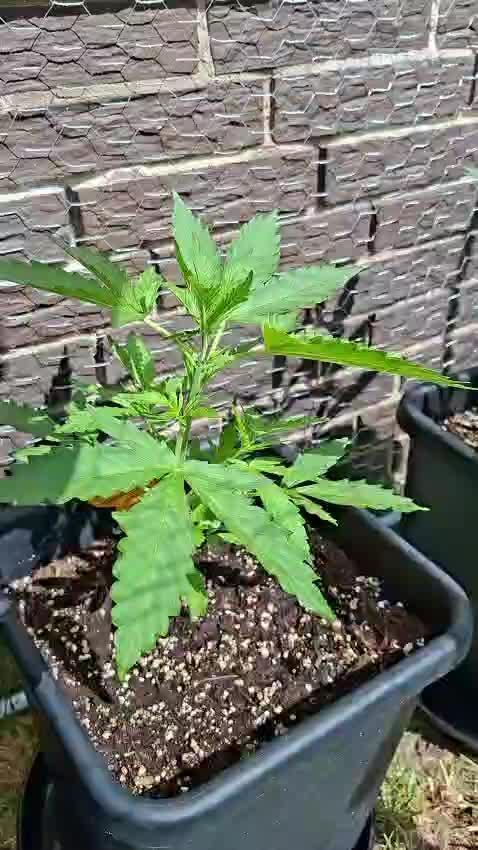
Gepflegt hat Sie jemand, der selbst noch nie Cannabis angebaut hat. Die Hilfe weiß ich sehr zu Schätzen und bin mehr als nur dankbar! Es konnte hierzu alles nur telefonisch besprochen werden und aus der Ferne gehandelt. Ende der Woche zeigte Sie leichte Eisenmängel. Daraufhin wurde Bio- Heaven und Acti-Vera etwas nach oben angepasst.
Natürlich und verständlich sind einige Sachen wie das Gießen etc. nicht ganz optimal verlaufen. Dennoch stehen sie auch Freiland was mit dem zusätzlichen Regen und auch einmaligen Hagel nicht immer nur ein Optimum voraussetzt.
Zum Wachstum
Bisher macht sie sich gut. Stamm und Blattwuchs schreitet voran, trieb entwickeln sich.
Sie zeigt sich nicht so in der Höhe aber wird schön buschig.
Zum Gießen
Da das Wetter schlechter wurde, Kühler und nass, wurde die Gießmenge nach unten korrigiert. Somit sind es ca. 500 ml die noch täglich gegossen wurden. Auch Super Microbes 0,4 g/L wurde einmal verabreicht.
Viele Grüße an die Community und Kollegen!
LueRootsGrowGermany!




Likes
4
Share


@GREENPHOENIX6262
Follow
Week 1 Veg - 10/01*
Currently CHERRY COLA is coming alone accordingly, first set of leaves have already sprouted and will be giving her small amounts of Nitrogen in about a week.

Processing
Likes
31
Share


@MadeInGermany
Follow
Hey everyone 🤗.
There isn't much to report this week.
It was topped again, otherwise everything is like last week.
She is developing well 👍.
I wish you lots of fun with the update, stay healthy and let it grow 🌱🍀
You can buy this Strain at
https://www.barneysfarm.com/blue-cheese-34
You can buy the fertilizer at
https://www.greenbuzzliquids.com/
Type:
Blue Cheese
☝️🏼
Genetics:
Blueberry
X
Original Cheese
👍
Vega lamp:
2 x Todogrow Led
Quantum Board 100 W
💡
Bloom Lamp :
2 x Todogrow Led
Cxb 3590 COB 3500 K 205W
💡💡☝️🏼
Soil :
Canna Coco Professional +
☝️🏼
Fertilizer:
Green Buzz Liquids :
Organic Grow Liquid
Organic Bloom Liquid
Organic more PK
More Roots
Fast Buds
Humic Acid Plus
Growzyme Big Fruits
Clean Fruits
Cal / Mag
Organic Ph - Pulver
☝️🏼🌱
Water:
Osmosis water mixed with normal water (24 hours stale that the chlorine evaporates) to 0.2 - 0.4 EC. Add Cal / Mag 2 ml per l water every 2 waterings . Ph with Organic Ph - Pulver to 5.8 .

Likes
2
Share

@Chrisandweed
Follow
Ale, cortada.
Me gustó la planta sobre todo el vegetativo ya que fue muy bien sin mostrar problemas y tal... Ahora, cuando llegó la floración ahí si arrancó todo, igual que la otra, la hyperion, con oidio y araña roja. Recalco que tenía dos plantas mas bien grandes y hermosotas que también lo sufrieron, pero a modo chiste... Una hoja pocha por bichos, alguna con un poquito de oidio.. pero en general resistieron muy bien eso, las otras.
En fin, esta planta si que es hermosa, el cogollo central es precioso, una lastima que mi movil haya jodido la mayoria de las ultimas fotos antes de cortarla, por eso alguna se estas últimas fotos se ven mal, miradlas de lejos, mejoran jajajajajaja
Bueno, les hice bud washing, o lavado de cogollos y subí las fotos para que se vea, no es video... Quizás en un futuro haya algo con YouTube, pero eso, es basicamente 3 cubos, como no tengo cubos cogí una garrafa, la corte, y le eché 7 litros de agua y 100ml de agua oxigenada (peroxido al 3%), cogí dos tappers grandes, los llene de agua y heche media cucharada sopera en cada uno de bicarbonato de sodio y medio limón exprimido igual, entre los dos tappers y lo mezclé todo bien. Finalmente cogí una olla porque no tenía mas tappers grandes disponibles xD y agua osmotizada (o de botella) pero fria.
-Paso 1: enjuaga el cogollo, rama, o lo que quieras limpiar, unos 20/30 segundo en la garrafa con el agua oxigenada.
-Paso 2: sacudes un poco lo que hayas enjuagado y lo metes a enjuagar a uno de los tappers con bicarbonato y limón (puedes usar 3, 4 tappers, o un cubo.. al fin y al cabo es cantidad para no hacerlo todo en 3 litros y que acabaes limpiando mierda con mierda :) ). Aquí pues otros 20/30 segundos.
-Paso 3: finalmente enjuagas en el ultimo tapper, barreño, lo que sea, con agua LIMPIA (de ahí osmotizada o embotellada) y fria, para que arrastre mejor los ultimos restos.
Ya finalmente lo pones a secar unas 3/4 horas en un tendedero o donde mejor pilles, pero con ventilación para que el agua termine de irse, o al menos lo gordo. Ya una vez pasado ese tiempo y que veas que los cogollos gordos, en la parte de abajo (en la cabeza si están boca abajo) están secos, sin agua sobrante vamos, los llevas a donde vayas a secar, en mi caso al armario, que por ese motivo les voy a dar un poco mas de tiempo fuera para evitar subir mucho la humedad ya que tengo la Papaya Zoap secando y le quedará unos 4 o 5 dias aún.
Cuando seque, subiré los resultados y fotos del manicurado y todo... Yo creo que va a salir una buena producción y además como la alargué bastante, espero que tenga efecto soporífero que ademas de sabor y aromas, es el efecto que busco en la hierba, que ayude a dormir.
Aclaro: el peso en humedo es inventado jajajaja sinceramente, además de que no iba a pesarla en humedo, osea, recien cortada xD, tampoco la iba a pesar teniendo en cuenta que sumergí los cogollos en soluciones para limpiarlos, por lo que pesarían como 4 o 5 veces mas que el peso de recien cortado xD.
Likes
36
Share


@SolitudeCorners
Follow
Can't wait to blazeeee
Feeding💪
10/17 Water30L+Cleanse80ml+calmag@190ppm
Ph6.3
Ebb 10.42/11.32/12.26/13
Clone 11.35/12.21/13.05/14
Average runoff ec1.5
Keeper 300ml per pot
10/18 Water26L+Flawless90ml+calmag@300ppm
Ph6.3
Ebb 11.38/12.24/13.17
Average runoff ec1.2 ph6.5
Clone 12.38/13.56/15.20/16.10
Average runoff ec1.5 ppm750
10/19 Water26L+Cleanse80ml+calmag@200ppm
Ph6.3
Ebb 11.12/11.48/12.24
Average runoff ec1.4
Clone 11.50/12.12/12.37/13.37/14.40
Average runoff ec1.3 ph6.6
10/20 Water30L+Cleanse30ml+Calmag@190ppm
Ph6.4
Ebb11.42/12.22/13.20/14
Clone 12.40/13.20/14.20/14.45/15.15
Average runoff 1.2ec ph6.4-6.7
10/22 last light day
10/23 2 Pm Cut and hang
Plan 21day at 23temp 55rh

Likes
29
Share


@GrownwithLED
Follow
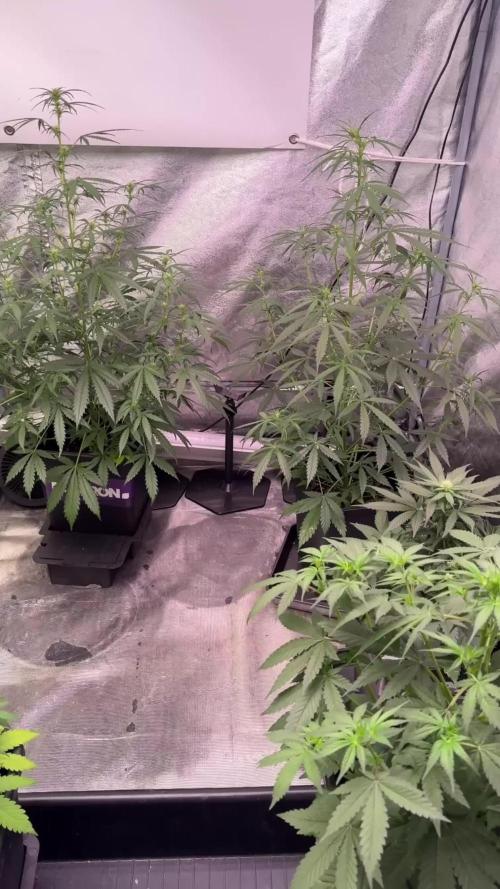
In week 9 my 'Fruity Terp' ladies have grown substantially and filled out the space in my HOMEBOX growtent. Therefore its time to do a round of defoliation. I take out my plants one by one and cut off the lowest branches on the stem (the ones not grown tall enough to get good light) and also the biggest fan-leaves (the ones shading the lower part of the canopy). The defoliation will increase the airflow thru my plants, which will in turn help to avoid mold from a build-up of humidity between the leaves. The light can now also penetrate deeper into the canopy now and therefore lower buds will also get more light and can grow bigger. The SANlight EVO4-120 LEDs are doing a GREAT job, my babies love their spectrum and intensity and grow like hell. The nutrients from BIO NOVA work EXCELLENT, all plants have a nice healthy green color. Since we are further in flowering now, I also add PK 13-14 from BIO NOVA following their 'SOIL-CULTIVATION' schedule.


Likes
Comments
Share

@DogDoctorOfficial
Follow
👑 Godfather OG – Pheno B
Week 5 | A Gentle Giant Finds Her Rhythm
Welcome back to another update from the 8×8 Adventure!
One of my favourite aspects of this project is documenting every phenotype individually. Although every plant is receiving the same care, the same environment, and the same attention, each one responds in her own unique way.
Godfather OG Pheno B is a perfect example of that.
Standing proudly among the tallest plants in the room, she’s developing into a vigorous, elegant lady with excellent structure, healthy growth, and an increasingly impressive canopy.
She may share the same name as her sister…
But she’s writing a completely different story.
⸻
🌱 The Journey So Far
If you’re joining this diary for the first time, welcome!
This entire project is being grown using the 12/12 From Seed technique.
Instead of allowing a long vegetative period before switching to flower, every plant has remained under a constant cycle of 12 hours of light and 12 hours of darkness from the very beginning.
This allows every phenotype to express its own natural rhythm.
No forcing.
No extended veg.
Just letting genetics decide when they’re ready to bloom.
That has become one of the most educational parts of this entire grow.
Watching siblings respond differently under identical conditions never gets old.
⸻
🌸 Flowering Has Officially Begun
For me, this marks Week One of Flower.
She’s now fully entering that exciting transition where vegetative growth slowly gives way to reproductive growth.
Fresh white pistils are appearing across the tops and developing branches.
Those tiny white hairs are the first signs of the flowers to come.
During the next several weeks they’ll multiply rapidly as each growth tip transforms into a future cola.
Every morning brings another little surprise.
It’s one of those stages where you can almost watch the plant changing before your eyes.
⸻
🌿 A Beautiful Structure
Already reaching approximately 70 cm, Godfather OG Pheno B is another one of the largest ladies inside the grow room.
She has developed a wonderfully open structure with strong vertical growth and healthy lateral branching.
Throughout vegetative growth I’ve relied mainly on gentle Low Stress Training, carefully bending leaves and branches to improve light penetration while allowing the plant to maintain her natural architecture.
Rather than forcing the plant into shape…
I’ve simply guided her.
Now those early adjustments are beginning to pay off as multiple flowering sites receive excellent light exposure.
Every branch is beginning to compete for the spotlight.
⸻
💧 Hand Watering — Precision Through Observation
Unlike her sister, this phenotype is being hand-watered, allowing me to monitor her individually at every irrigation.
Hand watering offers a different type of control.
Each watering becomes an opportunity to inspect the plant closely, evaluate her response, monitor runoff, and make small adjustments whenever needed.
It’s a slower approach than automated irrigation, but it creates a very personal connection with each plant.
As flowering begins, the feeding program has also transitioned to support this new phase of growth.
Bloom nutrients are gradually taking the lead while maintaining enough nitrogen to fuel the final stretch before the plant fully commits her energy to flower production.
⸻
🌡️ Environment Continues to Deliver
The grow room continues providing an exceptionally stable environment.
Current conditions include:
• Day temperature: 31.1°C
• Night temperature: 25°C
• Relative humidity: 72%
• Nutrient solution: 24.2°C
• Root zone: 21°C
• CO₂ concentration: 639 ppm
Everything remains remarkably consistent, allowing the plants to focus entirely on healthy growth.
As flowering progresses and the buds begin to develop greater density, humidity will gradually be reduced to create the ideal environment for the weeks ahead.
Consistency remains one of the most important nutrients we can provide.
⸻
📷 This Week’s Gallery
This week’s photographs capture her from every angle.
Studio portraits showcase her elegant structure and increasing height.
Close-up images reveal the first pistils emerging across multiple flowering sites.
Bird’s-eye views highlight how evenly the canopy is developing after weeks of gentle training.
I’ve also included updates from inside the room together with environmental controller readings so everyone following this project can continue seeing not only the plants themselves, but also the conditions helping them thrive.
Documenting the entire journey has become almost as rewarding as growing the plants themselves.
⸻
🔮 Looking Ahead
The coming week should bring another noticeable burst of development.
I expect the flowering sites to expand quickly as more pistils appear and the early bud clusters begin taking shape.
Stretch may continue for a little longer before gradually slowing down, allowing the plant to redirect more energy into flower production.
Training will remain minimal from this point onward, with only gentle adjustments where needed to maintain airflow and light penetration.
She’s healthy.
She’s vigorous.
And I have a feeling she’s only beginning to reveal what she’s capable of.
⸻
💚 Thank You
Thank you so much for following another chapter of this 8×8 Adventure.
Every diary tells a different story, and sharing these journeys with this amazing community makes the entire experience even more rewarding.
A huge thank you to:
💚 GrowDiaries for providing an incredible platform where growers from around the world can learn, share and inspire one another.
Zamnesia for the fantastic genetics making this phenotype hunt possible.
🌱 Plagron for providing the nutrients supporting these ladies every step of the journey.
💡 Future of Grow LED for delivering the light powering this entire project.
🌿 TrolMaster for helping maintain a stable, carefully controlled environment from day one.
And finally…
Thank you to everyone who takes the time to read these updates, leave comments, ask questions, share knowledge, or simply follow along.
Your encouragement makes documenting every single phenotype worthwhile.
I’ll see you all next week as Godfather OG Pheno B continues her journey deeper into flowering.
Growers Love and the adventure is only just beginning. 🌱👑💚


Likes
16
Share


@eldruida_lamota
Follow
Vamos familia, actualizamos la cuarta semana de floración de estas Panty Punch de Seedstockers, salieron 3, que van creciendo a buen ritmo aunque marquen una pequeña deficiencia ya estoy solucionandola, veremos cómo progresan.
Empezamos añadiendo varios productos de la gama de Agrobeta para la
Floración.
Temperatura y humedad dentro de los rangos correctos.
Vamos viendo cómo avanzan estas próximas semanas.
Agrobeta:
https://www.agrobeta.com/agrobetatiendaonline/36-abonos-canamo
Hasta aquí todo, Buenos humos 💨💨💨

Likes
9
Share


@Lazuli
Follow
Light defoliation on both of them,
They are both in full flower now, the autopot seems to go a bit quicker
Likes
11
Share

@Aircoholic
Follow
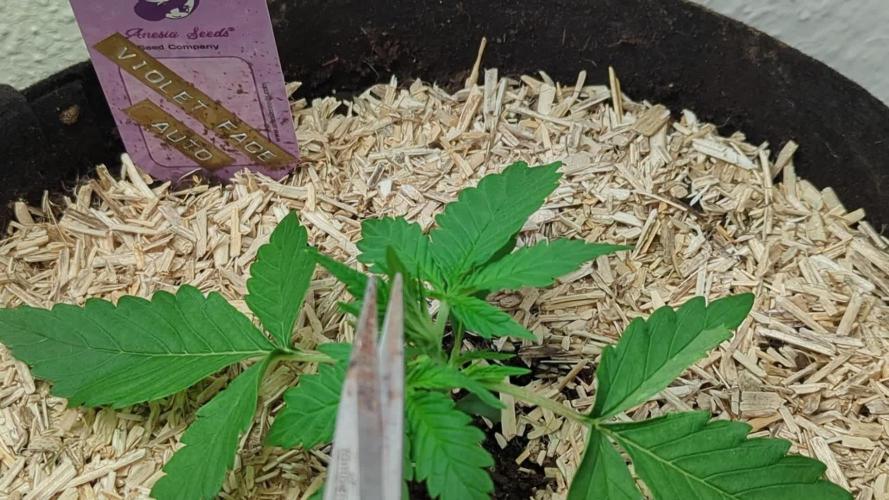
Looks like she recovered alright from the little dry patch in the watering schedule. Her leafs look healthy and vital, so I decided to top her on day 15 - maybe a day or two too early, we'll see. But I didn't just top her, I also removed the two top fan leafs - I'm aware, it's a tricky balance between the loss of energy produced from the leafs vs. giving the new growth underneath more light to stimulate growth. She'll be alright, I've got a good feeling about her!
She also received a layer of Mulch on top of the first soil layer. The idea: aiding the microbial life on the soil surface and at the same time reduce evaporation to prevent the top soil layer to dry out too quickly.

Likes
29
Share


@CANNASIM
Follow
—SETUP—
.BOSSLED LED 1800W full spectrum, real power consumption is +-250W.
.Grow space 60X100X200(a simple shower box.
.AN nutes and other simple additives.
.Grow medium is 60% peat, 30% perlite, 10% organic correction(worm castings), 5 gallon fabric pots(18l).
—BRIEF—
Hi there, I have tried already done this genetic outdoors, in poor lighting and a general purpose nute from Neudorff, yielded 25g dry, in 3gallon pots same medium.
So this is a good experiment, lets see indoors how she will compare.
—GERMINATION—
My germination process always start by scarifying the seeds, i created a little tool for that. I just a little container with sandpaper walls. Shake gently for about 60 secs+, this allows for the water to penetrate better in the seed shell, once you soak. Then i soak overnight from 12 to 20 hours max.
From there i either plant straight or use the paper towel method to see the tap root before. If you are a bit on the impatient side seen the tap root is advisable so you see some movement before planting. Lol!
—ROYAL QUEEN SEEDS . QUICK ONE . INFO —
Chose this strain because is basic and I have to travel for a month soon, and someone else is going to take care for this time. :)
Quick One is a fast-growing autoflowering strain. This was one of the first autoflowering strains developed. When it was first released, it was one of the quickest growing strains on the planet.
THC: 13%
CBD: Low
Yield Indoor : 275 - 325 gr/m2
Yield Outdoor: 100 - 150 gr/plant
Height Indoor: 50 - 60 cm
Height Outdoor: 60 - 100 cm
Flowering: 5 - 6 Weeks
Harvest month: 8-9 weeks after sprouting
Genetic Background: Strong Indica x Ruderalis
Type: Sa 10% In 60% Ru 30%
Effect: Physical
Climate: Mild
—RQS QUICK ONE GERMINATION UPDATE—
My mood said to me to plant straight, so scarify > soak 18 hours +- > plant straight.
Seedlings look a bit odd, with a yellow center, let's give her some days in and see what happens next.
Likes
22
Share


@UnorthadoxDude
Follow
Hey welcome to the start of week 6. Week 5 is now complete with daily updates so check it out!
Misty is still my least popular diary. I do not know why because she is awesome! Perhaps because she is a mystery strain?
Day 38: stretching fast now, wish I had space to LST this girl but after latest LST on Nesia there is NO room at all except upwards. Let's hope she stays under 1.5m. 😏
Day 39: Okay I moved all but the big pots and fan out. I still don't have space to LST Misty. I will have to wait until Bertha or Karen are finished. Hopefully it wont be too late. 🙏🏼
Day 40: She's putting in around 2cm a day right now. Fertigated 4l. Height: 35cm
Day 41: Misty continues to stretch. I have adjusted the timer such that the main tent is now getting 20/4 upped from 18/6. After monitoring DLI at 18/6 for a week I am unhappy with the overall level but because of the varying heights of the plants I am limited in what I can do in adjusting the light height. Some areas were only getting 20 DLI. So I have rearranged to have the taller plants on the edges and the lowest in the middle and doing it this way all plants are getting between 35 and 50 DLI at 20/4 - although one or two cola tips here and there are getting 55. Will monitor for a week.
Day 42: Alright I finally managed to find a way to organise the tent to get a bit more space for Misty so I'm going to do her first major defoliation and adjust the LST. I will update again when done.
Done. Photo's added. Fertigated 8l.
This was a brutal training session. I was very hard on her removing a lot of foilage and performing both extreme LST and some HST. Don't worry too much Misty will rebound from this. I will need to reapply further LST in a day or two when the nodes all straighten up.
I did the same thing to Nesia on day 42... however she had been continually LST'd so I was less hard on her. Let's see what happens. Last but by no means least... I am starting to wonder if Misty is actually another Amnesia Haze Auto... she's very very similar to Nesia.


Likes
42
Share


@BigDickBazuso
Follow
Day 43: Smells ultra-strong in tent. I didn't know plants could smell like they are at this stage!👍
Found out I was under dosing the h2o2. Upped the dose and am now hoping for the best
Day 45: Bud development is strong!!💪 Can't wait to see how hard the plant will let me push cola size.
Processing
Likes
15
Share

@eldruida_lamota
Follow
Buenos días familia, increíble, sin palabras con esta variedad, lástima la lie y perdimos una a principio, pero estas 2 crazy cookies crecen una locura.
Ph controlado en 6,5 y una humedad por encima de 40% así que todo fenómeno.
Una cepa bastante fácil en sus primeras semanas.
Veremos próximamente como se forman nuestras flores familia
