
Likes
Comments
Share

@GERGrowDesigns
Follow
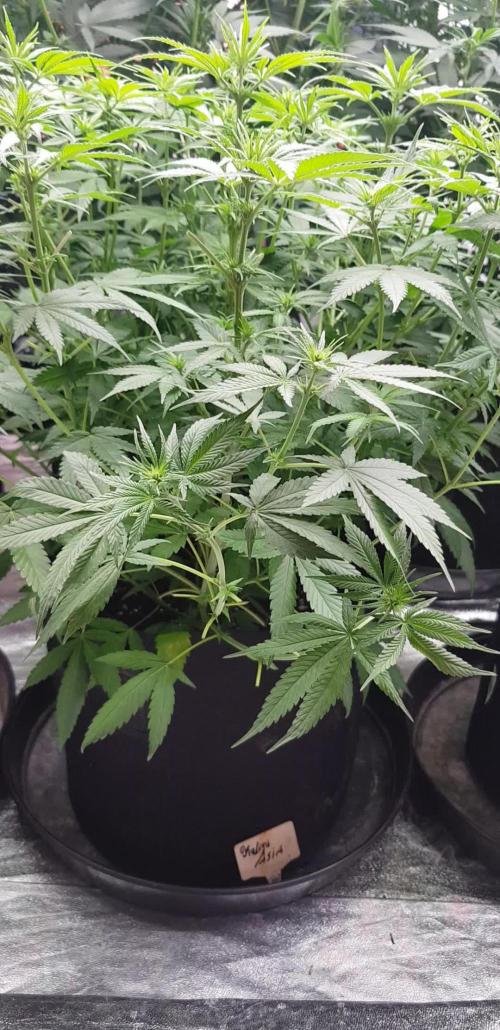
Welcome to Flower week 1 of Zamnesia Kalini Asia
I'm excited to share my grow journey with you from my
Zamnesia Project . It's going to be an incredible ride, full of learning, growing, and connecting with fellow growers from all around the world!
For this Project , I’ve chosen the Feminized Photo Strain Kalini Asia :
Here’s what I’m working with:
• 🌱 Tent: 120x60x80
• 🧑🌾 Breeder Company: Zamnesia
• 💧 Humidity Range: 50
• ⏳ Flowering Time: 7-8weeks
• Strain Info: 22%THC
• 🌡️ Temperature: 26
• 🍵 Pot Size: 16
• Nutrient Brand: Narcos
• ⚡ Lights : 600W x 2
I would truly appreciate every bit of feedback, help, questions, or discussions – and of course, your likes and interactions mean the world to me as I try to stand out in this exciting competition!
Let’s grow together – and don’t forget to stop by again to see the latest updates!
Happy growing!
Stay lifted and stay curious!
Peace & Buds!

Likes
57
Share


@nonick123
Follow
Día 76 (08/07) Riego con 1 Litro H2O + Regulator 0,15 ml/l + K-Boost 1 ml/l + CaMg-Boost 0,3 ml/I + TopBooster 0,3 ml/l - pH 6.2
Ultimo riego con nutrientes. Empezamos el flush (aunque no soy muy partidario del flush, voy a probar las indicaciones de Aptus)
Día 77 (09/07) La planta empieza a llegar al final de ciclo, porque ha reducido el consumo de agua en los últimos días
Riego con 750 ml sólo H20 - ph 6.2
Día 78 (10/07) Riego con 750 ml sólo H20 - ph 6.2
La senescencia está llegando. Efectivamente solo le faltan unos días para la cosecha! 😍💥💨😁
Día 79 (11/07) Riego con 750 ml sólo H20 - ph 6.2
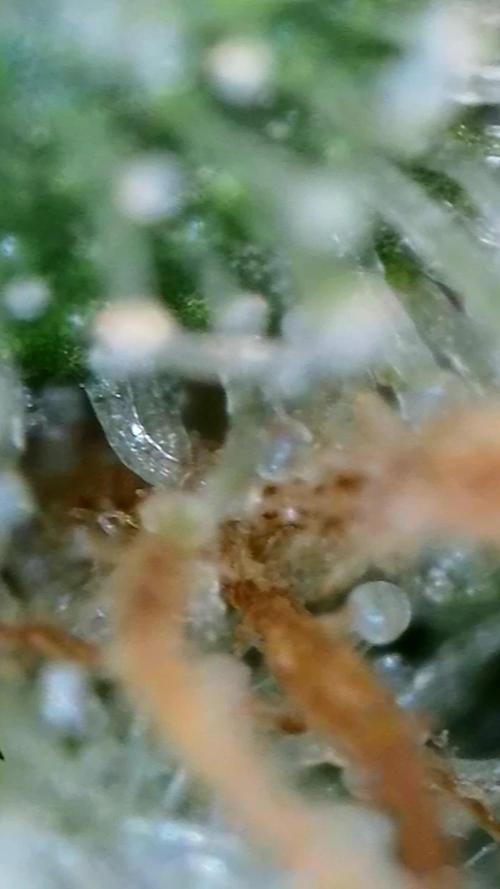
Revisión con el microscopio 60x! Los tricomas están 80% trasparentes + 20% de turbios.
La cosecha se va a demorar unos 4-5 días más
Día 80 (12/07) Riego con 750 ml sólo H20 - ph 6.2
He sufrido un ataque de gusanos y tengo que eliminar tres cogollos...
Los últimos días no he podido estar encima de ella tanto como me gustaría... 😞
Día 81 (13/07) Riego con 750 ml sólo H20 - ph 6.2
Vuelvo a revisar los tricomas y sigue sin estar lista....
Status tricomas: 50% turbios + 50% trasparentes
Día 82 (14/07) Hace mucho calor aqui! 37 ºC
Riego con 1000 ml sólo H20 - ph 6.2
💦Nutrients by Aptus Holland - www.aptus-holland.com
🌱Substrate PRO-MIX HP BACILLUS + MYCORRHIZAE - www.pthorticulture.com/en/products/pro-mix-hp-biostimulant-plus-mycorrhizae

Likes
31
Share


@Mrs_Larimar
Follow
2022-09-17
Plants would need just a few Days longer.
But Weather changed drasticly to lots of Rain and Cold.
So i cut alot of the Topbuds, to give the rest of the Plant more ventilation
and some buds were leaning out under the Roof and were getting wet.
I only found 2 small spots of Mold.
The rest of the Plant gets harvested next Wednesday, or if i see Mold.
But normally Plants are well covered and have place to get airflow now
But those Buds are superthick, and airflow is not to gurantee
well thats outdoor growing.
But iam very Pleased, and in common Honey cream is ready to get harvest.
I just hope for 4-5 more Days of Sun- and dry Weather.
The Plant smells superlovely, flowery and sweet

Likes
3
Share

@fabialien
Follow
semana del 14 al 21 de Marzo 2026, lamentablemente tuvo un estres por contaminación lumínica debido al deshumidificador dentro del tent y se hizo hermafrodita sacando bastante semilla. Sad
Likes
23
Share


@Kakui
Follow
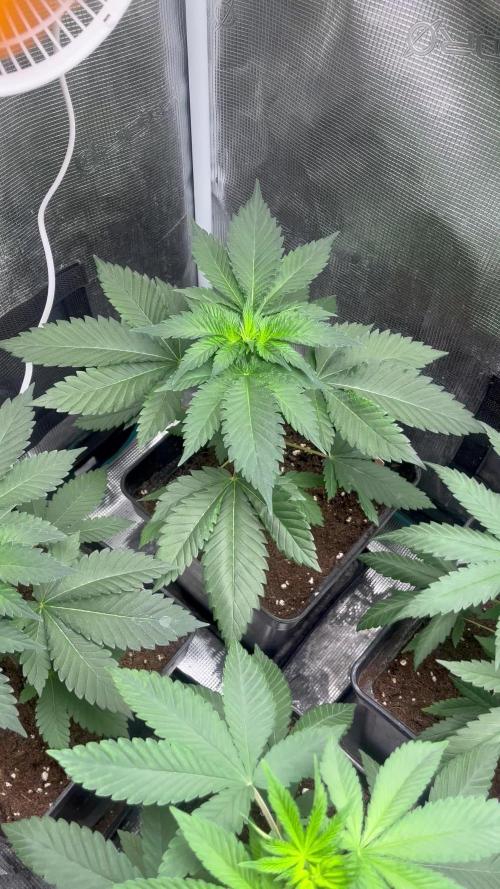
V4, están creciendo rápido, desde este punto empezaré con una EC de riego más alta 1.5~1.8, hace 3 días que aparecieron las primeras hojas verdaderas, por lo cual la etapa de vegetación ha iniciado.
V6, el día anterior tuvieron un riego con pH 6.2 y EC 1.7, se me pasó el agua y quedaron algo tristes, pero ya se recuperaron hoy, todas las stash presentan puntos de decoloración en las primeras hojas, las cookies están en perfecto estado. Están comenzando a salir raíces por el fondo de los vasos(algo que nunca me había pasado con otras genéticas) además se ven muy gruesas las raíces, están pidiendo transplante ya, en unos días serán transplantadas.

Likes
4
Share


@Boscaglia
Follow
Plants have really streached this week but it looks like they have almost gotten to full height (I hope). I'm running out of vertical space, but that's what you get with haze I guess.
The outside temperature has significantly increased but 30° was the warmest recorded in the tent.
Plants have started to really drink up so now I'm doing 1 watering with nutrients and one with water and CalMag with pH corrected to 6.5.
Will probably remove a few more leafs here and there to let some lower areas get more light.
Likes
2
Share

@eldruida_lamota
Follow
Vamos familia, actualizamos la sexta semana de crecimiento de estas NoName de Seedstockers.
La temperatura que estuvo entre los 24-26 grados y humedad dentro de los rangos correctos.
Esta semana ya cambiamos a 12 horas luz,12 horas de oscuridad, estiraron bien y ensancharon bastante también, el color es verde sano.
Se nota que los nutrientes de la marca Agrobeta hacen sus funciones.
También realicé una poda de bajos que yo si las veo necesarias para explotar después la flor.
- os dejo por aquí un CÓDIGO: Eldruida ,descuento para la tienda de MARS HYDRO.
https://www.mars-hydro.com
Hasta aquí todo, Buenos humos 💨💨💨
Likes
9
Share


@Belivitez
Follow
Very happy with buds i have some problems in flowering and this is new school for me... Thanks to watch ✌️

Processing
Likes
20
Share


@Hawkbo
Follow
This week they are all just putting on some weight still a few weeks left to go. Pics were taken on Monday video on Tuesday. The aromas are pretty strong in the tent in general.
They are all doin pretty good, the bud structure on 2 is kinda suspect but they all smell heavy lemons/gas.


Likes
17
Share


@Young_agronomist
Follow
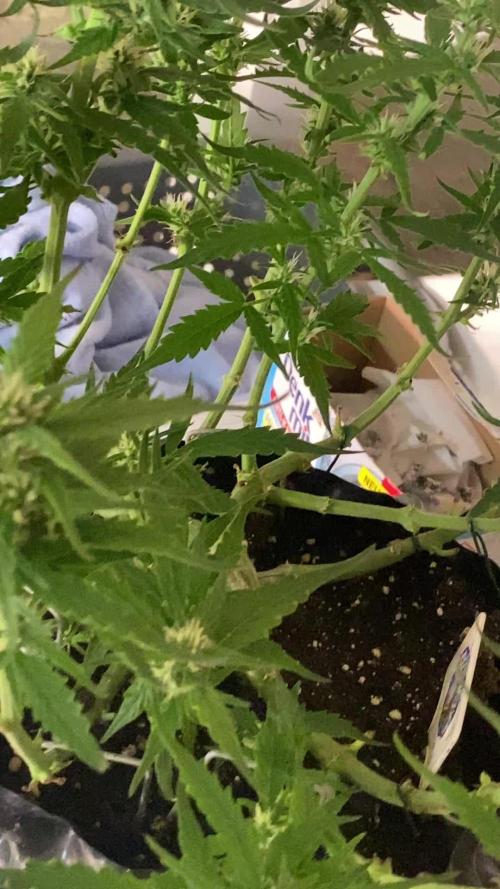
09.03.2023-первый день пятой недели начался с сломанного главного стебля ((
Увы спасти его не удалось пришлось сделать “топпинг“.
10.03.2023- После поломки стебля “видимого“ стресса не испытал.
По показаниям ppm стока стал активно пить воду (3 литра каждый день)и есть орехи .
На этой неделе я начну давать 750 ppm
12.04.2023-взрыв роста за ночь !!
Начинаю видеть предварительные цветы , думаю это последняя неделя вегетации(ей уже тесно в палатке )
Перевел на новое питание greenhouse feeding short flowering , сделав флаш новым раствором пока сток не сровнялся с входом
Ppm 700 ph6.0
13.04.2023- Продолжает сильно растягиваться (особенно малышка , которой был сломан ствол заметно быстрей растет , ветки толстеют .Видимо перелом основного стебля направил соки в побочные ветки 👌🏻мне повезло 😂😂) обе пьют 3 литра в день ppm 700 ph6.0
14.03.2023- у девушке что поменьше обнаружил легкий ожог орехами , после замера ppm он показал 1100 . Принято решение сделать флаш раствором с маленьким содержанием Орехов , после чего ppm стал 600.
Вечером этого дня срезал пару старых лопухов затемняющим свет .
15.03.2023- Этих девочек не остановить ! Рост каждый день , палатка полностью заполнена . Со дня на день она начнет цвести.
Добавил лампу на 25w для более кустистой части (девушка без топпинга).
Likes
4
Share


@Ieiogrow94
Follow
Eccoci qui...
Tutto va per il meglio, questa settimana non ho applicato stress alla piccola, ma ho guardato l'evoluzione che ha avuto dando i nutrienti. Si è ripresa ormai dallo stress che ha avuto e sta spingendo.
Ora ha un odore davvero intenso ed uno strato di resina pauroso, vediamo come si riprende dalla defogliazione che ho fatto settimana scorsa.
Seguiranno aggiornamenti, grazie a tutti per il supporto🔥🌲❤️
Likes
23
Share


@Mazgoth
Follow
It’s growing really well and tall,I forgot to topping the plant but it’s okay
Likes
9
Share


@wheedtobeus420
Follow
Day 71. She’s huge and heavy like heavier then I can explain. I took her off her hangers so she can go into her dark flushing period and she just well you can see 😂😂😂🍆🍆🍆 she smells Devine like spices and things I can’t even describe I’m very excited to chop her down in the coming weeks she’s been a pleasure to grow.

Likes
3
Share


@Narniaman
Follow
Grow on my closet at vegetative stage with a viparspectra 300. Start in the 20 litres airpot and transplanted to 60 litres geotextil pot. At week 11 I added an apollo 6 (136w real).

Likes
5
Share


@Nune2021
Follow
Hey Leute mal sehen was passiert bzw wie die Pflanze sich in so ein kleinen Topf entwickelt ich denke das Wachstum ist dadurch stark eingeschränkt!!

Likes
17
Share


@greenhousegrowgirl
Follow
Mar 7 (day 78): Start of week 12.
Mar 11 (day 82): Chopped plant.
Likes
33
Share


@deFharo
Follow
Hola y bienvenidos cultivadores de marihuana, la semana de corte está aquí después de 15 semanas desde semilla y 10 de floración, esta es una cepa auto floreciente con dominancia sativa que no ha defraudado.💁♂️🌲
He cultivado esta planta con atención y esmero, ataduras LST en las ramas y el tallo, en una maceta air-pot de 6l, con una mezcla de sustratos ligeros y minerales, sustrato activado con microbiología autóctona recogida en los bosques vírgenes de mi región y la he regado siempre con agua estructurada de manantial de montaña.
La he alimentado con macro y micro nutrientes solubles, creados con fermentados anaeróbicos e hidrolizados propios, creados con Microbiología, elementos orgánicos y minerales, mantengo mucha y buena luz en las carpas de cultivo, cultivo esta planta con 10h de luz interior, más otras 10 horas de luz exterior y cuatro de sueño, esta planta siempre ha usado sombrero (mulch), con mucha materia seca para dar de comer a la microbiología y mantener niveles de humedad óptimos en superficie, para facilitar la creación de raíces adventicias desde el primer centímetro de tierra.... 💧🌞👨🌾 todo para conseguir un pastel de bodas, digno de reyes! 🤴👸
Pensaba que el cultivo podía durar una semana más, pero en los últimos días la planta mostró que estaba madura, no he querido esperar más, pues necesitaba el ESPACIO para reorganizar mis carpas de cara a la nueva temporada de cultivos, que comenzaré en otoño, y mucho TIEMPO libre este verano para perderlo porro a porro! 🤷♂️
- Esta planta con dominancia sativa, y se notaba mucho por el grosor de las hojas, no se ha visto afectada por la araña roja que en mayor o menor medida ha atacado a todos mis otros cultivos, ha demostrado mucha resistencia! 🌲
- Las colas son enormes, densas y pegajosas, con muchas hojas de azúcar, el olor es apestoso, ha sido la cepa auto floreciente con el aroma más intenso, olores a menta, bosque y frutas ácidas.
- He tenido poco desperdicio después de hacerle la manicura a los cogollos, va a ser una producción decente, contando la pequeña maceta y el tiempo de cultivo.
- Como me ocurre con frecuencia la etapa de floración se ha alargado bastante con respecto a las indicaciones del productor, pero como estoy acostumbrado a foto periódicas se me ha hecho un tiempo de cultivo corto.
Actualmente la planta está en proceso de secado, con humedad y temperatura controladas, en una semana la pasaré a los botes de curado y en ese momento fumaré los primeros porros para hacer la valoración avanzada de la cosecha.
A falta de probar el resultado de las 3 cepas auto florecientes que he cortado esta semana, creo que voy a reservar este tipo de cepas para cultivarlas a principios de Abril, y así aprovechar las horas de luz exterior, con el fin de ahorrar costes de producción, pues estas cepas necesitan muchas horas de luz para conseguir una producción decente y cada vez está más cara la factura de la luz eléctrica.
Hasta la cosecha...
SALUDOS A TODOS Y GRACIAS POR LEERME!! 🌈
================================= 🙄☮️👇🙏👌🤛👍👉👉👉❤️💜❤️👈👈👈🤜👌🙏👇☮️🤩🖐️🏻 =================================
Likes
11
Share


@Tobagardenboy
Follow
Flowers are just starting to bud, they've been showing sex almost all week, gonna consider this the last week of veg! Bloom nutes are gonna be mixed in soon!
Likes
3
Share

@SouthGermanGrowGirl
Follow
Pablito, Pablito...
What is wrong with you my Man??
I mean...
Ph is at 6,3.
EC is at 1,5.
You get all Nutrients what you need.
The Light is at 50% (720w) and 50cm above you...
So why tf do you do this with you/me and your Leafs???

Likes
42
Share


@Dr_Boom
Follow
She's getting close now! She has bulked up and all her branches are starting to bend over. These aren't the biggest buds I have grown, but they are very dense and heavy. She should be a good yielder. I'm going out of town for the 4 day weekend and by the time I get back, I'm sure she will be ready.