Likes
Comments
Share
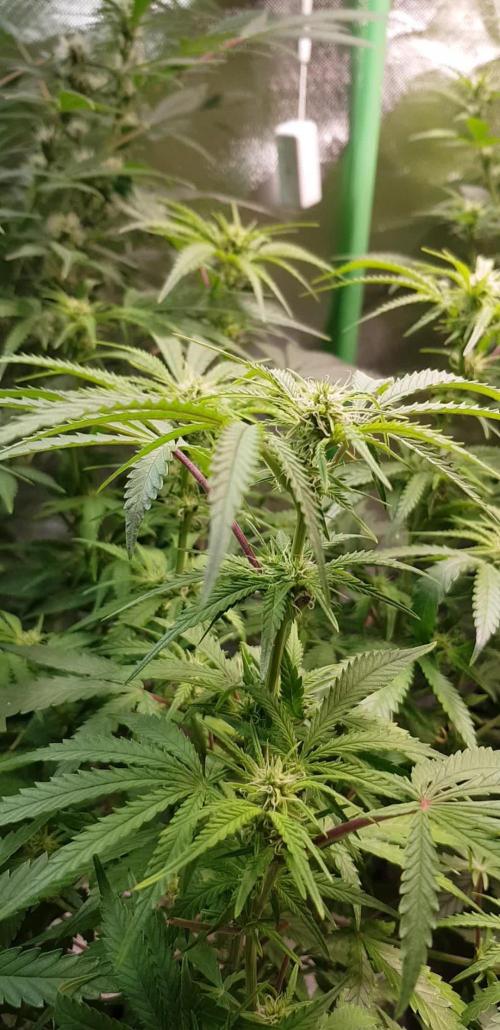
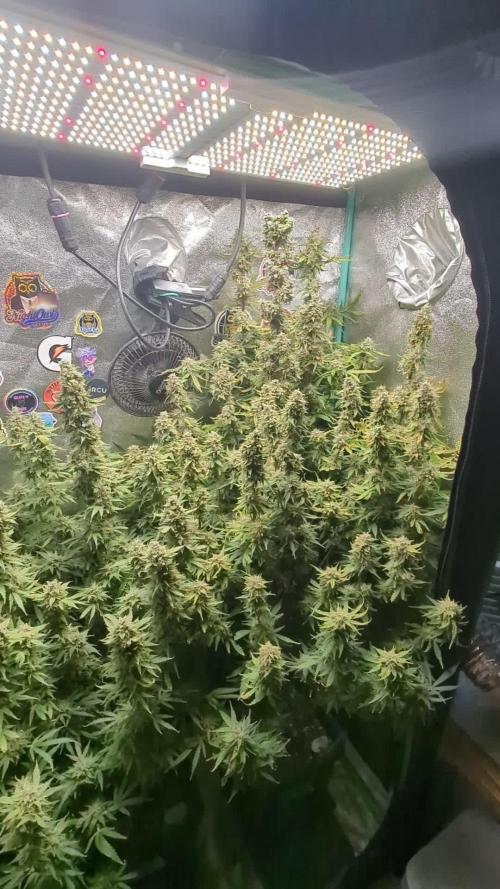
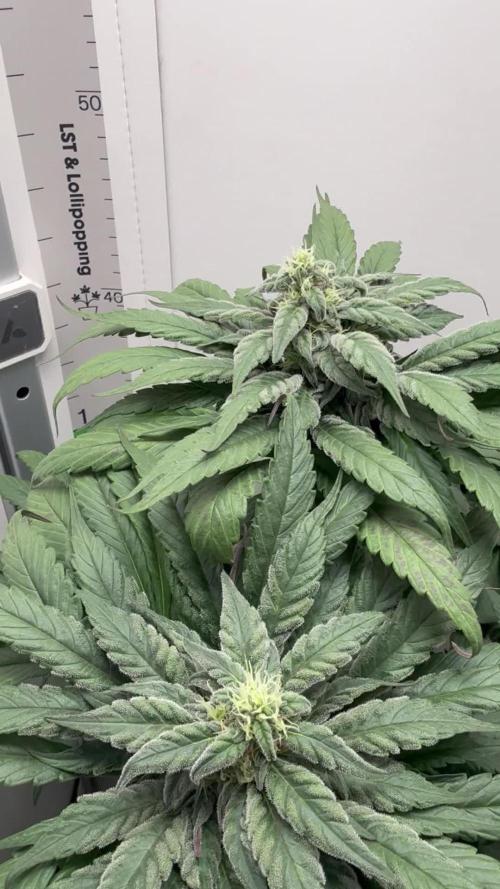
Welcome to Flower Week 3-4 of Divine Seeds Auto Black Opium I'm excited to share my grow journey with you all as part of the Divine Seeds Autoflowering Competition 2025. It's going to be an incredible ride, full of learning, growing, and connecting with fellow growers from all around the world! For this competition, I’ve chosen the Feminized Automatic strain: Auto Black Opium Here’s what I’m working with: • 🌱 Tent: 120x60x80 • 🧑‍🌾 Breeder Company: Divine Seeds • 💧 Humidity Range: 50 • ⏳ Flowering Time: 60-63 Days • Strain Info: 25%THC • 🌡️ Temperature: 26 • 🍵 Pot Size: 0.5l • Nutrient Brand: Narcos • ⚡ Lights : 200W x 2 A huge thank you to Divine Seeds for allowing me to be a part of this amazing competition and Sponsoring the Strains. Big thanks for supporting the grower community worldwide! Your genetics and passion speak for themselves! I would truly appreciate every bit of feedback, help, questions, or discussions – and of course, your likes and interactions mean the world to me as I try to stand out in this exciting competition! Let’s grow together – and don’t forget to stop by again to see the latest updates! Happy growing! Stay lifted and stay curious! Peace & Buds!
Likes
2
Share
11/15/22 Day 28- at the beginning of week 3 had the soil ph raise but got it under control so start of week 4 she is really growing nice trying to keep branches trained out to keep airflow in middle probably gonna switch to flower after end of this week
Likes
6
Share
@Piupao
Follow
Start of the week 10. I like the size of buds, i hope it continues gaining weight like that
Likes
5
Share
Likes
29
Share
@Naujas
Follow
Great :) GOOD START-HALF OF THE WORK !!!! The girl looks very good :) so far the small space does not cause any problems, for the first time I see that after you tried cutting off the main head, new branches grow from that place :) it will be really interesting :) I used LST a little until the height of the branches is even, and then I will try to do a scrog :) good luck to everyone :).
Likes
59
Share
Man Let me tell you, I am over the moon excited about my amazing haze right now. We're currently in week 2 of flowering and let me tell you, it's looking absolutely stunning in my 4x4 tent. I decided to use a scrog net, it has been a game-changer. The technique involves weaving the branches through the netting as they grow, which helps to create an even canopy and maximizes light exposure for all the buds. And let me tell you, the end result is just beautiful. I mean, have you ever seen a canopy so full and lush? It's like a little piece of heaven in my tent. And don't even get me started on the fruit formation. I can already see those buds starting to form and it's making my heart skip a beat. The end of the stretch is near and I couldn't be more excited to see what kind of harvest I'll end up with. Every time I look at my scrog net and full canopy, I can't help but feel a sense of pride and joy. It's like my Girls are always praying and thanking me for taking such good care of them. And let me tell you, I love it. So, if you're thinking about trying out the scrog technique, I highly recommend it. And who knows, maybe you'll end up with a full canopy that will make you feel like a proud parent. Just be prepared for all the praying that comes along with it. ;) As always thank you all for stopping by, for the love and for it all , this journey of mine wold just not be the same without you guys, the love and support is very much appreciated and i fell honored and blessed with you all in my life <3<3<3 #aptus #aptusplanttech #aptusgang #aptusfamily #aptustrueplantscience #inbalancewithnature #trueplantscience #dogdoctorofficial #growerslove 
 With true love comes happiness <3<3<3 Always believe in your self and always do things expecting nothing and with an open heart , be a giver and the universe will give back to you in ways you could not even imagine so <3<3<3 <3 Friendly reminder all you see here is pure research and for educational purposes only <3 <3<3<3 Growers Love To you All <3<3<3
Likes
5
Share
This lady is getting massive. I set her sister outside to bask in the darkness she wanted sleep. I'm gonna keep this weeks entry short and sweet. Check back next week to see just how fast she buds & remember its 4:20 somewhere!!!!!
Likes
56
Share
Been super busy so lagged on getting this posted. All plants are down and currently drying. The weather has gotten chilly so taking longer to dry than I would like. Super excited to get it jars and all cured up. First plant is all done and came out bomb af.... a couple of friends didn't even think it was real..lol.. because it was to purple.... the potency is totally there on this one ☝️ sometimes purple lacks that but this stuff has it all. Bag appeal, smell, taste, and potency!!! This is not a commercial strain due to the slow growth and average yield, but a conasuers dream. Didn't weight wet weight, but will post final dry weight
Likes
16
Share
Big week here. The girl got moved into the tent and also into the Autopot system. I'm excited to see how the Autopot performs! There appeared some burns, I had been busy with xmas, so I didn't had that much time to attend her. I believe she will get back on track now. The biggest challenge is to keep the PH stable in the water tank.
Processing
Likes
1
Share
Hello everyone, Been busy but I shoot a little video for yall to see, also if growing is something you guys intended to do, I suggest you guys get yourselves a Digital Microscope or a jewlers loop. I just got myself a Digital Microscope for under $20.00 on Walmart.com, I got me a cheap one to start with so I can learn how to use it properly. But for under $20.00 this one brings 8 led lights, a adjustable mount, comes with 3 different connection choices build in, magnifies from 50-1000x, can take pictures and also videos and my favorite part, it connects right to my mobile device, you download and install a Google app and your ready to go, ill work with it and add pictures next week... See you guys soon 👊👊👊
Likes
88
Share
hello to all, fellow cultivators! my girls are starting to show the first symptoms of pre-flowering ... they eat regularly and have formed a beautiful and solid structure. stay on track for the next updates also follow us on instagram
Likes
35
Share
Update February 4, 2019 (Video and Pics actually taken Feb 1). I’m figuring I’m about mid-way into flower now with the 6 girls I have flowering. Overall, I’m very happy with how things are going. The buds are coming in strong on all plants, they are stinky and sticky and I’m not complaining about anything really. But, I still see more yellow than I like. Last week I fed Recharge, Mammoth P, MegaCrop, and CalMag+. I don’t feed all of those at once, Recharge & Mammoth P one time, MegaCrop & CalMag+ the next, then the 3rd is usually straight water. I also seem to be able to go at least a day between waterings/feedings. Anyway, yellowing leaves during flower seems to be most common with a Nitrogen deficiency as far as I can tell. I’m tempted to feed in a round or two of veg nutes to see how that goes. One more thing… I transplanted my clones and seedlings into larger nursery pots today. They were transplanted into pots with soil that has been composting/recharging for almost a month now based on some of the tips from the books I have been reading. I’m excited to see how they react to their new environment.
Likes
5
Share
@Chubaka26
Follow
First day of vegetative state. I use 125 ml of spring water mixed with 0,2 ml of bio-grow( npk 3-3-3) and 0,1 Gr of rooting powder. She looks healty . This is the first day that i let her to direct aire, without protection. I am curious how She will handel the aireflow from the fan
Likes
17
Share
@Canna96
Follow
Hey now, hope everyone has been well. Super excited football season is finally here so things are about to get busy. I went out of town for 4 days and the plants struggled a little bit with the PH getting slightly too high before I returned. I also came back to see that some type of insect was munching away on the lower leaves of my Sundae Driver which I sprayed the plant and coco with neem oil, but hopefully they didnt do much damage before I can get them under control I have never experienced insect problems indoors, likely because I grow in Coco and not Soil. However, I left a 5 gallon airpot full of coco from a previous grow outside for a couple weeks by mistake, and pretty sure bugs got into. I wont make that rookie mistake again. Anyways the rest of the ladies are looking pretty good, They are almost getting what I consider a full dose of nutrients, even though it half of the manufacturers recommended dosage. I am feeding all Gen Hydro cal mag, Armor Si, and maxi grow. Not sure why I can't add it under GHE or the company that bought GHE. I also add some food grade hydrogen peroxide to keep the reservoir fresh for around 10 days or so but I clean it once a week. I did get all the ladies transplanted from solo cups to airpots on day 16, and it took 24 hours or so for them to recover from the transplant and start growing again. I am running 3 of the 3.4 gallon, and 2 of the 5.4 gallon just because that is what I had available. I hopefully top them all sometime this week for the first time, as soon as the roots are a little stronger. I let them grow to 7 nodes or so before I top them and make sure they're growing fast. Hopefully I can still mainline the Sundae Driver, she looks healthy other than those two leaves chomped off. All the plants are on their 5th nodes, except for the Green Crack 2.0 which is only on her 4th node. We got another heat wave coming through my region that I am not too excited about but at least its earlly in the game and I dont need to crank this light up yet. I am only running it at 30% and its putting off plenty to keep this ladies happy. Hoping to get a topping done this week, then another one next week, and be ready to flip to flower by week 7 or so. Thanks for stopping by, Stay Safe and Blaze On!!! 💪 Website: https://medicgrow.com/ https://growdiaries.com/grower/medicgrowled
Likes
8
Share
Super heavy yielder, nice dense, dripping and exotic looking nugz. Definitely recommend if you need to pull as much uhq dank with restrictions on plants or space. Grows very tall for an indica dominant hybrid, almost hit the light after stretch. Ultimately very hq stable genetics
Likes
155
Share
@deFharo
Follow
Bienvenidos cultivadores de marihuana clandestinos y también a los que tienen la fortuna de no serlo!🖐️👨‍🌾👍 Este es un diario donde semanalmente explico algunas de mis técnicas de cultivo y preparados orgánicos, los cuales llevo experimentando dos años en cultivos de marihuana interior. • Hay dos componentes absolutamente necesarios para cualquier cultivo y de los que no se puede prescindir: La luz y el agua... hoy toca hablar de agua, homenajear al agua que la montaña y el cielo me regalan para mis plantas de marihuana!! 💧💧💧 Tengo que decir, que hasta el momento, nunca he usado agua con cloro en mis cultivos, mi interés por el agua pura de manantial ya venía de antes, pues yo mismo la consumo habitualmente, el cloro es añadido al agua corriente para hacerla potable y acabar con posibles bacterias o patógenos, pero no distingue entre buenos y malos. Siempre he creído que el consumo de agua pura, ayuda a mantener la micro biota de nuestro sistema digestivo, os podría hablar de las ventajas palpables, pero voy a obviar comentarios escatológicos. En el caso de mi modo de cultivo, donde baso toda mi técnica en el mantenimiento e inoculación masiva de Microorganismos de Montaña (MM) en el sustrato, el uso de agua pura sin cloro es obligado. El 03 de julio de 2020, publiqué lo siguiente: GROWING TIP: Agua!! Mineralizada, viva y estructurada. La importancia de la calidad del agua para el cultivo es vital para mi, he recorrido los manantiales, ríos y arroyos de mi zona con el medidor de EC y el de PH para conocer las aguas que me rodean, recojo siempre que hay oportunidad agua de lluvia de la terraza de un vecino, nunca me falta agua pura, desecho regar con agua del grifo. Para mi, y actualmente, la mejor mezcla de agua que puedo ofrecer a mis plantas es agua de lluvia 75% con otra de un manantial de montaña de agua alcalina (Carbonato cálcico PH: 9.2) y muy mineralizada (EC: 0.85), esta agua yo mismo la consumo regularmente, consigo una mezcla de agua pura con un EC alrededor de 0.19, me garantizo así el aporte de calcio y otros minerales. En épocas donde no llueve uso agua pura de manantiales y arroyos con EC de 0.3. Estas aguas las filtro y almaceno a obscuras en mi casa, la cuestión es que el agua parada pierde oxígeno y también desordena su estructura molecular haciéndola caótica. Para poder recuperar esta estructura y oxigenación, el agua debe estar en movimiento como en la naturaleza, yo me ayudo de un agitador magnético para volver a tener agua viva, el agitador crea un vórtice implosivo que en 10 minutos pone las cosas en su sitio y carga de oxígeno nuestra agua, una vez hecho este proceso voy añadiendo los nutrientes uno a uno y sigo agitando hasta el final. El agua tratada con esta técnica, mejora la asimilación de nutrientes porque favorece el intercambio catiónico e inunda de oxígeno nuestro sustrato y raíces, también con esta técnica se pueden bajar las concentraciones normales de EC en un 30% y conseguir los mismos resultados, prueba y verás!! ------ Hoy tengo algunos comentarios nuevos sobre los diferentes tipos de agua que uso y usé. - Agua de río: Comencé recogiendo agua de los dos ríos caudalosos que cruzan mi pueblo, buena agua, no hay industrias en su cauce, pero sin embargo las aguas fecales de los pueblos acaban en él. Por lo que, ante la duda, deseche el uso de este tipo de agua. - Agua de lluvia: Como comenté antes, recogía agua de lluvia desde el desagüe de la terraza de un vecino (PH: 7, EC: 0.07), mucho trabajo, exposición vecinal y explicaciones surrealistas a los transeúntes que me preguntaban, como decir que recogía el agua para mi perro que no podía tomar agua con minerales por tener tendencia a la formación de piedras en la vejiga, en otras ocasiones, respondía con entusiasmo que era la mejor agua para cocinar alubias!! 🤷‍♂️😎 Definitivamente dejé de recoger agua de lluvia de ese lugar, pues el agua que explico a continuación ya viene con los niveles de EC que yo busco... - Agua de montaña: Manantial permanente a 700m de altitud, el PH varía según la época del año, cuando en otoño, invierno y primavera hay más lluvia, el PH está en 7, y el EC en 0.25, en verano el PH sube a 8 y el EC a 0,5, esto es debido a que la carga de minerales es mayor cuando no hay lluvias. Según la geología de la zona, rocas cálcicas, arcillas y basalto principalmente, este agua mineral contiene suficiente mineral (Ca, Mg, Si, Al, Fe, K...) para no tener necesidad de usar aditivos como CalMag. Esta, es el agua que más uso para riegos. - Agua de manantial alcalino: Casi a nivel del mar, muy mineralizada, con menos variación de PH y EC en épocas de lluvia: PH entre 8 y 9.2, EC entre 0.5 y 0.9. Esta agua la uso de varias maneras: a) Es el agua que yo bebo. b) El café y la comida la hago con esta agua. c) Por su nivel de alcalinidad la uso para los diferentes fermentados anaeróbicos, compensa la extrema acidez de estos preparados y aporta minerales ya solubilizados. d) Este invierno la he usado para riegos mezclada con agua de des-humificador al 50%, obteniendo agua con un EC de 0,25. e) Las raras ocasiones en que riego sólo con agua, uso ésta si el cultivo va bien, y si necesitara hacer un lavado de sustrato por sobre fertilización, uso el agua de des humificador: PH: 7, EC: 0.09, que al no contener minerales el poder de disolución es mayor. - Agua de des humificador: Este invierno debido a las bajas temperaturas, alta humedad relativa y aparición de oídio, me vi obligado a tener funcionando permanentemente un des humificador, y para hacer de la necesidad virtud, he estado recogiendo esta agua exenta de minerales, mezclándola al 50% con las aguas del manantial alcalino, de esta manera me he he ahorrado algunos viajes al manantial de montaña. Recientemente medí el consumo de este aparato, y casi me caigo de espaldas al comprobar un consumo de 140w, lo he tenido encendido más de 3 meses las 24h del día y en ocasiones he tenido funcionando dos des humificadores! y yo, engañosamente, pensé que no consumían más de 50w... bueno, después del disgusto de saber el despilfarro de vatios, yo, que me he esforzado mucho en los últimos cultivos, acarreando macetas del interior al exterior, por consumir el mínimo de luz eléctrica y que me ha supuesto obtener unas cosechas medio bajas para lo que estaba costumbrado, ahora, en mis nuevos 4 cultivos la luz no va a ser el obstáculo, ya que ahora los des humificadores están guardados, y voy a alumbrar estas plantas con todo lo que me quepa en la carpa, la media de vatios por planta de mi última temporada de cultivos fue de 40w/planta, esta temporada voy a llegar a los 100w por planta... más luz es igual a más masa floral!!🌲🌲🌲🌲 - Agua de mar (for nerds): Yo no me he atrevido a usarla para riegos, pero con el agua de mar preparo Ormus casero con agua del mar Cantábrico, donde separo el sodio y hago precipitar los minerales: Publicado el 10 de julio de 2020 a) Fuente principalmente de Magnesio, Azufre y calcio para todo el cultivo. El Ormus contiene de un 30 al 60% de magnesio. Yo lo uso sistemáticamente en todos mis riegos, las dosis van desde el 1% al 2%. b) Contiene más de 70 minerales, la mayoría en modo monoatómico que mejora el intercambio catiónico y la asimilación de nutrientes. c) Al ser un producto alcalino se puede usar para subir el PH del riego cuando se necesite. Aumenta muy poco la carga de EC. d) Forma parte de mis componentes en la solución acuosa que preparo para germinación y establecimiento de semillas. e) Almacenado a obscuras el producto no tiene caducidad conocida. • Agua de coco (for nerds). Producto natural rico en azúcares, vitaminas, proteínas y aminoácidos, enzimas citocininas (División celular, crecimiento), ácido giberélico (Estimulación de raíces) y minerales (Ca, Fe, P, Mg). - Los momentos clave de más demanda de enzimas citocininas comienzan en la mitad de la primera etapa de germinación y establecimiento de la plántula, y al comienzo de la etapa de floración/reproducción. En la última etapa de los cultivos es innecesaria. - Los momentos clave del ácido Giberélico comienzan también en la primera mitad de la primera etapa de cultivo y las últimas semanas de crecimiento vegetativo, después de estas etapas la necesidad del ácido decae hasta hacerlo innecesario en las últimas semanas del cultivo. - Yo uso el agua de coco, alternándola con otros nutrientes, sólo en las primeras etapas de la planta y hasta la preflora. - Las dosis dependen de la carga de EC que se prefiera. Como mínimo aconsejo una carga en disolución de EC de 0,4 o PPM 200. - El agua de coco natural se debe guardar en el refrigerador, como máximo 4 días, pues fermenta con mucha facilidad. y esto es todo por hoy... tengo sed! 😁 Hasta la próxima semana... SALUDOS CULTIVADORES!!🖐️👨‍🌾💧💦🌞💡 =================================
Likes
19
Share
@Hashy
Follow
******************************************** Week 13 Late flower (week 9 flower) ******************************************** Light cycle=12/12 Light Power=120w 50% Extractor controller settings (during lights on). High temp= 26c Temp step=0c High Rh= 46% Rh step=0% Speed max=10 Speed min=3 Extractor controller settings (during lights off). High temp= 20c Temp step=0c High Rh= 50% Rh step=0% Speed max=10 Speed min=3 Smart controller settings (during lights on). Lights on=9.00am Smart controller settings (during lights off). Lights off=9.00pm VPD aim=1.0-1.5 DLI aim=40-45 EC aim=1.0-1.8 PH aim=6.0-6.5 💧💧💧💧💧💧💧💧💧💧💧💧💧💧💧💧 NPK= 5-14-20 Method= Automatic Feed=Late Flower nutes Neutralise=0.1ml/L Plagron bloom=2.5ml/L Plagron Power buds=1ml/L Green Sensation=1ml/L Easy Ph down=0ml/L (1ml=24 drops, 1 drop=0.04ml) Easy Ph Up=0.0ml/L (1ml=24 drops, each drop is 0.04ml) Ec=1.2 PH=6.3/6.0 Runs=10 Run times=3mins (0.75L/0.375L each) Gap times= 17mins Total runtime=30mins(6.0L/3.0L each) Total flowrate= 0.25L/0.125L/min each Auto start time=10.00am Auto stop time=1.03pm 💧💧💧💧💧💧💧💧💧💧💧💧💧💧💧💧 ******************************************** ******************************************** 📅3/5/25 Saturday(Day 85) 📋 Removed Radiator summer conditions from now on. Small defoliation 💧 Automatic Water Ec=0.2 PH=6.6/6.5 Volume=10L Volume left=2.5L Volume used=7.5L Volume each=3.75L Total runoff=0.6L Ec=2.1 PH=6.4/6.4 💧 📅4/5/25 Sunday(Day 86) 📋 📅5/5/25 Monday(Day 87) 📋 📅6/5/25 Tuesday(Day 88) 📋 📅7/5/25 Wednesday(Day 89) 📋 💧 Automatic Late flower nutes Ec=1.2 PH=6.2/6.0 Volume=5L Volume left=1L Volume used=4L Manually Volume =1L Total used=5L Total runoff=0.8L Ec=2.5 PH=/6.6 💧 📅8/5/25 Thursday(Day 90) 📋 📅9/5/25 Friday(Day 91) 📋Day 63 of flower ******************************************** Weekly roundup. 📋My lung room is a little less crowded now I can take the radiator out of there. It's now the job of keeping the room cool as the season has changed. She's in late bloom now as pistils are starting to brown. The Fat bastard name really suits this plant, nice big flowers, I do have a bit of fox tailing going on the very top of the main cola but that can be expected for how close she is to the light. Still a way to go yet but she is doing great. Back soon. Take it easy. ********************************************
Processing
Likes
41
Share
This auto ghost of is at day 21 and she has been growing like crazy since she broke the surface. She has the potential to be a real work of art if I can keep her happy. I upped the maxigro to .5 tsp per gallon and started them on a little armor si so they can build some strong branches. Still running them on 24 hour light and 24 hour irrigation. They are going to stay under the blurple lights for a few more weeks until I can get them in the big room under the quantum boards. I'm hoping they will flower around 4 weeks but my autos seem to enjoy staying in veg so we will see what happens.
Likes
9
Share
How's it growing farmers? Oh my god, she kjust kept stretching, idk what's going on. She's so massive. I deffo need to defoliate, ill have mold issues. she drinks half the bucket every day, Early on in the week I had some Light burn, moved my lights up all the way My Flower lights: https://marshydro.eu/products/mars-hydro-ts-1000-led-grow-light/?ref=BelgianBudtender My Veg lights: https://marshydro.eu/products/mars-hydro-ts-600-led-grow-light/?ref=BelgianBudtender Coupon code BelgianBudtender for 3% off
Likes
37
Share
Comenzando ya la ultima fase del cultivo, descubrimos una paleta de olores bastante amplia la cual nos recuerda olores como Mango fresco y Melón Tuna, olores bien marcados. Comenzaremos el lavado de raices, ya que empezamos a ver tricomas con tonalidades "ambar", esperemos seguir con este resultado el cual nos tiene bastante satisfechos. !Saludos & Buenos Humos! 🙌