Likes
Comments
Share

@y11dos
Follow
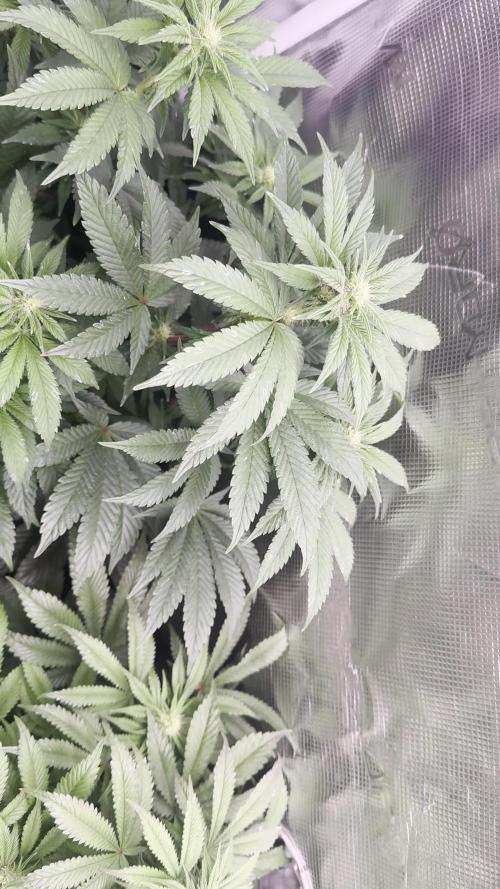
So this is the current state (7.dec), flowers are popping up everywhere and till now i feel like this is my best grow yet and feel like swapping to advanced nutrients was the right step so far, since my plants appear much much stronger than in previous grows also i cant see any signs of nutrient blockage or deficiency like i did before with biobizz. Always when i swapped to flower- mid flower the health of my plants decreased quite a lot especially if the enviroment wasnt perfect due to heat stress in summer. Since now i see a huge improvement at that point

Likes
24
Share


@Spazmagi
Follow
12/1 - Moving right along! Today is December 1st, Day 1 of week 9, or D63. Buds are finally starting to swell. Looking forward to seeing how they ripen over the next few weeks. Not sure how long she will last, but she still has a ways to go. This is always the hardest, but most exciting part! There are dozens of buds that are already super sticky, and if my last grow is any indication, it's only going to get better. Not sure what yield will be as this is a shared space, but I'm hoping to hit 100g from this plant. That would give me roughly 1.5gpw when counting via square footage/canopy space (270w/4plants = 67.5w/plant. 100g/67.5w = 1.48gpw).
12/5 - Uploaded video from 12/4
Thanks for stopping by the garden, and, as always, Happy Growing!



Likes
2
Share


@SolitudeCorners
Follow
I’m going to end this grow diary here. During the later stage, I went through a mental breakdown and kind of lost focus on life for a while. I’ll upload whatever photos I still have, but I didn’t get my friend to help take proper photos because he was dealing with military conscription at that time.
I feel genuinely sorry to the sponsors who provided the seeds. I promised to complete the grow diary for them, and I broke that promise. I tried to save some branches, but they didn’t survive. I don’t have any excuses for this.
If I get another chance in the future, I’ll buy their seeds myself and grow them again properly

Likes
18
Share


@Stonyways
Follow
lights up to 66w, 28 inches from the top of the plants, fox farm nutrients for this grow..... already anticipating my next grow...
start to the the Peet Pods I used were/are garbage, first and last time I will use them
Likes
2
Share


Likes
8
Share

@Ganjudo
Follow
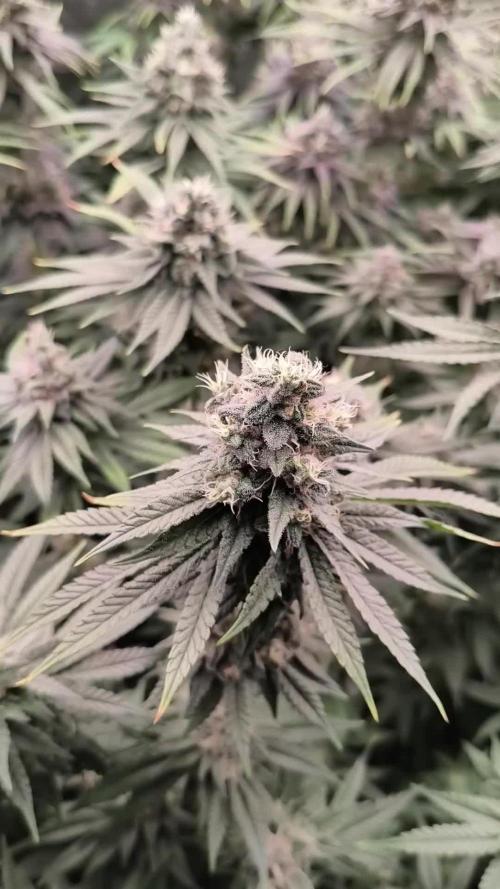
Dia 50 - 12/09. Planta 2 ficando roxa. Muita resina, especialmente na planta 3.
Dia 51 - 13/09. Olhando os tricomas vai pelo menos mais uma semana.
Dia 52 - 14/09. Rega 2lts
Dia 54 - 15/09.
Dia 55 - 16/09.

Likes
11
Share

@burnout
Follow
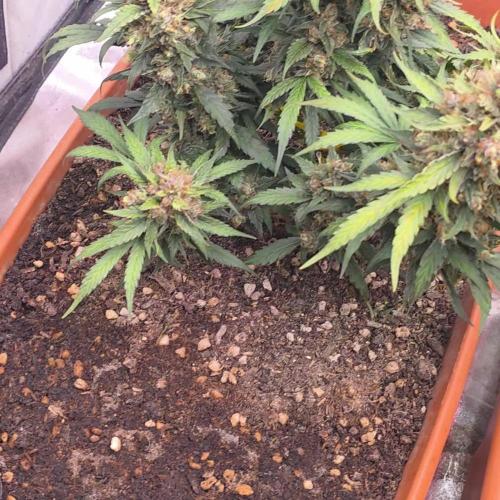
Day 77. Dimmed the light to 80% and duration to 16 hours on day 72. Gave it on more dose of buildabloom with top water along with ferment and recharge day 74. New stigma popping out, one last hurrah.

Likes
37
Share


@Grey_Wolf
Follow
Winter Greenhouse grow #2
Dutch Passion seeds Hollands Hope
6th May 2020
Well that was a turbulant week of weather for these two poor liitle ladies and from the look of the sky , they are in for more.
Last night we had a severe storm here with wind gusts at or above 100kmh an hour and heavy rain of about 45mm in the rain guage this morning.
The temp is currently 8 degrees outside at 12 noon and the minimum was 2 @ 630 am this morning.
I was half expecting to see the greenhouse had been smashed to pieces but luckily it seems to have survived so far relatively unscathed,
apart from the odd rip in the roof that is letting in water from the rain.
Both plants got an absolute drenching and you can see by the plant 1's droopiness that they are not liking it .
The only thing I could do was move them to another part of the greenhouse that didn't seem to be leaking and when the weather settles down I will
line the inside of the greenhouse with new plastic .
This will be a grow that I will need to plan one week at a time as anything could happen the way our weathers been here
Thanks for stopping by 👍

Likes
20
Share


@NorthernMonkeyzInc
Follow
Im really pleased with how these girls are turning out, i was worried at 1st as the propagation tent they were in wasnt big enough to get good air flow so they were very small but as soon as i got them into the Homebox triangle tent that all changed and they are looking great. Fantastic strains and genetics by Anesia Seeds.


Likes
11
Share


@HegauHillsFarmers_M11
Follow
Tag 70 - Ende der 10. Woche.
Die Pflanze duftet mittlerweile extrem. Die Blüten duften cremig mit kushigen und fruchtigen Untertönen. Ich kann es kaum erwarten zu ernten.
In dieser Woche habe ich nochmal gedüngt, werde aber die Tage mit dem spülen beginnen und die Pflanze auf die Ernte vorbereiten. Die Trichome sind fast komplett trüb und milchig.
Wir beginnen nun mit der 8. Blütenwoche.
An Tag 64 wurde die Pflanze gedüngt.
Nährstofflösung:
2 ml/l - B-52 Advanced Nutrients.
4 ml/l - pH Perfect Sensi Bloom Part A
4 ml/l - pH Perfect Sensi Bloom Part B
2 ml/l - Bud Candy Advanced Nutrients.
2 ml/l - Overdrive Advanced Nutrients.
Davon hat die Pflanze 1l an Tag 64 erhalten.

Likes
4
Share


@Lazuli
Follow
She flowered very fast. The smaller ones smell different and have more shiny flowers very nice, it smelled very strong at the end, while trimming the buds a smell of fruit and gas spread trough the whole house

Processing
Likes
8
Share


@MMatos
Follow
Week 1
Today I started 2 Strawberry Pie Auto from Fastbuds. 🍓🍓
I'll start by giving 18 hours of light and controlling the ph 6.5 without nutrients
Let's see if they want to grow or not.
Likes
5
Share


@Hitthejuan
Follow
September 8th 2026q
Mix Pack Auto RF3
This week temperature averaged highs around 79°F to 81°F and lows around 57°F to 66°F. Conditions were mostly clear, foggy at times in the early mornings, and generally dry. Rain coming for the next week off and on. Humidity this week has been between 60% to 90%.
Plant A (Apple Strudel Auto RF3) was kept in a small tent this past week because its been rainy and wanted to collect pollen. Brought it back outside on Friday. Going to let it finish outside before I chopper down. Want the seeds to develop more maybe 2 to 3 more weeks at most. I did collect pollen and then use it on some other Auto plants i got inside. Snoop's punch, Mango Surbert, Apricot Scone, Velvet Moon, Schedule 3 are the plants i pollenate it with. Just one or two stems on each plant. Very excited to see what kinda babys they make. It also pollenate its self on the stems i didnt spry with silver thiosulfate spray.
Plant B (Strawberry Gorilla Auto RF3 ) was chopped in half. Half im going to smoke. All i got was about an 8th out of it. I took it to my friend's to smoked it. Had a great nice body and head high very tasty. The other bottom half i pollenate it with the Apple Strudel Auto RF3 and very excited to see the outcome on these ladies. They should be all female seeds i believe. Im calling these seeds (Strawberry Apple Gorudel auto) 😆 🤣
Likes
7
Share


@StonedandSteady
Follow
1st Day of Flower: 2nd Feed Humboldt
Let's Grow and Stretch Out to Fill your Mighty Branches with Giant Gorgeous Budz Ladies! Happy Birthday HoneyBuns!!! I Love you so Much and Thankful to be your Man and Husband! It's been a few days since I gave the Ladies thier 2nd Feed of #HumboldtCountysOwn Nutrients and they look Super Awesome!!! We'll definitely Grow back to everything here soon! I'm Glad it's May 1st and Flipped to Flower and also to Celebrate my Wonderful and Beautiful Wife's Birthday!
11th w/ Veg and Flowers Update #Pre-Sexed🚺 #SuperCropped #Defoliated #Lollipoped
Good Day and Happy Growing Everyone! These Ladies were Growing into thier 11th Week of Veg and Looking Totally Tight and Phenomenally *Femed* from the Right!
#Pre-Sexed 4/9/21 #Opium/#PabloEscobar *Fems* breed by Team #DivineSeeds #DivineSeedsSquad #DivineSeedsBreedingCompany and #SuperCropping continued! I'm Very Excited and Extremely Gracious!!!
Heck Yeah Growmies and Growmets!!! Check Out these Confirmed Females with thier Wild Pistol Hairs popping and I'm still Training and Widening them Out with #SuperCropping Everything looks Expanded and Growing Great!
After #SuperCropping the plant will Grow Bushier, Produce More Buds, and possibly even Produce More THC! This is how the plant naturally responses to danger and protects itself! Growers take advantage of this technique to get Bigger Yields and More Potent Buds than would be produced otherwise!
Getting Trained out into thier 11th Week of Veg and Looking Mighty Fine!!! Thier getting Humongous and Hearty in thier 10 gallon Grow Bag from Broski #www.as420.ca These Cannabis plants are Camping out in the Closet for a week or so! Lol
This is my 2nd run using the Osree.Light QB1000w and Everything is Mesmerizing!!!
My #Opium and #PabloEscobar *Fems* from #DivineSeeds Regs: SalamiLegF3's×2 and FireAlienRomulan look$ Outstandingly Awesome and Growing Up Phenomenally Fine into thier 11th week of Veg in our 2- 10 gallon The Grow Bags from Broski #www.as420.ca and also 2- 5 gallons as Well! Our others are Super and Breed by #thehumancannabiniod #AlienBloodGenetix #TNBNaturals #Foop
Yo!!! Thanks Again for All the Love and Support my fellow Growmies and Growmets!!! These Magnificent and Magical Ladies were Growing in our 48×24×60 ViparSpectra Official Club 🌿 ®️ Grow Tent and under our #Osree QB1000w and #GrowStarStore Kokokala QB1000w and our Purple Rose Cutting×2, Aloe Vera Cutting, Maters×3, Morel Mushroom, Lavender×3, Sunflowers×5 and The 6 Brand New and Fresh Starts are Wonderful with a Huge Hint of Fantastical Fire is my #SalamiLegF3×2 by Broski #thehumancannabiniod #DankFlowGenetics #EastCoastSeedBank #FireAlienRomulan by Broski #AlienBloodGenetix my #PabloEscobar and #Opium by Team #DivineSeeds #DivineSeedsBreedingCompany We Grow with #Growatt 600w with #FoopOrangicBioSciences and #TNBNaturals The Enhancer Co2 Despersal canister and ph'd them w/ Declorinated watering w/ TNB ph Up and Down! Totally Top Quality Topz all Around! Thanks Again #GallowGlas420 #HarleyGrower #thehumancannabiniod #AlienBloodGenetix #TNBNATURALS #FoopOrangicBioSciences #www.as420.ca #divineseeds #divineseedssquad #divineseedsbreedingcompany #BioFlux Family's and Teams!!! Your Genetics are Merry Magnificent, Mega Marvelous and Mighty Medical! Love um!!! I really Can't stress enough how Thankful and Grateful I am of All of you and what you've Shared with Us! Means the World!!! It's definitely a Pleasure being able to Grow with these Phenomenal Grow Lights! Please Enjoy! BudBrothers4-Life! Cheers Famz!!! Much Props and Much Topz!💯🔥 #Osree #GrowStarStore #Growatt #TNBNaturals #TNBTeam #FoopOrangics #GrowYourOwn #Bliss
HumboldtCounty'sOwn:
Email: info@humboldtbottling.com
Phone: (707) 725-4119
Toll free: (866) 872-9434
Humboldt Bottling
Po Box 429 · Fortuna, CA 95540
HumboldtCounty'sOwn Website Link: https://humboldtcountysown.com/
HumboldtCounty'sOwn Instagram Link: https://instagram.com/humboldtcountysown?igshid=1qj809qkkwych
https://instagram.com/divine.seeds?igshid=1r90iwe9xiwz8
https://instagram.com/thehumancannabinoid?igshid=17k159pumklkq
https://www.instagram.com/alienblood_genetix_official/
https://instagram.com/as420.ca?igshid=1f116alw054wp
The Grow Bags: https://www.as420

Likes
86
Share


@Tropicannibis_Todd
Follow
ALRIGHTY THEN
REMINDER I DO 2 UPDATES PER WEEK 👉WEEKLYROUNDUP👈👉MIDWEEKLY UPDATE👈
At this very moment , hint of Grape Crush Soda smells 😛 Which is awsome
We just hit week 7 and all is well , for the most part , still having a little Cal/Mag issue but hopfully with some adjustments I got under control 😃 .......
Middle of last week I have decided to start with her little sister and started a little training by pulling her over to the side 👌 And will continue to LST this week👈 And she's also showing Cal/Mag problem but like her big sister I have made adjustments and hope that works she's already begun next faze by flowering 😲 They are so quick 👈 Baby Sister Plant #2 Is 5 weeks 35 days from seed
rain water to be used entire growth👍
Lights being readjusted and chart updated .........👍
I GOT MULTIPLE DIARIES ON THE GO 😱 please check them out 😎
👉IF ANYONE IS LOOKING FOR A PLACE TO HANGOUT VIA GROWDIARIES AND TALK GROWING AND JUST CHILL AND WHATEVER .....👈
👉I CREATED GROWDIARIES DISCORD SERVER !!!!!!!!!!!👈
LINK IS 👉
https://discord.gg/zQmTHkbejs
AND SEE HOW IT PLAYS OUT !!!!!!!
Likes
7
Share

@Skynets_Growing
Follow
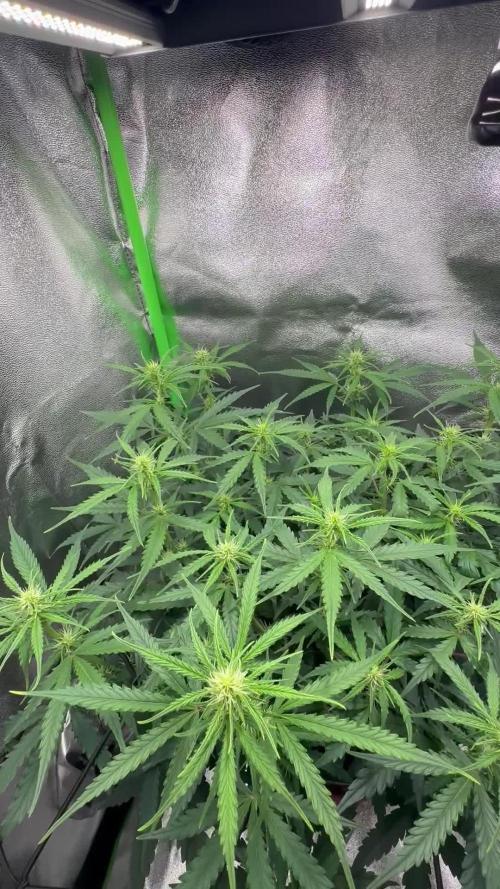
Tamara starts her second week of flowering with a solid stretch, which I had to keep tucking into the scrog net so she could get more light exposure. It’s truly amazing how much she can grow in just 24 hours.
Looking closer, we can already see the first trichomes forming, and I have to say it again: I absolutely love
Likes
49
Share


@Reyden
Follow
E siamo veramente bene qui! Stiamo decollando verso un aspetto gelido e pungente, i tricomi iniziano a formarsi sui calici e la pianta prende la sua forma finale! La super hash come le altre 2, non sono state allenate in nessun modo, andiamo avanti così e aspettando che si gonfiano le cime 😁🚼💯🕷️🌀🌱🙌🌲


Likes
41
Share

@gr3g4l
Follow
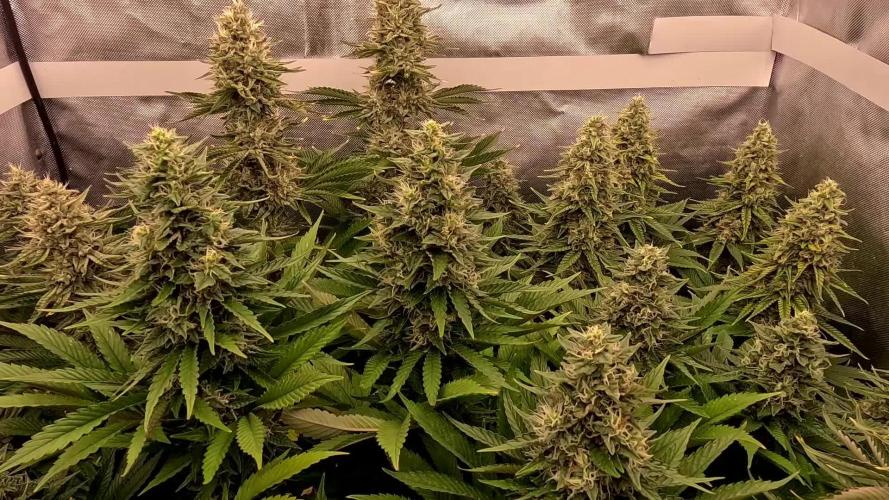
Last week, and it seems they've perked up a bit.
Root flush with reverse osmosis water, between three and four waterings.
I had to remove part of the apical bud from plant number 5 due to botrytis. Even after adding a dehumidifier last week, it wasn't enough to lower the humidity further. Sometimes it spikes to over 80%.
And that concludes after 70 days. A little longer than expected, but less than it should have been. I understand they could mature and fatten up a bit more, but my fear of botrytis is stronger, so I'm ending the monitoring.
Última semana, y parece que han espabilado un poco.
Lavado de raices con agua de osmosis , entre tres y cuatro riegos.
De la nº5 tuve que deshacerme de parte de un apical por culpa de la botritis, aun habiendo añadido la semana pasada un deshumidificador no fue suficiente para lograr bajar aun más la humedad. en ocasiones se dispara a más del 80%
Y esto termina con 70 dias. Algo más de lo esperado pero menos de lo que deberia. Entiendo que podrían madurar y engordar algo más pero el miedo que le tengo a la botritis es superior asñi que doy por finalizado el seguimiento.

Likes
16
Share


@Ensign420
Follow
Introduction - Week 14|07 Summary -
Ensign's log, stardate 9437.65,
Great week of growing! Wow what a good week!
Growth in the main tent has all around been incredible!
Submitted my first submission to the Global Grow Cup! Filmed a video of the solo cup container (marked with the ticket/order number) that will be used for the competition. Also had to fill and prove the solo cup holds 2 cups of soil. Now I need to root a clone (for the first time), transplant her into this cup, and submit my 2nd entry before the 30th of this month.
As far as my first attempt at cloning, have already begun the rooting process! Managed to take cuttings from 3 out of the 6 phenos in the main tent (the first cutting was also my first time topping). Soaked the cuttings for two days before planting them into Coco Coins. So far everything has gone surprisingly well! The clones are now rooting under the propagation dome with the vents fully closed. Will check for roots soon!
At the end of the week, growth was just raging! Was planning on flipping to flower in a week, but decided to begin the first week of flower next week! Thus this is the last week of veg. Plan to flip to 12/12 next Monday!
Onwards to next week!
[START OF WEEK 14|07]
==========================================================
Garlic Budder #1 - WEEK 14|07 - Full Veg Wk5
Garlic Budder #2 - WEEK 14|07 - Full Veg Wk2
Garlic Budder #3 - WEEK 07 - Full Veg Wk5
Garlic Budder #4 - WEEK 06 - Full Veg Wk4
06/03/24 → 06/09/24
This Week's Estimated Goals
----------------------------------------------------------------------------------------------
DLI: ~26 mol/m²/d
PPFD: ~400 μmol/m²/s
VPD: ~1.0 kPa
This Week's Meter Readings & Averages [Lights On: 16:00 - 10:00]
----------------------------------------------------------------------------------------------
DLI: 24.56 mol/m²/d
PPFD: 379 μmol/m²/s
VPD: 0.91 kPa
Soil %: [32.7, 37.6, 37.9, 34.1]
==========================================================
Day 01 - Monday - 06/03/24 - Total Days: 098
-----------------------------------
Daily Averages [~23:00]
- Temps: 80.7°F [27.1°C]
- Humidity: 74.4%
- VPD: 0.90 kPa
- Soil %: [31, 34, 39, 35]
-----------------------------------
- [09:57]: Quick morning check!
--- #1 is looking a bit droopy, but almost lights off (at 10:00) so not concerned.
--- Nice! Mainly wanted to check on #4 and she is looking great! She’s perked back up and looking good!
- [23:08]: Evening check.
--- Wow! It’s a jungle in here!
--- #1 has gotten too big? Nah!? Keep on growing girl!
--- #2 is growing and definitely getting bigger! Growth just looking really weird.
--- #3 has continued to get larger and is looking quite uniform in growth!
--- #4 is growing and looking perky again!
--- Even the original #1 and #2 phenos (in the back) are looking good!
--- Wow! #4 is really getting close to the light.
- [23:14]: Checked down both fill tubes.
--- Both reservoirs were completely dry!
- [23:27]: Checked the Ecowitt soil moisture sensor data:
--- 30% - [CH01 EB1 - Garlic Budder #1]
--- 34% - [CH02 EB2 - Garlic Budder #2]
--- 39% - [CH03 GFP - Garlic Budder #3]
--- 32% - [CH04 FPT - Garlic Budder #4]
- [23:32]: Poured 4 cups of distilled water down EB1’s fill tube.
--- Poured 2 cups of distilled water down EB2’s fill tube.
- [23:38]: Checked the humidifiers.
--- Refilled the 4X4’s humidifier with distilled water.
--- Tomorrow, plan to defoliate and start cloning for the first time!
--- Going to take multiple cuttings from both #1 and #4 for sure, but still deciding on the rest.
--- Getting hyped!
Day 02 - Tuesday - 06/04/24 - Total Days: 099
-----------------------------------
Daily Averages [~23:00]
- Temps: 81.4°F [27.4°C]
- Humidity: 74.3%
- VPD: 0.93 kPa
- Soil %: [29, 35, 38, 32]
-----------------------------------
- [11:59]: Time to film the first entry for the Global Grow Cup!
--- Going to be using BuildASoil 3.0 potting soil.
--- Filming the video using a stand and my phone.
--- This video is mainly to establish the container that the plant will be grown in. Also to prove that the container is a 16oz container and that it can hold 2 cups of soil.
--- The ticket (order) number also had to be written on the cup.
- [12:36]: Done!
--- The video had to be done in one continuous shot with no edits (my original submission does not have the logo).
--- There was also a photo that needed to be shot which shows the cup filled with 2 cups of soil (just like the video, the original image submission did not have the logo).
--- I think I did everything correctly, but also sent an email for verification of submission and validation.
--- Getting hyped!
--- [*smokes a bowl]
--- Going to defoliate today along with for the first-time, going to take cuttings for clones!
--- After a bit of online research, decided to split the cloning process into two days.
--- Today going to take cuttings and will soak them in a solution of aloe for 24hrs. Afterwards will change the water out and use straight distilled water.
--- Then in a couple days, plan to transplant into coco plugs (Coco Coins) for rooting.
--- For optimal results, also be using a rooting hormone (Clonex).
--- Well.. Here goes nothing!
- [17:01]: Evening check.
--- Wow! #1 is looking huge! Her main top is stretching above the lower canopy which is continuing to bush out.
--- #2 is growing along. Growth is gnarly and a bit droopy, but she’s getting taller!
--- #3 is looking great! Still a bit small, but she is continuing to get larger.
--- #4 looks like she needs a watering.
--- Both plants in the back are also looking surprisingly great as well!
- [17:05]: Checked down both fill tubes.
--- Both reservoirs were completely dry!
--- As far as today's defoliation, going to leave #2 and #3 alone and will focus my defoliation and cloning on the rest of the plants.
--- This will be my first attempt at cloning, also going to try topping for the first time today.
--- No pressure Ensign. What can possibly go wrong right?
- [17:27]: Time to start the cloning and defoliation process!
--- Filled a measuring cup with 3 cups of distilled water.
------ Added 3/4tsp of Horticultural Aloe
------ Added 1 more cup of distilled water
--- Mixed the solution and poured an even amount into three separate solo cups.
--- Made sure to mark two of the cups (#1 and #4). The unmarked one will be for any other clones from amongst the 6 phenos (if any at all).
- [17:43]: Time to top and defoliate #1!
--- Using a pair of brand new trimmers (AC Infinity),
--- Gently cut the main stalk to even out the canopy.
--- Then trimmed and cleaned most of the nodes leaving the top node or two.
--- Also trimmed the leaf fingers a bit before placing the top cutting into the cup of aloe solution.
--- Now for the rest of the cuttings!
--- [~45 minutes later]
- [18:32]: Managed to finish defoliating and cutting the rest of the clones.
--- Took two more lower cuttings from #1 (3 clones total).
--- Took 3 lower cuttings from #4
--- While defoliating, decided to try and clone the original #2 pheno as well. Took 4 small cuttings.
--- Similar to the top cutting, trimmed and cleaned each lower node for each cutting before placing them into the cups.
--- Before finishing up the 2nd cutting, I noticed the first cutting (the top cut that was also trimmed) was drooping.
--- So I did not trim and the leaf fingers for the other cuttings.
--- In total there were 10 cuttings taken for potential clones.
--- My main focus was to take cuttings and to clean up all the lower growth from both #1 and #4.
--- Defoliated and cleaned up the back original phenos as well (also trimmed back the cover crop).
- [18:35]: Temporarily placed the cuttings onto the floor of the 4x4 tent.
--- Took the trimmings (about 3 cups) and spread them onto the top mulch of #1 and #2.
--- Time to set the environmental controls for the 3x3 veg tent.
- [18:43]: Within the AC Infinity App,
--- For the Veg Tent [3x3] controller,
--- Adjusted the 'Vegetative [18/6]' Schedule for the grow light.
------ Set the Mode to ‘On Mode’
------ Set the START/END times to 04:00PM/10:00AM
------ Set the MAX to 1
--- The IonBoard S33 is now utilizing around 60.8W (at intensity 1 out of 10).
--- Adjusted the 'Vegetative [18/6]' Schedule for the exhaust fan.
------ Increased the Humidity’s HIGH trigger value from 81% to 87%
--- Adjusted the 'Vegetative [18/6]' Schedule for the humidifier.
------ Decreased the VPD target value from 1.5kPa to 0.8kPa
- [18:52]: Moved the cuttings into the 3x3 veg tent.
--- It begins! I think.
--- Going to let these cutting drink some aloe for a day before switching to straight distilled water.
--- Hmm. Could be the white floor of the 3x3 veg tent, but have noticed the S33 has a whiter spectrum whereas the FC-6500 seems to be warmer in color.
--- Anyways,
- [18:58]: Poured 4 cups of distilled water down EB1’s fill tube.
--- Poured 2 cups of distilled water down EB2’s fill tube.
- [19:06]: Filled a pump sprayer with 5 cups of distilled water.
--- Focused mainly on the straw mulch of #4.
--- But also misted the straw mulch for the rest of the plants a bit.
- [19:12]: Checked the humidifiers.
--- Refilled the humidifiers with distilled water.
- [19:44]: Going to be using Clonex rooting gel before planting the cuttings into Coco Coins (pre-soaked with microbes and aloe). But before that begins, going to transfer the Clonex gel into a squeeze bottle.
--- Gently peeled back the seal on the original Clonex bottle. Just enough make a tiny opening,
--- Then slowly and carefully poured the gel into an empty squeeze bottle.
--- Also removed the sticker from the original bottle and placed it onto the new one.
- [19:54]: Perfect!
--- Instead of applying the gel to the cutting, going to be applying the gel to the Coco Coin.
--- This squeeze bottle will make applying the gel a lot easier.
--- Will take PPFD readings tomorrow.
--- Also will change out the aloe solution to distilled water.
--- I really hope I didn’t screw things up before they could even begin.
--- Don’t die on me ladies!
--- Please.
Day 03 - Wednesday - 06/05/24 - Total Days: 100
-----------------------------------
Daily Averages [~23:00]
- Temps: 81.9°F [27.7°C]
- Humidity: 75.5%
- VPD: 0.90 kPa
- Soil %: [29, 36, 38, 36]
-----------------------------------
- [09:40]: Quick morning check!
--- #1 is looking a bit droopy, but looking okay. Topping is a high stress technique so going to take some time to recover. Don’t plan on flipping the main 4x4 tent to flower for a good week or so which should be enough time.
--- #4 looks great! The defoliation seems to have no effect on growth. Nice!
- [09:41]: Also quickly checked on the 3x3 veg tent,
--- Nice! The cuttings are looking great!
--- No yellowing and they all seemed to have turned up towards the light.
--- So far so good!
- [22:53]: Evening check.
--- #1 is continuing to dominate this grow! She has spread wide and looking incredible!
--- #2 is looking gnarly, but getting there.
--- #3 is getting larger! But still a runt. By far, her leaves are the darkest of the bunch, but she is still growing!
--- #4 looks happy and growing along beautifully! Wow!
- [22:55]: Checked down both fill tubes.
--- Both reservoirs were completely dry!
- [22:59]: Poured 5 cups of distilled water down EB1’s fill tube.
--- Poured 2 cups of distilled water down EB2’s fill tube.
- [23:05]: Checked on the 3x3 veg tent.
--- Ooo yea! The cuttings are still green! Nice!
- [23:07]: Took PPFD readings.
--- The cuttings were around 121 μmol/m²/s which gives a DLI of 7.84 mol/m²/d
--- Nice! These levels are on the lower range for seedlings (~100-300), perfect! I think.
- [23:14]: Swapped the aloe water out to straight distilled water.
--- Going to let these cuttings soak for one more day before planting.
--- Please don’t die girls!
- [23:15]: Checked the humidifiers.
--- Refilled the humidifiers with distilled water.
--- Ooo yea!
--- Tomorrow is the big rooting day!
Day 04 - Thursday - 06/06/24 - Total Days: 101
-----------------------------------
Daily Averages [~23:00]
- Temps: 81.9°F [27.7°C]
- Humidity: 75.2%
- VPD: 0.91 kPa
- Soil %: [32, 38, 38, 34]
-----------------------------------
- [16:20]: Evening check.
--- #1 is a bit droopy, but growth is looking green and healthy.
--- #2 is looking bigger! She’s also looking sort of droopy.
--- #3 is growing along nicely! Looking good girl!
--- #4 is looking great! A bit droopy but plan to water today.
- [16:23]: Checked down both fill tubes.
--- EB1's reservoir still has some water.
--- EB2's reservoir was completely dry!
- [16:23]: Checked the Ecowitt soil moisture sensor data:
--- 28% - [CH01 EB1 - Garlic Budder #1]
--- 36% - [CH02 EB2 - Garlic Budder #2]
--- 37% - [CH03 GFP - Garlic Budder #3]
--- 30% - [CH04 FPT - Garlic Budder #4]
- [16:30]: Using a pump sprayer,
--- Misted the straw mulch of #4 with 6 cups of distilled water.
--- Focused mainly on the straw mulch.
--- Also misted the straw mulch of #3 (in the grassroots fabric pot) a bit.
- [16:43]: Poured 5 cups of distilled water down EB1’s fill tube.
--- Poured 3 cups of distilled water down EB2’s fill tube.
- [16:52]: Checked the Ecowitt soil moisture sensor data:
--- 56% - [CH01 EB1 - Garlic Budder #1]
--- 44% - [CH02 EB2 - Garlic Budder #2]
--- 40% - [CH03 GFP - Garlic Budder #3]
--- 45% - [CH04 FPT - Garlic Budder #4]
- [17:01]: Took general PPFD readings.
--- #1 was around 379 μmol/m²/s which gives a DLI of 24.56 mol/m²/d
--- #2 was around 333 μmol/m²/s which gives a DLI of 21.58 mol/m²/d
--- #3 was around 293 μmol/m²/s which gives a DLI of 18.99 mol/m²/d
--- #4 was around 378 μmol/m²/s which gives a DLI of 24.49 mol/m²/d
- [17:09]: Took the weekly height and light distance measurements.
--- #1 was about 21" tall.
--- #2 was about 13.5" tall.
--- #3 was about 9.5" tall.
--- #4 was about 19.25" tall.
--- Hmm..
- [17:19]: Adjusted the right oscillating fan a bit.
--- Re-angled the CloudRay S6 oscillating fan upwards. Been noticing that the air has been hitting the tops of the plants so easing off a bit (#1 is still getting hit, but she’s huge so not too worried).
- [17:23]: Back to the measurements!
--- #1 was about 9.5" away from the grow light.
--- #2 was about 17" away from the grow light.
--- #3 was about 17.5" away from the grow light.
--- #4 was about 11.5" away from the grow light.
- [17:46]: Checked on the 3x3 veg tent.
--- Cuttings are still green! They do look a bit droopy but no signs of yellowing.
--- Okay!
- [17:55]: Time to begin the rooting process!
--- For my first attempt at rooting, going to be using Coco Coins pre-soaked in saponins, microbes and aloe.
--- To further help with rooting, going to also be using Clonex rooting gel.
--- Filled a measuring cup with 4 cups of distilled water.
------ Added half of 1/64tsp of Quillaja Saponaria Extract [60]
------ Added 1/16tsp of Horticultural Aloe
------ Added 1/8tsp of Mycrobe Complete
--- Mixed the solution thoroughly.
--- Time for the Coco Coins!
--- 10 cuttings means 10 Coco Coins.
- [18:09]: Dropped 10 Coco Coins into the measuring cup.
--- The coins immediately started to expand.
--- A bit too much.. Oops!
--- Poured the solution and Coco Coins into a pitcher.
--- Added 2 cups of distilled water to the solution (now at 6 cups).
--- Great! The coins are pretty much fully expanded, but going to wait a bit longer to fully saturate each coin.
--- [~20-30 minutes later]
- [18:42]: Great!
--- Took the seedling and flood tray from the AC Infinity propagation dome and placed all 10 Coco Coins into the slots.
--- Gave each Coco Coin a quick shake to remove excess solution. The coins were not dripping with solution but still pretty saturated.
--- Arranged them into 3 groups with the cuttings in mind.
--- Also tried to keep the pre-made holes intact.
--- Time to inoculate the Coco Coins!
- [18:54]: Using a squeeze bottle,
--- While keeping the nozzle from making contact with the coco, gently filled each pre-made hole with Clonex rooting gel. Just enough gel to fully cover the hole of each coco coin.
- [19:00]: Time to plant the cuttings!
--- Gave each cup a misting of distilled water. Focused on wetting the top growth with water.
--- Okay!
--- To avoid mixing cuttings up.
- [19:01]: Starting with the original #2 pheno cup,
--- For each cutting,
--- Using a pair of clean trimmers, made a final 45° cut about 1/2" from a bottom node.
--- Then stripped away and scared the protective membrane below the node before planting.
--- Made sure the node was about 1/2" below the surface of the coco.
--- To help with planting, while inserting each cutting, gave the Coco Coin a gentle squeeze to loosen the coco. This also helped to ensure the coco and gel was in good contact with the cutting.
--- Once the cutting was planted into the Coco Coin, made sure to place back in the same spot (made sure to keep the cuttings in their groupings).
--- Once a cup was complete, made sure to keep the label with the group.
--- Re-misted the top growth as needed to keep it wet.
--- Also wiped the trimmers with isopropyl alcohol in between cuttings (plan to use 10% bleach solution for next time).
--- Repeated this process until all 10 cuttings were cut, planted, and in the tray.
--- The coco coins fit perfectly into the tray and don’t reach the bottom. Nice!
--- The bottom air gap is important.
--- Poured a bit of distilled water through one of the empty slots into the bottom of the tray. Just enough to fill the bottom of the tray, but not enough to reach any of the Coco Coins (~1/4cup).
- [19:35]: Placed the propagation tray with cuttings into the 3x3 veg tent.
--- Placed the first layer of the propagation dome on before giving the sides a misting of distilled water.
--- Also sprayed the top of the propagation dome before covering the cuttings.
--- Vents are all fully closed.
- [19:40]: Placed the bar lights onto the top of the dome before configuring the controller.
------ Set the START/END times to 04:00PM/10:00AM
------ Set the bar light’s intensity to 2 (out of 10).
--- Also made sure the propagation light controller’s time was in sync with the Controller 69 Pro.
- [19:47]: Took PPFD readings.
--- The cuttings were around 136 μmol/m²/s which gives a DLI of 8.81 mol/m²/d
--- The PPFD levels are similar to the floor.
--- Perfect!
--- Going leave the IonBoard S33 on during this rooting process.
--- Will check back tomorrow to cycle the air under the dome.
- [19:56]: Checked the humidifiers.
--- Refilled the humidifiers with distilled water.
- [20:17]: Quick night check!
--- Ooo yea! Growth is raging and looking perky!
--- Mainly checked on #1 and #4 which were looking incredible!
--- Keep on growing ladies!
Day 05 - Friday - 06/07/24 - Total Days: 102
-----------------------------------
Daily Averages [~23:00]
- Temps: 82.7°F [28.2°C]
- Humidity: 76.2%
- VPD: 0.89 kPa
- Soil %: [37, 40, 38, 35]
-----------------------------------
- [10:03]: Decided to increase the ambient temp in the 3x3 veg tent.
--- Within the AC Infinity App,
--- For the Veg Tent [3x3] controller,
--- Adjusted the 'Vegetative [18/6]' Schedule for the heater.
------ Increased the Temp target value from 78°F to 82°F
--- Hopefully this will help to keep the veg tent at a more consistent temp.
- [22:26]: Evening check.
--- Ooo yea! The garden is looking incredible!
--- #1 is looking perky and just bushing out! Wow!
--- #2 is getting big! Growth is weird and leaf fingers are huge! Just going to let her grow.
--- #4 is looking happy and growing along like a champ! Nodes are starting branch out and she is turning into a bush!
- [10:28]: Checked down both fill tubes.
--- Both reservoirs were completely dry!
- [22:33]: Poured 5 cups of distilled water down EB1’s fill tube.
--- Poured 3 cups of distilled water down EB2’s fill tube.
- [22:40]: Checked on the propagation dome (inside the 3x3).
--- Ah yea! Looking great ladies!
--- Lifted the top of the dome to let some fresh air in for a bit.
--- Wow!
--- Leaves still look nice and green!
--- So far everything looks great!
--- Just going to continue on!
- [22:53]: Checked the humidifiers.
--- Refilled the humidifiers with distilled water.
- [11:01]: Decided to adjust the humidifier for the 3x3.
--- Within the AC Infinity App,
--- For the Veg Tent [3x3] controller,
--- Adjusted the 'Vegetative [18/6]' Schedule for the humidifier.
------ Increased the VPD target value from 0.8kPa to 1.5kPa
--- The higher VPD level will essentially turn the humidifier off.
--- I won’t be needing the humidifier for a good week so might as well save the water.
Day 06 - Saturday - 06/08/24 - Total Days: 103
-----------------------------------
Daily Averages [~23:00]
- Temps: 81.6°F [27.6°C]
- Humidity: 74.9%
- VPD: 0.91 kPa
- Soil %: [35, 40, 37, 31]
-----------------------------------
- [07:40]: Quick morning check!
--- #1 and #4 are looking perky and happy!
--- Also checked on the propagation dome,
--- All cutting still look green! Hyped!
- [20:02]: Evening check.
--- Wow the garden is raging with growth!
--- #1 has blown up! She has clearly recovered and growth is ramping up again!
--- #2 is stretching upwards!
--- #3 is now the smallest of the 4, but still getting larger!
--- #4 is looking incredible! Wow! Growth looks perky and happy!
- [20:05]: Checked down both fill tubes.
--- Both reservoirs were completely dry!
- [20:10]: Poured 6 cups of distilled water down EB1’s fill tube.
--- Poured 2 cups of distilled water down EB2’s fill tube.
- [20:16]: Checked the Ecowitt soil moisture sensor data:
--- 35% - [CH01 EB1 - Garlic Budder #1]
--- 40% - [CH02 EB2 - Garlic Budder #2]
--- 36% - [CH03 GFP - Garlic Budder #3]
--- 27% - [CH04 FPT - Garlic Budder #4]
- [20:19]: Using a pump sprayer,
--- Misted the straw mulch of #4 with 5 cups of distilled water.
--- Focused mainly on the straw mulch.
--- Also misted the mulch of #3 a bit (in the fabric pot).
- [20:27]: Checked propagation dome (in the 3x3),
--- To cycle the air under the dome, lifted the top off for a bit.
--- Ooo yea! Everything is still green and looking great!
--- Keep on rooting ladies!
--- Oops!
- [21:45]: Checked the humidifiers.
--- Refilled the humidifiers with distilled water.
Day 07 - Sunday - 06/09/24 - Total Days: 104
-----------------------------------
Daily Averages [~23:00]
- Temps: 81.5°F [27.5°C]
- Humidity: 74.8%
- VPD: 0.91 kPa
- Soil %: [36, 40, 37, 36]
-----------------------------------
- [08:18]: Quick morning check!
--- Nice! The main tent is looking great! #1 and #4 are both raging with growth!
--- Checked on the propagation dome (inside the 3x3) and the clones are still looking green!
--- Wow! Everything is going almost too well! Just keep on growing!
- [19:08]: Evening check.
--- Garden is just exploding with growth! Seems everyone has fully recovered from the defoliation and topping!
--- Wow #1 is bushed out and looking incredible!
--- #2 is growing really starting to get large! Growth still is funky, but stoked none-the-less.
--- #3 is starting to fill in the pot! Getting larger!
--- Wow! #4 is getting taller and looks healthy and green!
- [19:12]: Checked down both fill tubes.
--- Both reservoirs were completely dry!
--- Wow the canopy is really starting to get taller and closer to the light. May need to raise it up soon.
--- Absolutely surprised how low the light levels have been throughout this entire cycle. Barely moved the light and have not increased the intensity past 2 (out of 10). Less is really more.
--- Anyways!
- [19:18]: Checked the Ecowitt soil moisture sensor data:
--- 36% - [CH01 EB1 - Garlic Budder #1]
--- 41% - [CH02 EB2 - Garlic Budder #2]
--- 37% - [CH03 GFP - Garlic Budder #3]
--- 34% - [CH04 FPT - Garlic Budder #4]
- [19:19]: Poured 6 cups of distilled water down EB1’s fill tube.
--- Poured 3 cups of distilled water down EB2’s fill tube.
- [19:24]: Checked propagation dome (in the 3x3),
--- To refresh the air, lifted the top off for a bit.
--- Sweet! Still green! Wow!
--- Using a spray bottle, misted the top growth with distilled water.
- [20:35]: Checked the humidifiers.
--- Refilled the humidifiers with distilled water.
--- Wow what a week!
--- Growth has been just insane in the 4x4 tent! All plants have fully recovered and have just exploded with growth.
--- I think it’s time to flip to flower!
--- Also, I’m absolutely baffled about how well the cloning process has been going.
--- So far no issues!
--- Not complaining, but just surprised. Keep on growing ladies!
--- If all goes well, should have fully rooted clones soon ready for transplanting (into solo cups of course).
--- Absolutely hyped for next week!
--- Maximum warp Ensign, Engage!
[END OF WEEK 14|07]