
Likes
Comments
Share

@GoodTimesOrganics
Follow
Welcome Back!💚
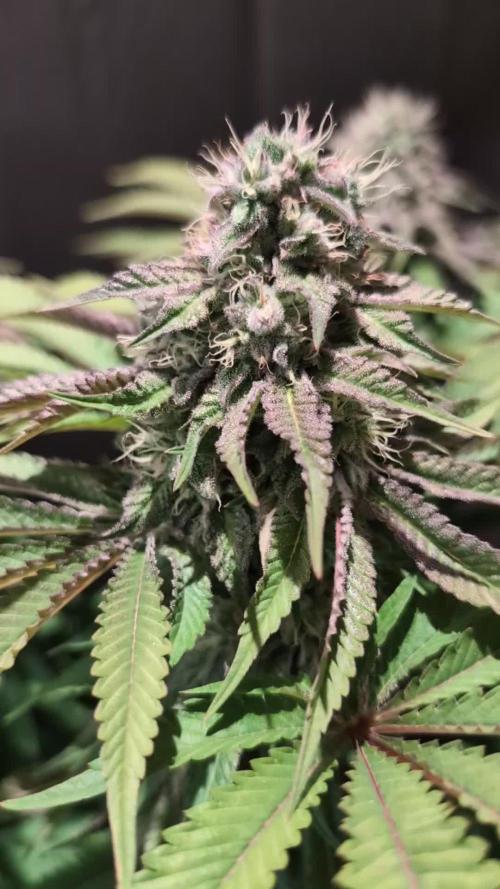
Die Sleepy Joe befindet sich nun in der siebten Blütewoche und die Blütenbildung entwickelt sich wunderbar. Ich bin gespannt ob sie in der 8 Wochen range bleibt.
Nach dieser Woche kommt ein Trichomcheck.
Das Blattwerk habe ich nochmals ein bisschen ausgedünnt.
Der Geruch hat sich auch nochmal stark intensiviert. Aktuell kommen starke Nuancen von süsslicheren düften, kombiniert mit Lösungsmittel oder ähnlichem hervor.
Die Umgebungsgegebenheiten sind aufgrund des nassen Wetters etwas anders.
—————
🌞 Temp: 24°C
🌚 Temp: 18°C bis 19°C
💦 RH: 58%
💨 VPD: 0,91 kPa
😎 PPFD: 830 mqm
—————
Grüne Grüße 🥦

Likes
2
Share


Likes
4
Share


@theVotanaGarden
Follow
Cut down at day 80. I cut the first plant at day 56 and washed a lot of it into FF live rosin. First time doing that’d got lower yields than I wanted but think I know how to bump them up on the next wash!
The 56 tasted good but trichomes weren’t as mature as I wished they would be. I’m thinking the 80 day will be not enjoyable. This 80 day plant will be mostly for smoke.
Likes
10
Share


@Rob691
Follow
This week the girls look very thirsty. They clearly increased their consumption of water, maybe because of the temperature witch is quiet high for a end of october....
Anyway, I have to water the plants every 2 days maximum otherwise the leaves are going down...
Beside this, they look great :)


Likes
4
Share


@QixxGrows
Follow
Day22: As said in Week3, I will not keep this perspective for the whole grow, as it doesn't really show the size of the plant. But it gives a nice view of how to top leaves grow :) The flashes that you see in the video is the humidifier. It pumps out vapour every hour for 15mins. So basically a quarter of each second of the video will be when the humidifier runs.
Day23: I changed it, as I wanted to see the size as well.
Day24 - Day28: Happy, healthy growth.

Likes
202
Share


@CrazyHorse
Follow
Hello my friends 😇
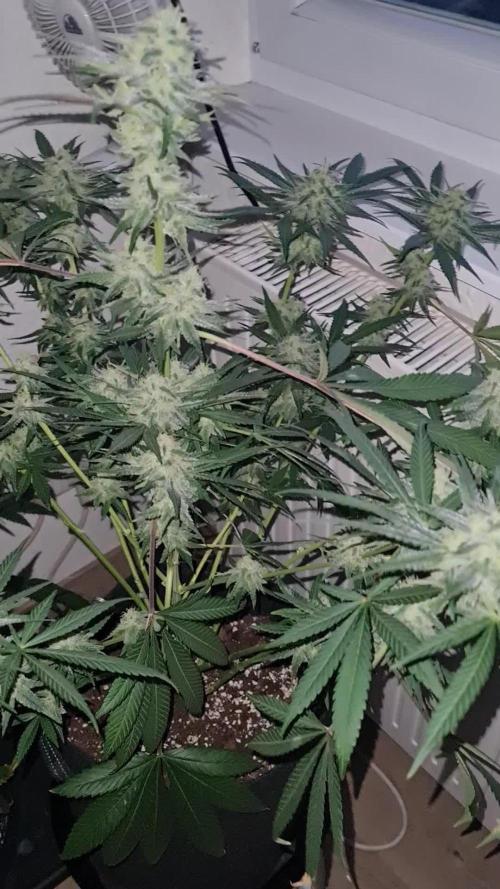
Purple Lemonade had been flush today !! She looks beautiful that purpul-dark buds are amazing. In next 3 or 4 days I will cut her 😇
Cinderella and Bruce Banner drinking less from a avg. 1.7l/day to 1.25l/day, so end of flowering for this two will be in around 2 weeks.
Cinderella looks really good, she should give a good harvest.
Update:
Day 67
Happy time !! Harvest time !! Finally Purple Lemonade get to the final point.
At this moment there is 0% of lemon scents, BUT !! There is a beautiful smell of berries, chocolate and leather in the air. I can't wait to try it
All the best, You Lovely Girls Growers 😇 💪 🙏

Likes
25
Share


@Aleks555
Follow
Anesia Seeds - Chimera Cut
Our girl is now 112 days from seed and 62 days into flowering. We've trimmed off all the leaves, leaving just the buds, and she looks absolutely stunning. The branches have bent under the weight of the dense, heavy buds, so we've tied them up to prevent any breakage. The time to finish is approaching, but we're not ready to harvest just yet – we still have some time to flush the roots and ensure everything is perfect before the final cut.
Throughout the entire grow, we've been using nutrients from Xpert Nutrients, and the results have been incredible – the plant’s structure and bud quality are outstanding.
Processing
Likes
22
Share


@Yiyis_Grow
Follow
Semana tranquila. Algunas hojas inferiores se están poniendo amarillas por falta de luz. Este cultivo decidí no quitar hojas y dejar que las plantas tuvieran el mínimo de estrés, por lo tanto las hojas inferiores no reciben luz.
Las flores han aumentado bastante de tamaño y ya comienza a oler bastante rico el cuarto.
Están consumiendo prácticamente dos litros de líquido al día.
Buenos humos para todos!


Likes
8
Share


@Oldwied
Follow
Day 23
The third week of flowering is complete. Most of the height growth is finished. Time for a radical defoliation.
The girls look great.
Unfortunately, Kush has formed hermaphrodites on the flowers in the shade. I hope that I have removed them all.
The lamp will be raised to 100% output in two stages.


Processing
Likes
15
Share


@DeStarr_GhettoGrows100
Follow
Great Week! Girls are getting bigger and loving there new light. LST is going well. They are showing there sex and will be going into there stretching phase
Processing
Likes
24
Share


@MadeInGermany
Follow
Hey everyone 😎.
This week they have grown significantly in buds ☺️.
They already smell very good 😍.
Canna Bio Flores has been increased to 4 ml per liter of water.
The color slowly changes to autumn 😃.
Otherwise not much has changed this week.
I wish you all a lot of fun with the update, stay healthy 🙏🏻 and let it grow 🌱
You can buy this Strain at :
www.Zamnesia.com
Type:
Runtz
☝️🏼
Genetics:
Zkittlez x Gelato
👍
Vega lamp: 2 x Todogrow Led
Quantum Board 100 W
💡
Bloom Lamp : 2 x Todogrow Led
Cxb 3590 COB 3500 K 205 W
💡💡☝️🏼
Soil : Canna Bio
☝️🏼
Nutrients : Canna Bio
☝️🏼🌱
Water: Osmosis water mixed with normal water (24 hours stale that the chlorine evaporates) to 0.2 EC. Add Cal / Mag to 0.4 Ec Ph with Organic Ph - to 6.0 - 6.3

Likes
12
Share


Likes
29
Share


@SalocinSpecial
Follow
***Note that I started to count the days when I placed the seeds between paper towels. The seeds were planted 3 days later and sprouted from the ground 2 days after being planted.
D80 (13/05/2021): I'm looking at the trichomes every other days. Glue Gelato is starting to show amber on top buds. No amber for Banana Kush and Gelato. This time I will chop them all at the same time so the one I will rely on is the Glue Gelato. As soon as she is ready, I will harvest them all. Banana Kush and Gelato would probably need more, but in term of logistic, I need to harvest all my plants at the same time.
D83 (16/05/2021): Not ready yet. I'm checking trichomes closely! 😬
- Light: the lights are at 100% and at 12 inch form the plants.
- Temperature: during the day: 24-25C ; during the night: 20C.
- Humidity: the humidity is maintain around 46-48% all the time.
- Air circulation: There is an oscillating fan on the ground, one fixed fan pointing on top of the canopy and one fixed fan to help cool the lights.
- Water: I gave water every other day or when the ground feel dry or the pots feels light.
- ***IPM: I never mention it but I'm using nematodes pouch as an integrated pest management. I had trouble with pest in my first grow and I learned from it. That's the only thing I do for pest and of course watching closely and regularly at my plants 😊

Likes
16
Share


@IQuSX
Follow
Hyyyh..Hello, topman!!
>>
Its 120 day of growth strains Golosa.
>>
And last 3 day -all night 24/3.
>>
I’m showing next week mass of harvest.


Likes
7
Share

Likes
132
Share


@XII_XII_MrGreen
Follow
I think this is gonna be the last time I'm topping her, and I will start to apply some lst to make her a little wider in a couple days👨🌾💚🌲
Still only water and sometimes adding some Aptus 🌊💦
