


Likes
Comments
Share

@Naujas
Follow
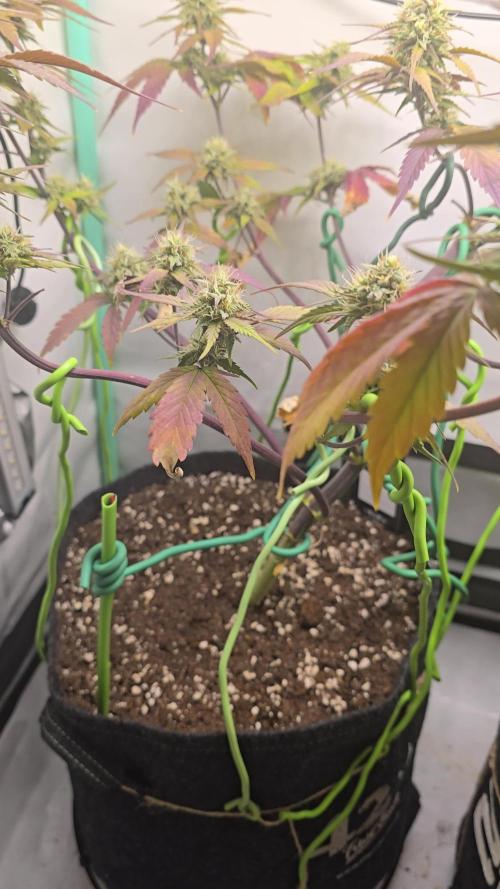
49 dienos, jos žiedai tikrai rodo brandos požymius, tiesą sakant, neturiu ką pasakyti, tikrai parašysiu dar vieną tinklaraštį su šia veisle, bet kituose dirvožemiuose, su kuriais jau esu susipažinusi :).

Likes
3
Share


@AutoZone420
Follow
Started LST this week, not sure if it’ll work out
LST seems to be helping form a better shape already
Likes
16
Share


@JUNGLE_B4RNS
Follow
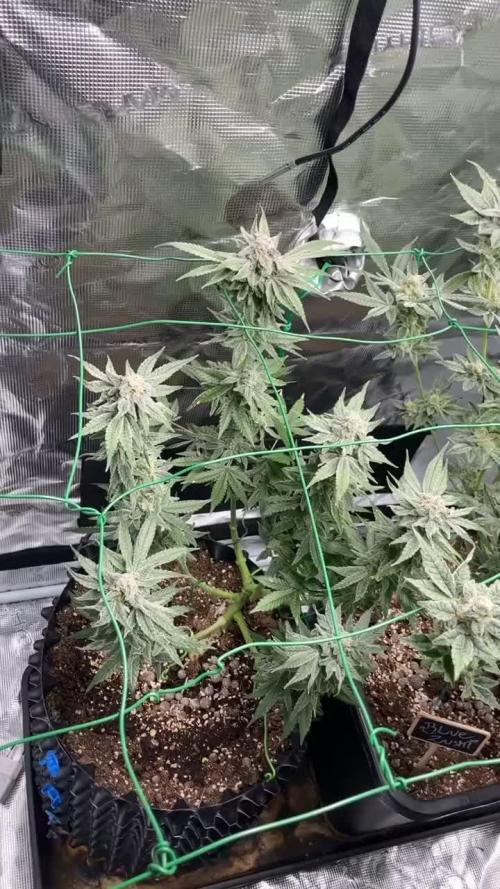
Skunk Special, a.k.a. Red Skunk, stems from the infamous Red Skunk clones that conquered the Netherlands in the late eighties/ early nineties. Ferry started working on the Skunk Special in the nineties. The Skunk Special is the result of several S1 lines inbred with a 25% of Automatic. The current line was selected over several generations in order to retain the right and essential Skunk features, yet creating a fast flowering strain.
Showing almost no variety between the individuals, this is among the most stable and homogenous strains since it was selected from a few thousand plants. This Skunk Special is a powerful and strong plant with thick, solid stems, creating massively tight buds during the flowering stage. The Skunk Special has gorgeous looking red pistils that give this plant an amazing bag appeal.
Skunk Special is suitable for indoor, greenhouses and outdoors if grown in temperate and/or the warm Mediterranean climate. It is a massive yielding outdoor behemoth with amazing trichome production.
The smell can be described as extremely pungent and citral with the classic cat-piss smell of the old-school Skunk. It is a very clean smoke. A Skunky and slightly sweet taste that is pleasantly acidic towards at the end. A mildly relaxing body high that causes a tingling sensation combined with a very pleasant head high.




Likes
38
Share

@Natrona
Follow
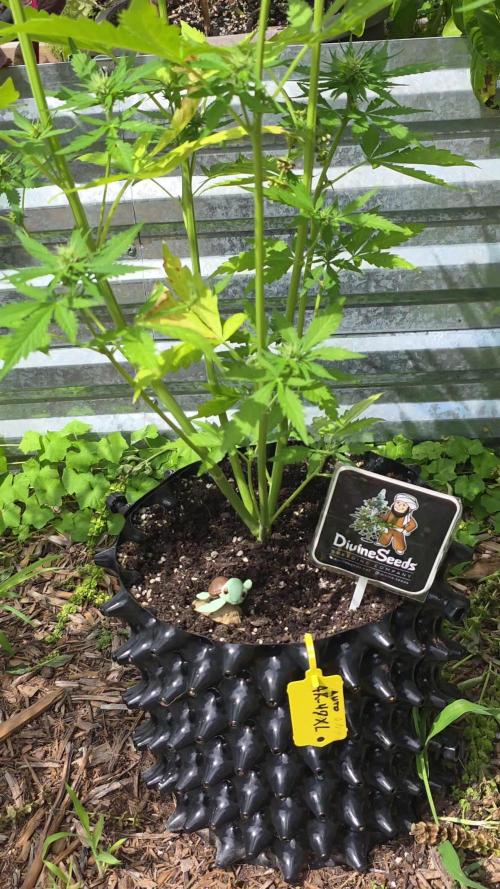
Divine Seeds 2025 Auto Contest AK-47XL Auto
👉Sponsored Grow👈
W8F4
7/20-26
The hot weather returned with humidity and days of scattered thunderstorms. I fertilized once this week with I49 and top dressed with worm castings. Thankfully with all the rain we’ve had this month she doesn’t show any deficiencies or bud or root rot. I fertilized with I49 grow 1 tbsp/gal & 2 tbsp I49 Flower.
My auto AK-47XL grew 1 more inch and is now 32 inches tall. She demonstrates resistance to pests and fungal diseases.
As always, thank you all for stopping by, for the likes and most of all growers love and support.
Stay green, growers love 💚🌿
💫Natrona💫

Processing
Likes
3
Share


@DBanned
Follow
July 12, 2020
Hi,
Plants are looking great and stretching a lot( i want a christmas🌲🤤)
7 plants are showing pistils, two little ones still need to bloom.
Talking of bloom, we added Gaiga Green bloom, organic powder. To all the blooming plants. The other got veg feed.
We topped one of the biggest plants and a medium size plant.
Lots of water and lot of movement for the plants. Two thunder storms last week so The plants were moved in and out of their cover a few times.
Thanks everyone
Happy grow and high fun !
Likes
17
Share

@foxbberg
Follow
Day 22:
Drain EC 3 feet high and risin'😅( average 3.3 to be exact...)
dunno how much whatever-salt is building up in that pots, but it obviuosly doesn't bother the ladies.
Dark green colour, very few 'claws', no signs of tipp-burn, new foliage appears in a juicy green and turns dark in an instant, leafs point upwards.......
looks like they're happy😊.
Planns for this week:
- Install the scrog-net
- Obsereve plants/soil ( when do i have to feed nutrients again?)
otherwise there will be no changes......
Thoughts:
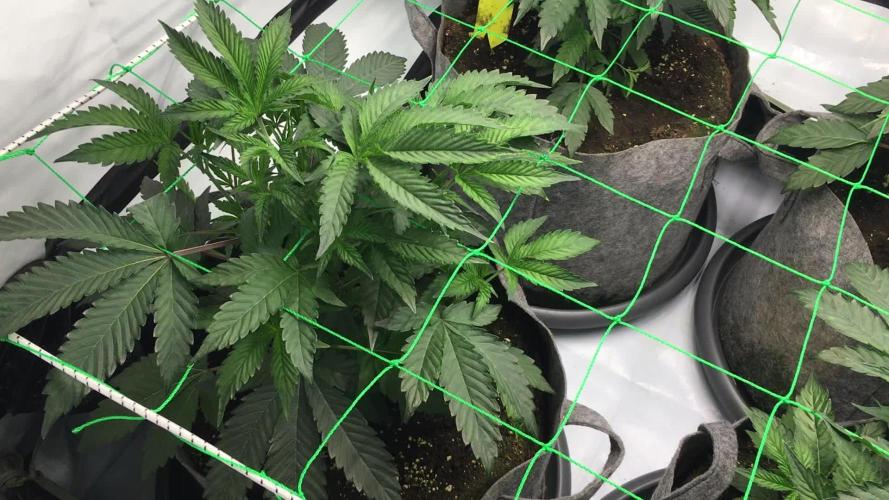
These bushy babies will be kind of a challlenge to create this scrog the way i'm used to (basically bending the 4 main main colas to the corners of the tent, upper branches to the walls and spaces between the pants, lower branches to the very center).
Now these ladies make so many branches, so close togehter and so equal in length, underneath huge fanleafs..... i'd love to have them in a 100 square meter canna-crib....but in a tent...????? I really hate doin' things without having them planned - but in this case i guess i will have to install the net, start weaving and see what's happening😯
Day 23
Let's keep it positive...... indoor-climate of 64% rh is perfect for my health💪😁!!! ......but in my tent it's killing the vpd😖.
at a lousy 24 degrees C, i'm readin' about 60-64 % rh wich results in about 0.7 to 0.8 kPa.*
More figures? Here come the crazyones👻!:
pH 5.5; EC 4.2😨
but thats only drain from plant 3....... average was 6.1/3.6
The girls busy produce roots, shoots and leafs....... still very green, still not unhealthy.......few claws, no tipp-burn.
Basically a comfortable place to be: It's not bad yet - no work but watering - and it can only get better!!!😁
*VPD issue solved:
The sensor hung too close to a fanleaf - didn‘t expect this thing beeing so sensitive 😅.
Day 24
Climbed new hights this morning: Plant 1 had an EC of 3.8 - the others didn't climb any higher than yesterday.
So maybe we've reached the climax..... 😇
Visible growth now - so i installed the scrog-net and will start bending and weaving these days:-)
Thoughts:
Did beeing out of VPD-range for one day harm my plants? How exact can my sensor measure VPD?
after a bit of research i found out: Whatever you buy for less than 200 bucks is far from beeing exact! Even professional sensors have a margin of about +/- 1% in relative humidity. Thermometers at least +/- 0.5 degrees C. This could give some a good guess of the actual VPD BUT: Leaf-temperature-offset is absolute key! Many of our trusted homegrow-equippment isn't even able to measure it (some offer default temp-offset) ....don't wanna go further here - but there's no way to achieve something like a precise VPD-measurement in homegrowing.
So why caring for VPD?
Even with those less accurate instruments, you may be able to keep your plants in something like a comfort-zone. Way better than only guessing 👆!!!
In case i ran a much higher VPD than planned, yesterday (due to a missplaced sensor) , it will not harm or kill my plants. they might have had a bit of stress from dry air - but nothing to worry about!
Day 24:
Decreasing salt-levels in the drain - excepting plant 4, wich had an EC of 4.0 - so i guess i'm slowly draining exess-salts from top to bottom and might have collected some build-up.
The girls seem to be quite okay. Root-growth is vigorous (there are thick, white roots penetrating through the pots, everywhere), the stems are relatively thin.
removed the LST-lines.
the Sc.r.o.g:
only materiels needed, were a climbing-net for gardening (HDPE) cut to 90x90 for my 1x1 tent, 4 cable-ties and 2 meters of strong rubber-cord.
Pre-installed the net with the cable-ties, then weaved the cord around the outter cords of the net, led it aroud the posts and pulled tight.
Then brought the net into it's final position. Not as sturdy as with a wooden frame - but i had less than half the work and a bit of freedom to move things if necessary.
Any shoot will now be put to the next outter square (relative to the center of each plant) as soon as can be held by the net, without harming the top.
Once i moved all of the dominant colas to the next square, i'll have to take 10-15cm steps (vertical growth), to reach the next square.
As soon as i have about 70 of my 81 squares filled, i'm going to flip to 12/12. Since i'm plannin' to have them full of sugar when flippin', i don't expect too much of a stretch. This way i hopefully have the longest and strongest shoots framing the shorter ones in the center - so the canopy shapes like a bowl, in order to achieve the most even light distribution possible.
Day 25:
The main colas visibly reached out for the light - but yet i only moved 1 single shoot to the next square.
Girls look good, EC is dropping slowly, climate fine.
CU tomorrow👋
day 26:
on Track... nothing to worry about......
till day 28.......
Due to high EC levels in the soil, i couldn't do much more than pour out some water and prepare the scrog this week.
Next week i will have to do some weaving. If the nutrientlevels allow, i'll do some defoliation.
Likes
12
Share


@rickhaZe
Follow
debido a quemaduras que encontre en las plantas el dia 14/06, dia 29 desde germinacion, debi regar con cal max, ya que creo que hay falta de calcio - magnesio. aplique 1.2 ml por litro de agua.
no creo que sea exceso de ferti ya que todos riegos se han preparado con la dosis minima que indica.
se sigue regando con 0.4 L cada 48hrs
una tecnica que he hecho es ir acomodando o doblando las hojas hacia abajo dando prioridad a los bracitos de cada planta.
Dia 30: riego de agua 600 ml de agua
Dia 32: todas las plantas en floracion
Aplicamos solo tek groow ya que las manchas en las plantas se debian a falta de azúfre lo concluimos con un grupo de amigos todos growers y un agrónomo.
Por que queremos continuar con la tabla de grotek nutrients y el domingo dia 34 aplicar blossom blaster

Likes
62
Share


@SimpleGrow
Follow
Hey guys ✋🏻 it‘s start of week 5 and day 26 of growing for the plants. Today I switched the light to a 12:12 schedule and put up a scrog net. Since my light gets more intense in the middle I build it this way. In the end I hope that all the buds get the same amount of DLI.
Starting Flower the plants will need a bit more nutriens during the stretching. I will tug them under the net everytime they grow out of it. But they have to reach it first. I hope they transition well and during the night I will keep the tent as dark as I can by making my living space dark as well. We‘ll see how this week progresses.
Happy sunday growmies 💪🏻
Update: today (D29) I watered Nr.1 and Nr.3, since they didn‘t need water yesterday. The EC of Nr. 3 and Nr. 2 were around 2.0 wich is good but Nr.1 had an EC of 6.0!! I think she doesn‘t need as much food as the other two because shes smaller. I watered enough so the EC went down to ≈3.0. I‘m also beginning to tug some shoots under the net but they all will need to reach up. I hope this doesn‘t end in chaos. Thats all, c ya soon🌿

Likes
19
Share


@Ganjagrandaddy
Follow
Day 16 ( Today 17th nov): Another week passed and now we are in to the interesting patch that is new ground for me , namely rapid growth and flowering together. Being a photo-period grower , the autos are throwing new curves at me daily. seeing how quickly they change due to their genetic traits is amazing. #1 in the LOS is still a little too pale but mottled looking now instead of bleached out looking. I reckon her roots are nice and adventurous now so should be racing round that big pot grabbing goodies like sonic the hedgehog on crack.
#2 has gone through a rough patch this week and her dis-coloured leaves got worse and had another set to join them !!!. I had been conditioning the coco outside in the rain before the planting so could be something in the pots from then.
#3 is the star of the show so far with great growth and no signs of slowing down. I am now starting to feed at the lower end of the coco feed each watering and being careful with the amounts I use in the LOS but am more confident of not being heavy handed. They all had a life-cycle feed too , so hopefully the pots charge additive will be awake and boost them a bit for their near flowering cycle. I am hoping to top an start their training soon too so should get interesting from this point .


Likes
7
Share


@mingokoon
Follow
WEEK 7 - March 14 - 20
I now have a good light meter so I rearranged the parts provide light efficiency trying to get close to PPFD for the age of each plant. ALL HAVE HAD CALCIUM MAG DEFICIENTCIES. I NEED TO ADD CALMAG TO MY RO WATER AND KEEP ADDING MORE THROUGHOUT THE GROW.

Likes
4
Share


Likes
24
Share


@MrJones
Follow
02.08.20 - Starts week 7 according to Seedsman this is a 75-day seed to maturity grow right at 11 weeks, I think we are on track but feel it will push 12 weeks, the stems are loaded with flowers and I am confident they will fell in to produce some very large nugs - exciting to say the least!
So tomorrow I pick up my items needed to start brewing compost tea - will shoot a quick video of the process / then will feed with compost tea on Monday / this should carry the plants through harvest.
02.09.20 - Started up my Compost Tea today - Recipe: 2 Cups Worm Castings (Used a Paint Strainer Bag), 1 Tablespoon Kelp Extract, 1 Tablespoon Fish Extract, 2 Table Spoons Molasses, brew for 24/36 hours.
02.10.20 - Today just watered the plants with my first compost tea, it looked amazing, had a beautiful white protein foam on the top - I will have a look at the plant's first thing in the morning and see if they are dancing!
02.11.20 - Just a quick update - plants continue to grow big great genetics!
02.12.20 - Keeping it simple, light watering - temps are good - buds are getting larger - all in all thinngs are looking great!

Likes
5
Share


@LockDownGrow
Follow
Coming along real nice now and starting too show the very start of flower too ,

Likes
1
Share


@alexb420
Follow
probably won’t work with these for a bit. BUT was fun to grow something out and soon i’ll be able to try it out.
Likes
35
Share


@Eryan
Follow
Day 42 - Kinda crazy how fast it's gotten to be day 42 (the meaning of life - *) in the grow. Haven't watered yet. Plan on doing that with the above nutrient schedule tomorrow or the day after. And I think that might be the last time I give any nutrients to the plant. Pistils are beginning to curl, and I've seen (just a few) amber tirchomes on one bud. I want to harvest on the earlier side because I don't want this harvest to have a big couch-lock effect. Prefer a more cerebral high, although some bodily relaxation is nice too.
So I think I will be harvesting at the latest by April 10th (Day 56). Of course I will continue to watch how the plant develops and if no further trichomes are turning yellow/brown in a week, I'll wait longer.
The trichomes on the sugar leaves have a wonderful lemon citrus smell by the way. Not what I was expecting, but that's fine 😛
Day 45 - Made a video of the trichomes. They definitely look cloudy enough to me. No more nutes for sure, harvest in 10 days max I think.

Likes
11
Share


@Paradox_1ste1
Follow
They are starting to grow fast and healthy .
(Ayahuasca plants are showing good and healthy growth more than i expected. Wile the stardog ( the bigger ones are still suffering a little), just added 2 co2 bags just to try out how will it work , ex-el foilar spray aswell is working fine)
Likes
36
Share


@Erpollic3verde
Follow
Bene amici growers come potete vedere la fioritura procede senza molti problemi. Ho innaffiato le piante per la prima volta con una soluzione adatta alla fioritura e ora staremo a vedere come pian piano cominceranno a gonfiarsi i nostri amati fiori.
Le piante iniziano ad emanare un profumo inebriante, le Durban posion stanno già assumendo un colore violaceo mentre le critical sembrano un po' più in dietro. Vi ringrazio anticipatamente nel caso lasciate un like!!

Likes
4
Share


@Stoner1419
Follow
All ladies doing well.👍
Bubblegum sherbet and Fat bastard seems around 1~2 weeks left,
so I start to give water without nutrients.
Some parts of buds chage color purple🍇
Permanent Marker needs more weeks.
bud size is not much bigger than last week but its gaining, very dense and smelly😍😍
Likes
24
Share


@Chow_13
Follow
Day 50 - EC 1016, PH 6.3 Added PH down. Created a grow video and did a bunch of defoliation. Removed all of the lower bud sites.
Day 51 - EC 1025, PH 5.78. Brewed a 7L batch with 3ml Gro, 2ml Micro and 1ml of Bloom( EC 543 ) PH down to 5.8 added 4L to the reservoir. Noticed the top leaves are getting a bit of yellowing in between the veins, I think its light burn.
Day 52 - EC 0852, PH 5.73. Thinking of letting her heal up a bit more then I am going to try to supercrop her.
Day 53 - EC 0795, PH 4.68. Added PH up and the rest of the brewed batch from day 51.
Day 54 - EC 0783, PH 6.15.
Day 55 - EC 0816, PH 5.77. added PH up
Day 56 - EC 0987, PH 5.09. Brewed a 6L batch with 2ml Gro, 2ml Micro 2ml Bloom( EC 531 ) Added a bit of PH down to bring it to 6.8. Added 3L to the reservoir then began
Supercropping every one of her nodes. Went a little crazy, lol. But cut her height a lot . Didn't tie anything down so were gonna see how she recovers.
After that the readings were EC 0955, PH 5.98
------------------------------------------------------------------------------------------------------------------------------------
Now this was a big week. First I had a little bit of fun and entered the holiday video contest. Decided to do it with the counter saying 1 day left and uploaded it at 4:am in fear I would not get anything entered. Later to find out after the "Days left" counter it shows hours so I could of gotten better video. Still had a lot of fun doing it. Also did a defoliation while recording the video so the start has it pre-defoliation and the end you see everything I cut out. I don't think she liked what I did because the days after she started showing yellowing, PH kept on dropping dramatically. So what did I do. I bent every single side shoot of growth!!.Supercroped. Hope she heals well.
