


Likes
13
Share


@Lfuego22
Follow
Good week. On day 50 I Defoliated. Removed lowers, Taped up the room for light blockage
Day 56 from
Complete reservoir change
Room temp/humidity- 67/70
Plant temp/humidity-70/65
CO2 level-922
CO-47
Water ph- 5.9
Water ppm- 1200
Water temp- 73
Likes
27
Share


@Prototype0181
Follow
Week 3, check
Had to battle fungusgnats again:( thought i had em all. So did a h202 3% 33/66 mix with water and flushed again-_- I also added a 1000 predatory Mites in the ballpark and nematodes. I also picked 2 new toys up microscope videorecorder 50/500x and a IR temp reader. Chasing the perfect VPD
Rock on Growmies


Likes
5
Share


@Krissci
Follow
Didn't realize I didn't start a diary for this.
Very lazy...
Overall plant seems happy..
This week and going forward mostly LST and light fan leaf defoliation.

Likes
23
Share


@dataTwiiix
Follow
06/19: Début deuxième semaine de floraison. Elle commence à produire du SUCRE :D. premier fillet mit en place (j33)
Ajout de BudCandy 1/sem (A partir de cette semaine)
06/20: rien à raconter au repos. (J35)
06/21: 2L eau clr (j36)
06/22: (j37)
06/23: à partir de maintenant je vais remplacer 1/2 topMax par boost accelerator de Canna.
06/24: arrosage +/-2L *engraisser
06/25: je ne trouve pas le plants énorme j'aurais du donner plus de grow/fishmix pendant la phase de végétation peu être pourtant j'avais ajouter de l'humus de lombric à mon soil.?¿ (j40)
Likes
16
Share


@Sadhus
Follow
Rempotage en 3 litres, beau système racinaire belle croissance vigoureuses

Likes
14
Share


@GRow_M8s
Follow
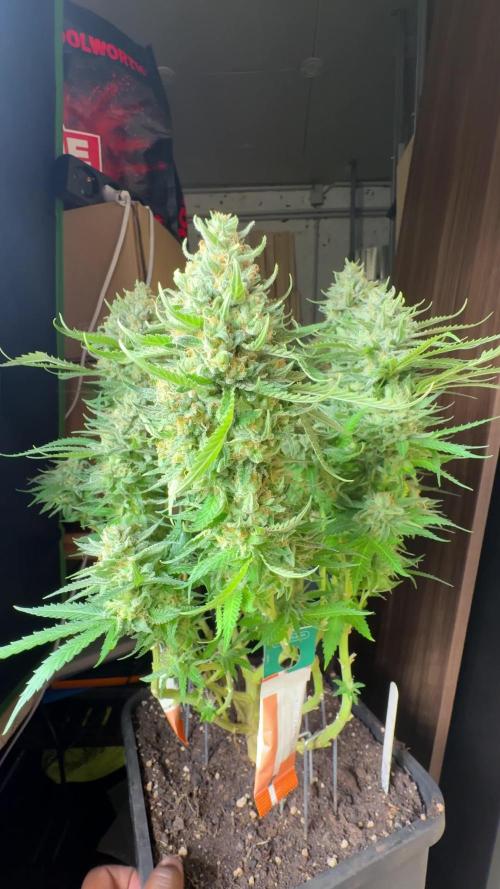
So, day 65 of the 🔅Root66 auto project🔅 and this is the last update before harvest:
❎- GSC (2) are the only plants that didn't make it so we didn't defol --> 15-20 days late.
Strong plants, high ppm feeding --> no probs at all.[Same phenos].
☑️- Cream mandarine xl (4) more than a week (10 days) before maturity.
Besides that CMxl is a great yielder, tall plant with light brunches.
Average ppm needed.
✅- Jack 47 (4) 5 days before maturity but that's enough for these Jacks to pass the test.
Smell is unique (pineapple), no stress probs, really dwarf plants.[Same phenos].
✅- Gorilla Glue (2) pass the test and ready for harvest. Not what I really expected, average yield,growth etc.
✅- Fast berry (3) pass the 66 project.
We had 2 phenos (2 green and 1 purple), beautiful plants with great aromas.
Nitrogen issues, don't overfeed.
✅- Crystal Meth (3) pass the test from day 60🤯, 2 phenos. We experimented with these.
The green one (with a little purple inside) had a topping and is already mature one week before the end of the project, purple #1 just defol and purple #2 supercroping.
A really fast strain, good yield n hungry.



Likes
38
Share


@Cariboo_OG
Follow
Utopia Haze is a rare heavily sativa dominant hybrid (90% sativa/10% indica) strain created through back crossing Brazilian Sativa strains. This tasty little bud took home 1st Place for Best Sativa in the 2008 High Times’ Cannabis Cup and for good reason – with its potent 18-22% average THC level and long lasting cerebral effects, Utopia Haze is one powerhouse smoke. The Utopia Haze high comes on soon after you finish your first toke, hitting you with a strong cerebral lift that infuses you with a sense of hazy relaxation.
Type: Feminised/Photoperiod
Cultivation: Indoor/Outdoor
Flowering Time (days): 70-75
Indoor Yield (g): Up to 650
Feminised Outdoor Harvest Month: October
Feminised Outdoor Harvest Month Week: 3rd-4th week
Aroma: Citrus, Woody, Pungent, Mint
Effect: Cerebral Lift, Hazy Relaxation, Sleepy
Welcome Everyone to the Final Entry of my Utopia Haze Grow !
There is so much to discuss ! I have been extremely busy as of late trying to get this Harvest together, but i am happy to have it here for you now !
I Seriously under estimated the amount of time, help from others, and my own necessary skills to pull this off.. and i still kind of screwed it up lol !
But its worth noting i have never actually done this before and trying to document it during....was extremely hard.
It is next to impossible to work an iPhone with rubber gloves on !
First I want to discuss everything step by step so before you jump straight into the comments on how the end product is so small in "quantity"
Rest assured i am happy with its"quality"...and thats all that matters to me because Life is a journey not a destination! and i have learned so much from this grow that I couldn't be any happy even if i messed some things up :)
But at the very least I hope you read through this entry in its entirety with an open mind and focus more on the process, rather than just the outcome!
I ran out of Ice & i was only able to wash three times..(normally I've heard you should go sometimes 5-6 washes)
Preparation is Key & things will be much better next round :)
Photos 1-22
These are pretty self explanatory but for those of you just tuning in now.. this is what happens to a very happy plant when you don't have the necessary tools to monitor key components of growing cannabis.. Ph, as well as EC levels play a very key role in the outcome of your grow lol that being said I was just able to save this plant by purchasing both tools but that doesn't mean the plant didn't suffer because of the prior events.. This was a Huge reason behind me choosing to turn this harvest into what i would consider
"Solventless Hash Rosin" from "Ice water extracted Bubble hash".
Pictures 23
The idea here is the process of using "fresh Frozen Cannabis" this has been discussed many a time online on such sites as instagram and here on grow diaries as well.. I personally have Never tried the process so i decided to try it out and make a judgement for myself..
Video 24
The Cannabis has now been in the freezer for 72 hours making it very well frozen.. as you can tell i struggled getting it all into the 25u Screen Wash Bag. One thing of note i would do differently is i will de-stem my next batch as i also believe this played a part in the amount of plant matter that escaped through the sieves.
Photo/Video's 25-28
The idea here is "ice water Seiving" & especially with the bags that I am using here that are only have screen material on the bottom portion of the bag it is very important to have spaces in-between the screens to allow the water to pass directly through the screens into the bottom bucket with the least amount of resistance.. because the hash is so extremely temperature dependant if it gets warm on the side of the bag.. it will stick there and not make it to the bottom to become use able product..
29
You do not need to use as much Ice as i used here lol... the idea is to keep everything very cold..i certainly achieved that but at the sacrifice of using so much that i ended up grinding product and producing "contaminants" but in the end they are just plant matter that i would be smoking when i rolled up my joint either way so.. I'm not super disappointed..
But it should be noted that what you want to achieve here is a Layering effect where you have the wash bag between two small layers of ice while the "water current" washes the Trichomes away allowing them to be separated by the screens setup below :)
Before Starting the machine you should allow some time (i.e.;10-12minutes pre soak to allow the product to become saturated) before the first cycle.
By video 32 I have just ran out of ice lol..
Video 33-34
Here I have a tip for you.. to separate the screens that you sieve through.. cut 5 gallon buckets to stretch them across nice and tight.. it'll make scooping your Bubble that much easier ! i learned this from the many "Frenchy" videos I have watched :)
Picture 35
Here in lays the problem for most people.. drying your hash without loosing vast amounts of "Terpenes" whilst also stay ever vigilant against mold !
Thanks to all those videos I've watched on youtube.. id like to think this was one of my most successful parts of this process..
Things to Note; Terpenes start to seriously evaporate at temperatures 68F or 20C
you need to stay as cold as possible whilst bringing the Relative Humidity in the space down into the 40-30% to stay away from that nasty mold !
I used my cold storage room in the basement.. with a dehumidifier running to keep the space at 45% RH & staying at a constant 15c.
All while spreading the hash as thin as possible across parchment paper, on top of the white screens with a fan moving air across both sides of the paper.
Pictures 36-38
These are some macros i took in the middle of my drying session I fell in love with the colour.
Yes i know the black spots are plant material but they will get caught when i bag the hash & squish the oil out.
Thing to Note; at this stage it is important to ensure you 'micro plane" the hash down as fine as you can whilst staying weary of the temperature... any "chunks" will hold pockets of moisture.. that lead to potential problems..ie; mold ...
Picture/Video 39-41
Successfully planed bubble hash ready to be bagged and Squished !
Picture 42
Ive decided to follow Pedro.. from Pedros Grow Room and double bag to be on the safe side so i don't have any blow outs.
So thats One 25u bag inside one 160u bag ! :)
Pictures 43
This is almost 3 grams of the bubble hash from above, already melting in the bag.. this is where i ran into trouble again lol things started getting to warm in the house and i was only able to get one of the three squish's i did on video :( things started getting sticky.
Picture 44
This is basically just a photo of the equipment I'm using; 3x5 LowTemp Cage in the frame I built myself, with a 20Ton bottle jack.
Something to note here is this is an older Lowtemp model with only a single heating zone which is which i have it closed here heating Both sides of the press :)
As well as the importance of having adequate pressure on your plates.. my rig is very overkill for the size of hash bags..lol
Video 45
Here is the lovely press video.. its didn't quite work the way i wanted either lol my directional folding wasn't quite tight enough for a big "drip" :)
&the Press was set to 65°c
Photo's 46-50 are pretty self explanatory :) I had a blow out.. but still managed to pull an 80% return from the hash once squished...& yes it tasted amazing :)
Was it worth it in the end... that could be debated.. for some..i understand..its not your thing, but for those of us that are interested in making our own concentrates.. free from Solvents...
I wouldn't make it any other way :)
If even ONE of you reading this diary finds it helpful to reference for ANYTHING.....even if its "what not to do" ill consider it a success !
Thanks again for tagging along on this garden adventure.. its been one heck of a journey !
Much Love from B.C. Canada,
Until Next time,
Cariboo
Processing
Likes
10
Share


@UrbanFog
Follow
The plants grew well this week, as did all the clones. Any extra rooted clones have been planted outdoors as a further experiment.
We moved all the clones into a Veg room. Even though the large room is not in flower and still also in veg, we had to separate the plants due to lack of space. Also setting up for mother, clones and SOG in the future.
The plants were defoliated and training continued. There are 2 weeks of Veg left hoping to have some very large plants for flowering.
Aiming for large flowers.


Likes
Comments
Share


Processing
Likes
1
Share


Likes
37
Share


@Wrongholn519
Follow
Edit: I came home from work after making my weekly log entry yesterday and I could smell my grow from my driveway... so I asked for help. THANK YOU OOZLEFINCH FOR THE HELP.. THIS IS WHY WE ASK FOR HELP...
I left a question on here stating that my new canister wasn't working and asked for generic advise. He left an answer that pointed out the fact that my exhaust fan might be set waaaay to high... and it was! It turns out there's a limit to the amount of air that filter fan 'scrub', and my exhaust fan goes way over that limit even on 6 or 7.. I turned it down to 3 and the smell got better immediately. ☮️
Still on auto pilot at this point... I'm really close to harvest.. and I'm not even on day 60 😲. I created videos this weeks, they capture the plants in ways that a still picture just won't.
My entire house stinks.. my neighbors are looking at my funny, and my wife thinks a family of skunks is hiding in our walls... I've never had this problem.. I even got a brand new carbon air scrubber and its not helping 🤣
Process/ Environment changes since last week:
- To help preserve the terpenes I've been trying to lower my temperature, which is hard without an AC unit I'm not plugging in an ac just to grow some plants. I'm at 24- 26 degrees C (75 - 82 F).
- I've been lowering my humidity accordingly to keep VPD in a good range
- I lowered my lights closer to my plants, turning them up would just add to the heat.
- I'm defoliating as much large fan leaves off as possible
- My watering pH is at around 6.7 to 6.8.. I will not be flushing these plants
- I rotate my plants every day to make sure I'm getting light to hit every node it can
This week I'm pulling out the digital scope and doing the first trichome checks for these babies. The cheese auto is going to get the chop by the end of next week.. I hope you like the video I added of it.. it's the easiest plant I've ever grown and she's going to be FIRE.
The blackberry auto is giving off a gas/berry smell and is very sticky to the touch. A beautiful triploid... my first and I hope to get many more.
The Forbidden Runtz smells just like a zkittles does, it's bang on. Very dense very sticky buds. I almost tossed her during the seedling stage too due to her mutation. I'm glad I reconsidered ☮️
Thank you Fastbuds
Likes
81
Share


@TheCannaProphet
Follow
Growing this strain was such a pleasure! I vegged her for quite a bit at 86 days as I started her along with a dozen Autoflowers that were growing in my 4x8 tent.
I wanted to wait until the Auto's finished up so that when I flipped the Meringue into flower I could move her into the 4x8 which has better environmental control, more light and co2 supplementation which I wanted to take advantage of to bring out the full potential of this awesome strain!
From germination through the Fourth Week of Veg she grew in my 4x4 under a HLG Blackbird light set to 300W at the wall, on a 19/5 light schedule and was given only de-chlorinated water with FishShit Soil Conditioner added. I then switched her over to Dutch Pro nutrients for the remainder of the grow.She handled up to 1400ppms 2.8 EC of nutrients without skipping a beat and ended up with a marvelous dark maroon coloration with hints of red that were contrasted by the heavy, frosty coating of glistening trichomes she produced throughout the last 5 weeks of her 9 week flower, four of which she received 4 hours a day of supplemental UVA light.
Once in the 4x8, I trellised off half of the tent and placed her under it. Once she was acclimated to her new home which only took two days, I flipped her light to 12/12 to induce flowering and sat back to watch the 'show' begin! By Week Two of flower she nearly had half of the 4x8 covered wall to wall! Keep in mind that she does have really wide node spacing so prepare yourself for daily 'leaf tucking' to ensure adequate light penetration through her canopy. All in all she was an absolute joy to grow and provided some of the most beautiful, pungent, dense and sticky flowers that I love so very much!
I've cultivated this strain several times now and would recommend it, especially to experienced growers as sometimes she can be a bit finicky. The breeder recommends 30-45 day veg and advertises an 8 week flower. I vegged her for 86 days and flowered her for a full 9 weeks, the last two of which had the light cycle dropped to 10/14 to further induce trichome production (which along with the 72hrs. of dark apparently worked) which is a reminder to you new guy's that Breeder times are not 'cut in stone' and are a 'general recommendation'. Always know your plant and check the trichomes to determine exactly when the ideal harvest time has arrived as so many variables can affect harvest times. Grow Strong! 😎💚💚💚


Likes
102
Share


@GirlGoneWeed
Follow
Great strain for beginners, easy to grow don't require too much attention or special techniques . She will grow fast, gorgeous and smell very very strong, I didn't think I was going to be able to harvest more than an ounce (because this is my first time) but hey, I'm very happy with my 41G! The buds were skinny but dense in flavour, I wonder why the buds didn't get fat, its because of my LED panels, or genetics? Overall I recommend this strain for first time growers!


Likes
88
Share


@ZoobZoob_farmZ
Follow
Phénotype hermaphrodite je viens de trouver une 1ere fleur mal JeCroise les doigtsPour qUe J'en ai peu
Phénotype coloré cool j'ai hâte de voir l'évolution !!!!!! merci a tous ceux qui sont passés !!!
👍 Watermelon Automatic: Meet the Offspring of Tropicanna Cookies and Lemon OG
Our talented breeders wanted to create a strain that tickled the taste buds to the highest point. To achieve such a terpene profile, they selected two incredibly tasty parent varieties: Tropicanna Cookies and Lemon OG. These two varieties are full of limonene, myrcene and other fruity and earthy molecules.
After back-cross and stabilization of these varieties over several generations, Watermelon Automatic appeared with a genetic composition of 75% indica, 20% sativa and 5% ruderalis. This fast autoflowering strain has managed to inherit the delicious terpenes of its ancestors.
Growing Watermelon Automatic: A Real Delight On All Plans
Watermelon Automatic has a fast life cycle that will deliver some rewarding yields. In addition, its compact and discreet nature allows growers to grow it in places with limited space or environments hidden outside.
Indoor plants reach heights of 70—110 cm and if left to their own devices, they will form a broad central branch of heads. If subjected to low-stress trellising techniques, this variety will grow closer to the ground and form a more uniform and productive canopy. Expect a satisfactory harvest of 500 g/m² in just 8-9 weeks post-germination.
Plants grown outdoors reach slightly higher heights of 90—120 cm and produce a respectable yield of 100 g/plant. They thrive well in containers, raised beds or directly in the ground.
Watermelon Automatic's Aromas, Flavors and Effects: A Triple Threat on All Fronts
Although compact and cute, its resinous buds have a heavy striking force. A 20% THC level will smash the body with a superb comforting indica effect that will soothe body, mind and soul. Average levels of CBD come into synergy with the psychotropic cannabinoid to balance the slightest shattering ounce.
Take advantage of this strain in the evening to fully enjoy its enjoyable euphoria. By doing this, you will encounter a real armada of divine flavors and aromas from its superb terpene profile. Typical scents of watermelons come to mix with other tropical fruits and earthy notes sublimate an undeniably refreshing smoke.
Watermelon Automatic data sheet
Variety type: Auto flowering
THC: 20
CBD: Medium
Indoor Yield: 450 - 500 gr/m2
Outdoor Yield: 50 - 90 gr
Indoor Height: 80 - 110 cm
Outdoor Height: 100 - 120 cm
Flowering Time: 6 - 7 Weeks
Harvest Month: 8-9 Weeks after germination
Origin & Breeding History: Tropicanna Cookies x Lemon OG
Type: 20% Sativa, 75% Indica, 5% Ruderalis
Effect: Calming
Climate: Summer Long
Taste: Fruity, Watermelon
https://marshydro.eu/products/100x100x180cm-grow-tent/
https://marshydro.eu/collections/ts-series/products/ts-1000/
Likes
18
Share


@eldruida_lamota
Follow
Que pasa familia, vamos con la segunda semana de floración de estas Tropicana Cookies Fast Flowering, de FastBuds.
Vamos al lío , las 3 plantas se colocaron en macetas de 7 litros definitivamente.
El ph se controla en 6.2 , la temperatura la tenemos entre 21/24 grados y la humedad ronda el 50%.
Ir van creciendo y no llevan ni mal ritmo ni mal color, veremos como avanzan las próximas semanas y como van formándose las flores.
Mars hydro:
Code discount: EL420
https://www.mars-hydro.com/
Agrobeta:
https://www.agrobeta.com/agrobetatiendaonline/36-abonos-canamo
Hasta aquí todo, Buenos humos 💨💨💨


