



Likes
Comments
Share


@GoodTimesOrganics
Follow
Hi liebe Community and Welcome back! 💚
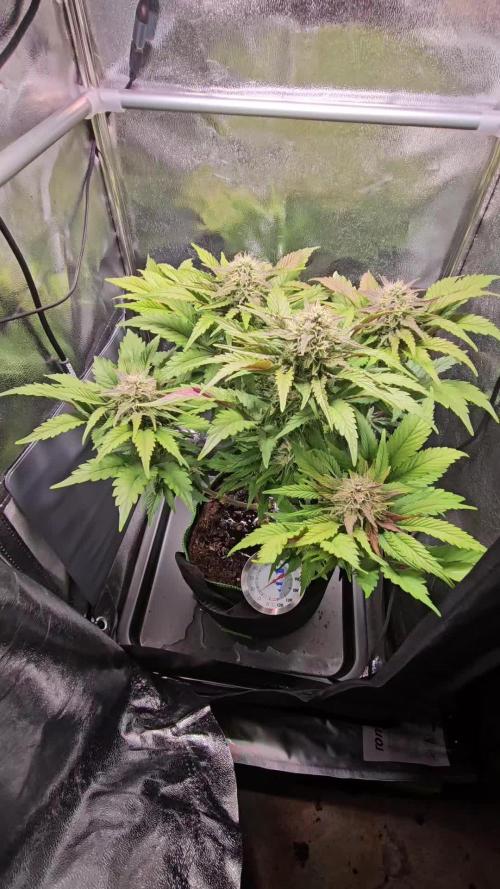
Der zweite Strain von Good Times Genetics. Entwickelt sich überaschend anders als vermutet.
Ein schönes Wuchsbild verreint mit einem doch unterschätzen Stretch! Die Pflanze hat innerhalb der letzten 2 Wochen einen starken Stretch von knappen 18 cm hingelegt.
Das bedeutet, das die Diesel Sativa Gene jetzt voll einschlagen.
Auch die Blattform wird an den oberen Trieben, schlanker.
Daher eher die Tendenz 60% Indica, 40% Sativa.
Nach der zweiten Blütenwoche entwickeln sich die Blütentriebe immer stärker und die Stigmen bilden sich weiter aus.
Bei diesem Genotypen, ist das Wichsverhalten weitgehend ähnlich, nur die Hauptwuchsphase war mit etwas kürzeren Internioden abständen geprägt.
Der Stängelabrieb duftet schon stark nach säuerlichen, dieselartigen Nuancen, mit einen etwas GMO typischen Aroma.
Die Wachstumsbedingungen im Growzelt sind aktuell wieder super!
———————
🌞 Temp: 22°C
🌚 Temp: 20 °C
💨 RH: 53%
VPD: 0,91 kPa
😎PPFD: 830 mqm
———————
Stay Tuned! 💚
Likes
24
Share


@Samsemilla
Follow
Die vierte Woche der Blüte hat begonnen.
Der Platz im Zelt ist mehr als ausgeschöpft und die Pflanzen küssen fast die Lampe.
Ich denke der Stretch ist vorbei, ich hoffe es zumindest. 🙏🏻
Diese Woche startet mit etwas Bio PK 5-8 von Biotabs.
Die Blüten und die anliegenden Blätter fangen an zu glitzern. 💎
Ich habe dem Wassertank meines Autopot Systems einen Luftstein hinzugefügt.
Wird das einen großen Effekt bringen? - keine Ahnung.
Kann es schaden? - ich denke nicht.

Likes
7
Share


@Jays_Not_Here_Man
Follow
Love using Grow Diaries and the community of people I have met and chatted with along the way ❤️🇨🇦👊 I’ve “grown” so much over the past year from the advice and journals posted! Thanks Growmie’s! 👊❤️

Likes
20
Share


@Santica_Garden
Follow
WIFI PUNCH by Growers Choice, another strain I am excited about trying, I did try this strain before but had a terrible germination that time so I ended up scrapping them.
But this time around things are going great 👍🏾🔥😎


Likes
10
Share


@Fibro_Witch
Follow
Gave the photos a haircut today. Removed some fan leaves and lower branches that wouldn't amount to much. Gave the branches to my horse because he loves them! Tried enticing the ducks with fan leaves but they weren't having any of it. They prefer lettuce, not "The Devil's Lettuce"😂
I added in a little 5-1-1 fish fertilizer to my feeding regimen as well. Still picking off inchworms.
And as you can see I made it to the hardware store and put up this baby almost completely by myself. I only asked my husband to hold the center roof panel support while I screwed it in. Couldn't have been better timing since hurricane Dorian came through yesterday and we had plenty of rain. Of course it didn't fully protect them but the majority of the rain hit the roof. And then it got down to 49 F last night. It's really Fall now!
This girl is frosty and she ain't near done, those pistils are like a white walker! So looking forward to this finish, because it's gonna be better than last year for sure!

Processing
Likes
19
Share


@eldruida_lamota
Follow
Bueno, empezamos por el final familia.
Gorilla girl, me parece una cepa BRU-TAL , ya partiendo de esa base, mi error, creo que e cometido , es poner estos ejemplares en macetas de 5L, que tonto... mínimo recomendado 7L y a ser posible 11L
Otro error fue no dejarlas una semana más. pero, escasez. (intentaremos curarla un par de semanas).
Cepa con flores muy compactas, hay bastante separación entre nudos pero compensa las flores de verdad.
Sabor muy dulzón a mi me recuerda a melón , es un pepino recomendado para amantes de la hierba que llevan tiempo en esto, un colocón muy fuerte, ahora mismo estoy bajo los efectos de esta vaina, aseguro que con cada frase, leo varias veces y detenidamente por que válgame.

Likes
13
Share


@GrowGuy97
Follow
Day 49 - Had to put the 3 Girl Scout cookies on a 12/12 light cycle to get them to switch to flower for some reason, first time I have had that happen with autos but all the plants are doing good, 2 of my strawberry pies are showing a little calmag deficiency but overall they are doing great and getting extremely frosty! Thanks for following & happy growing friends!✌️🏼🙏🏼🌱


Likes
1
Share


@Dr_Med_Rasen
Follow
just filling up nutrient solution, adjusting light and took some small leafs away. Easy grow until now. Hope it stays this way and getting a nice purple pheno. Ordered a fan to get some air movement inside the tent. When the leafs lay on top of each other you get wet spots. Hope it arrvies soon.
Update 27.06
Fan arrived and also Plagron Green Sensation and Power Buds. Used 1ml/L. Will Change the whole solution next Weekend.
—————————
Deutsch
Nur Nährlösung aufgefüllt, Lampenabstand geregelt, ca 35cm und ein paar kleinere Blätter entfernt. Düngeschema wie bisher.
Bis jetzt läuft alles glatt, hoffe bekomme nen schönen purple Phänotyp. Einen Clipventilator bestellt für ein wenig mehr Luftbewegung wenn die Blattmasse zu dicht wird und aufeinander aufliegt. Es bilden sich dort sonst feuchte Stellen. Hoffe der kommt morgen wenn DHL es nicht vermasselt.
Update 27.06.:
Ventilator ist da und dazu Plagron Power Buds und Green Sensation, 1ml pro Liter direkt in den Eimer gegeben. Tausche die gesamte Lösung nächstes Wochenende.
Likes
31
Share


@Mrs_Larimar
Follow
2024-07-29
Show must go on.
same for the Outdoor Tangerine SowF1 Fast.
I can see signs of Flowers, so next week she will be officially into Floweringstate too.
she stretched heavy and spreaded vertically like a folding Fan
super structure.
and the harvested Plant stands outdoors, too. i look if shes revegetating.
she gets water and attention.
BREEDER INFO
Tangerine Snow F1 Fast Feminised is a 75% sativa, four-way cross of (Boost x Tangelo) with (Lavender x Power Plant).
This Fast F1 hybrid is bred from Cali genetics and boasts great citrus terps, high resin production for extracts,
high levels of THC, very good yields and excellent mould resistance.
Tangerine Snow F1 Fast can be grown indoors as well as outdoors. Indoor flowering times are between 8 - 10 weeks
while harvest time in northern latitudes is during September while in the southern hemisphere growers will be harvesting during March.
Recommended climate regions are hot, dry, humid and warm. These are tall, semi-branched plants that grow in excess of 200cm
and display a high degree of vigour with very good uniformity.
In common with many other heavily sativa-dominant strains, Tangerine Snow F1 Fast offers excellent resistance to mould
as well as to plant pests and diseases. The combination of citrus terps and plenty of resin makes thi
a very good extract strain with the 'washing' method delivering very good yields of hash.
The citrus terpene profile is reminiscent of mandarins and tangerines and also has sweet candy notes.
THC production has been lab-verified at a strong 24% while CBD is low. The effect is uplifting and energising,
perfect for use during the day and early evening.

Likes
13
Share

@GrowGuy97
Follow
Flower day 42 - Mainline is doing great, has by far the biggest buds of all the Gorilla Zkittlez, can’t wait to see how she turns out👍🏼 Thanks for following friends will try to update more

Likes
11
Share

@Thirsty_Grower
Follow
Die Wurzeln hatten das gesamte Volumen des Topfes durchwachsen. Die Hauptwurzel war allerdings nur etwa 15–20 cm lang; der restliche Wurzelballen bestand überwiegend aus sehr feinen, stark verzweigten Wurzeln. Wahrscheinlich lag das an der unzureichenden Belüftung des Wurzelbereichs. In einem Stofftopf wäre das Wurzelsystem vermutlich besser entwickelt gewesen.
Die Trocknung erfolgte in einem Textilschrank auf dem Dachboden. Die Temperatur lag nachts bei etwa 5–10 °C und tagsüber bei ungefähr 10–15 °C.
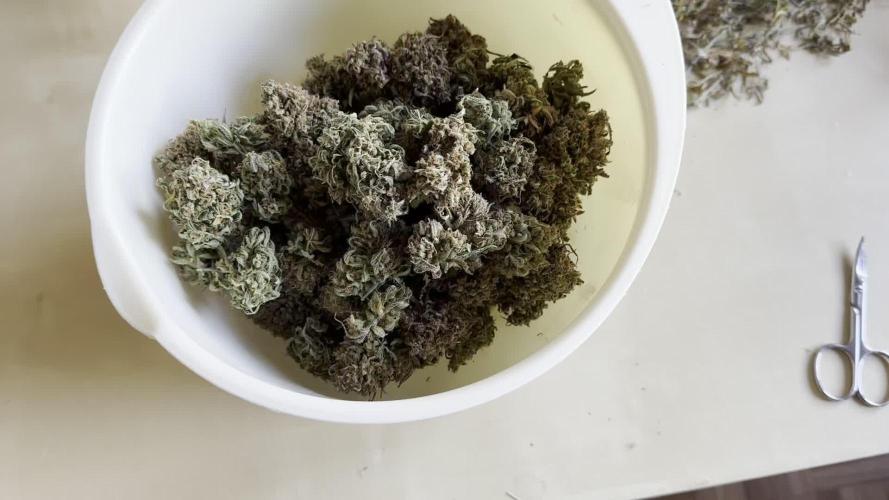
Das Gesamtgewicht nach der Trocknung betrug 117,55 g. Der durchschnittliche Gewichtsverlust während des Curings lag durchschnittlich bei etwa 2,61 % (siehe Tabelle). An der Messung des Gewichtsverlustes während des Curings nahm nicht die gesamte Ernte teil, sondern lediglich ein Teil davon. Die untersuchte Menge war jedoch ausreichend, um den durchschnittlichen Gewichtsverlust zu bestimmen.
Das über 49,9 g hinausgehende Gewicht wurde ordnungsgemäß entsorgt.

Likes
14
Share


@Macc420
Follow
So weiter geht's :D
Alles klar sie sind geschlüpft
Sogar der 5 Jahre alte Zamnesia seed hats geschafft
Nun in Plagron Seeding and Cutting soil
Bei der hinten links passiert nichts - bisschen wurzel is da und der Anfang vom Stiel aber sonst nix mehr ... Hab jezz noch schnell eine Sweet ZZ in Papier Tücher gepackt damit es wieder 6 sind.

Processing
Likes
11
Share


@Andres
Follow
I do not know what happened ... she germinated the same day as GSC and GC ... and the seed came badly ... so it will die ... it only takes up space ....
Likes
Comments
Share


@All_about_420
Follow
Heute gibt's wieder mehr zu gucken, ist auch nochmal einiges passiert.
Ich hab das letzte Mal die Schere angesetzt um noch einmal die Spitzen zu vervielfältigen
und ich habe nochmal Blattmasse, sowie untere Triebe entfernt.
Da sie so schnell wächst, wird es kein Problem sein, das alles wieder zu kompensieren,
diesmal aber schon zielgerichtet auf die wichtigen Teile der Pflanze.
Endspurt vor der Umstellung auf die Blüte und den Stretch.
Likes
49
Share


@Kayotic
Follow
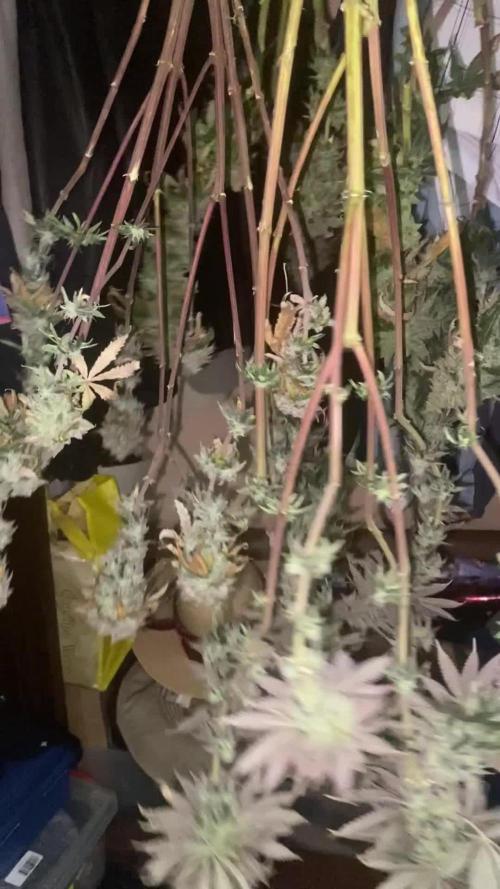
Week 14 of flower..She is very thirsty, drinking a gallon every 2 to 3 days. Watered and gave tea yesterday . I copied the details above from last week, didn't check this time. Getting very, very close. The purple is really starting to show now, very pretty!
Lights out on Saturday March 26th , shooting for 72 this time.


Likes
12
Share


@AlienScrOG
Follow
I hope you like them !! let me know !! I accept any advice .....? according to you if I add 300w ... led roleandro full spectrum in mid-bloom can I get a few more gram?
bye bye alien$c®️0g


Likes
2
Share


@Polishsmoker_pl
Follow
Yoyo 🤙🏽🤙🏽 Kolejna aktualizacja mojego małego projektu , krzaczki maja sie świetnie są silne i zdrowe, caky czas karmione odżywkami firmy... Ph utrzymywane jest na poziomie 6,1-6,3. Jeszcze 2-3 dni i zmiana światła na flow 😉
Dzień 46
1x Cookies Gelato fem. US RQS ( pojdzie na zewnątrz)
1x Strawberry Cough fem.
1x Orange Skunk fem.
1x Black Triangle OG fem.
1x Grandaddy purple fem.
Te cztery odmiany od Panpesta.pl
I z poprzedniego projektu (solo cup)
1x Cookies Gelato fem. RQS USA po treningu LST
1x Royal Runtz fem. RQS USA
Światło 18/6
temp. Dzień/Noc 29°C/23°C
Wilgotność - 80%
Box - spiderfarmer
Lampa - spiderfarmer SF4000
Ziemia i odżywki - B.A.C