


Likes
Comments
Share

@Meckyman
Follow
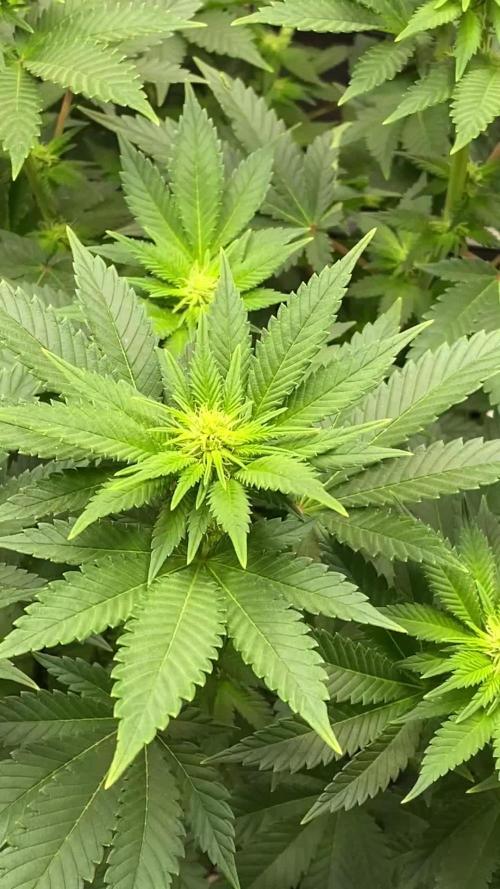
Hallo Gärtner 👩🌾 wieder eine Woche vorbei ist das gießen wird immer häufiger und mehr 😅 ich denke hab das Fehler gemacht das viel Blätter 🍂 weggenommen habe wie sieht ihr das so? Würde mich sehr interessieren. Ansonsten sie wirkt prall voll saftig. Was mir sehr überrascht ihr Geruch riecht nicht so stark. Aber es macht nix

Likes
31
Share


@Reaper
Follow
day 5 flowering, i did some LST with rope they look healthy also transplated one into a 20L pot 2 days before they went into flowering, with soil wich has 3month fertilizer in it see how that turns out. the one in the 12L pot has thicker branches so harder to bend so im not taking too much risks on that one.
they stretched a bit every day and start to go into the pre flowering stage in a week or 2 the flowers will start pop up from everywhere O.o
see you next week
Processing
Likes
70
Share


@CBD_Sweden
Follow
@MephistoGenetics,
Hi all the happy people here in GrowDiaries.
This is my second cultivation ever and it will be fun to try a bigger space than my closet grow.
First, I'm just going to say I'm done with the construction of my new growroom.
The room is 2.14 meters by 1.7 meters and has a ceiling height of 2 meters.
It provides a floor area of 3.6 square meters.
I use a 54 Watt Lightwawe T5 for germination and 2 Pcs 400 Watt HPS lamps.
I have a channel fan that replaces the room air about 40 times an hour to get a comfortable environment in the room, the air enters a fresh air intake from the outside.
The air is purified through a carbon filter to then leave the room to the rest of the basement.
Then I use that heat to heat the rest of the basement.
I will use 10 pcs 15 liter Autopots to grow with and a 100 liter water tank that supplies the pots of water and nutrition.
I will grow completely organically in soil and will watercure my buds to get the best possible medicine for me.
But there are no cultivation rooms to be displayed here, so I continue with what is most important.
Today I have put my seeds in paper towel and hope the seeds have germinated within a few days.
I am very excited to see how the new growroom will work and how this Illuminauto 21 - Sour Crinkle will turn out.
Illuminauto 21 - Sour Crinkle (Grape Crinkle x Sour Crack)
Two of our fastest and frostiest varieties collide to make a sweet and sour delight!
Expect super frosty, compact nugs that won't be a toke for novices.
Destined to be a great strain for extraction work too!
Plant size - Small - Medium
Cycle time - 60-65 days from sprout
Indica/Sativa - 80/20
Frost level - Extra Ridiculous
https://www.mephistogenetics.com/product-page/illuminauto-21-sour-crinkle
.................................................................................................................................................................................................................................................................................................................................................
2017-08-21. Started to germinate the seed.
.....................................................................................................................................................................................................................................................................................................................................................
2017-08-23. Seed germinated and put in small pot in the humidity dome.
.........................................................................................................................................................................................................................................................................................................................................................
2017-08-27. Slow and steady she grows.
---------------------------------------------------------------------------------------------------------------------------------------------------------------------------------------
2017-08-28. Transplanted in 15 liter autopot. Check the roots on this girl
-----------------------------------------------------------------------------------------------------
2017-08-29. New movie of the girl.
-------------------------------------------------------------------------------------------------------------------------------------------------------------------------------------------------------------
2017-08-29.
Hello to you who read my diary, I just want to say that I am pleased that you have chosen to check in with me and in my diary.
I just want to say that I do this for myself and for a steady flow of my medicine.
Everything you read and see in my diary is 100% honest and I will never distort or beautify anything here.
I document my crops so that I can learn from my mistakes and also to look back at those different crops.
I try to update with pictures every day and with text if something special has happened in the garden.
This is my strainhunt for the best medicine and the beginning of my journey with cannabis and the cultivation of it.
-----------------------------------------------------------------------------------------------------------------------------------------------------------------------
2017-08-30. Cleaned the room this morning, just vacuuming and cleaning with chlorine solution. Im testing the fan to control temp and humidity, it works great.
Added some pics and a movie. Everything is looking great right now.
-------------------------------------------------------------------------------------------------------------------------------------------------------------------------------
2017-08-31. 3 new pics.
---------------------------------------------------------------------------------------------------
2017-09-01. New pics and a video from the grow room today.
------------------------------------------------------------------------
2017-09-02. New pic.
----------------------------------------------
2017-09-03. New video from this morning.
---------------------------------------------------------------------
2017-09-04. Week 2 starts now, new pics.
-----------------------------------------------------------------------------------------------------------------------------------------
2017-09-05. KL 08.00. Cleaned the room this morning, just vacuuming and cleaning with chlorine solution.
KL 12.00. The girl got 2 liters of water with nutes in it, added a video.
---------------------------------------------------------------------------------------------------------------------------
2017-09-06. KL 08.00. The girls woke up after their beauty sleep, the leaves are always a bit down after 6 h of darkness, but they will stretch now when the HPS lamp starts.
Everything looks good and I keep trying to tuck the leaves so they get the maximum amount of light where needed. Added pics and video.
--------------------------------------------------------------------------------------------------------------------------------------------------------
2017-09-07. Day 17 from sprouting. I have never tested PH in my grows, when growing organic in soil iv learned that it adapt PH by it self. But im curious by nature so i had to test.
Kl 10.00 Tested PH in the soil, it was 6.9 and tested my tap water and it was 6.8. Added video of the girl.
Kl 22.30. New pics.
------------------------------------------------------------------------------------------------------------------
2017-09-08 KL 08.00. Good morning, added new video.
2017-09-08. Kl 23.50. Gave every girl 3 liters of water and nutes, added new video.
------------------------------------------------------------------------------------
2017-09-09. Kl 21.00. Defoliated a lot and added pics.
-----------------------------------------------------------------
2017-09-10. Kl 08.00. Last day of week 2. New video.
2017-09-10. Kl 23.00. 3 new videos.

Likes
78
Share


@Hou_Stone
Follow
👌It’s progressing, slowly but surely for my 4 young banana krumble 👶🍌
For this grow, I plan to let each plant grow with a large main bud, without topping.
Next week I will cut the lower branches closest to the ground.
-----------------------------------------------------------
💧Watering:
1L on day 9 and 0.5L on day 12
I use tap water, adjust the ph to around 5.8 and water
------------------------------------------------------------
🤩Equipment of the week :
Light FC3000 Mars hydro. power 80% at 50cm
Extractor 6 inch Mars Hydro. power 1/10. ON 24/24h
2 fans to circulate the air inside the tent. Each on for 30 minutes then off for 1 hour. this rhythm repeats itself in a loop
Heating mat Romberg 95x95cm. ON 45 minutes. OFF 30minutes. In a loop
I am adding anti-midge bird stickers 🐦
------------------------------------------------------------
Thank you for your visit and your support with the likes, comments. It's always nice to see you!💚
------------------------------------------------------------
My Instagram 🌱❤️️ :
https://www.instagram.com/hou_stone420/


Likes
179
Share


@StarLorr
Follow
Welcome to my Øpium diary.
In this diary:
Seeds: sponsored by Ðivine Șeeds
Media: Promix HP
Nutrients: Advanced Nutrients, Diablo Nutrients.
Light and Weather: Şun☀️and Mother Earth.🌎
___________________________
Feeding:
Tue 02Jul: 5L water not pH'd
Wed 03Jul: 6L nutrients pH'd 6.5
Thu 04Jul: 6L water not pH'd
Fri 05Jul: 6L water not pH'd
Sat 06Jul: 6L water not pH'd
Sun 07Jul: 6L water not pH'd
Mon 08Jul: 9L water not pH'd
*please note that most water only feedings are 2L at the time throughout the day in bottom saucer*
___________________________
Weather wise nothing to complain about, again some showers overnight nothing to serious, warm nights and days.
I've been slapping Japanese Beetles down a bucket with water and dish soap, they have an appetite for my Ðivine Gals i have leaves to spare but enough is enough😤🤨speaking of which i did some minor defoliation on lower part fan leaves and branches that would never reach their full potential.
______________________________
Thanks for stopping by, likes and comments are appreciated!👊🏻😎
Keep on growin!
Keep on tokin!!!
😙💨💨💨💨💨


Likes
89
Share


@Zurban_Poison
Follow
Hello friends, everyone!
I would like to inform you that this report is being held within the framework of the local growing championship in which the winners will appear in 4 categories ..
Our girl will compete for the title in the Best Hibrid category! wish us good luck!
And by the way! I have interesting plans for this girl!) do not miss the report!

Likes
5
Share


@cr0baron
Follow
Buds getting super chunky now. This is probably my best grow to date.
Afghan Kush looks the most mature, I'll likely harvest this one first
Crack and The Beanstalk has a huuuge main cola.
Gushers colas are fucking phat at this point
Smell is louuuuud!
I've increased the airflow to try and reduce the relative humidity. The air in general is just quite humid so increasing airflow and circulation reduces humidity around the colas.
This is supposed to be the penultimate week. Next week is flush week. I'll likely harvest AK after about 3 days of flush, CATB will probably flush to close to 14 days simply because it needs more time to mature.


Likes
22
Share


@bypado_farm
Follow
Day 43:
Watered each plant with 1L with nuts
1589 ppm, 3380 us/cm, 3.3 EC (purple punch and wedding cheesecake)
1563 ppm 3325 us/cm 3.3 EC (strawberry banana)
1476 ppm 3180 us/cm 3.1 EC (gorilla cookies)
I have 3 different feedings for the 10 plants
They look healthy
Day 45:
Watered each plant with 1L with nuts
1563 ppm, 3325 us/cm, 3.3 EC (purple punch, strawberry banana, wedding Cheesecake)
1286 ppm, 2765 us/cm, 2.7 EC
(gorilla cookies)
2 different feedings for the 10 plants
Day 47:
Watered each plant with 1L with nuts
1584 ppm, 3380 us/cm, 3.3 EC (purple punch, strawberry banana, wedding Cheesecake)
1481 ppm, 3180 us/cm, 3.1 EC
(gorilla cookies)
2 different feedings for the 10 plants
Likes
33
Share


@zera1337
Follow
Week 2: Day 9 Update 🌱
Sup fellas,
My cuties are off to a fantastic start. While they've only grown a couple of cm in height, fresh new pairs of leaves are coming in strong now. Imo, they look really solid for day 9 and ready to take off.
They're responding well to the Canna Coco A + B and Rhizotonic nutrients. Been doing the last 4 grows with Canna and my plants always loved it. Never had any issues at all.
Also I made a big upgrade this week and finally got my hands on a new SF Exhaust fan with speed control and overall more power. It was about time. Airflow in the tent is much better now and it's more spacious overall since i placed the fan itself outside the box.
My lights are at 50% now, and I'll be increasing them by at least 10% per week from here on out. Also upping the water amounts gradually, aiming for ~ 300ml per plant by the end of week 2. I always prefer to stay on the lower side until week 4-5.
Update Day 11: My babies are growing really well. Also, my new Spiderfarmer Humidifier arrived yesterday and I love it. Makes the growing conditions even better.
Update Day 13: Plants progress is on track. Super satisified so far. Can't wait for the 3rd week.
More updates to come! 🍀🔥
Likes
5
Share


@Jays_Not_Here_Man
Follow
Girls have exploded into flower! They had a big stretch and have started stacking very nicely. Flower came so fast, they are showing a slight phosphorus need, and perhaps a bit more cal/Mag to help with uptake and such. I’ve been introducing the Clyde nutrients slowly to try and avoid burn, but I clearly need a bit more. I am liking the results overall though. Happy Gardening 🇨🇦❤️🌱😎💨

Likes
41
Share


@PrairieFrostGrow
Follow
********Week 1 Flower - Sept 19 to 25, 2020*******
We switched to flower this week and put in the first SCROG layer.....been busy😃
These girls have some very thick main branches and are pushing out some huge fan leaves💪 They were easily stretched out horizontally to fill in the net and the topping helped to keep the canopy at an even height. The girls are in the same tent as another strain that is known to grow big and will benefit from a SCROG. I don’t feel these girls necessarily need one though. To combat this I decided to set the Cream 47 on boxes before putting in the netting. I set them on boxes which put them 10” taller than Gorilla Girls......may still not have been enough but that is what we are running with🤞😃
Pest maintenance this week as we are getting the last days I am able to comfortably spray the girls. Lost Coast Plant Therapy to keep the gnats, aphids and thrips in check😃
Had a small mishap this week and a damn fan fell on one side of C471 while opening the tent. The net helped to not make this more disastrous but it still set her back a day or two. She has bounded back now and that side of her is coming back and getting taller.
At the end of the week I finally gave in and started to pull some of the upper fan leaves😗😗 There is so much leaf in this little 3’ x 3’ tent that it is impacting airflow.......would love a 4‘ x 4’😃 They have reacted very well to the removing of the leaves and those branches are standing up taller and look more healthy the next day!!
Keeping the waterings up and getting a fair bit of runoff from the feedings but that is best for Coco to avoid lockouts and pH issues. There were only three feeding days this week. We switched to bloom nutes for base and added silica for supplementals. Vitamin B and Kelp coming from B52 and sweetener for the microbes from bud candy. As well as Sensyzime to let the enzymes clean up the root zone because they have been in the pots for a few weeks now.
Little more detail:
Sept 19/20 - Day 1
- Plant Therapy @ 5ml in 1L water. Ph to 5.4.
- Folier spray applied to whole tent half hour before lights on, used 3/4 of mixture
- Feeding mixture was Sensyzime @ 1ml only
- 25ppm and 5.2pH......missed it a bit.
- each girl given 3L
- SCROG put in
Sept 20/20 - Day 2
- Sprayed the last of the IPM mixture on the tent tonight.
- Noticed several small shinny spots on leaves later today.....suspect from Folier spray on leaves.
Sept 21/20 - Day 3
- Nice full strength week 1 mixture applied today
- Rhino Skin, Cal Mag @ 2ml, Sensi Bloom A&B , B52, Bud Ignitor, Bud Candy @ 1ml.
- 625 ppm and 5.7pH
- 3L given to each girl.......not enough runoff.....bump feedings up to 4L going forward.
- silica added today.
- freaking fan dropped on C471 today in the one corner🤬 Could have been worse👌
Sept 23/20 - Day 5
- CalMag @ 2ml, Rhino, Sensi Bloom A&B, B52, Bud Candy, Bud Ignitor @ 1ml.
- 850ppm and 5.9pH
- 4L given to each girl.
- better run off amount
That wraps up the first week of flower........Cream 47 was more of a transition week while Gorilla Girl was well in flower. The net is in and the lights flipped. The girls were ready for flower and now we just need to keep giving them what they want for the next 6 weeks and then coast from there👍 Hopeful they will find another 12” of growth in them but not sure they will stretch that much in the net....time will tell. Sweet Seeds girls making me smile again with anticipation of some fat colas from these girls😃


Likes
Comments
Share


@Daggstein
Follow
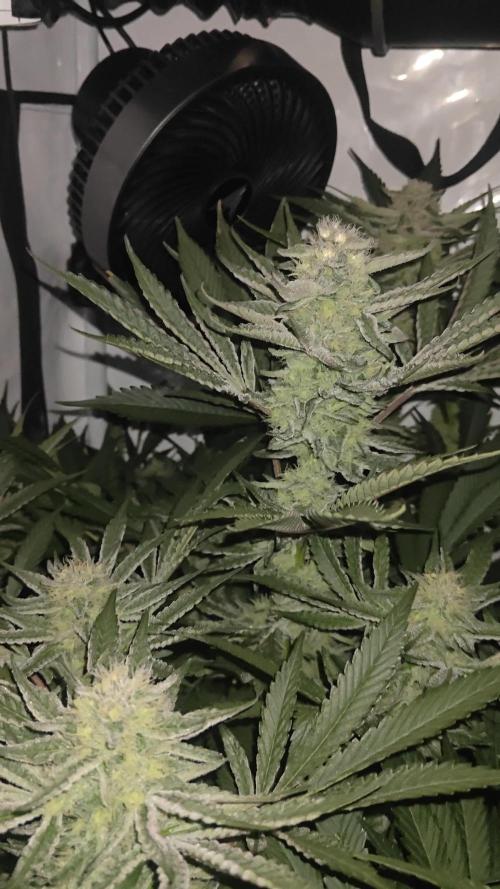
the buds are starting to develop nicely, although I have mildew starting to come through, im trying to get it under control before it gets out of hand.


Likes
2
Share


@viggagrow
Follow
I have started removing substrates and other things that contain nitrogen in them.
You see, the trichomes are quite dense, and the flesh is also blooming, there is a tree that foxtail me sad because its flowers like pillars.

Likes
6
Share


@Cannabis_ConnectionUK
Follow
Soil PH Stabilised
Plants Have Shot Up Over 10” Over The Last Week.
Moonshine Spray Used Once A Week Until Flip.
Lights Are At 60% Brightness
Likes
3
Share

@Lvnsource
Follow
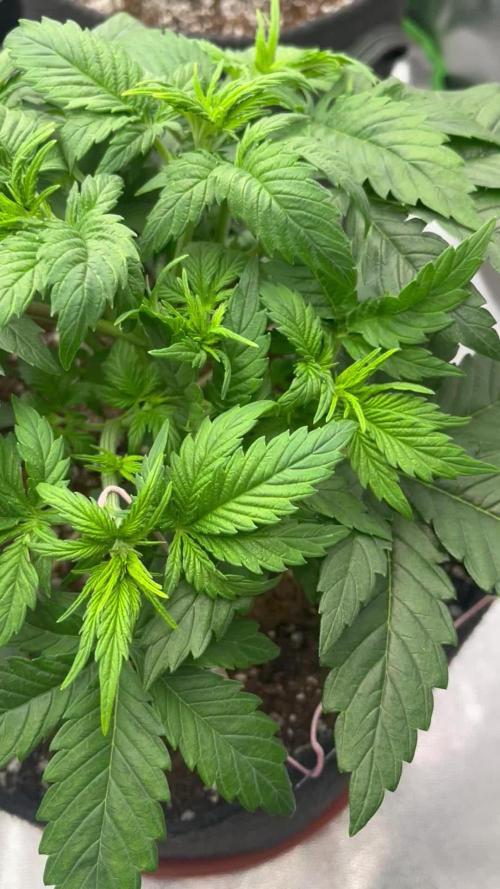
She’s grown up; been doing some light defoliation, I remove 2-4 leaves a day as needed. Otherwise I’m still utilising leaf - tucking ‘ !


