


Likes
Comments
Share


@Nistnov
Follow
Edit: I decided to harvest her tomorrow, i dont want any bud rot.
Shes doing well, the buds are not fattening as much as i hoped for so i think she needs 2 more weeks here is the crux, next week itll rain nonstop, no sun and high humidity in this stage its safe to assume shell get bud rot.
So i took a look through the microscope today cause im thinking about an early harvest. Its better than expected, 75% white 20% clear and 5% amber, almost all pistils are brown.
If you have suggestions, leaving her to grow in real bad weather or an emergency harvest, what do you think would be better?

Likes
46
Share


@M420_GROWS
Follow
Grow looks good.
I will compile only full week videos now. Video be provided by end of week. End of week in this diary is Tue - video expected by Wed.
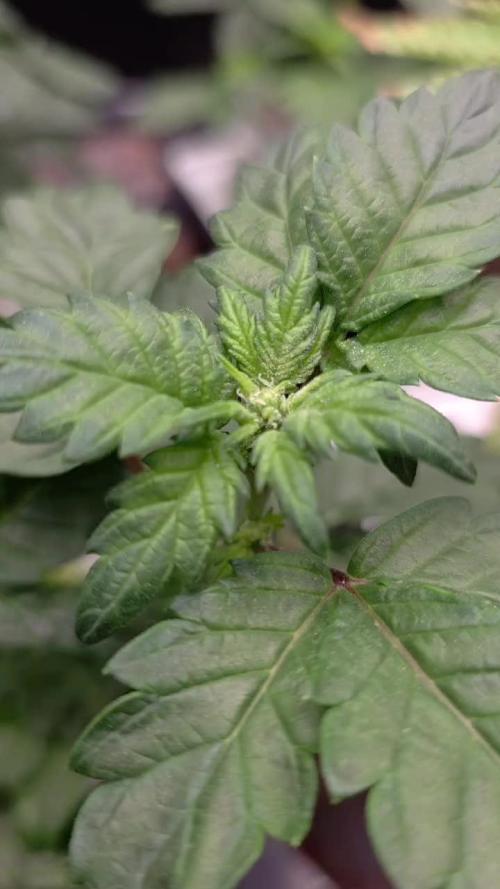
Say 19: first stigmas, I think

Likes
2
Share


Processing
Likes
16
Share


@GirlGoneWeed
Follow
I have introduced a second bottle of CO2 to pump flowering weeks, I have cut off nutrients completely to get rid of nutes burn, plants are been fed PH water only.
For this run I have been using a DIY automated drip system that cost me less than $100, this system can be used to feed up to 10 plants, now I can go way for days without a worry :) if anyone is interested here is my Instagram video: https://www.instagram.com/p/Bwm1kO0BTNC/?utm_source=ig_web_copy_link
Stay Lit folks 👩🌾🏻

Processing
Likes
4
Share


@CityFarmer
Follow
Hello everyone,
The girls are finally outside in 20 gallon fabric pots. This season I have a greenhouse for them and I hope it goes good. Still have to build the first cages around them and start stretching them. 🎊🎉 finally, summer is here 🎉🎊
See you guys next week 🤞🤞🤘🤘👊👊👊

Likes
1
Share


@Anakin_Skunkwalker
Follow
5x Tropicana Poison Fast
58.den 12/12 sklizeň
300w attis pro
Hnojiva Shogun
90x90 secret jardin stan plus odtah a filtr taky secret jardin
Plagron lightmix+kokos+perlit
11L květníky

Likes
11
Share


@DuckeedWizard
Follow
Sorry for the shaky hand lol
She's growing so much by the day! Leaves are sticky and snowy, the smell is starting to increase!
I'm having to keep a close eye for defoliation, she's popping and stretching leaves like crazy!!!
Likes
77
Share


@Ukfarmer420
Follow
So this week the little gelatocake is on week 8 and is really starting to eat herself now, full of trichomes and smells like tutti fruity chewie sweets.
Last week of nutes for her then mollases only. Week 7 for the othere gelatocake and shes starting to fatten up now as well as fade also.
Babys have got big since re potting I will.bend them over later.
Sherbert mimosa are still taking there time I think they are starting to get bigger 🤔🤣 I Will keep you updated lol.
Happy growing guys 👌💪💚


Likes
92
Share


@DogDoctorOfficial
Follow
🌸 Week 4 Flower Report: Growth, Challenges & Big Changes! 🌸
Hey, Grow Diaries Fam! ✨
We’re here at Week 4 of Flower, and what a week it’s been—packed with challenges, adjustments, and exciting progress! Before diving into the details, let’s start with a note on my flowering timeline. While this is Week 4, I don’t start counting flower days the moment I flip to 12/12. Instead, I wait for the plants to show true signs of bloom. It’s a small but significant distinction that keeps things accurate and aligned with the plants’ development. 🌱
Defoliation: Timing is Everything!
Defoliation is a critical part of the flowering stage, and I typically wait until Day 21. However, this week, I tackled it earlier on Day 17 because:
1️⃣ The room was simply too full.
2️⃣ And most importantly—the Papaya Zoap had other plans!
She’s a fighter—determined, defiant, and constantly reaching for the moon. Despite intense training like super cropping, she’s still pushing upward, nearly outpacing the LED lights. Challenges like this remind us of a simple truth: gardening mirrors life. It’s about resilience, adaptation, and unwavering determination. 💪
This week, I added a second SCROG layer. While this net will support the flowering colas, it’s also there to strategically manage the Papaya Zoap. Why? Because experience has taught me that if she grows out of the LED’s range, she won’t finish properly—and that could disrupt the balance for every other plant in the tent. It’s all about teamwork, even in the garden. 🌟
Defoliation was intense, removing nearly all the leaves with stems to clear space and boost airflow. The tent now looks dramatically different! For the full before-and-after transformation, be sure to check out my YouTube channel—trust me, you’ll want to see this process up close! 🎥✨
Switching to Aptus Holland Minerals
A major milestone this week: I’ve transitioned entirely to Aptus Holland Minerals. 🌊 From now on, it’s just minerals—no more organic inputs. This marks the start of a new chapter, and I’m incredibly curious to see how the plants react to these changes. Here’s the current nutrient mix:
• System Clean: 0.5 ml/L
• Regulator: 0.15 ml/L
• RO Water Conditioner: 0.8 ml/L
• All-in-One Liquid: 2.1 ml/L
I’m keeping the pH at 6.1 and TDS at 556 ppm, and so far, the plants are thriving. This week also included a thorough system clean, ensuring everything runs smoothly as we enter the final flowering stages. 🌿
Bud Development: Pure Magic!
The bud formation across all the genetics is nothing short of incredible. Every plant is thriving, and the canopy is lush, vibrant, and full of potential. I’ve raised the PPFD to 750 for this stage, with temps steady at 25°C and RH at 63%—keeping the VPD dialed in at 1.11. The TrolMaster ecosystem, paired with the AutoPots, makes managing these precise conditions seamless. With more time to focus on the plants, I can give them the daily care they deserve. 💚
Shoutouts & Gratitude
A huge thank you to my sponsors and supporters: TrolMaster, Aptus Holland, Pro-Mix, Cannakan, and the amazing seed banks. Your incredible products and technology make this journey possible. 🌟
To the Grow Diaries community and all my followers—thank you for your energy, love, and even the challenges from the haters. It all fuels this incredible process, and I apprecilove every bit of it.
Special shoutout to Brother Daggadna—check him out on Instagram and show some love! 💚
The plants are heading into the next phase of bloom, and I can’t wait to share how this story unfolds. 🌸✨
As always, stay tuned, stay positive, and let’s keep growing strong together! 🙌
Growers’ love to all 💚
#TrolMaster #AptusHolland #GrowLife #CannabisCommunity #FlowerWeek4 #NeverGiveUp #GrowWithLove #IndoorHorticulture #Defoliation #PPFD #ControlledEnvironment #SCROGNet #DogDoctorOfficial
Discount Codes so you can save big on your next check out 💚💚💚
Kannabia - DOGDOCTOR 30% off
SeedsmanSeeds - DOGDOCTOR 10% off
CannaKan- DOGDOCTOR 15% off
terpyz.eu - DOCTOR 15% off
The Neutralizer - PORKIT5-DOG 15% off
As always thank you all for stopping by, for the love and for it all , this journey of mine wold just not be the same without you guys, the love and support is very much appreciated and i fell honored and so joyful with you all in my life 🙏
With true love comes happiness 💚🙏 Always believe in your self and always do things expecting nothing and with an open heart , be a giver and the universe will give back to you in ways you could not even imagine so 💚
Friendly reminder all you see here is pure research and for educational purposes only
Growers Love to you all 💚💚💚
P.S. – A Deep Dive into the ICL-300: Revolutionizing Under-Canopy Lighting
The ICL-300 isn’t just another LED—it’s a game-changer for under-canopy lighting. Unlike traditional LED systems that project light in a single direction, the ICL-300’s 300-degree design ensures even light distribution beneath the canopy. 🌟 This unique feature means that no part of your plant is left in shadow, creating a balanced environment for lower buds to thrive.
Key Tech Specs & Benefits:
• 300-Degree Light Distribution: This design fills the under-canopy space with optimal light, enhancing photosynthesis where it often gets neglected. 🌱
• Full Spectrum Output: Tailored to meet the specific needs of plants at every stage, ensuring quality growth from base to apex.
• Energy Efficiency: Advanced LED technology delivers maximum output with minimal energy usage, keeping costs down and sustainability up. 💡
• Durability & Heat Management: Built with high-quality materials, the ICL-300 stays cool and reliable, even in intense growing environments.
Why It Matters:
Under-canopy lighting is a game-changer for growers aiming to maximize yield and quality. Typically, lower buds receive less light, resulting in larfy or underdeveloped flowers. The ICL-300 changes that dynamic entirely by turning shadows into opportunity. 🌟 With light evenly dispersed across the entire plant, you’re not just growing; you’re sculpting a masterpiece.
For me, the ICL-300 is more than a tool—it’s a partner in innovation. It ensures that every plant in my grow room has equal opportunity to shine, from the top colas to the smallest buds at the base. When paired with a carefully managed ecosystem, like the one powered by TrolMaster, the potential for consistent, top-quality harvests reaches new heights.
This isn’t just about adding light—it’s about adding value, efficiency, and balance to the grow process. I’m beyond excited to see how the ICL-300 transforms the game in my tent, and I can’t wait to share the results with you all! 💚


Likes
18
Share


@Grower_Of_Persia
Follow
my dry and cure style is this:
4 days of hanging upside down to get water activity lower to around 0.6 in 50% humidity and 26 C temp (i know its a little high but we are in a hot summer right now and i cant get it lower even with air conditioner) and then after 4 days of drying i remove leaves and stalks, trim buds and move them to jar for the rest of their life :D . and in the first 4 days of curing i open the jar door and let hem get some fresh air in the jar for about 5 minutes and close the jar door again, after 4 days of curing like that buds are smokable but they will get better as they getting cured about 1 month.
buds are one of the hardest as fucking rocks type of buds! very dense , compact , sticky , smelly , amazing at every aspect
growing stage was 56 days and flowering stage was 75 days total (harvested tops at day 64th)
the total weight of dry buds was : (plant #1 & #3 top buds 56 G + lower buds 22 G ) 78 G + (plant #2 top buds 47 G + lower buds 18 G ) 55 G + (plant #4 top buds 120 G + lower buds 67 G ) 187 G = 367 G

Likes
4
Share


@Skinnytalls420
Follow
Another easy auto to grow looks like she’s gonna come out amazing
When dried let’s see how it goes!!!

Likes
2
Share


@CannaIGrow
Follow
Topped this girl this week, she’s growing pretty good. Very nice looking plant to my eye.
Likes
10
Share


@Audi_grows98
Follow
This week gorilla cookies finally got the chop! She was a very fun plant to grow and she produced dense,sticky buds that have some very pretty colors to her. If you wanna impress your friends with a plant,she’s one to do it with🔥
Likes
2
Share


@Jokey4
Follow
This plant is my first real plant because the first one had a genetic mutation coming from the seed because I gave it exactly the same conditions as this one and therefore I will consider this plant as my first plant.
I am very proud of myself to have obtained such a yield (188g wet) with very few problems during the culture of this Steacky Beast Automatic from Zamnesia. This plant resisted very well to a nitrogen deficiency due to a too high ph because of my ph metter which was out of order but also to a small burn to the nutrient. I started rinsing on day 54 (it lasted 2 weeks and a half).
I couldn't put you pictures of the trichomes but they were perfect for the harvest and the pistils were also matching so here is why I waited until day 73
The heads are hung in the culture box with brown soft ties (I removed everything except the extractor and the filter), the box is plunged in the dark so it's perfect for drying
Thank you for your interest in my growing diary!
See you soon,
Jokey4

Likes
20
Share


@French__flair
Follow
First Week of flowering
Week without too much hassle. A small excess of fertilizer but nothing serious. Uniform color. High water consumption (10L every 2 days), you can feel that they are in good shape.
Semaine sans trop d'encombre. Un petit excès de fertilisant mais rien de grave. Couleur uniforme. Grosse consommation en eau (10L tous les 2 jours), on sent qu'elles sont en forme.
Una semana sin demasiados problemas. Un poco de exceso de fertilizante pero nada serio. Color uniforme. El alto consumo de agua (10L cada 2 días), se puede sentir que están en buena forma.

Likes
6
Share


@Bud_vista
Follow
I tried budwashing for the first time. Went quite good. The buds are drying for the next 2 week
Likes
25
Share


@Master_weeda
Follow
Jour42 defolliation and LST
Jour45 defolliation
Jour47 arrosage avec de l'eau ph6.3 à laquelle j'ajoute 1ml par litre d'eau de topmax biobizz
La plante entre maintenant en floraison c'est donc le début du stretch
Explication en anglais
(Stretch explanations more)
EXPOSURE TO LIGHT
One of the main culprits in abnormal stretching of cannabis plants is the lack of light. Plants that are too far from an adequate light source will respond by accelerating stem growth in order to get closer to the lamp themselves. Especially when there are many other plants. A lack of lighting can easily cause overcrowding in a growing chamber, reducing the steady progression of your crop and the distance ratio between your bulbs and your plants.
To address this problem, be sure to provide enough light to your plants to prevent stem growth. At the same time, you should not position your lights too close to your plants either since this would also result in an over-stretching of the stems and in some cases, the loss of your crop.
In addition to the distance between the light source and the plant, the type of light you will use also affects the size of the stretching of your crop. The orange and red lights encourage stretching and result in thinner, larger stems. And conversely, blue light stimulates a growth of thicker stems and a smaller size. When a species is ready to enter the vegetative phase and undergo its most drastic stretching period, metal halide lamps can be used to deter far too long stems.
THE HEAT
Heat is another essential element that can determine the stretch size of your plants during vegetation. Temperatures above 27 degrees push the stems to lengthen more and more and will propel the potential of sativas to push as high as possible. Heat lamps that are positioned too close to plants create an intolerable environment that will grow large, soft plants that will potentially wobble until they fall and lose flowers in its fall.
OTHER CAUSES OF STRETCHING
There are multiple variables that can lead to the stretching of plants beyond what could normally be expected of the plant. Environmental stressors resulting from transplantation (when a plant passes from one pot to another) can cause the plant to return to shock. This will eventually trigger a reaction causing a stretch. Cannabis plants that are not grown in decent conditions or do not receive enough nutrients will respond in a variety of ways and this includes stretching.
Crops that are not spaced far enough apart are likely to stretch to sting the light to other plants. Due to extreme proximity, the plants will fight among themselves to reach the light, forcing them to expand as much as possible throughout the crop.
HOW TO CONTROL STRETCHING DURING FLOWERING
Stretching during flowering, you guessed it, takes place when you move your plants from the vegetation stage to the flowering stage. This is a completely normal reaction, as your plants are preparing to bear the weight of their heads.
Stretching of a plant at the beginning of flowering varies widely; some plants can double in height while others grow only a few centimetres. There are, however, two main variables that can give you at least an idea of how your plants are stretching during flowering, and how much. Here are these two variables:
Variety: Genetics has the greatest impact on the size of your plant. In general, sativa varieties stretch more than indicas and tend to develop long, slender stems.
Light: Some lights, such as HPS, are more likely to encourage stretching. In addition, great distances between your canopy and your lights will cause the plants to stretch as they try to get closer to the light source.
Stretching during flowering usually lasts the first two weeks of the phase. To minimize stretching, keep your lights between 10 (for CFL) and 30 centimetres (for HID) of your canopy. Finally, choose indica varieties if you have a smaller growing space.
HOW TO AVOID STRETCHING
In many cases, you can expect your cannabis plants to stretch during the flowering phase. Keeping that in mind helps to make a plan in case your species ends up growing much more than you could have imagined. If the information is available, get information on the standard size of your species and compare it to the size of your growing space taking into account the necessary distances between the bulbs and the plants.
TRAFFIC
While outdoor crop operations benefit from natural air to naturally limit stretching, indoor crops must assume the maintenance of air circulation within a confined space. Basic ventilation is enough to help the cannabis stems strengthen and become thicker rather than too high. In this way, the plants continue to grow vigorously without reaching heights and at the same time, your tolerance ceiling.
MANUAL INTERVENTION
For growers who want to get their hands dirty, there are physical procedures that can be done to reduce stretching. Similar to the natural effect that the wind has on cannabis plants, manually bending the leaves and stems will cause tiny cracks in the plant's tissues that will cause the plant to focus on regenerating its wounds instead of its vertical growth.
THE TOPPING
Topping is a form of manual intervention on cannabis to influence its performance, shape or size. In essence, topping is a process in which a new node is cut, growing from the plant to reduce its size and create a "v"-shaped notch that will eventually form two heads. Topping may be an effective measure to combat stretching, but it is important not to do so when the flowering phase begins.
In most cases, an abnormal stretch of cannabis plants will not completely destroy your crop. In fact, stretching can indeed help increase your performance. For growers with a growing operation large enough to contain tall plants, stretching can increase the total yield of a species with more vertical space for head formation. In both cases, stretching can easily be planned in advance and there are multiple solutions to help you with this problem which is all too common.
May the force be with you 💪
Likes
8
Share


@Philippovic
Follow
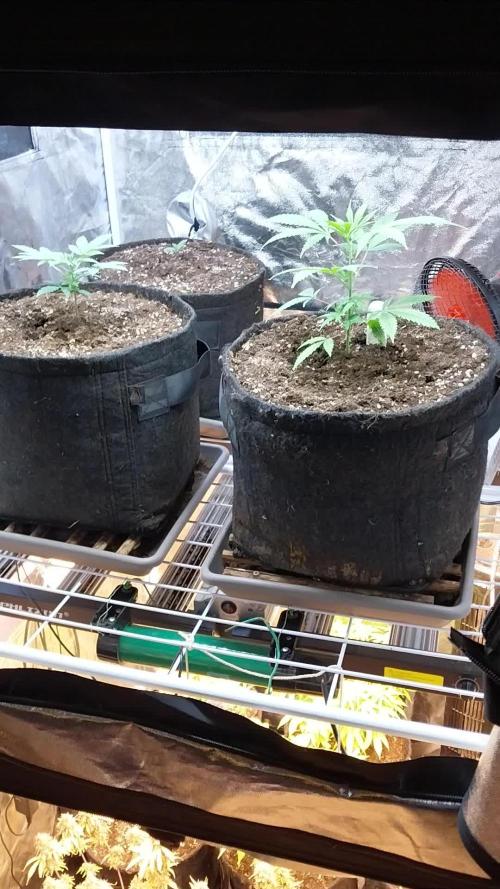
Die Pflanzen entwickeln sich gut. Es wird die nächsten 10 Tage nachts sehr kalt, deshalb wurde heute eine heizmatte zur Sicherheit ins Zelt gehängt und auf 25 C gestellt.
Die zwei Blumat pro Topf sind zu wenig, sie können den Wasserbedarf einer Pflanze nicht decken Halten den Boden aber trotzdem leicht feucht, wenn ich zwei Tage nicht gegossen habe.
Likes
19
Share

@PapaBlob
Follow
02/11 Et voila! L'affaire est faite. Il me manque certainement quelque grammes perdu suite au blocage de l'excès de nutriment mais je suis plutôt content du résultat.

Likes
5
Share


@AustinRon
Follow
TH 1Q2025 - Week 4 - Bolt I
(ON Haze X Original Haze) X Northern Lights #2
“Todd’s Haze”
Objective
- 8 Female Plants, Topped ONCE @ Flip, 12” when topped
- Modified Sea of Green
Seeds Wet: 1139PM, 28.2.2025
Germinated: 2.3.2025
Flip: 21.3.2025
Harvest: 77 Days, DATE: 6.6.2025
_________________________________________
Weeks Summary:
- Photos indicate we’ve been overdriving our plants. Lime - Yellow Green, Stressed lowers. NOT Relaxed.
- Tue - EOW We’ll run moderate light, Low-Moderate Feed (EC: 1.1)
__
Fri Mar 28, 2025
TH 1Q25 8:B:1:1
All plants have lifted, with minor praying at least.

Applied Remaining Gallon of Root Steering solution. TODAY we switch to Rooted Leaf Medium @ 1.3 mS/cm.
At this point the Coco should be WELL BUFFERED with CalMag - Reducing Calcium to normal level, we should be able to run w/ NORMAL Calcium levels, no boots. We’ll see
We need
- more nitrogen evident in the plants
- to get from 351 - 750 µMol/m2/s
- To ramp EC from 1.2 - 1.6
When the girls are receptive . . .
__
Sat Mar 29, 2025
TH 1Q25 9:B:1:2

PRE-CUT Foliar of MOMs (15 Min before taking Cuts): [ 1, pt]
- Cal Mag Fuel: [ 2.5, ml]
- Lush Green: [ 0.625, ml]
- Resin Bloom: [ 2.5, ml]
Wrap Label below Top Node
Top to Node 3, Cut plunged in water
- [x] 8 Cuts, “Todd’s Haze”
- [x] 2 Cuts, Lemon Jeffery
Dip Tray
- Rooting Powder, Aloe Gel
- Top + 2 Nodes
Cuts to Rooting Cubes
- Cut 45° just below 2nd Node
- Gently Abrade cuticle of stem below 2nd Node
- Dip END in
- Rooting Powder
- Beauveria Bassiana
- Fresh Aloe Vera Gel
- Afix IN Prepped Rooting Cube - 1/4” from BOTTOM NOT THROUGH
- Place in Rooting Tray, Cover
“Cut Foliar Solution”
When All cuts in Dome, Foliar (1 pt) w/
- PCAL 1660: [ .25, g]
- KelPak: [ 1, ml]
- CalMag Fuel: [ 1, ml] # Acidification of PCAL 1660
- Photosynthesis Plus: [ .75, ml]
DAILY UNTIL ROOTED -
- [x] Verify Rooting Cubes are adequately hydrated
- [x] Light Foliar with Cut Solution
Take Cuts WHEN All Phenos are WELL into 6 Nodes
- When ALL Cultivars have At Least 6 Nodes:
- Top to 3
- Use Crown as Cut for Labeled Pheno
- [x] Prep Cut Dome
- [x] Pull Seedling Mat (78°F) for use UNDER Cut Dome
- [x] Rooting Prep
- [x] Rooting Powder
- [x] Beauveria Bassiana
- [x] FRESH Aloe Vera Gel
- [x] Root Riot Cubes MOISTENED / NOT WET
Cut Spray Solution
- [x] KelPak: [ 4, ml, gal]
- [x] PCAL1660, [ 2, g, gal]
- [x] Photosynthesis Plus, [ 6, ml, gal]
- [x] Check All Pots for Emergent Roots
Once we’ve roots at EACH pot - Switch to Normal Fertigation . . .
Fertigation: 1 Gal, EC: 1.2-3
- [x] Primer A&B: [ 5, ml]
- [x] CalMag Fuel: [ 2.5, ml]
- [x] Silica Skin: [ 2.5, ml]
- [x] Lush Green: [ 2, ml]
- [x] Root Anchor: [ 2, ml]
- [x] Peak Bloom: [ 2, ml]
- [x] Photosynthesis Plus: [ 6, ml]

__
Sun Mar 30, 2025
TH 1Q25 10:B:1:3
Fertigation: 1 Gal, EC: 1.2-3
- [x] Primer A&B: [ 5, ml]
- [x] CalMag Fuel: [ 2.5, ml]
- [x] Silica Skin: [ 2.5, ml]
- [x] Lush Green: [ 2, ml]
- [x] Root Anchor: [ 2, ml]
- [x] Peak Bloom: [ 2, ml]
- [x] Photosynthesis Plus: [ 6, ml]
- [x] TM-7 (µNutrients): [ 0.5, tsp] # Teabag Style Infusion

__
Mon Mar 31, 2025
TH 1Q25 11:B:1:4
Fertigation: 1 Gal, EC: 1.3
- [x] Primer A&B: [ 5, ml]
- [x] CalMag Fuel: [ 2.5, ml]
- [x] Silica Skin: [ 2.5, ml]
- [x] Lush Green: [ 2, ml]
- [x] Root Anchor: [ 2, ml]
- [x] Peak Bloom: [ 2, ml]
- [x] Photosynthesis Plus: [ 6, ml]
- [x] Quillaja 60 Powder: [scant]
IF Initial appearance at Lights on doesn’t suggest “Relaxed, supple,” we’ll run @ EC: 1.1 Until resolved . . .
__
Tue Apr 1, 2025
TH 1Q25 12:B:1:5
We’re Running Lowered Light. And reducing EC to 1.1 until we’ve plants that seem REALLY HAPPY.
Fertigation: 1 Gal, EC: 1.1
- [x] Primer A&B: [ 5, ml]
- [x] CalMag Fuel: [ 3.0, ml]
- [x] Silica Skin: [ 2, ml]
- [x] Lush Green: [ 2, ml]
- [x] Root Anchor: [ 2, ml]
- [x] Peak Bloom: [ 2, ml]
- [x] Photosynthesis Plus: [ 6, ml]
- [x] TM-7: [ 0.5, g]
- [x] Quillaja 60 Powder: [scant]
- [ ] 
__
Wed Apr 2, 2025
TH 1Q25 13:B:1:6
EC: 1.1
LightIntensity: [ 400, µMol/m2/s]
We only watered 220 / plant, about half of what we’ve been delivering.
Foliar: # 1 pt Spray Bottle @ Lights ON
- [x] Solar Rain: [ 2.5, ml]
- [x] Silica Skin: [ 2.5, ml]
- [x] Photosynthesis Plus: [ 1.5, ml]
- [x] Quillaja 60 Powder: [scant]
__
Thu Apr 3, 2025
TH 1Q25 14:B:1:7
EC: 1.3
LightIntensity: [ 401, µMol/m2/s]. # Staying low, waiting for plants to resolve
Fertigation: 1 Gal, EC: 1.3
- [x] Primer A&B: [ 5, ml]
- [x] CalMag Fuel: [ 2, ml]
- [x] Silica Skin: [ 2, ml]
- [x] Lush Green: [ 2, ml]
- [x] Root Anchor: [ 2, ml]
- [x] Peak Bloom: [ 2, ml]
- [x] Kelpak: [ 4, ml]
- [x] Photosynthesis Plus: [ 6, ml]
- [x] Quillaja 60 Powder: [scant]

Likes
38
Share


@OutForReal
Follow
Monday
It’s beginning of week 4 and they are doing pretty well. The main stems are hard and strong and it’s impossible to bend them at that point.
I am practicing a very light hand LST everyday like I am showing in the video.
Tuesday
Watering for both of them , you can follow the (simple) process in the videos. The plants are doing great except for a little issue on one of them that I will show you tomorrow.
Topping or not ? May be beneficial so I’m about to do it. Fiming maybe ?
Thursday
Topping on video ! Simple method