


Likes
Comments
Share

@GrowBro1981
Follow
Hallo liebe Growfreunde 💞,
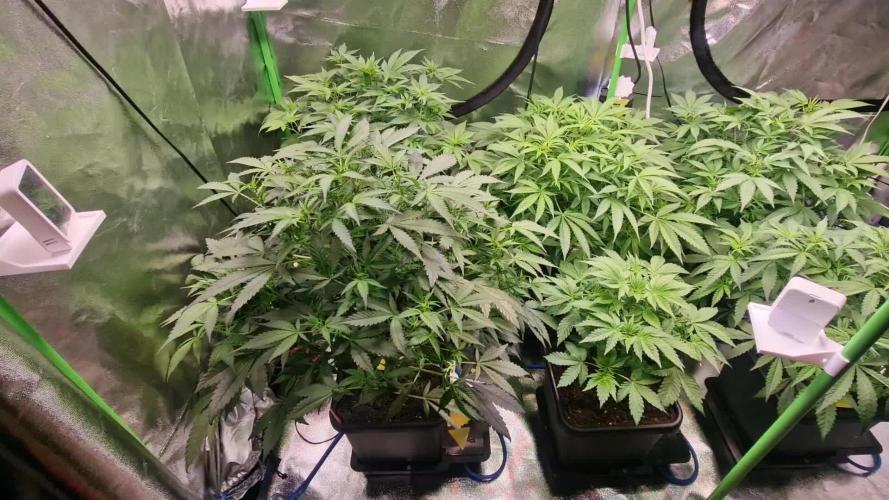
Heute an BT 10 sieht alles super aus soweit, der stretch lässt noch auf sich warten🤔 malbsehen was noch kommt. Bin soweit sehr zufrieden, nur eng wird es langsam im Zelt 😅


Likes
11
Share


@LoccoMotive
Follow
🌿 Woche 6 – Keine besonders gute Woche 👺
🌱 Wachstum & Training
Zweite Blütewoche – und zack!
Gleich zwei vielversprechende Triebe sind ausgefallen. 😭 💀
Den einen habe ich aus Versehen mit der Hand umgerissen (siehe Video). 👉
Der andere – und das ärgert mich noch viel mehr – war der Haupttrieb der dominanteren Guava.
Beim täglichen LST ist er mir abgebrochen. 😰
🔻 Schätzung: Bis zu 10 g Ertragsverlust.
📊 Prognose
Das Blätterdach hat nun zwei sichtbare Macken, aber der Rest entwickelt sich weiterhin solide.
Vor den Verlusten lag meine Schätzung bei ~100 g Ertrag.
Jetzt wird es schwer, die 100 g noch zu knacken. 😕
💧 Blumat 💧
Grade als ich anfing mich an den Blumat richtig zu gewöhnen, fängt er zu spinnen an.
Er fing auf einmal an, viel zu trockene Werde zu liefern. Ganz merkwürdig. 😣
Und ich habe eine Woche lang jeden Workaround gemacht den man machen kann.
Da war ich doch sehr Endtäuscht... Jetzt muss ich wieder mit dem Finger rein. 💩
💡 Licht & Schatten
PPFD wird langsam, Step by Step erhöht. 📈 Aktuell ca. 600 µmol/m²/s.
Je höher die Triebe wachsen, desto mehr Licht bekommen sie ohnehin. ☀️
☀️ Wetter
Die Temperaturen sind und bleiben brutal: 25–31 °C
Die Lady´s schlagen sich tapfer unter diesen Bedingungen.
💧 Gießen
🕒 Alle 2–3 Tage
🚿 Jeweils 2,2 l Wasser
🎶 The Grow must go on! 🌱

Processing
Likes
11
Share


@DesDeGrower
Follow
Pow pow 💥
Welcome in official WEEK 5 OF FLOWER 💐
Every day those buds getting bigger and bigger.
Last 4 days of week 4 girls got only pH’d water with not nutrients.
Today with start of week 5 we are introducing Overdrive into the regime and cutting down Amino Treatment as stems don’t need any more juice
Last photo update of week 5 uploaded so enjoy the view 😍
- cruise mode on. Both girls taking now 4l per day each. EC 2.3
Stay tuned with Week 6 of Flower this Friday!


Likes
38
Share


@Cariboo_OG
Follow
Utopia Haze is a rare heavily sativa dominant hybrid (90% sativa/10% indica) strain created through back crossing Brazilian Sativa strains. This tasty little bud took home 1st Place for Best Sativa in the 2008 High Times’ Cannabis Cup and for good reason – with its potent 18-22% average THC level and long lasting cerebral effects, Utopia Haze is one powerhouse smoke. The Utopia Haze high comes on soon after you finish your first toke, hitting you with a strong cerebral lift that infuses you with a sense of hazy relaxation.
Type: Feminised/Photoperiod
Cultivation: Indoor/Outdoor
Flowering Time (days): 70-75
Indoor Yield (g): Up to 650
Feminised Outdoor Harvest Month: October
Feminised Outdoor Harvest Month Week: 3rd-4th week
Aroma: Citrus, Woody, Pungent, Mint
Effect: Cerebral Lift, Hazy Relaxation, Sleepy
Welcome Everyone to the Final Entry of my Utopia Haze Grow !
There is so much to discuss ! I have been extremely busy as of late trying to get this Harvest together, but i am happy to have it here for you now !
I Seriously under estimated the amount of time, help from others, and my own necessary skills to pull this off.. and i still kind of screwed it up lol !
But its worth noting i have never actually done this before and trying to document it during....was extremely hard.
It is next to impossible to work an iPhone with rubber gloves on !
First I want to discuss everything step by step so before you jump straight into the comments on how the end product is so small in "quantity"
Rest assured i am happy with its"quality"...and thats all that matters to me because Life is a journey not a destination! and i have learned so much from this grow that I couldn't be any happy even if i messed some things up :)
But at the very least I hope you read through this entry in its entirety with an open mind and focus more on the process, rather than just the outcome!
I ran out of Ice & i was only able to wash three times..(normally I've heard you should go sometimes 5-6 washes)
Preparation is Key & things will be much better next round :)
Photos 1-22
These are pretty self explanatory but for those of you just tuning in now.. this is what happens to a very happy plant when you don't have the necessary tools to monitor key components of growing cannabis.. Ph, as well as EC levels play a very key role in the outcome of your grow lol that being said I was just able to save this plant by purchasing both tools but that doesn't mean the plant didn't suffer because of the prior events.. This was a Huge reason behind me choosing to turn this harvest into what i would consider
"Solventless Hash Rosin" from "Ice water extracted Bubble hash".
Pictures 23
The idea here is the process of using "fresh Frozen Cannabis" this has been discussed many a time online on such sites as instagram and here on grow diaries as well.. I personally have Never tried the process so i decided to try it out and make a judgement for myself..
Video 24
The Cannabis has now been in the freezer for 72 hours making it very well frozen.. as you can tell i struggled getting it all into the 25u Screen Wash Bag. One thing of note i would do differently is i will de-stem my next batch as i also believe this played a part in the amount of plant matter that escaped through the sieves.
Photo/Video's 25-28
The idea here is "ice water Seiving" & especially with the bags that I am using here that are only have screen material on the bottom portion of the bag it is very important to have spaces in-between the screens to allow the water to pass directly through the screens into the bottom bucket with the least amount of resistance.. because the hash is so extremely temperature dependant if it gets warm on the side of the bag.. it will stick there and not make it to the bottom to become use able product..
29
You do not need to use as much Ice as i used here lol... the idea is to keep everything very cold..i certainly achieved that but at the sacrifice of using so much that i ended up grinding product and producing "contaminants" but in the end they are just plant matter that i would be smoking when i rolled up my joint either way so.. I'm not super disappointed..
But it should be noted that what you want to achieve here is a Layering effect where you have the wash bag between two small layers of ice while the "water current" washes the Trichomes away allowing them to be separated by the screens setup below :)
Before Starting the machine you should allow some time (i.e.;10-12minutes pre soak to allow the product to become saturated) before the first cycle.
By video 32 I have just ran out of ice lol..
Video 33-34
Here I have a tip for you.. to separate the screens that you sieve through.. cut 5 gallon buckets to stretch them across nice and tight.. it'll make scooping your Bubble that much easier ! i learned this from the many "Frenchy" videos I have watched :)
Picture 35
Here in lays the problem for most people.. drying your hash without loosing vast amounts of "Terpenes" whilst also stay ever vigilant against mold !
Thanks to all those videos I've watched on youtube.. id like to think this was one of my most successful parts of this process..
Things to Note; Terpenes start to seriously evaporate at temperatures 68F or 20C
you need to stay as cold as possible whilst bringing the Relative Humidity in the space down into the 40-30% to stay away from that nasty mold !
I used my cold storage room in the basement.. with a dehumidifier running to keep the space at 45% RH & staying at a constant 15c.
All while spreading the hash as thin as possible across parchment paper, on top of the white screens with a fan moving air across both sides of the paper.
Pictures 36-38
These are some macros i took in the middle of my drying session I fell in love with the colour.
Yes i know the black spots are plant material but they will get caught when i bag the hash & squish the oil out.
Thing to Note; at this stage it is important to ensure you 'micro plane" the hash down as fine as you can whilst staying weary of the temperature... any "chunks" will hold pockets of moisture.. that lead to potential problems..ie; mold ...
Picture/Video 39-41
Successfully planed bubble hash ready to be bagged and Squished !
Picture 42
Ive decided to follow Pedro.. from Pedros Grow Room and double bag to be on the safe side so i don't have any blow outs.
So thats One 25u bag inside one 160u bag ! :)
Pictures 43
This is almost 3 grams of the bubble hash from above, already melting in the bag.. this is where i ran into trouble again lol things started getting to warm in the house and i was only able to get one of the three squish's i did on video :( things started getting sticky.
Picture 44
This is basically just a photo of the equipment I'm using; 3x5 LowTemp Cage in the frame I built myself, with a 20Ton bottle jack.
Something to note here is this is an older Lowtemp model with only a single heating zone which is which i have it closed here heating Both sides of the press :)
As well as the importance of having adequate pressure on your plates.. my rig is very overkill for the size of hash bags..lol
Video 45
Here is the lovely press video.. its didn't quite work the way i wanted either lol my directional folding wasn't quite tight enough for a big "drip" :)
&the Press was set to 65°c
Photo's 46-50 are pretty self explanatory :) I had a blow out.. but still managed to pull an 80% return from the hash once squished...& yes it tasted amazing :)
Was it worth it in the end... that could be debated.. for some..i understand..its not your thing, but for those of us that are interested in making our own concentrates.. free from Solvents...
I wouldn't make it any other way :)
If even ONE of you reading this diary finds it helpful to reference for ANYTHING.....even if its "what not to do" ill consider it a success !
Thanks again for tagging along on this garden adventure.. its been one heck of a journey !
Much Love from B.C. Canada,
Until Next time,
Cariboo

Processing
Likes
2
Share


@Cannatech
Follow
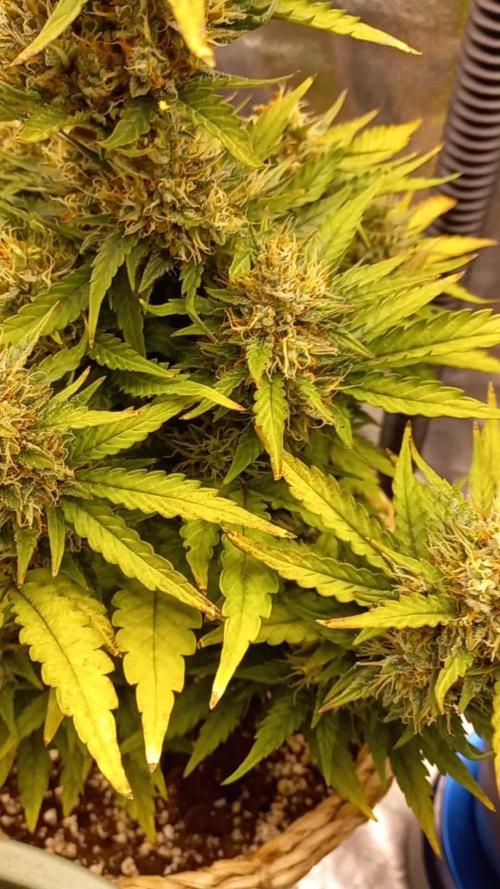
I like to defoliate well just before flower especially lower parts to expose bud sites so light gets trough and some larger top leaves but not too many so I don't shock the plant too much



Likes
67
Share
@Tower84
Follow
Cherry Limeade von Doja – Wochenupdate 🌱
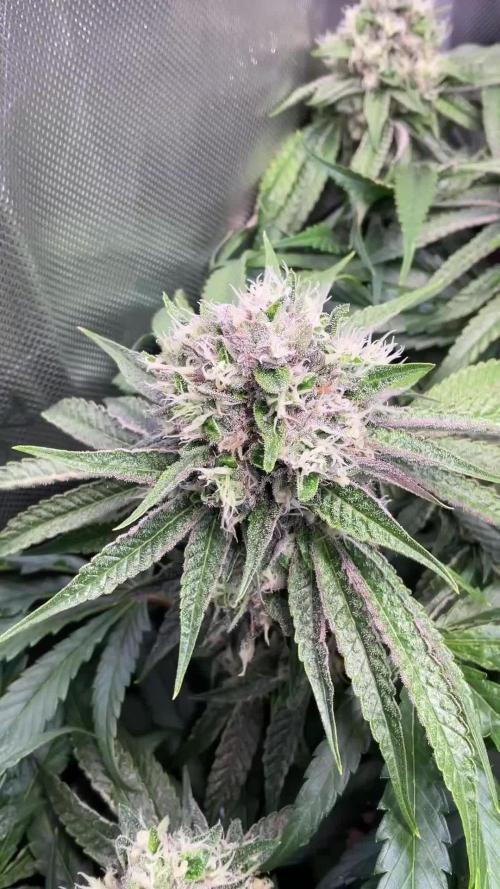
Die Entwicklung der Buds schreitet weiterhin sehr gut voran 🌸. Sie legen sichtbar an Masse zu und insgesamt entwickelt sich die Cherry Limeade genau so, wie ich es mir zu diesem Zeitpunkt der Blüte wünsche.
Auch beim Geruch hat sich wieder einiges getan 👃. Das zuvor sehr spritzige Limettenaroma ist mittlerweile etwas schwächer geworden. Dafür entwickelt sich das Terpenprofil zunehmend in eine angenehme Zitrusrichtung mit etwas Süße und Cremigkeit 🍋🍦. Genau diese Entwicklung gefällt mir sehr gut. Das erhoffte Kirscharoma ist allerdings leider weiterhin überhaupt nicht wahrnehmbar 🍒. Ich hoffe zwar immer noch, dass sich hier gegen Ende der Blüte noch etwas tut, langsam habe ich aber Zweifel, ob die Cherry Limeade tatsächlich noch in diese Richtung geht.
Beim Tensiometer habe ich inzwischen einen weiteren Versuch nach den Angaben des Herstellers durchgeführt. Leider zeigt es auch diesmal nach einigen Tagen wieder deutlich trockenere Werte an, als ich aufgrund des tatsächlichen Zustands des Substrats erwarten würde 🤔.
Ich habe inzwischen allerdings einen Verdacht, woran es liegen könnte. Mein Substrat enthält einen gewissen Kokosanteil, der bei der Herstellung der Suspension stark aufquillt. Wenn ich diese Suspension wie vorgesehen in das Loch einfülle und anschließend die Keramiksonde einsetze, scheint sich das Substrat beim anschließenden Rücktrocknen wieder etwas zusammenzuziehen. Dadurch könnte der direkte Kontakt zwischen Keramiksonde und Substrat schlechter werden und das Tensiometer anschließend zu trockene Werte anzeigen.
Diese Woche werde ich deshalb noch einen letzten Versuch mit einer entsprechenden Anpassung durchführen 🔧. Danach werde ich das Thema für diesen Grow aber auch erst einmal abhaken. Ich kontrolliere den Wasserverbrauch der Pflanze ohnehin relativ regelmäßig und habe dadurch einen zusätzlichen praktischen Anhaltspunkt 💧. Aktuell liegt der Verbrauch bei etwa 1,8 Litern pro Tag, was für die Größe der Pflanze weiterhin sehr plausibel erscheint.
Ab heute erhöhe ich den Ziel-VPD noch einmal leicht von 1,3 auf 1,4 kPa 📈. Ansonsten läuft der Grow inzwischen praktisch vollständig auf Autopilot 🤖. Alle drei bis vier Tage fülle ich den Wassertank wieder auf – viel mehr gibt es momentan nicht zu tun.
Genau so soll es sein: Die Pflanze macht ihr Ding und ich versuche, möglichst wenig daran herumzuschrauben 😎🌱.
📊 Aktuelle Parameter:
💡 Licht: 900 PPFD / DLI 39 (12/12, Stufe 6, 40 cm Abstand)
🌡️ Temperatur: 28 °C
💧 Luftfeuchtigkeit: 61 %
📈 VPD: 1,3 kPa → 1,4 kPa
🌿 CO₂: Ø 740 ppm
💦 Wasserverbrauch: ca. 1,8 l/Tag
Cherry Limeade – Weekly Update 🌱
The buds are continuing to develop very well 🌸. They are visibly putting on more weight, and overall the Cherry Limeade is progressing exactly as I would hope at this stage of flower.
The aroma has also changed quite a bit 👃. The very zesty lime aroma that dominated before has become a little less pronounced. In return, the terpene profile is developing more towards a pleasant citrus aroma with some sweetness and creaminess 🍋🍦. I really like this direction. Unfortunately, there is still absolutely no sign of the cherry aroma I was hoping for 🍒. I’m still hoping it might show up towards the end of flower, but I’m slowly starting to doubt whether this Cherry Limeade will actually develop much cherry character.
I made another attempt with the tensiometer this week, once again following the manufacturer’s instructions. Unfortunately, after a few days it is again showing noticeably drier values than I would expect based on the actual condition of the substrate 🤔.
However, I now have a theory about what might be causing it. My substrate contains some coco, which expands quite strongly when making the suspension. When I fill the suspension into the hole as recommended and then insert the ceramic probe, the substrate seems to shrink slightly again as it dries back. This could result in the ceramic probe losing some of its direct contact with the surrounding substrate, causing the tensiometer to indicate conditions that are actually drier than they really are.
I’ll therefore make one final attempt this week, with a slight adjustment to the installation 🔧. After that, I’ll probably leave the issue alone for the rest of this grow. I regularly monitor the plant’s actual water consumption anyway, which gives me another useful practical reference point 💧. At the moment, the plant is using around 1.8 liters per day, which still seems very realistic for a plant of this size.
Starting today, I’m also increasing the target VPD slightly from 1.3 to 1.4 kPa 📈. Apart from that, the grow is basically running on autopilot 🤖. Every three to four days I refill the water reservoir, and that’s pretty much all there is to do at the moment.
And honestly, that’s exactly how I like it: the plant does its thing and I try not to mess with it too much 😎🌱.
📊 Current parameters:
💡 Light: 900 PPFD / DLI 39 (12/12, Level 6, 40 cm distance)
🌡️ Temperature: 28 °C
💧 Humidity: 61 %
📈 VPD: 1.3 kPa → 1.4 kPa
🌿 CO₂: Avg. 740 ppm
💦 Water consumption: approx. 1.8 L/day
Wenn du möchtest, kann ich den nächsten Wochenkommentar wieder im exakt gleichen Stil fortführen und dabei nur die Veränderungen zur Vorwoche herausarbeiten.

Likes
23
Share


@huyngoquang12
Follow
There are a few problems with limp leaves
I start train her, hope everything will be fine
Likes
5
Share

@TrickzGrowz
Follow
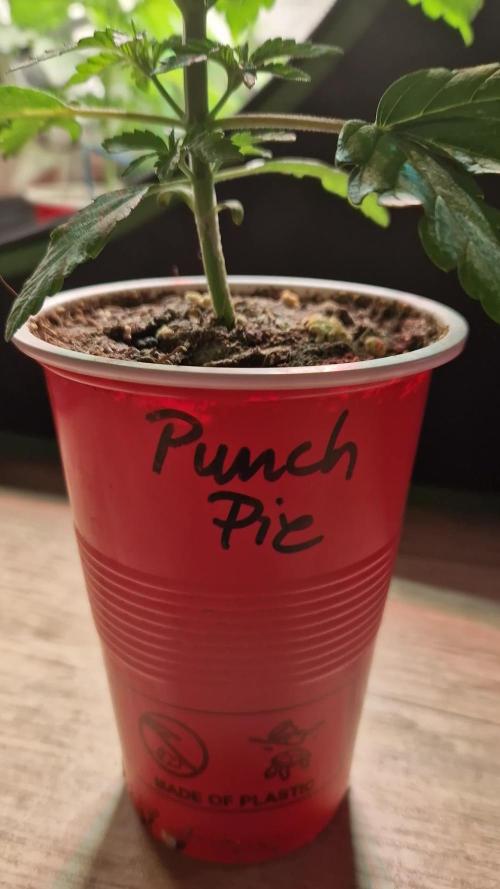
Für die Punch Pie war es nun so weit für das toppen. Über der 2. Nodie wurde getoppt, damit sich 4 schöne Triebe ausbilden können.


Likes
31
Share


@Flauros
Follow
Пережил дефицит Кал-мага и засол почвы почти весь цикл. Справился с этой проблемой, дал не плохой урожай и приятный накур. Реально пахнет конфетами.
Likes
31
Share


@JeyGanesha
Follow
Ultime 2 sett.per la maturazione e a parer mio posso anche tagliare tutt'e due le gorilla 🦍 cookies.....good job fast Buds good job
Likes
Comments
Share

@gonzzzac
Follow
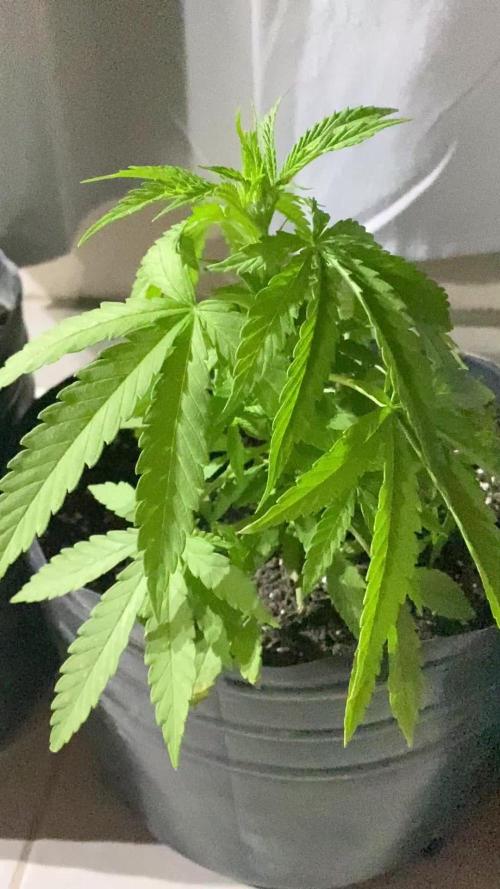
Las seguí entrando a la noche por temperaturas menores a 10 grados, riego solo con agua hasta ahora muy poco enraizante
Likes
3
Share


@PalmaGrow
Follow
No se cómo expresar mi felicidad después de casi 3 años sin poder cultivar consecutivamente he podido cosechar esta belleza gracias a @blacktunaco por la K.O una genética llena de resina con flores compactas. Cometiendo errores desde el principio se pudo obtener una excelente planta corrigiendo todo para así mejorar el aprendizaje continuo. Se dieron 12 días de lavado de raíz y 3 de estos estuvo expuesto a lluvia constante durante los 3 días por tal razón se decidió cosechar para evitar dañar las flores



Processing
Likes
4
Share


@Skillgrower
Follow
A meio da 6° semana, fiz o primeiro lolipop antes da floração, dar uns dias pra curar bem e trocar o ciclo de luz 12/12h, vamos ver como estas meninas se comportam na floração!

Likes
10
Share


@CVK31
Follow
I actually harvested Sunday, Tuesday, and Thursday. First harvest was tallest buds only, they were probably 30% amber. Second harvest was the rest of the upper canopy three days later. Third harvest was the lowest buds.

Likes
Comments
Share


Likes
214
Share


@Rock_n_Roll_Randy
Follow
Can't wait to start all these👍 I've been screaming and yelling at my plants to hurry the f#@& UP!!! 🤣🤣🤣 they
WWW.MARS-HYDRO.COM
PROMO CODE: rocknroll
Instagram: @marshydropenny
https://greenbuzzliquids.com/
#greenbuzzliquids
@GreenBuzzLiquids
Track: Ethan Meixsell - Thor's Hammer [Rock]
Music promoted by BreakingCopyright
Watch: https://youtu.be/o6Gr0xn6U88
Download: https://www.youtube.com/audiolibrary_...
Likes
2
Share


@Rene1968
Follow
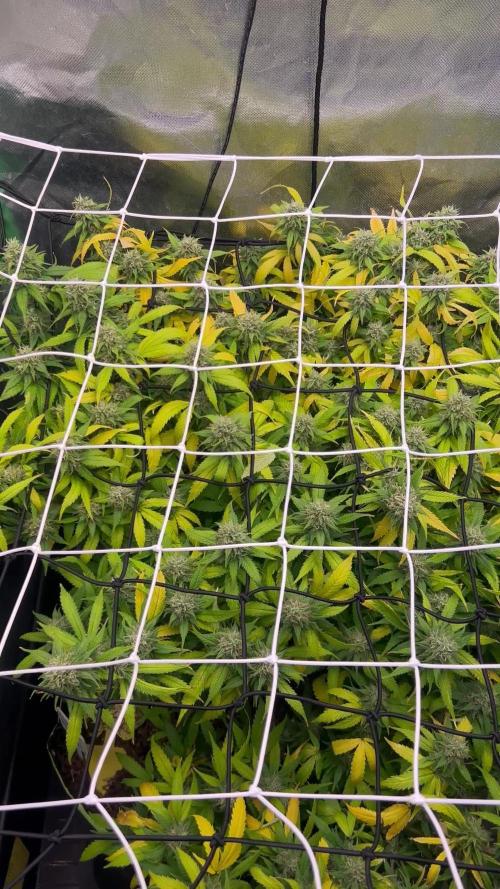
1-5 week 4 of vegeration and the Girls goes very well. Distance between lamp and plants is 60 cm. Ppfd is 840 umol/s.
5-5 a nice screen of Green at the moment
and i think first flowering begins.🙂


