


Likes
Comments
Share


@Master_weeda
Follow
Bonjour à tous les padawans et maîtres jedis
Jour84 arrosage avec 2 litres d'eau ph6.3
Jour86 arrosage avec 2. 5litres d'eau ph6.3
Jour89 arrosage avec 2 litres d'eau ph6.3
LE MEILLEUR MOMENT POUR RINCER SON CANNABIS
Le rinçage commence en général deux semaines avant la récolte. Si le plant a une période de floraison de huit semaines, le rinçage doit commencer six semaines après le début de la période de floraison. Il est préférable de regarder de près les trichomes sur le plant pour déterminer quand votre cannabis est prêt à être récolter. Si les petits trichomes commencent juste à passer d’une couleur transparente à une teinte laiteuse et blanche, c’est une bonne indication que les plants peuvent commencer à être rincés. Il faut s’arranger pour que la majorité des trichomes aient changé vers la couleur désirée pour la récolte après deux semaines – ça devient plus facile à faire avec l’expérience, alors accrochez-vous !
Le rinçage peut également être un bon moyen de remettre à zéro la terre quand un plant est toujours en phase de croissance végétative. Parfois, un cultivateur suralimente par accident son cannabis, ce qui provoque un changement de couleur et un flétrissement du bout des feuilles. Ceci est appelé une « brûlure par nutriments ». Rincer la terre peut éliminer les nutriments excédentaires, ce qui aide à résoudre le problème. Cependant, c’est une mesure drastique à ce stade de la culture, alors assurez-vous que le problème soit bien une brûlure par nutriments et non quelque chose d’autre.
Le rinçage ne concerne pas que le moment de la récolte. Cette technique peut aussi être mise en place durant la phase de croissance afin de débarrasser le sol des nutriments. Bien évidemment, les nutriments permettent à votre plante de rester en bonne santé et vous assurent des rendements maximaux, mais une trop grande quantité peut causer une accumulation et un état statique durant lequel la plante ne peut plus y accéder.
Le blocage des nutriments peut être causé par une accumulation saline ou des niveaux de pH incorrects. Ces deux causes peuvent être résolues par un rinçage de votre plante à l’eau claire. Les fluides viendront pousser les nutriments en dehors du substrat et le débarrasseront de l’accumulation, permettant ainsi aux racines de pouvoir accéder à nouveau aux nutriments.
EMPÊCHER LE BLOCAGE D'ABSORPTION DES NUTRIMENTS AVANT QU’IL NE POSE PROBLÈME
Au mieux, le blocage des nutriments peut être un problème, au pire, il peut être un vrai désastre. Comme le dit l’adage, il vaut mieux prévenir que guérir. Il vaut mieux prendre de l’avant pour empêcher le blocage des nutriments plutôt que de s’y atteler lorsque c’est trop tard.
Empêcher le blocage des nutriments peut se faire par le biais d’un rinçage de routine. En rinçant vos plantes une fois avant la floraison et une fois au milieu de cette dernière, vous minimiserez l’accumulation de nutriments.
LES ENZYMES À LA RESCOUSSE
Après le rinçage pour contrer l’accumulation ou le blocage des nutriments, vous remarquerez peut-être que vos plantes ont une apparence vert foncé, c’est le signe d’un excès de nutriments. Dans ce cas, certains cultivateurs choisissent d’ajouter une formule riche en enzymes à leur substrat.
Au cas où vous auriez oublié vos cours de biologie, les enzymes sont des protéines qui catalysent les réactions. Elles aident à rincer le substrat en décomposant l’amidon, les glucides et les nutriments. Il existe sur le marché toute une variété de produits qui contiennent des formules d’enzymes très efficaces.
Si l’eau ne suffit pas à vos plantes, ces petites protéines ne feront qu’une bouchée de l’accumulation de nutriments !
COMMENT BIEN RINCER SON CANNABIS
Rincer votre plant de cannabis est un processus simple. À chaque fois que vous apporteriez normalement des nutriments, vous rincez à la place. De l’eau du robinet non traitée est tout ce dont vous avez besoin pour rincer, assurez-vous juste que son pH est sans danger pour le cannabis. La plupart de l’eau de puits a un pH sain et ne nécessite pas de traitement, mais s’il est nécessaire de traiter l’eau de rinçage pour avoir un pH adapté, faites-le. Les ajustements du pH seront donc la seule chose à considérer.
Inonder la terre avec autant d’eau fraîche qu’elle puisse contenir. Laissez l’eau durant quelques minutes pour qu’elle puisse absorber les nutriments, puis inondez la terre encore pour rincer les nutriments loin du plant. Si vous cultivez en intérieur dans des pots, notez la couleur de l’eau qui s’échappe du fond des pots. Elle sera tâchée et aura une couleur sale. C’est à cette étape qu’un appareil de mesure des TDS (Total des Solides Dissous) est utile. Si vous récupérez et mesurez le TDS de l’eau « évacuée », elle devrait avoir un taux de 1300ppm, ce qui est assez élevé. Il est important de rincer le plant jusqu’à ce que total baisse à un niveau de 50ppm, ou du moins qu’il s’approche du TDS de l’eau fraîche que vous utilisez pour rincer le plant. La couleur de l’eau d’évacuation va s’éclaircir et apparaîtra plus propre. Vous devez tirer autant que possible de minéraux dissous du plant.
Comment et Quand Rincer les Plants de Cannabis
Rincer les plants de cannabis avant la récolte peut faire la différence entre les meilleurs têtes ou la plus rude pour la gorge. Cette petite tâche est simple et facile à faire. Ajoutez juste de l’eau ! Attention car le moment du rinçage joue un rôle critique.
Le b.a.-ba du rinçage de ses plants de cannabis.
Sommaire:
1. Qu’est-ce que le rinçage ?
2. Le meilleur moment pour rincer son cannabis
3. Empêcher le blocage d'absorption des nutriments avant qu’il ne pose problème
4. Les enzymes à la rescousse
5. Comment bien rincer son cannabis
6. Comment rincer ses plantes en hydroponie
7. Les résultats du rinçage de son cannabis
8. Quand éviter de rincer son cannabis
Vous avez enfin fini vos cultures et vous vous retrouvez avec un magnifique plant couvert de super têtes, maintenant sèches, vous avez fait le curing et vous êtes prêt à fumer – et pourtant quelque chose ne va pas. La weed semble ne pas vouloir se consumer et quand vous tirez une bouffée, c’est comme si on vous avait donné un coup de poing dans les poumons et vous toussez en craignant pour votre vie ! Le goût est rude et décevant. Si c’est une situation que vous avez vécue, il y a des chances pour que vos plants n’aient pas été rincés correctement avant la récolte.
Cette fumée bien loin d’être agréable est provoquée par la présence dans le plant des nutriments et minéraux utilisés lors de la culture, ce qui altère la façon dont le plant se consume. Rincer le plant élimine ces nutriments restants, ce qui améliore la qualité des sensations. Heureusement, le rinçage des plants de cannabis se fait facilement et sans effort, et cela vous permet de produire des têtes douces et délicieuses en un rien de temps.
ARTICLE LIÉ
Comment Utiliser les Nutriments pour Cannabis
QU’EST-CE QUE LE RINÇAGE ?
L’acte de rincer un plant implique d’utiliser de l’eau pour éliminer tout nutriment présent dans la terre. Une grande quantité d’eau est passée à travers la terre et drainée sur une base régulière. Tous les minéraux et nutriments présents dans la terre sont rincés avec le temps avec l’eau, ce qui laisse une terre propre.
Mais pourquoi vouloir éliminer tous les minéraux de la terre ? N’est-ce pas mauvais pour la récolte ? En fait, cela aide à la récolte de manière significative. Quand les nutriments sont éliminés de la terre, ceci force le plant de cannabis à utiliser tous les nutriments toujours présents dans le plant. C’est comme pour le corps humain. Quand on consomme beaucoup d’aliments, ce que nous n’utilisons pas est transformé en graisses. Dans les situations extrêmes où la nourriture est rare, le corps s’appuie sur cette graisse stockée pour tirer de l’énergie.
Comme rincer force le cannabis à utiliser tous les nutriments restants dans le plant, aucun ne devrait rester et altérer les têtes récoltées. Cependant, si vous le faites trop tôt, cela peut nuire à la santé du plant, le moment est donc clé.
LE MEILLEUR MOMENT POUR RINCER SON CANNABIS
Le rinçage commence en général deux semaines avant la récolte. Si le plant a une période de floraison de huit semaines, le rinçage doit commencer six semaines après le début de la période de floraison. Il est préférable de regarder de près les trichomes sur le plant pour déterminer quand votre cannabis est prêt à être récolter. Si les petits trichomes commencent juste à passer d’une couleur transparente à une teinte laiteuse et blanche, c’est une bonne indication que les plants peuvent commencer à être rincés. Il faut s’arranger pour que la majorité des trichomes aient changé vers la couleur désirée pour la récolte après deux semaines – ça devient plus facile à faire avec l’expérience, alors accrochez-vous !
Le rinçage peut également être un bon moyen de remettre à zéro la terre quand un plant est toujours en phase de croissance végétative. Parfois, un cultivateur suralimente par accident son cannabis, ce qui provoque un changement de couleur et un flétrissement du bout des feuilles. Ceci est appelé une « brûlure par nutriments ». Rincer la terre peut éliminer les nutriments excédentaires, ce qui aide à résoudre le problème. Cependant, c’est une mesure drastique à ce stade de la culture, alors assurez-vous que le problème soit bien une brûlure par nutriments et non quelque chose d’autre.
Flushing
Le rinçage ne concerne pas que le moment de la récolte. Cette technique peut aussi être mise en place durant la phase de croissance afin de débarrasser le sol des nutriments. Bien évidemment, les nutriments permettent à votre plante de rester en bonne santé et vous assurent des rendements maximaux, mais une trop grande quantité peut causer une accumulation et un état statique durant lequel la plante ne peut plus y accéder.
Le blocage des nutriments peut être causé par une accumulation saline ou des niveaux de pH incorrects. Ces deux causes peuvent être résolues par un rinçage de votre plante à l’eau claire. Les fluides viendront pousser les nutriments en dehors du substrat et le débarrasseront de l’accumulation, permettant ainsi aux racines de pouvoir accéder à nouveau aux nutriments.
EMPÊCHER LE BLOCAGE D'ABSORPTION DES NUTRIMENTS AVANT QU’IL NE POSE PROBLÈME
Au mieux, le blocage des nutriments peut être un problème, au pire, il peut être un vrai désastre. Comme le dit l’adage, il vaut mieux prévenir que guérir. Il vaut mieux prendre de l’avant pour empêcher le blocage des nutriments plutôt que de s’y atteler lorsque c’est trop tard.
Empêcher le blocage des nutriments peut se faire par le biais d’un rinçage de routine. En rinçant vos plantes une fois avant la floraison et une fois au milieu de cette dernière, vous minimiserez l’accumulation de nutriments.
LES ENZYMES À LA RESCOUSSE
Après le rinçage pour contrer l’accumulation ou le blocage des nutriments, vous remarquerez peut-être que vos plantes ont une apparence vert foncé, c’est le signe d’un excès de nutriments. Dans ce cas, certains cultivateurs choisissent d’ajouter une formule riche en enzymes à leur substrat.
Au cas où vous auriez oublié vos cours de biologie, les enzymes sont des protéines qui catalysent les réactions. Elles aident à rincer le substrat en décomposant l’amidon, les glucides et les nutriments. Il existe sur le marché toute une variété de produits qui contiennent des formules d’enzymes très efficaces.
Si l’eau ne suffit pas à vos plantes, ces petites protéines ne feront qu’une bouchée de l’accumulation de nutriments !
Comment et Quand Rincer les Plants de Cannabis
COMMENT BIEN RINCER SON CANNABIS
Rincer votre plant de cannabis est un processus simple. À chaque fois que vous apporteriez normalement des nutriments, vous rincez à la place. De l’eau du robinet non traitée est tout ce dont vous avez besoin pour rincer, assurez-vous juste que son pH est sans danger pour le cannabis. La plupart de l’eau de puits a un pH sain et ne nécessite pas de traitement, mais s’il est nécessaire de traiter l’eau de rinçage pour avoir un pH adapté, faites-le. Les ajustements du pH seront donc la seule chose à considérer.
Inonder la terre avec autant d’eau fraîche qu’elle puisse contenir. Laissez l’eau durant quelques minutes pour qu’elle puisse absorber les nutriments, puis inondez la terre encore pour rincer les nutriments loin du plant. Si vous cultivez en intérieur dans des pots, notez la couleur de l’eau qui s’échappe du fond des pots. Elle sera tâchée et aura une couleur sale. C’est à cette étape qu’un appareil de mesure des TDS (Total des Solides Dissous) est utile. Si vous récupérez et mesurez le TDS de l’eau « évacuée », elle devrait avoir un taux de 1300ppm, ce qui est assez élevé. Il est important de rincer le plant jusqu’à ce que total baisse à un niveau de 50ppm, ou du moins qu’il s’approche du TDS de l’eau fraîche que vous utilisez pour rincer le plant. La couleur de l’eau d’évacuation va s’éclaircir et apparaîtra plus propre. Vous devez tirer autant que possible de minéraux dissous du plant.
COMMENT RINCER SES PLANTES EN HYDROPONIE
Le rinçage des plantes en hydroponie est bien plus simple que de se débarrasser des nutriments en terre. Les cultivateurs en hydroponie pourront simplement drainer leur système et le remplacer par une eau au pH neutre.
Le rinçage des plantes en hydroponie est aussi un processus bien plus court. Une fois que la réserve d’eau aura été modifiée, les plantes en hydro n’auront pas accès aux nutriments externes. Pour cette raison, un rinçage de deux jours suffira.
LES RÉSULTATS DU RINÇAGE DE SON CANNABIS
Après la récolte des têtes, prenez du temps pour bien faire le curing pour atteindre le potentiel le plus élevé. Un affinage correct par curing permet de réduire encore plus le côté rude des têtes, en éliminant des choses comme un excès de chlorophylle. Vous serez étonné de voir la différence que ce petite effort peut avoir sur votre produit. Tout votre travail se sentira dans la première bouffée de cette weed douce comme de la soie, qui caresse la gorge comme du miel. Le plus doux de la nature. Vous pouvez donc améliorer la qualité de votre cannabis en ajoutant juste de l’eau !
QUAND ÉVITER DE RINCER SES PLANTES
Le seul moment où nous recommandons d’éviter le rinçage de son cannabis est lorsque l’on travaille avec une terre biologique amendée ou un super soil. Ces substrats ont été développés avec précaution afin d’héberger des micro-organismes bienfaisants tels que des bactéries ou des champignons. Cette délicate biodiversité pourrait être éliminée et endommagée par le rinçage.
Une fois de plus, l’absence de rinçage ne devrait pas poser de soucis, car aucun nutriment externe ou synthétique n’aura été ajouté au substrat. À la place, les plantes comptent sur les micro-organismes pour décomposer la matière organique et la livrer aux racines.
May the force be with you 💪

Likes
28
Share


@Susquihanna
Follow
This week has been sunny, hot and wet. I have not done a thing except to keep an eye on Miss Gorilla Cookies. It has been a hot and rainy week and I did not feed this plant this week. That is why I did not record Ph levels and PPM, etc this week. I have really wanted to give this diary an honest, straight up review of Gorilla Cookies growing in whatever Mother Nature threw her way. She is tall and thin but has a lot of bud growth. I am eager to see how big her buds will get.
One thing that I have not been super pleased with is using Miracle Grow as a nutrient. This outside grow was an experiment using Miracle and not my typical Fox Farm nutrients. At this point in my grow, Miracle Grow needs to remain for garden vegetables and flowers NOT cannibas.
As a result, I have made an Executive Decision and will going add some @Advance Nutrients Jungle Juice for the remainder this grow.
@Hindugod and I have been growing our Gorilla Cookie plants simultaneously and his plants look thicker than mine do. His weather has not been as hard on his plants as I have had here in Virginia. He is also using different nutrients. It is fun watching these 2 Gorilla cookies grow differently and the same:)
Stay tuned to next week and comments are always welcome. Thanks for visiting--susquihanna

Likes
60
Share


@SooSan
Follow
12/12 + 116 jours
Vu qu’il y a 16 plantes mais que sur growdiaries on ne peut mettre que 8 variétés j'ai divisé en 2 diaries pour le bas de la tente
1️⃣
🏠 90x60x90
☀️ FC-E 4800 => puissance a 75%
🍁
Black Bomb / Philosopher Seed
Amnesia Lemon / PEV Seeds
Amnesia Lemon /PEV Seeds
Blueberry / PEV Seeds
Blueberry / 00 Seeds
Wappa / Paradise Seed = 11g
Dark Phoenix / Green House Seed
Quick Sherbet / Exotic Seeds = 14,5
Mango Cream / Exotic Seeds
Banana Frosting / Sensi Seed = 11g
Hindu Kush / Sensi Seed
Mix 1 / Sweet Seed
Mix 2 / Sweet Seed = 15g
Mix 3 / Sweet Seed
Mix 4 / Sweet Seed
📎 https://growdiaries.com/diaries/122084-grow-journal-by-soosan
📎https://growdiaries.com/diaries/124052-grow-journal-by-soosan
2️⃣
🏠 30x60x50
☀️TS1000 => 100w = 54g
🍁
Quick Sherbet - Exotic Seed = 12g
Quick Sherbet - Exotic Seed = 12g
Quick Sherbet - Exotic Seed = 17,5g
Quick Sherbet - Exotic Seed = 12,5g
📎 https://growdiaries.com/diaries/122080-grow-journal-by-soosan


Likes
3
Share


@Krautbauern
Follow
Ladies need a lot of water, every other day they are drinking 1,2l+nutrients
Lollipopping + Scrog done at day 18 now they will hopefully get another boost

Likes
72
Share


@Natrona
Follow
Week 11 July 16-22 hello friends and followers, welcome to week 11.
I started seeing trichomes last week on Gaia and Circe. I don't smell anything from them. Only cream caramel gives off any fragrance. After flushing for 3 weeks, I've reintroduced fertilizer. I am using 1/3 to 1/4 the recommended dosage. How do I know what is the correct range for ec and whether I've unlocked the nutritional bind.?
7/16 flushed each with 1 gallon of water.
7/17 flushed each with 1 gal
7/18 fertilized at reduced strength each got 3.5 liters. Tps1 15ml, cal mag 1 top, big bloom 6 tbsp, signal 2.5 ml. Pictures and video.
7/19 no water, tent cleaning day, vacuum, wipe up dried spills. Took the girls outside for a few hours.
7/20 reduced fertilizer in 2 gals Tps1 7.5 ml, signal 1.25ml. Each girl got only 2 liters today. There was very little run off only Gaia with EC .80, ppm 570. Their tent mate cream caramel is very sticky and fragrant.
This week has been very busy. I packed up more geneology albums and shipped to my sister. I found my some of grandmother's award winning photographs and awards, certificates and brass plaques. Until WWII women did not work outside the home. If they did, they were teachers, nurses or secretaries.
During the early 1920-40 she raised her son as a single mother and found work during the depression as an executive secretary.
Her family men were bankers and merchants so she had awareness of business practices. During her employ, she won an award of $2 for a human resource suggestion on the proper attire for women in the offices and women on the manufacturing lines.
She continued working until the 50s. Her family always had cameras . That's how i have so many pictures from 1900. But she immersed herself in photography once she retired.. So when my Dad was in post WWII Japan, he bought her a state of the art camera. I came across so many self photos. She was the queen of selfies. Interesting to see the fashions over the years. Let me know if you would like to see some fashion pics.
7/21 made cookies. See week 1 Natronas recipes. The almond flour cookie is the basic recipe for cookies. The r3cipe calls for chocolate chips but It is versatile in that you can add nuts, dried fruit, caramels etc. If you want to taste my cookies the way I make them, you have to chop Lindt 78% dark chocolate bars and use that instead of chips which are sweeter.This time I added macadamia nuts as well. Yummy.
7/22 light defoiliation , and no water or nutrients.

Likes
23
Share


@adam_pawloski87
Follow
Today is day 71 for these ladies and they are doing just amazing! Stacking up densely with a Very sweet smell , I still get hints of vanilla ! Not to much longer to go these girls few more weeks an they should be done! Stay tuned for next week ! ✌️


Likes
2
Share


@Alepower
Follow
Iniziamo ad abbassare temperatura nella stanza. Distanziato tutte le cime e legate per un ottima circolazione e prevenzione muffe.

Likes
10
Share


@asstonmartian
Follow
We enter the second full week of flower. I went and got some nutes to start adding in sparingly to the watering sessions. Mild mix from Foxfarms of their Tiger Bloom formula. I didn't catch that the large plant's leaves were curling pretty tellingly so I didn't realize I was about to overload the nutes for that plant when I should have been flushing for a week. I had supercropped this large plant as it was 6" taller than the others but it bounced back so quickly. Five colas snapped and turned 90 degrees, bounced back in a day or two. It did allow the others to catch up a bit.
I find that the one potential male I removed was 100 a male as it now had well developed pollen sacs. I had this plant outside alonside the other two potential herm/males. I put the two questionable ones on the roof and chopped the male down.
Likes
2
Share

@Daris_Growmance
Follow
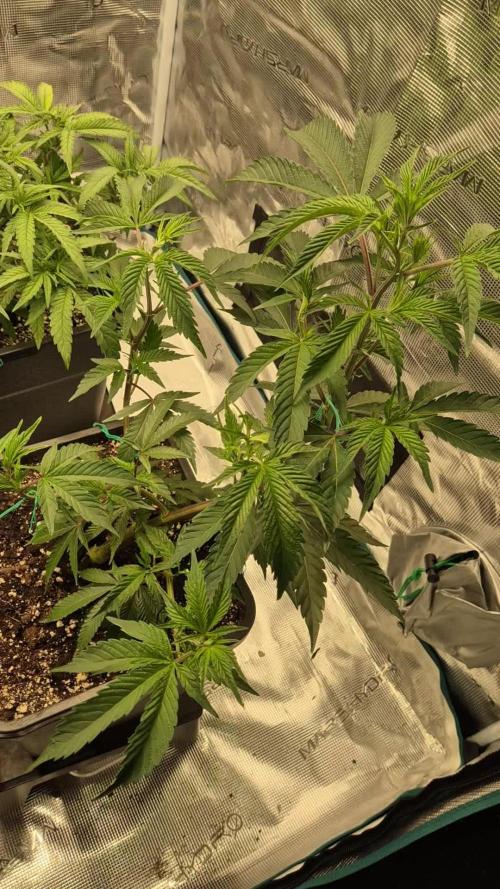
🌸 Blütetag 1 – Umstellung auf 12/12
Gestern haben wir offiziell die Blüte eingeleitet und auf 12/12 umgestellt.
Damit startet jetzt die Stretch-Phase und die Pflanzen gehen langsam in den Blütemodus über.
Heute Morgen wurde gegossen und dabei gab es eine Übergangs-Düngung mit Crazy Hills Nutrients, damit die Pflanzen den Wechsel möglichst stressfrei schaffen.
Verwendete Nährstoffe (Crazy Hills):
Upthrive (Grow Fertilizer) – weiterhin leicht mitgegeben für den Übergang
Prosper (Bloom Fertilizer) – als Start in die Blütephase
Spark (Flowering Stimulant) – zur Unterstützung der frühen Blütenbildung
Elix (All-in-One Booster) – als zusätzlicher Support im Mix
Zusätzlich wurden heute einige Blätter entlaubt (Defoliation), um die Luftzirkulation zu verbessern und mehr Licht an die unteren Triebe zu bringen. Ziel ist es, die Pflanzen jetzt sauber und offen in die Stretch-Phase zu schicken.
Die Pflanzen zeigen noch leichte Anzeichen vom Training und der Umstellung, was direkt nach dem Flip normal ist. Jetzt geht es vor allem darum, die Bedingungen stabil zu halten und sie in Ruhe in die Blüte starten zu lassen.
Training / Setup
LST bleibt aktiv, damit das Canopy möglichst gleichmäßig ist.
Die beiden hinteren Pflanzen (Roswell Code) wurden gezielt geöffnet und verteilt, damit mehr Licht ins Innere kommt.
Ziel ist ein flaches, gleichmäßiges Dach für die Stretch-Phase.
Da ich übers Wochenende unterwegs bin, wurde die Blüte bewusst jetzt eingeleitet, damit alles stabil läuft, während ich weg bin.
Jetzt heißt es beobachten, ruhig bleiben und den Stretch arbeiten lassen 🌱
🌸 Flowering Day 1 – Flip to 12/12
Yesterday we officially switched to 12/12, starting the flowering phase.
The plants are now entering the stretch period and slowly transitioning into bloom mode.
This morning they received a full watering with a transition feed using Crazy Hills Nutrients to help them move smoothly into flowering.
Nutrients used (Crazy Hills):
Upthrive (Grow Fertilizer) – still included lightly for the transition phase
Prosper (Bloom Fertilizer) – introduced to start flowering nutrition
Spark (Flowering Stimulant) – added to support early flower development
Elix (All-in-One Booster) – extra support within the mix
Today I also did some defoliation, removing selected fan leaves to improve airflow and allow more light to reach lower growth. The goal is to send them into stretch with a cleaner, more open structure.
The plants still show slight stress from training and the recent flip, which is totally normal at this stage. The main goal now is to keep conditions stable and let them settle into flower.
Training / Setup
LST remains in place to maintain an even canopy.
The two plants in the back (Roswell Code) were opened up and spread out for better light penetration.
Goal is a flat, even canopy going into stretch.
I decided to flip now because I’ll be away over the weekend, so this timing keeps everything stable while I’m gone.
Now it’s time to watch the stretch and let them do their thing.🍀

Likes
18
Share

@GoodTimesOrganics
Follow
Welcome Back!💚
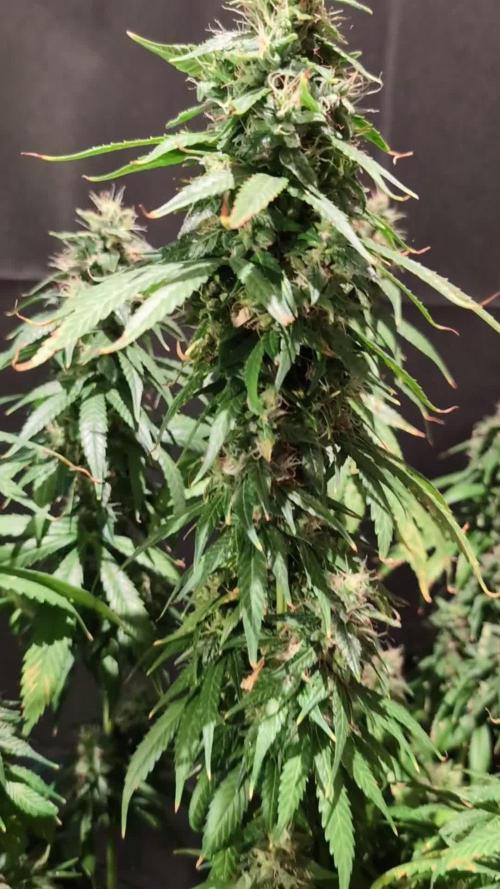
Nach der achten Blütewoche bildet die Pflanze weiter Blütenkelche aus und auch trichome werden immer mehr ersichtlich.
Daher war es Mal Zeit diese unter die Lupe zu nehmen.
Sie sind fast alle noch Durchsichtig, daher haut das mit der 11 Wöchigen Blütezeit vermutlich gut hin.
Die Pflanze entwickelt einen eher würzigen und vin Kräuternoten geprägten Geruch.
Die Pflanze ist von der Beschreibung her nicht darauf getrimmt viele Trichome auszubilden, da dass Hauptaugenmerk ja auf die THCV Produktion gelegt wurde.
Die Umgebungsgegebenheiten sind trocken und warm
—————
🌞 Temp: 27°C
🌚 Temp: 18°C bis 19°C
💨 RH: 56%
VPD: 1,42 kPa
😎 PPFd: 830 mqm
—————
Viele Grüße 👋

Likes
17
Share


@Gordy
Follow
Beginning of week 10(Bloom):
Not much to mention this week. The fade is starting to show more.
Really looking forward to harvesting this. Doing my research now on what I need to do for a successful harvest.
Added in a family photo😀

Likes
22
Share


@Rabidreject
Follow
Update - 4th July 2021
Just still flushing away. The colours that are coming out are crazy. I have edited some pics but not videos and the videos dont really pick up the colour. Its strange that it started completely green and then went darker and darker until it reached purple buds covered in trichomes.
I am planning on harvesting both this plant and the purple punch today or tomorrow depending on when i can be bothered lol
Tbh, its not hard because i dry trim so it's just a case of plucking off the fan leaves and hanging it in different branches.
Likes
12
Share


@TrueNorth
Follow
okay guys this is insane.....232 grams wet... with a final dry weight of 17 grams..... im devastated.... although they are dense buds with such wonderful colour and smell, the yield and time was not worth it.... i gave it same treatment as the other ladies in the tent and they all BY FAR exceeded this.
STRAWBERRY NUGGETS has a great berry flavour and honestly you can taste it a bit when you exhale and keep in mind this is not cured fully yet. every day it smells better and better.
i am super disappointed with the yield, i was really excited for this considering it was my first prize ever! i do love the smoke but i will for sure never grow this again i was super disappointed......
there was 32 grams of HUGE stems lol
after trimming i had 73.6 grams wet. total dry was 17 grams...... not even an ounce folks.....
i will be making bubble hash, rosin and edibles with this! STAY TUNED!!!!!!!
LOVE YOU ALL THANK YOU FOR LOOKING

Likes
283
Share


@love_2_grow
Follow
D14 - The new #1 is looking way better than her predecessor, although she still has her seed helmet on. I've tried oh so carefully to remove it but no luck so far, and I'm afraid of using excessive force, so for now, it stays on.
#2 is just trucking along, doing her thing. She is now 11 cm tall and 10 cm wide. I also removed her support as she is strong enough without it.
I also cut back the cover crop as it was getting a bit wild and partly overshadowed the girls.
Since starting the grow, I have yet to water the girls properly, but they did get a little bit a couple of days ago when I had some extra after watering nematodes (against fungus gnats) to our regular houseplants. Better to be proactive than reactive ;)
D15 - Today, #1 popped out of her seed. Well, mostly as it is still stuck on one of the cotyledons.
It's been over two weeks without proper watering, so the girls are getting a bit thirsty. The blumat digitals show around 115-120 mbar.
I started a simple compost tea consisting of worm casting, rock dust, algal limestone, bentonite, biochar, and molasses. I'll leave it brewing overnight, and then it's watering/feeding time tomorrow.
D17 - Not much to report as the girls are simply doing their thing. Yesterday, I gave each around 2 liters of the compost tea I started a couple of days ago. As always, I completely forgot to check the pH of the tea. I have no idea why I keep forgetting that with my teas when I have no problem checking the pH when I use plain water. Oh well. Not the end of the world but something I need to keep in mind for the next tea in a couple of weeks.
D20 - The last day in week two of veg. Nothing to report, really. The girls are getting bigger day by day, and both are looking healthy and well. The second girl already has purple leaf stems which I don't think is stress since she looks lush and vibrant otherwise. I guess it is her genes as this strain can turn purple. I have never grown any purple cannabis, so my fingers are crossed!

Likes
5
Share

@AustinRon
Follow
TH 1Q2025 - Week 5 - Bolt 2
(ON Haze X Original Haze) X Northern Lights #2
“Todd’s Haze”
Objective
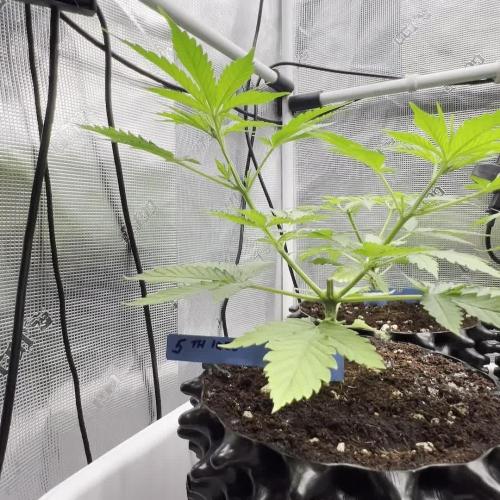
- 8 Female Plants, Topped ONCE @ Flip, 12” when topped
- Modified Sea of Green
Seeds Wet: 1139PM, 28.2.2025
Germinated: 2.3.2025
Flip: 21.3.2025
Harvest: 77 Days, DATE: 6.6.2025
Weeks Summary
- Continuing slow increase of EC & PPFD - Achieved EC: 1.8
- Allowing natural PPFD Increase (STRETCH), and providing modicum of intensity increase.
_________________________________________
__
Fri Apr 4, 2025
TH 1Q25 15:B:2:1
Light Intensity: [ 400, µMol/m2/s]
EC: [ 1.1, mS/cm]
Foliar: # 1 pt Spray Bottle @ Lights ON
- [x] CalMag Fuel: [ 2.5, ml]
- [x] Lush Green: [ 0.67, ml]
- [x] Kelpak (Auxins): [ 1, ml]
- [x] Photosynthesis Plus: [ 1.5, ml]
- [x] Quillaja 60 Powder: [scant]
- [x] Fertigation: 5:2:2:2:2:2:0
__
Sat Apr 5, 2025
TH 1Q25 16:B:2:2
EC: 1.3
- [x] EC: 1.3
- [x] Fertigation: [5.8:5.8:2.3:2.3:2.3:2.3:2.3] # [Primer A:Primer B:CalMag Fuel:Silica Skin:Lush Green:Root Anchor:Peak Bloom]
__
Sun Apr 6, 2025
TH 1Q25 17:B:2:3
- [x] EC: 1.4
Foliar: # 1 pt Spray Bottle @ Lights ON
- [x] CalMag Fuel: [ 2.5, ml]
- [x] Lush Green: [ 0.67, ml]
- [x] Kelpak (Auxins): [ 1, ml]
- [x] Photosynthesis Plus: [ 1.5, ml]
- [x] Quillaja 60 Powder: [scant]
- [x] Fertigation: [6.3:6.3:2.5:2.5:2.5:2.5:2.5] # [Primer A:Primer B:CalMag Fuel:Silica Skin:Lush Green:Root Anchor:Peak Bloom]

__
Mon Apr 7, 2025
TH 1Q25 18:B:2:4
EC: 1.5
Raised Dimmer to 77%
LightIntensity: [ 517, µMol/m2/s]
- [x] Fertigation: [6.3:6.3:2.5:2.5:2.5:2.5:2.5] # [Primer A:Primer B:CalMag Fuel:Silica Skin:Lush Green:Root Anchor:Peak Bloom]
__
Tue Apr 8, 2025
TH 1Q25 19:B:2:5
EC: 1.6
LightIntensity: [ 517, µMol/m2/s]
Foliar: # 1 pt Spray Bottle @ Lights ON
- [x] CalMag Fuel: [ 2.5, ml]
- [x] Lush Green: [ 0.67, ml]
- [x] Silica Skin: [ 2, ml]
- [x] Fertigation: [7.1:7.1:3.5:3.5:2.8:2.8:2.8] # [Primer A:Primer B:CalMag Fuel:Silica Skin:Lush Green:Root Anchor:Peak Bloom]
- [x] Terps Plus: [ 0.2, ml]
- [x] Photosynthesis Plus: [ 6, ml]
__
Wed Apr 9, 2025
TH 1Q25 20:B:2:6
Looking Relaxed, Happy, Lifted, Supple.
EC: 1.7
- [x] Fertigation: [7.1:7.1:3.5:3.5:2.8:2.8:2.8] # [Primer A:Primer B:CalMag Fuel:Silica Skin:Lush Green:Root Anchor:Peak Bloom]
- [x] Kelpak: [ 4, ml]
- [x] Photosynthesis Plus: [ 6, ml]
- [x] Terps Plus: [ 0.2, ml]
- [x] Quillaja 60 Powder: [scant]
__
Thu Apr 10, 2025
TH 1Q25 21:B:2:7
Light Distance: [ 23, in]
HOME Depot Run
- [x] Tube Insulation (Re-Fresh Chiller Insulation)
EC: 1.8 # MAX EC for GROW
Foliar: # 1 pt Spray Bottle @ Lights ON
- [x] CAL106 (Micronized Calcium Carbonate): [ 0.125, g]
- [x] Lush Green: [ 0.67, ml]
- [x] Kelpak (Auxins): [ 1, ml]
- [x] Photosynthesis Plus: [ 1.5, ml]
- [x] Quillaja 60 Powder: [scant]
- [x] Fertigation: [8:8:4.8:4.8:3.2:3.2:0.0:0.0:3.2] # [Primer A:Primer B:CalMag Fuel:Silica Skin:Lush Green:Root Anchor:Peak Bloom]
- [x] PCAL 1660: [ 0.5, gm] # Once or Twice/Week
- [x] Kelpak: [ 4, ml]
- [x] Photosynthesis Plus: [ 6, ml]
- [x] Terps Plus: [ 0.2, ml]
- [x] Quillaja 60 Powder: [scant]

Likes
74
Share




Likes
3
Share

@Earthsower
Follow
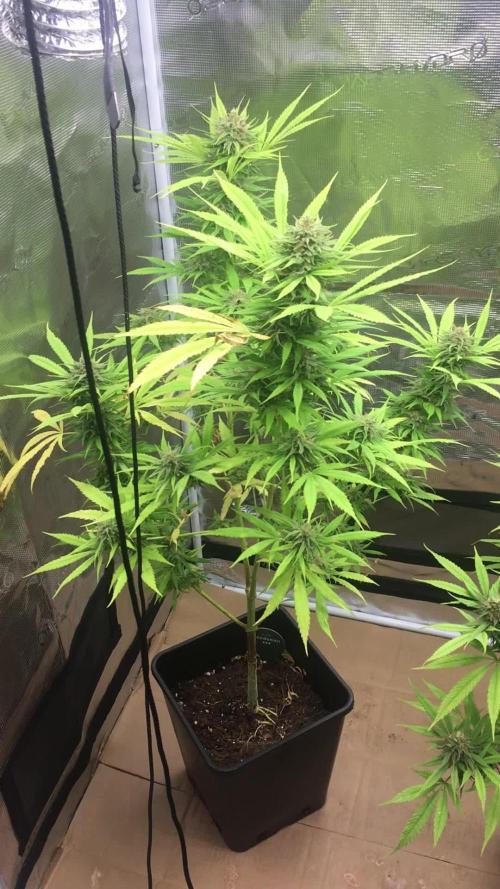
The blue dream is finishing off the bloom cycle. The plants leaves are fading evermore leaves are practically yellow. The stalk is beginning to decay. The aroma emanating from the plant has increased smells like fortified wine with a floral essence. The try chromes have covered all the flowers and are most of them are milky! The hue’s are light green. The calyxes are almost fully swollen and complete! Just waiting for the amber try chromes. The blue dream will be flushed out at the next feed. The lady stands at 93cm ta


Likes
56
Share


@Ultraviolet
Follow
What's in the soil? What's not in the soil would be an easier question to answer. 16-18 DLI @ the minute. +++ as she grows.
Probably not recommended, but to get to where it needs to be, I need to start now.
Vegetative @1400ppm 0.8–1.2 kPa 80–86°F (26.7–30°C) 65–75%, LST Day 10, Fim'd Day 11
CEC (Cation Exchange Capacity):
This is a measure of a soil's ability to hold and exchange positively charged nutrients, like calcium, magnesium, and potassium. Soils with high CEC (more clay and organic matter) have more negative charges that attract and hold these essential nutrients, preventing them from leaching away.
Biochar is highly efficient at increasing cation exchange capacity (CEC) compared to many other amendments. Biochar's high CEC potential stems from its negatively charged functional groups, and studies show it can increase CEC by over 90%. Amendments like compost also increase CEC but are often more prone to rapid biodegradation, which can make biochar's effect more long-lasting. biochar acts as a long-lasting Cation Exchange Capacity (CEC) enhancer because its porous, carbon-rich structure provides sites for nutrients to bind to, effectively improving nutrient retention in soil without relying on the short-term benefits of fresh organic matter like compost or manure. Biochar's stability means these benefits last much longer than those from traditional organic amendments, making it a sustainable way to improve soil fertility, water retention, and structure over time. Needs to be charged first, similar to Coco, or it will immobilize cations, but at a much higher ratio.
a high cation exchange capacity (CEC) results in a high buffer protection, meaning the soil can better resist changes in pH and nutrient availability. This is because a high CEC soil has more negatively charged sites to hold onto essential positively charged nutrients, like calcium and magnesium, and to buffer against acid ions, such as hydrogen.
EC (Electrical Conductivity):
This measures the amount of soluble salts in the soil. High EC levels indicate a high concentration of dissolved salts and can be a sign of potential salinity issues that can harm plants.
The stored cations associated with a medium's cation exchange capacity (CEC) do not directly contribute to a real-time electrical conductivity (EC) reading. A real-time EC measurement reflects only the concentration of free, dissolved salt ions in the water solution within the medium.
98% of a plants nutrients comes directly from the water solution.
2% come directly from soil particles.
CEC is a mediums storage capacity for cations. These stored cations do not contribute to a mediums EC directly.
Electrical Conductivity (EC) does not measure salt ions adsorbed (stored) onto a Cation Exchange Capacity (CEC) site, as EC measures the conductivity of ions in solution within a soil or water sample, not those held on soil particles.
A medium releases stored cations to water by ion exchange, where a new, more desirable ion from the water solution temporarily displaces the stored cation from the medium's surface, a process also seen in plants absorbing nutrients via mass flow. For example, in water softeners, sodium ions are released from resin beads to bond with the medium's surface, displacing calcium and magnesium ions which then enter the water. This same principle applies when plants take up nutrients from the soil solution: the cations are released from the soil particles into the water in response to a concentration equilibrium, and then moved to the root surface via mass flow.
An example of ion exchange within the context of Cation Exchange Capacity (CEC) is a soil particle with a negative charge attracting and holding positively charged nutrient ions, like potassium (K+) or calcium (Ca2+), and then exchanging them for other positive ions present in the soil solution. For instance, a negatively charged clay particle in soil can hold a K+ ion and later release it to a plant's roots when a different cation, such as calcium (Ca2+), is abundant and replaces the potassium. This process of holding and swapping positively charged ions is fundamental to soil fertility, as it provides plants with essential nutrients.
Negative charges on soil particles: Soil particles, particularly clay and organic matter, have negatively charged surfaces due to their chemical structure.
Attraction of cations: These negative charges attract and hold positively charged ions, or cations, such as:
Potassium (K+)
Calcium (Ca2+)
Magnesium (Mg2+)
Sodium (Na+)
Ammonium (NH4+)
Plant roots excrete hydrogen ions (H+) through the action of proton pumps embedded in the root cell membranes, which use ATP (energy) to actively transport H+ ions from inside the root cell into the surrounding soil. This process lowers the pH of the soil, which helps to make certain mineral nutrients, such as iron, more available for uptake by the plant.
Mechanism of H+ Excretion
Proton Pumps: Root cells contain specialized proteins called proton pumps (H+-ATPases) in their cell membranes.
Active Transport: These proton pumps use energy from ATP to actively move H+ ions from the cytoplasm of the root cell into the soil, against their concentration gradient.
Role in pH Regulation: This active excretion of H+ is a major way plants regulate their internal cytoplasmic pH.
Nutrient Availability: The resulting decrease in soil pH makes certain essential mineral nutrients, like iron, more soluble and available for the root cells to absorb.
Ion Exchange: The H+ ions also displace positively charged mineral cations from the soil particles, making them available for uptake.
Iron Uptake: In response to iron deficiency stress, plants enhance H+ excretion and reductant release to lower the pH and convert Fe3+ to the more available form Fe2+. The altered pH can influence the activity and composition of beneficial microbes in the soil. The H+ gradient created by the proton pumps can also be used for other vital cell functions, such as ATP synthesis and the transport of other solutes. The hydrogen ions (H+) excreted during photosynthesis come from the splitting of water molecules. This splitting, called photolysis, occurs in Photosystem II to replace the electrons used in the light-dependent reactions. The released hydrogen ions are then pumped into the thylakoid lumen, creating a proton gradient that drives ATP synthesis.
Plants release hydrogen ions (H+) from their roots into the soil, a process that occurs in conjunction with nutrient uptake and photosynthesis. These H+ ions compete with mineral cations for the negatively charged sites on soil particles, a phenomenon known as cation exchange. By displacing beneficial mineral cations, the excreted H+ ions make these nutrients available for the plant to absorb, which can also lower the soil pH and indirectly affect its Cation Exchange Capacity (CEC) by altering the pool of exchangeable cations in the soil solution.
Plants use proton (H+) exudation, driven by the H+-ATPase enzyme, to release H+ ions into the soil, creating a more acidic rhizosphere, which enhances nutrient availability and influences nutrient cycling processes. This acidification mobilizes insoluble nutrients like iron (Fe) by breaking them down, while also facilitating the activity of beneficial microbes involved in the nutrient cycle. Therefore, H+ exudation is a critical plant strategy for nutrient acquisition and management, allowing plants to improve their access to essential elements from the soil.
A lack of water splitting during photosynthesis can affect iron uptake because the resulting energy imbalance disrupts the plant's ability to produce ATP and NADPH, which are crucial for overall photosynthetic energy conversion and can trigger a deficiency in iron homeostasis pathways. While photosynthesis uses hydrogen ions produced from water splitting for the Calvin cycle, not to create a hydrogen gas deficiency, the overall process is sensitive to nutrient availability, and iron is essential for chloroplast function.
In photosynthesis, water is split to provide electrons to replace those lost in Photosystem II, which is triggered by light absorption. These electrons then travel along a transport chain to generate ATP (energy currency) and NADPH (reducing power). Carbon Fixation: The generated ATP and NADPH are then used to convert carbon dioxide into carbohydrates in the Calvin cycle. Impaired water splitting (via water in or out) breaks the chain reaction of photosynthesis. This leads to an imbalance in ATP and NADPH levels, which disrupts the Calvin cycle and overall energy production in the plant. Plants require a sufficient supply of essential mineral elements like iron for photosynthesis. Iron is vital for chlorophyll formation and plays a crucial role in electron transport within the chloroplasts. The complex relationship between nutrient status and photosynthesis is evident when iron deficiency can be reverted by depleting other micronutrients like manganese. This highlights how nutrient homeostasis influences photosynthetic function. A lack of adequate energy and reducing power from photosynthesis, which is directly linked to water splitting, can trigger complex adaptive responses in the plant's iron uptake and distribution systems.
Plants possess receptors called transceptors that can directly detect specific nutrient concentrations in the soil or within the plant's tissues. These receptors trigger signaling pathways, sometimes involving calcium influx or changes in protein complex activity, that then influence nutrient uptake by the roots. Plants use this information to make long-term adjustments, such as Increasing root biomass to explore more soil for nutrients. Modifying metabolic pathways to make better use of available resources. Adjusting the rate of nutrient transport into the roots. That's why I keep a high EC. Abundance resonates Abundance.