


Likes
Comments
Share

@HOMEGROWBOOK
Follow
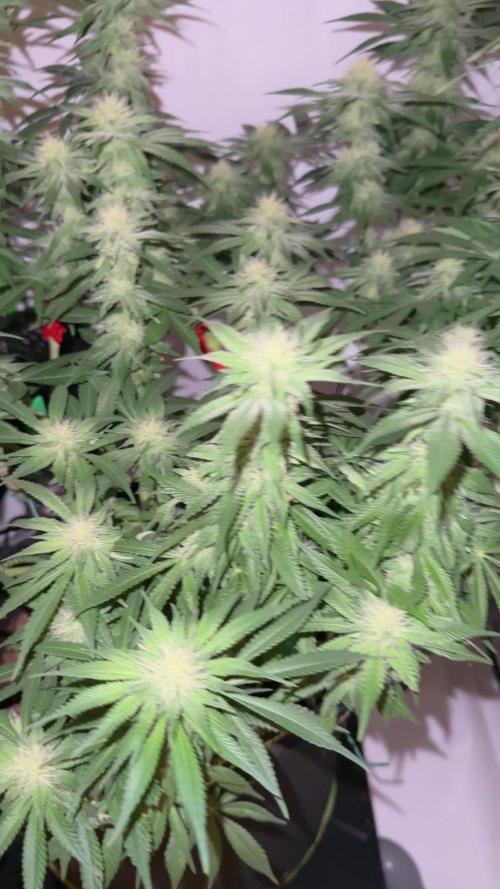
We’re now deep into week 5 of flowering, and the plants are fully in their prime!
The buds are getting visibly denser, while trichome production is exploding. Under the microscope, countless clear and first milky heads can already be seen — a sure sign the resin phase is in full swing.
24K Gold is stacking up beautifully with compact, uniform bud formations.
Her aroma is becoming stronger and more complex — sweet and spicy with a subtle fruity note.
The top colas are firming up and already showing a frosty coating of resin.
Gelato 33 continues to impress with tight internodes and a balanced canopy.
Her buds are slightly airier but covered in a thick layer of trichomes — the sugar leaves are already sparkling.
Both plants look perfectly healthy: rich green color, no signs of stress or burn, just steady growth and ideal nutrient balance.
The drip irrigation system keeps the coco medium consistently moist, ensuring a stable root environment.
The semi-hydro setup continues to prove its efficiency — nutrient uptake and oxygen levels are right on point.
Nutrients & Conditions:
• 💧 Canna Coco A + B → 8 ml/L
• 📈 EC 1.7 | pH 5.8
• 🌡️ Temperature: 25 °C day / 20 °C night
• 💧 Humidity: 45 %
• 💨 Airflow: strong and continuous for optimal resin production
The smell is getting more intense by the day, and the buds are tightening up beautifully.
From this point onward, the focus shifts to ripening and trichome maturity — the final stretch is officially on the horizon!


Likes
7
Share

@Redweasel
Follow
Total tent entry time this entire week was 15 minutes.
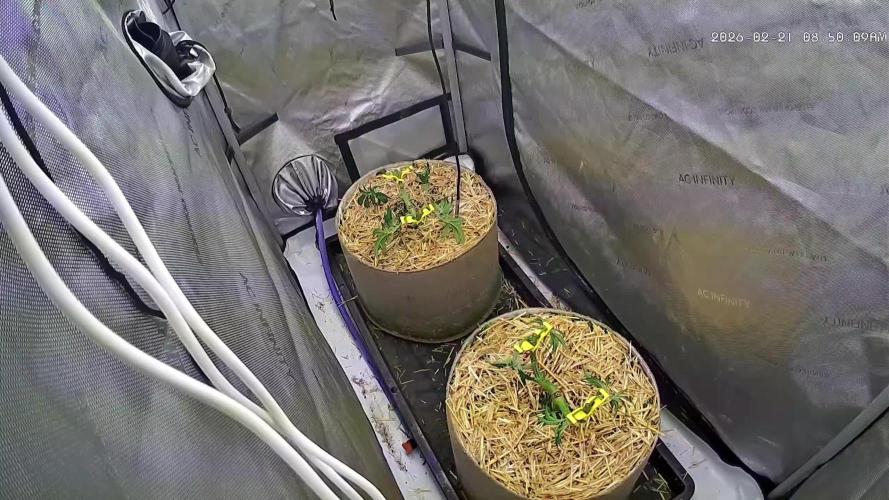
Today was focused on recording data mainly. I'm giving them a weekend off before full schwazze, top dress, & flip next week.
Tucked any fan leaves blocking growth sites.
Worked 1/4 cup Kiss My Frass, mealworm derived insect Frass, into straw mulch top layer of each container.
Hand watered each plant with 1/2 gallon 6.5 ph 13 ppm reservoir water mixed with 1/2 tsp each of coconut water powder, Azos, & quillaja powder.
Raised DLI to 35. I fully expect it to naturally raise to 40 as the plants expand vertically.
Raised average VPD to 1.0
-Expression #1-
Previous Week
Height-5"
Width-6"x9"
Current Week
Height-10"
Width-18"x20"
-Expression #2-
Previous Week
Height-4.5"
Width-8"x7"
Current Week
Height-8.5"
Width-15"x14"
Likes
4
Share

@Jardineiro_Br
Follow
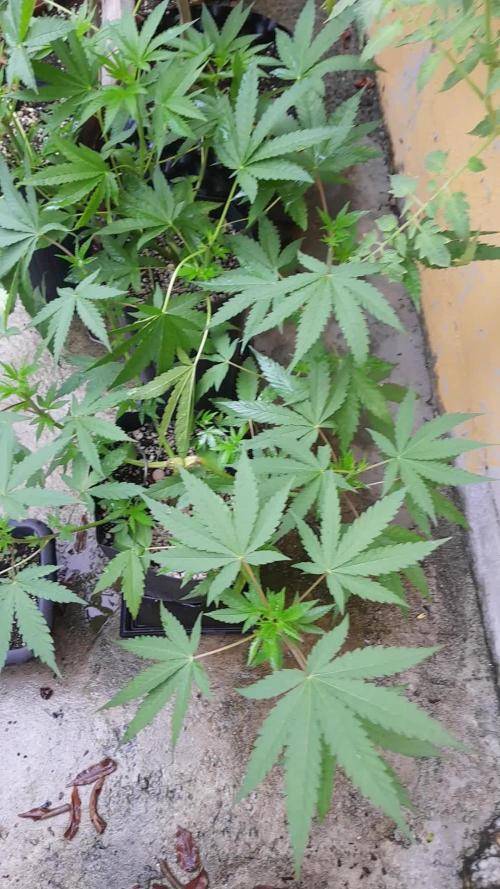
Essas plantas estavam com pouca luz na estufa e as trouxe para o quintal, estao junto da horta , fiz um LST forcei demais e virou um super HST.
Aqui todos os.dias chove e por isso troquei os fertilizantes e vou usar apesar esse em pastilhas , tenho pastilhas de vegetativo e de floração, coloquei a dos 3x maior que de flores , será a única fertilização que vou usar nelas .
Likes
24
Share


@Samsemilla
Follow
Die siebte Blütewoche beginnt, den Ladies geht's relativ gut und ihre Knospen werden immer verlockender. 💚😍
Die Woche neigt sich dem Ende zu und es gibt nicht viel zu berichten.
Der Appetit steigt!

Likes
6
Share

@Prof_Weed
Follow
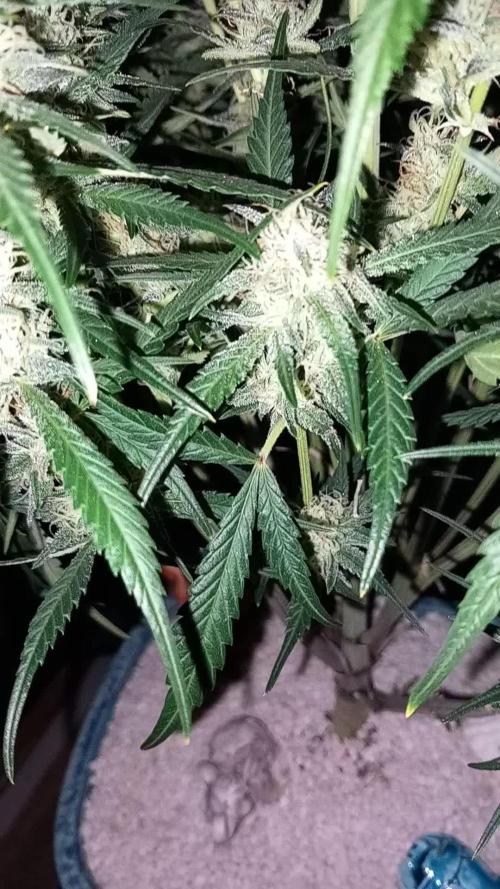
Yess she is healthy, but i will kill her in 20 daze!!
Hope to get 8 g's harvest ..
Likes
17
Share


@CanadianFillmore
Follow
Flush time for divine storm and mandarin dreams. These ladies are frosty and sticky AF! Just insane how sticky they are and the frost is like light snow, my camera just doesn't do it justice.
The Mars-Hydro TSW2000 has blown me away over the course of this grow. It's definitely a high quality light and has delivered impressive results so far.
Thanks for stopping by growfessors! 👽🌳💚


Likes
70
Share


@Insaniac_0
Follow
Notes for flower week 9 (12/15-12/21, days 56 to 62)
Watering Days.
All feeds with nutes use either a whole ratio, or combination, of "Veg Mix" and "Bloom Mix"concentrates. These are/will be DILUTED in water until a total ppm of add-in is reached using a (Total Dissolved Solids) TDS Meter measured in PPM (parts per million). The "Veg Mix" concentrate will eventually be added-in larger, then smaller, ratios while the "Bloom Mix" concentrate will eventually replace the "Veg Mix" concentrate entirely. The ppm and ratios will be listed when I feed. Veg mix recipe is on week 3. Bloom Mix recipe is on week 5.
Day 128/58 (last feed was day 124/54)
Tested and Calibrated my ph pens. Fed 3 gallons of de-chlorinated tap (starting with 251ppm) mixed with 402ppm of 100% Bloom Mix Concentrate. Due to this soil showing a possible calcium deficit, I am still using 1ml per gallon add-in to test on all plants using this soil, so I added 3.0ml of CaliMagic (General Hydroponics 1-0-0) and then I ph balanced before feeding. The ph on this feed was balanced to 7.0 (7.13 last feed). I used knitting needles to help both aerate the soil and create new water pathways for the roots. (a practice I am making a new feeding standard for all my plants) I got ~20 cups of runoff (~27 cups last feed). Higher runoff volume was expected with the feed volume increase as well as previous knitting needle aeration. Runoff was tested at 6.15ph and 1800ppm (6.21ph and 2100ppm last feed). Top soil tested at 6.4,6.48,6.39,6.42 for an avg of 6.42 (6.42 avg after last feed)- next feed will be 6.8 to 7.0 ph as I'm still liking where the ph is finally at. I dont see any issues with the feed's data other than the possible calcium deficit Next Feed should be 2.5 gallons of de-chlorinated tap water ph balanced to 6.8 in +4 days (132/62). I expect I will run 400ppm and 2.5ml of CaliMagic (General Hydroponics 1-0-0) again, but no more HP2. I expect to start flushing her out with lower nute levels from that next feed point.
Day 132/62 (last feed was day 128/58)
Tested and Calibrated my ph pens. Fed 3 gallons of de-chlorinated tap (starting with 277ppm) mixed with 397ppm of 100% Bloom Mix Concentrate. Due to this soil showing a possible calcium deficit, I am still using 1ml per gallon add-in to test on all plants using this soil, so I added 3.0ml of CaliMagic (General Hydroponics 1-0-0) and then I ph balanced before feeding. The ph on this feed was balanced to 6.8 (7.0 last feed). I used knitting needles to help both aerate the soil and create new water pathways for the roots. I got ~17 cups of runoff (~20 cups last feed). Runoff was tested at 6.0ph and 1710ppm (6.15ph and 1800ppm last feed). Top soil tested at 6.42,6.45,6.34,6.33 for an avg of 6.385 (6.42 avg after last feed)- next feed will be 6.8 to 7.0 ph as I'm still liking where the ph is finally at. I dont see any issues with the feed's data other than the possible calcium deficit Next Feed should be 2.5 gallons of de-chlorinated tap water ph balanced to 6.8 in +4 days (136/66). I expect I will run 400ppm and 2.5ml of CaliMagic (General Hydroponics 1-0-0) again. Im flushing with these lower ppm feeds through harvest.


Processing
Likes
88
Share


@No_Clout
Follow
08/08/18 - Day 22 looking good especially after the minor bump in the road, the wire I bought for the LST is doing it’s job for the time being but I will be buying some proper stuff on the weekend. ✌️🏻
10/08/18 - did more LST last night and their responding well except one, I did some minor defoliation of some fan leaves hogging the 💡
11/08/18 - plant #3 is finally getting into feel of the LST and is looking a lot happier, but girl #1 & #2 are just going with the flow and killing it, my first time doing LST like this and I wish I started doing it two harvest ago 😂👌🏻
13/08/18 - watered each plant with 2 litres each 💧plant number #3 has a slight kink in it from the LST it has been a pain for it the main stem has hardly any flexibility but the other two are 👍🏻
Processing
Likes
17
Share


@JustKeepGrowing
Follow
I placed the 2 seeds in a damp paper towel and placed it into a closed Tupperware. The tupperware was placed in my stereo cabinet (warmest place I could find) and less than a day taps roots were showing. I then placed them in my humidity dome and within 18hrs I had roots sprouting thru the bottom of the sponge. This has been the best start I have yet to have. I also built a new RDWC system with waterfalls to veg and flower these two in. I have photos and video above on the new tent setup. I have it running with just regular tap water until the seedlings are ready to go in. I have also installed a 90gpd RO system (APEC brand) under my kitchen sink. The water comes out 5.8ph and 7ppm. I will be using this RO water thru the entire grow with some Cal-mag of course. The system holds about 25 gallons total of water. The main res is 17 gallons and the two buckets are 5 gallons. I will no longer be using air stones. I have a recirculating pump in the main res, waterfalls in the buckets and of course the main pump running the whole system. Should be plenty of air for the roots. I used 2 in return pipes in the hopes of avoiding roots clogging the pipes. I scrogged last time but I'm not sure I will be going that route. I might just top and train. I will be doing a major defoliation on one and just simple trimming on the other. I am trying to find out if the risks of stressing the plant are worth the returns. Well wish me luck....and away we go.
Equipment used on this grow:
VIVOSUN 48"x48"x80" Mylar Hydroponic Grow Tent
AC Infinity CLOUDLINE T6, Quiet 6" Inline Duct Fan
Grower's Choice Horticulture Lighting with Full Spectrum 315W Ceramic Metal Halide
Kingbrite diy 240W lm301h qb288 v3 led grow light
PHILIPS 901573 Master Color CDM Lamp 315 Watt Elite MW, 4200K (Blue)
PELONIS PFT30T2ABB-V Portable 3-Speed 12-Inch Oscillating Table Air Circulation Fan,
Bluelab Guardian Monitor for pH, Temperature, and Conductivity Measures
Power Strip Surge Protector, Anker 12 Outlets & 3 USB Ports
hygger 1060GPH Quiet Submersible and External 24V Water Pump, with Controller
Marineland Maxi-Jet 600
Midea SmartCool 8,000 BTU Wi-Fi Window Air Conditioner (will be running a 4 inch tube into tent from a/c)
All hardware and buckets were bought from Lowes.
1in & 3/4 in for supply lines
2 in for returns

Likes
23
Share

@Chubbs
Follow
What up fam, weekly update on these lovely ladies. They're getting close to being finished so I'd say where in the home stretch. The flowers are swelling amazing and definitely smelling even better. All in all its been HappyGrowing.
Likes
3
Share


@Ninjabuds
Follow
My Gorilla Cookies plant is absolutely exploding under these new high-intensity lights! It's showing incredible resilience – seriously, this thing can take a beating. The combination of its hardiness and the promise of those potent, frosty buds has me super excited for the weeks to come. I'm starting to catch whiffs of that classic sweet, earthy aroma, with just a hint of chocolate in the background. It's gonna be a good harvest!
This past week has been a whirlwind of work, leaving little time for anything else. My phone's camera roll is sadly neglected, with only a few snapshots to show for it. But finally, I'm finding a moment to catch up on my grow diaries. It's been exciting to see the progress, even if it's just through photos. I'm looking forward to documenting the next stage!
Likes
41
Share


@GermanGrow182
Follow
War 10 Tage im Urlaub. Eine Woche wechselhaft, 3 Tage heiß. Sie sind gut gewachsen. Blue mystic: habe eine getoppt und eine gefimmt.
Die getoppte skywalker schießt in die Höhe und muss bald wieder getoppt werden. Fat banana ist sehr stark im wuchs. Bald werd ich die mal entlauben.Es läuft gut. Bis nächste Woche ✌️
Processing
Likes
4
Share


@Snuffys_garden
Follow
Into day 30 and I have some flowers starting. The girls look healthy and I am only using some LST and defoliation. Backed off the Foxfarm Big Bloom and I am now just using Ph balanced water between 6.3 and 6.5 Very pleased with their progress so far🌱🤙


Likes
26
Share


@GERGrowDesigns
Follow
Dear Growers ,
Welcome to Week 7 or Flower week 4 // Day 49-56 from Sweet Seeds Orange Apricot Xl Auto.
Incase of Moving to a New Home . I Decided to skip 3-4 Weeks from every Diarie of the 12x12 Automatic Project . Everything should be Normal in the next Weeks .
Project Setup & Conditions:
• Brand/Manufacturer: Sweet
• Tent: 222cmx150cmx150cm
• Light: 2x 720 Watt Full Spectrum
• Humidity: 50%
• Soil: Narcos Organix Mix
• Nutrients: Narcos Products
• pH Value: 6
If you want Germinitation results like mine , check out Kannabia Seeds with my link [https://www.kannabia.com/de?ref=61966] and grab the germination device or the strains I used . Trust me – it’s worth it for sure !
Get another 20% Discount at all products using the code [GGD] at the Checkout .
Stay curious and keep up Growing —we look forward to welcoming you back for the next chapter soon!

Likes
34
Share


@MadeInGermany
Follow
Info:
Unfortunately, I had to find out that my account is used for fake pages in social media.
I am only active here on growdiaries.
I am not on facebook instagram twitter etc All accounts except this one are fake.
Have fun with the update.
Hey everyone 😀.
A week with a wonderful development is over again 😃.
I decided to stay in the vegi for another 10-14 days and to top it off a few more times.
Then it is put into bloom.
Until then, I wish you all the best 🙏🏻.
You can buy this Strain at :
https://www.exoticseed.eu/
Type:
Quick Sherbet
☝️🏼
Genetics:
75% Indica / 25% Sativa
Sunset Sherbet X Black Lemon
👍
Vega lamp:
2 x Todogrow Led
Quantum Board 100 W
💡
Bloom Lamp :
2 x Todogrow Led
Cxb 3590 COB 3500 K 205W
💡💡☝️🏼
Soil :
Canna Coco Professional +
☝️🏼
Fertilizer:
Green House Powder Feeding
☝️🏼🌱
Water:
Osmosis water mixed with normal water (24 hours stale that the chlorine evaporates) to 0.2 EC. Add Cal / Mag to 0.4 Ec Ph with Organic Ph - to 5.5 - 5.8 .

Likes
7
Share


@KannaKullektiv
Follow
Hiiigh friends 🙌
Welcome to week 5. 😍
The pretty ones have gained a lot of mass and have grown big and strong. This means they are continuing to train diligently.. 😊
See you next week. 👋
Arturo for KannaKullektiv
🙏


