


Likes
Comments
Share

@Organic_G
Follow
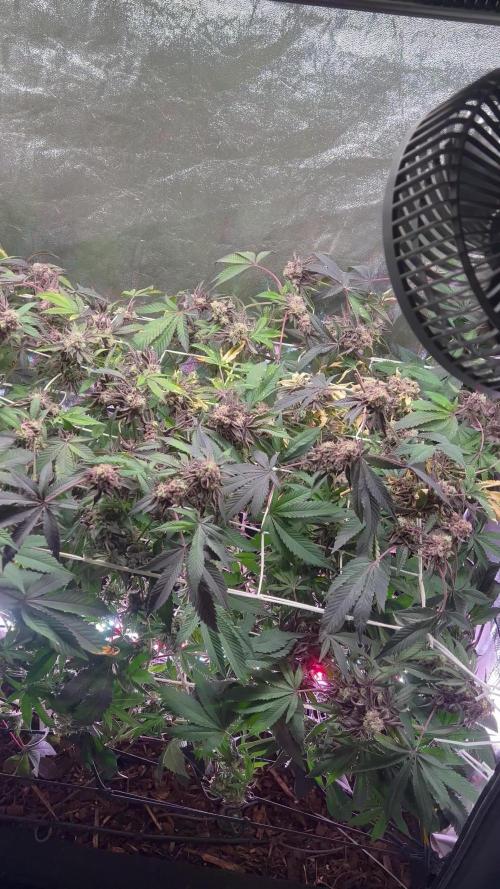
Ich hasse es wie die Pest, schlimmste was es auf der Welt gibt, Harvest… 😭 3 Tage meines Lebens schon in die kacke versenkt… denke für die nächsten Ernten wird eine Trimm Maschine angeschafft

Likes
9
Share


@Smokingthatdank420
Follow
Week2 of flowering and this baby is really stretching. She’s the tallest one in the tent 🏕️. And the smell of mango is great. I had to cut a lot of fan leaves off her for more light penetration. Lot of bud sites, can’t wait to see how she fills out.😎


Likes
15
Share


@AllieO
Follow
1/12: impatiently waiting for lemon auto to finish up. Still not sure what the northern lights is trying to do, but..the little buds are slowly growing. S l o w l y...
1/14: things are getting out of hand in here. Northern lights is bushy AF again but the budlets appear to be increasing in size. Lemon is getting closer every day. Looks like I've got milky trichomes and the pistils are darkening. Still a bit early, but I'd be lying if I wasn't anxious for the space..
1/15: I've accepted that I have at least a week ish left on Lemon auto,but she's getting there! I did some rather risky defoliation on northern lights and holy shit, she's got potential. I'm hoping she's just a slow grower and those buds will really fatten up! Perhaps lemon is just a really fast growing plant? I've also decided that since space is limited, my best bet is to probably rotate the plants every other day to allow all bid sites an opportunity for direct light. I'm reigning myself in. Once lemon auto is harvested I need to NOT immediately plant another. I've got some mephosito seeds I want to get going, but I've learned my lesson. This tent fits two 5 gallon mature plants... Uncomfortably. Three is too many 😂
1/17: wondering if northern lights has is it her to fatten up. Gave her a good flush &feed. Popcorn buds or not, I'm invested (#forscience). Lemon auto is still finishing up. Can't get good enough pics with phone to see trichomes. Clearly, I have a minimum of a week left, but I got a digital microscope so I can keep track! Should be here for next update.

Likes
16
Share


@Coopmc
Follow
Time for the LAST CUT!!
Top two picks transplanted I’ll do 2 more and find homes for the rest !
Likes
105
Share

@Coopmc
Follow
7 week first 5 were 12 on 6 off seamed stuck in week 2 flower for 4 weeks
Gave her week 4 feed modeled after fox farm feed rate

Likes
103
Share


@Schnabeldino
Follow
_____ Week 14 | Day 92 - 98 | 7th week of Flower ______
Day 93🌞💧
- 3 liter each Plant, small drain.
Day 94 🌞
- Since I'm a bit afraid of mold, I run the fans at a higher speed, which causes the leaves to rub against each other and causes physical damage to the leaves. A few tips are burnt but nothing to worry about.
-------------------------------------------------------
Temp. avg. - 22,6°
Hum. avg. - 53,6 %

Likes
62
Share


@Santica_Garden
Follow
Things are abit hectic at the moment in the garden as all my tents are currently occupied so these guys have to share for the next few days.... More information on the video I have uploaded.... Sorry I couldn't give you guys a better update

Likes
4
Share

@AlphaCut_Gen
Follow
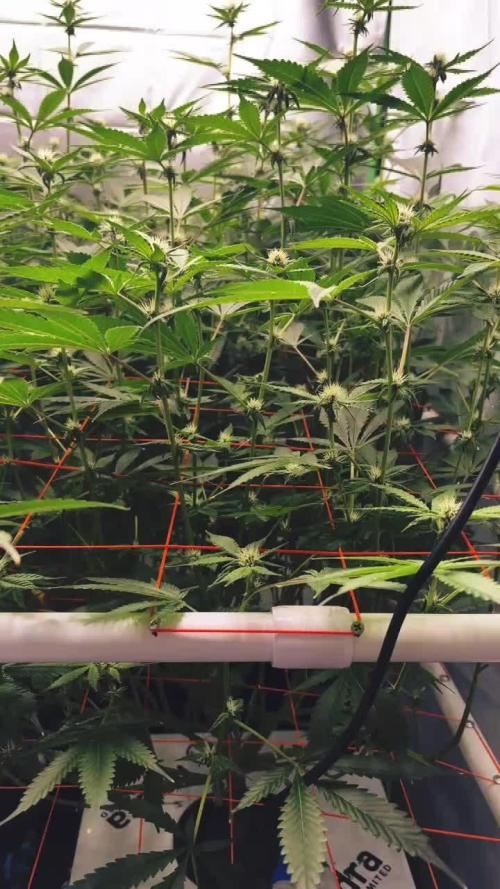
Not much to write about this week. It might not look like it, but I did a heavy defoliation and removed a lot of lower growth and leaves that would’ve turned into larf. I’ll clean a little more out as things progress.
Stretch has calmed down and resin production has started. Fan leaves and sugar leaves are already getting lightly coated. Now we’re getting into the fun part where the plant starts putting on weight.
I decided not to use any supplemental lighting this run since it’s my first time running this strain. I’m hoping to use this pheno in an upcoming breeding project, assuming no weak traits show up. So far though, this plant has handled everything I’ve thrown at it without any issues, so we’ll see how the next couple weeks go
Likes
4
Share

@deseed_uy
Follow
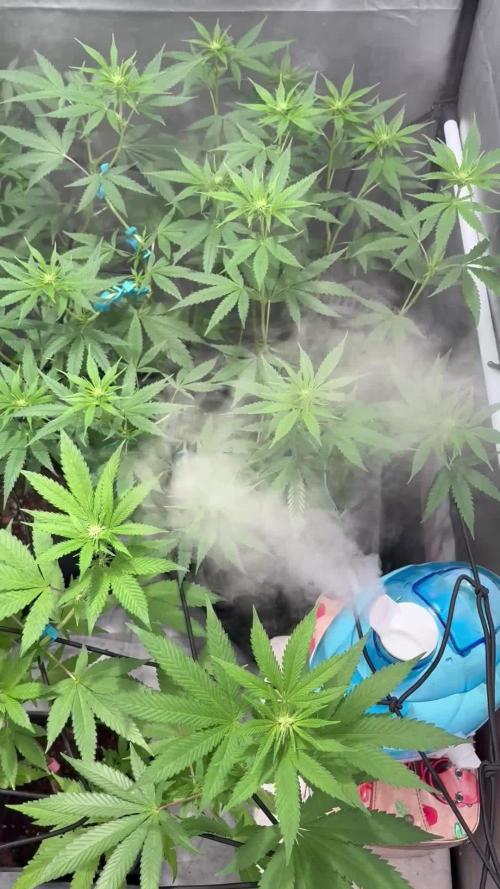
Hace unos dias puse los ultimos clip lst para nivelar las ramas mas altas del medio, muy orgullosa q pude hacer bien el scrog quedo re lindo




Likes
92
Share


@DogDoctorOfficial
Follow
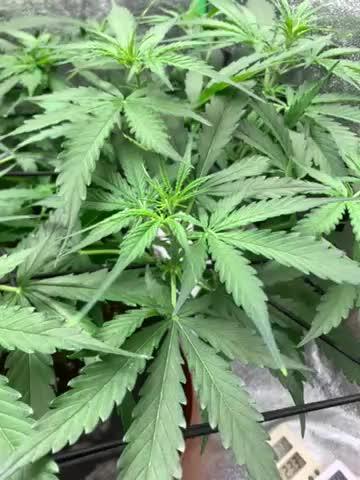
Week 9 - First Week of Flowering 🌸
The dark period has ended, and these ladies came back into the light fully energized and ready for action! It’s just the first week of flower, and they’re all praying, stretching, and absolutely thriving—filling up every inch of the tent. This grow space is officially packed from wall to wall, with each plant competing for its share of light and showing off some of the biggest, healthiest leaves I’ve seen yet! 🌱
A few strategic plucks here and there have kept airflow smooth and light penetration balanced. Those big leaves? They’re a sign of happy, healthy growth. Large leaves help the plant capture maximum light energy, essential during this stage, especially as they start focusing on developing those flowers. When plants grow huge, vibrant leaves like these, it means they’re well-nourished and content in their environment—a true testament to the well-balanced conditions we’ve got going in the tent!
Flowering Parameters 🌡️
Room Environment:
• Temperature: 26.7°C
• Humidity: 63.3%
• CO2: 960 ppm
• VPD: 1.29 kPa (prime zone for flowering health!)
Lighting:
• Light Intensity: 835 PPFD (ideal for boosting flower growth)
• Solution: pH 5.96, TDS 460 ppm, temp 21.1°C
• Medium: Moisture: 100%, TDS: 520 ppm, Temp: 21.6°C
Carbon Filter Installation & Smell Management 🌬️🌱
With the transition to flower, the scent profile is already starting to kick in—crazy for the first week, right? 🌸 To keep everything fresh and under wraps, I’ve set up a carbon filter system. Here’s how it’s working: I’ve connected the filter to my Aerofan, which pulls air directly from the tent. This air is cleaned by the filter and released into the main room, where it then passes through another filter before exiting my space. This dual-filter setup means no scent escapes into the wild, keeping things stealthy and the grow room a peaceful, scent-contained environment. Perfect for anyone concerned about keeping their home free from that telltale aroma! 🕶️🌬️
Enhanced Lighting with Emerson Effect 🌞
This week, I’ve introduced an extra 15 minutes of red light at the beginning and end of each light cycle. Why? Well, this red boost taps into the Emerson effect, enhancing photosynthesis efficiency, especially during the flowering stage. By stimulating a little extra wake-up and wind-down light, we’re mimicking the natural sunrise and sunset experience for these plants, which can help reduce flowering time. Not only does it encourage smoother transitions into day and night, but in theory, it’ll help these ladies finish a bit faster, while giving them a little nudge to build more substantial, quality flowers. 🌇
Nutrient Adjustments 🌱
Now that we’re in flower, I’ve swapped out the Start Booster for P-Boost and TopBooster to specifically support flowering needs. Here’s why:
• P-Boost brings in additional phosphorus, vital for energy transfer and cell division as the plant channels more resources into budding sites.
• TopBooster supports the flowering phase by improving flower quality and density, helping to build those big, aromatic buds we’re after.
These changes bring the nutrient mix in line with what’s most beneficial at this stage. All this precise dialing in is easy to manage thanks to the TrolMaster system. From pH to nutrient scheduling, the TrolMaster ecosystem and ThinkGrow LEDs have been the ultimate teammates in this grow journey, giving me real-time data, fine control, and peace of mind. 💯
(Not introducing UV light just yet, but stay tuned as that’s coming soon for an added boost!)
Looking Forward 🌟
Next week, we’ll be upping the reds, giving us an even greater chance of activating those flowering signals for a smoother, faster transition through the cycle. I’ll keep tweaking and fine-tuning every parameter to make sure these ladies get exactly what they need to thrive.
Big thanks to the TrolMaster system for keeping everything in balance and optimized, along with the supportive Grow Fam following this journey! Your enthusiasm, advice, and support are a huge part of this grow’s success. Keep following for more updates, and stay tuned for what’s next! 🌿✨
P.S. Deep Dive: TrolMaster’s MBS-S8 CO₂ Sensor & Smoke Detector 🚨
The MBS-S8 CO₂ Sensor from TrolMaster is a powerhouse for growers, especially when it comes to optimizing plant growth and efficiency in a controlled environment. This sensor continuously monitors CO₂ levels and integrates directly with the TrolMaster ecosystem, giving you real-time data on CO₂ concentration. Ideal levels of CO₂ can significantly boost growth and yield during certain stages, so understanding and managing CO₂ is key. With the MBS-S8, I can control CO₂ levels precisely, keeping them within the optimal range for photosynthesis. This sensor is a game-changer because it adjusts CO₂ delivery automatically, giving plants exactly what they need without any extra monitoring from me.
Meanwhile, TrolMaster’s Smoke Detector is an essential safety device, especially in spaces with electrical equipment, lights, and heat-generating components. This detector can be set up to alert me instantly via the TrolMaster app if any smoke is detected, allowing me to respond immediately to any potential issues. Fires and smoke are rare in controlled grow setups but having this safety measure provides peace of mind and lets me focus on the plants without constant worry. It’s an incredible tool for any grower prioritizing safety and proactive monitoring.
Discount Codes so you can save big on your next check out 💚💚💚
Kannabia - DOGDOCTOR 30% off
SeedsmanSeeds - DOGDOCTOR 10% off
CannaKan- DOGDOCTOR 15% off
terpyz.eu - DOCTOR 15% off
The Neutralizer - PORKIT5-DOG 15% off
As always thank you all for stopping by, for the love and for it all , this journey of mine wold just not be the same without you guys, the love and support is very much appreciated and i fell honored and so joyful with you all in my life 🙏
With true love comes happiness 💚🙏 Always believe in your self and always do things expecting nothing and with an open heart , be a giver and the universe will give back to you in ways you could not even imagine so 💚
Friendly reminder all you see here is pure research and for educational purposes only
Growers Love to you all 💚💚💚


Likes
5
Share


@Ensign420
Follow
Greetings fellow growers 🖖 and welcome to my first grow ever. This adventure actually started several months ago when I decided to stop buying flower from dispensaries and just grow my own bud. How hard can it be!?
This is actually my second seed of this strain. The first bean sadly died due to over watering (sorry girl, RIP). I was literally watering the cube to the point where water was dripping from the bottom, then heavily sprayed the humidity dome and tray with the vents completely closed. Everyday. Multiple times. I never let the dome or try dry out. So after about 8 days of not sprouting, there was a funky smell of rot. So that was that.
Later I learned that rockwool retains a lot of water and can easily drown seeds. So a wet/dry cycle is best for rockwool germination.
So even after hours of researching and digging through forums and tutorial videos, I was still under prepared for this journey. Did not consider how delicate the germination phase is. Oh well. Lesson learned. Reset and try again!
I hope everyone is safe and stoned during this corona crisis. Just like everyone else in the world, I want this pandemic to be over with. But in the meantime, let's grow some weed! 🖖
[START OF WEEK 01]
Day 01 - Monday - 08/03/20 - Total Days: 001
-----------------------------------
- [0830]: Light Schedule: 24Hrs/0
--- Soaked cube in 5.5 PH water for 10 min. Did not shake water out.
--- NO NUTES! Only PH'd down to control the PH levels.
--- Did not use the default hole (way too deep).
--- Flipped cube upside down and made a shallow hole for the seed (less than 0.25" deep).
--- Placed seed in and pinched hole close. No additional water added.
--- Sprayed the tray and dome with straight water (5.5 PH).
--- Vents are cracked opened a for ventilation (about 1/4 opened each).
--- Distance between the light and tray was 53"
--- AC was set to 80 °F
--- Exhaust fan was set to 86 °F
--- Room average temp was at 85 °F
--- Dome humidity was at 85-99% when sprayed.
--- Allowing to completely dry before respraying.
- [2200]: Dome and tray were completely dry! Sprayed only tray and dome with more water.
Day 02 - Tuesday - 08/04/20 - Total Days: 002
-----------------------------------
- [0845]: Sprayed dome and tray in the morning. Everything was dry.
--- Hoping for the best!
- [2130]: Everything was dry again, so sprayed dome and tray at night along with a light spray on the cube.
Day 03 - Wednesday - 08/05/20 - Total Days: 003
-----------------------------------
- [0830]: Everything was dry again. Resprayed dome and tray. Slightly sprayed cube.
- [2125]: Hooo damn!! She popped! Am little stub is visible! Resprayed dome and tray again.
--- Still going 24/0 for lights.
- [+0033]: Just checked up on her and I swear she grew a bit taller! Getting excited!
Day 04 - Thursday - 08/06/20 - Total Days: 004
-----------------------------------
- [0845]: Wow! Went from a little stub to fully sprouted overnight! Everything was pretty dry again so resprayed dome and tray.
- [2200]: Tap root is visible! Over 1" long too! Just resprayed dome and tray again.
-- Going to prep for hydroton transplant tomorrow!
Day 05 - Friday - 08/07/20 - Total Days: 005
-----------------------------------
- [0930]: She keeps growing!
-- Added a bit of CalMag to the spray bottle (8 drops to 650ml of distilled water). Resprayed dome and tray. Water was at a 5.4 PH with 141 PPM.
- [1045]: Prepped the bubble bucket with 4.5gal of water. Water is high enough to reach about 0.25" above the bottom of the net pot.
--- Added 3 drops of Superthrive
--- Added 3.5ml of CaliMagic
--- Added 2ml Hydroguard
--- Then PH'd down to 5.6
--- Solution Strengh: 120 PPM
--- Water chiller is set to 20 °C
- [1100]: Transplant time!
--- Filled the net basket 1/3 with hydroton. When placed in the bucket, air bubbles are not visible, but are slightly below the surface (slight digging will reveal the water/bubbles below).
--- Removed plastic on rockwool cube and placed in basket, then filled around and covered with hydroton. Making sure to block any light from passing through the net pot and into the nutrient solution.
--- Covered with a half-bottle dome sprayed with the CalMag water from earlier.
--- Hoping for the best!
- [1300]: Raised Bucket 5" higher. Now light distance is 48" to top of bucket.
- [1820]: Lowered tent exhaust temp to 76 °F
--- Lowered AC to 75 °F
--- Raised bucket even higher so light distance is 30" to top of bucket.
- [2300]: Looking good!
--- Sprayed dome and surrounding hydroton with more CalMag water.
--- Attached timer to light! So new 18 Hrs On/6 Hrs Off light schedule.
--- Lights On: [1600] (4pm)
--- Lights Off: [+1000] (10am the next day)
--- Decided to go with lights on during the evening/night and off during the later mornings/afternoon (the hottest part of the day) to see if temps can be controlled better.
--- Please survive girl!
Day 06 - Saturday - 08/08/20 - Total Days: 006
-----------------------------------
- [0800]: Everything was dry. Resprayed hydroton and dome.
- [2000]: Here first night cycle seemed to go well! Get'n taller!
--- Dry again. Removed the dome.
--- PH went up to 6.5 so PH'd down to 5.7
--- Ran the top feed drip ring for a bout a minute to wet the hydroton and rockwool with the nutient solution.
---Too scared to leave the top feed on 24hrs (I don't want over water her and cause dampening-off). Will let dry before re-watering.
- [2100]: After closer inspection, I think she's looking a bit yellow.
--- Decided to add a bit of grow nutes to the bubbler solution.
--- Added 2ml of Sensi Grow A
--- Added 2ml of Sensi Grow B
--- Solution strength after adding more nutes: 176 PPM
--- PH went up to 6
--- I hope that the extra chelating properties of the 'PH Perfect' solution is enough of a buffer for proper nutrient uptake.
Day 07 - Sunday - 08/09/20 - Total Days: 007
-----------------------------------
- [0800]: Water dropped a bit (mostly due to evaporation) so solution strength was at 190.
--- Checked PH again. Was still at 6, so PH'd down to 5.4
--- Ran the top feed for a minute to wet the hydroton a bit.
- [0915]: Since she's looking perky but still a bit yellow. So decided to up the nutrient concentration even more before lights out.
--- Added 2ml more of Sensi Grow A
--- Added 2ml more of Sensi Grow B
--- Solution strength after adding more nutes: 199 PPM
--- PH went up to 5.8
- [1700]: Checked nutrients.
--- PH: 5.9
--- Solution strength: 202 PPM
--- Added 4ml of Voodoo Juice
--- Added 4ml of B-52
--- PH after adding more nutes: 5.9
--- Solution strength after adding more nutes: 238 PPM
- [2130]: Decided to make a new foliar spray to address the continued yellowing.
--- Started with 500ml of distilled water.
--- Added 3 drops of CaliMagic
--- Added 3 drops of Sensi Grow A
--- Added 3 drops of Sensi Grow B
--- Added 3 drops of B-52
--- Added 1 drop of Superthrive
--- Solution strength: 164 PPM
--- PH was at 5.9 and did not adjust.
--- Gave her one spray.
--- Also sprayed the surrounding hydroton.
[END OF WEEK 01]

Likes
3
Share


@CannaGods
Follow
Now we are going to week four, the plants have started to really vegetate, I have seen rapid growth in cannabis and other plants before, however, this strain is growing very large at a tremendous pace.
I am having no issues so far, I am doing very light training and I started using pH down, as the plants ingest the nutrients the pH is rapidly rising. I hope to preserve perfect pH within the next week and continue on. I have been adding a gallon of water every three days to keep the reservoir at the right level. The plants are receiving a constant PPM of 400.
Not only am I seeing five-finger leaves but I am also seeing seven-finger leaves. The plants are looking very healthy and there are no issues at all so far.
I have Started to train the plants and started mainlining, I have also slightly defoliated the plant. This Plant is overgrowing the free seed from seedsmen.
( in hindsight I have never gotten any good free seeds from seedsmen)
Science:
There are a few ideas in this grow journal that I am toying with.
The first idea is putting low-voltage conduction through the roots of the plants, I strongly believe that stimulating the the roots with electricity will induce larger and stronger vegetation.
The other idea is blasting the plants with low decibel sound waves. We will see.
There is another idea I have with string LED lights. However, I'm going to keep some of my secret sauce to myself.
Likes
15
Share


@Skinnytalls420
Follow
So this was a simple going grow!!! It’s strange how the hot so big under the light! I had one blue cheese under the same light and tent and it was way smaller!! Anyway 1 of these has come out perfect very happy the other two I’m not to sure the hairs were still pointing up but I really don’t have the time to have them going another week there already over the time they was supposed to be done but yeah I’d say out of 10 I’d rate this blue cheese growing experience a 6 out of 10 hopefully this improves when it’s dry!!!
Likes
161
Share

@DogDoctorOfficial
Follow
This girl is moving fast and decided to catch up with them sisters living in the same space but way older than she is hihihi
Growing amazing and entering her pre flower stage, she is looking great and on the way to become massive , lets see how she does now that she is in flower.
Defoliated all of them sisters with opened space in here for her, lets see how she reacts now that she as double space photons and airflow traveling all over her
Man she is moving fas and in a beautiful unique way, love how her leaf formation is showing long fingers very sativa style, i mean this is a Super Sativa Seed Club Phenotype hihihi i guess it could not be other way <3 3 <3
Just amazing she keeps getting more beautiful with the week passing by , in love with this one , just amazing , SHOUT OOUT to SSSC for what it looks to be a great one <3 <3 <3
As always thank you all for stopping by for the love and for it all, hope you all surrounded with love , health and blessing of all kinds <3 <3 <3
Genetics :
PURPLE OG PUNCH AUTO (Purple Punch x Auto OG Kush) @ Super Sativa Seed Club
All info and full product details can be find in can find @
https://aptus-holland.com/
https://supersativaseedclub.com/cannabis-seeds
https://autopot.co.uk/
https://lumatek-lighting.com/
#aptus #aptusplanttech #aptusgang #aptusfamily #aptustrueplantscience #inbalancewithnature #trueplantscience #growerslove #dogdoctoofficial
With true love comes happiness <3 <3 <3 Always believe in your self and always do things expecting nothing in return and with an open heart , be a giver and the universe will give back to you in ways you could not even imagine so <3 <3 <3
More info and updates @
https://growdiaries.com/grower/dogdoctor/official
https://instagram.com/dogdoctorofficial
https://youtube.com/channel/UCR7ta4DKLFMg2xxTMr2cpIg
<3 <3 <3 Growers love to you all <3 <3 <3
<3<3<3 have a bunch of other journey going on, fell free to stop by and say hi, don be shy <3<3<3
Strain info :
About Auto Purple OG Punch cannabis seeds
To create Auto Purple OG Punch we crossed our feminised Purple Punch with an autoflower OG Kush. The original Purple Punch is a cross between Larry OG and Grandaddy Purple, illustrious and stable indica dominant THC-rich heavyweights!
The total grow cycle from autoflower seed to harvest is a short 9 weeks. You will be rewarded with a large yield of sticky resinous buds, up to 600g/m2 indoors. If you’re looking to grow a high quality indica auto made with cannabis cup winning genetics you will love Auto Purple OG Punch. THC content is always up-to/around 20%. Auto Purple OG Punch effects are intense, euphoric and relaxed. She also contains around 1% CDB which contributes to the very smooth, chilled smoke. Expect a mouthwatering blend of sweet tasting candy, dark fruit and hints of spice. A real connoisseur cocktail with powerful effects!
She normally reaches around 1m tall. But in optimized conditions with LED grow lights you can see occasional monster plants up to 2m tall with XXL yields. Auto Purple OG Punch is easy, potent and heavy yielding indoors. She also delivers well outdoors - such as the balcony or garden.
Auto Purple OG Punch is a perfect, powerful strain for a quiet relaxed day. The calming indica body effect is very satisfying and de-stressing.
Likes
2
Share


@Ninjabuds
Follow
They all needed me to do surgery to get the shells off let's hope they grow. I got these as a bonus when I bought a pack like a year ago so there kinda old and I opened the package when i got them so humidity prob git to then little over time with an open package. I'm not sure what to expect from these but lit has failed to have anything other than a1 plants so

Likes
8
Share


@DonPerion1983
Follow
Beginning to grow which has made me happy seems to be growing steady! Ph level of 50 air temperature 24/26

Likes
5
Share
@Chrisandweed
Follow
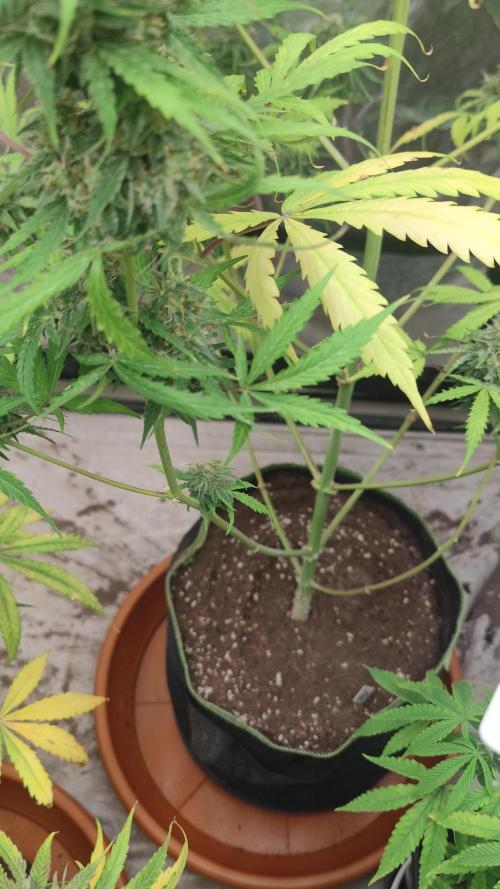
A ver, la planta va muy bien, crece muy bien, tragando agua sigue igual, al mismo ritmo, cada 2 o 2 dias y medio le hecho sus 3 litros, y a veces riego con 7 para que drene algo. Ahora bien, el amarillo... ¿Porque está tan amarilla!?
-Puede ser por haber pecado de ir flojo con los nutrientes. Falta de potasio.
-Puede ser por bloqueo por PH o por sales.
-Puede ser un hongo.
-O puede ser, y es aquí mi teoría jajajaja, que dado que esta planta ya la he cultivado dos veces mas antes, la primera vez, fue bastante mejor que la segunda y pude asegurar el lavado y llegar bien a sus últimas fases y tal (se cagó en el secado que duró 4 dias jajajaja pero bueno, de todo se aprende) y lo curioso, es que en ese primer cultivo, me amarilleo también muuy pronto, con las mismas manchas y de aquí mi teoria: este genotipo alarga el uso del nitrogeno hasta fases avanzadas de floracion y además empieza a tirar de reservas antes de lo habitual (lo cual explicaría que esta es una de esas plantas que en una semana ha madurado y no te das cuenta) y dado que en floracion el ph se baja, yo lo fui bajando conforme arrancó el stretching por lo que le fui limitando las reservas de nitrogeno antes de lo que ESTE GENOTIPO pide, y de ahí el amarillenteo de la mayoria de las hojas.
Como tengo todavía varias semillas mas de esta, seguiré plantándola a ver hasta donde podemos llevarla y gracias a cosas como estas, ir aprendiendo por el proceso.
PD: tengo ramas atadas o apoyadas a la pared por que se caen del peso xD

Likes
15
Share


@CanadianFillmore
Follow
Week 8 of 9 for Do-si-dos! This girl is also appreciating the extra feeding even though she shows the least amount of deficiency. Not much else to say about this girl, this week.
