Check the winners The Grow Awards 2026 🏆 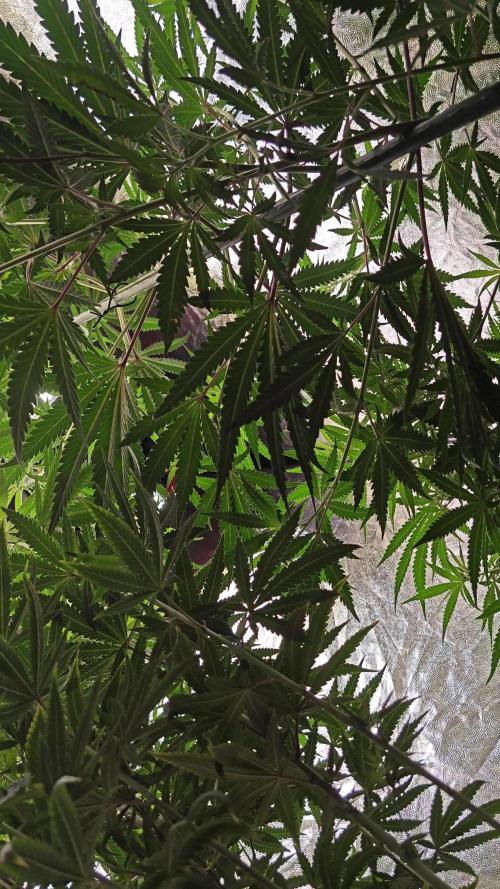


Likes
Comments
Share
@Pot_Portraits
Follow
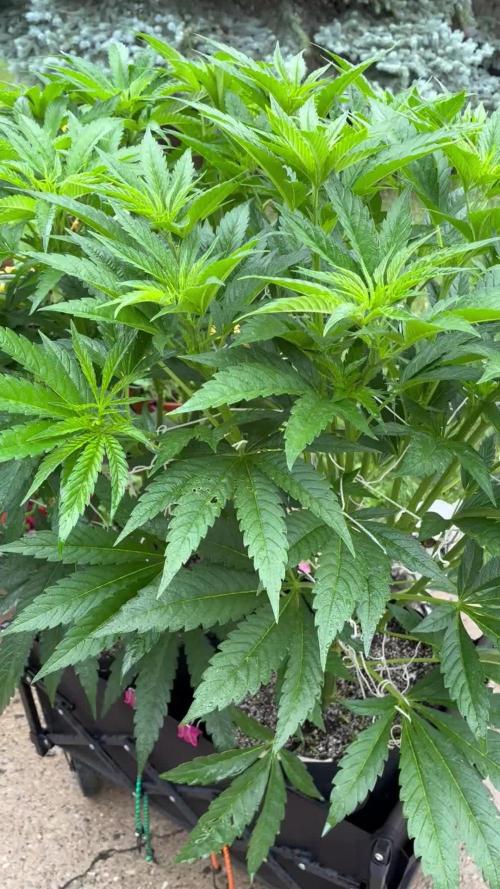
Week 2 and she is fast ! Flowers are developing super nice, she is growing a lot every single day, no slowing down.
She is happy in all the ways and she is getting massive, super tall and great structure overall !
Amazing strain so far !

Likes
Comments
Share
@JardineiroBr
Follow
Perdi mais uma semente , agora vamos tocar essas duas para ver se elas crescem bem saudáveis e fortes.
Estão com um bom tamanho vieram para o quintal, ainda pode ter algum ataque de pássaros mas preciso do espaço na estufa para novas sementes que germinaram.
Perdi mais uma só restou uma , mas ela está bem .

Likes
3
Share
@CheeeRz
Follow
The ladies have almost reached 40 cm in height, so we are switching to the flowering stage. For the next two weeks, they will receive fish mix before I switch to Biobizz Bio Grow. 💚💚

Likes
26
Share
@HowtoBubatz
Follow
Today marks the start of the final week before harvest, and I’ve officially begun flushing the plant.
It's really exciting to see how far it has come. The buds have developed beautifully, and the scent is amazing – super fruity and sweet, almost like a mix of berries and tropical fruit.
The aroma fills the space every time I check on it.
I’m pretty satisfied with how the plant has grown overall.
The structure is solid, and the buds are dense and sticky. Everything looks on track for a good yield, and I can’t wait to see the final product after curing.
Fingers crossed for a smooth finish!
Likes
44
Share
@GODSGIFT_2005_JM
Follow
For LIQUIDS & NUTES ******GREEN BUZZ NUTRIENTS***** organic.
Also i’m using their LIVING SOIL CULTURE in powder form!
MARSHYDRO ⛺️ has large openings on the sides which is useful for mid section groom room work. 🤩
☀️ MARSHYDRO FC 3000 LED 300W
💨MARSHYDRO 6” in-line EXTRACTOR with speed-variation knob, comes complete with ducting and carbon filter.

Likes
5
Share
@GermGrowFox
Follow
Die 6. Blütewoche hat begonnen und es ist schon echt gut Volumen vorhanden. Beim öffnen des Zeltes kommt ein sehr starker Geruch entgegen! Ohne Aktivkohlefilter wäre es unmöglich das zu managen 😂!
Es stehen weiterhin keine Arbeitsschritte an, außer alle 3-4 Tage Wasser + Nährstoffe zu verabreichen.
Spätestens in zwei Wochen beginne ich die Trichome nach Reife zu checken.
1. Januar….
Happy new year 💚❤️
Meine Runtz hat nun doch gezwittert und mir das Zelt bestäubt… erste Samen werden erkennbar… bin grad etwas traurig aber it is what it is… wären nur noch 4 Wochen gewesen :(

Likes
4
Share
@mad_nad
Follow
So... it happened
Because of the lack of space and poor light I decided to defoliate them a bit..
No water the whole week, as the soil was still quite humid
Processing
Likes
26
Share
@GrowGuy97
Follow
First auto run! Fastbuds , Seedsman & Victory seeds!
Never done autos before so excited to see how this goes!
Day 5 and 2 of the NHL’s from Victory seeds still hasn’t popped😫😬


Likes
3
Share
@chris140220
Follow
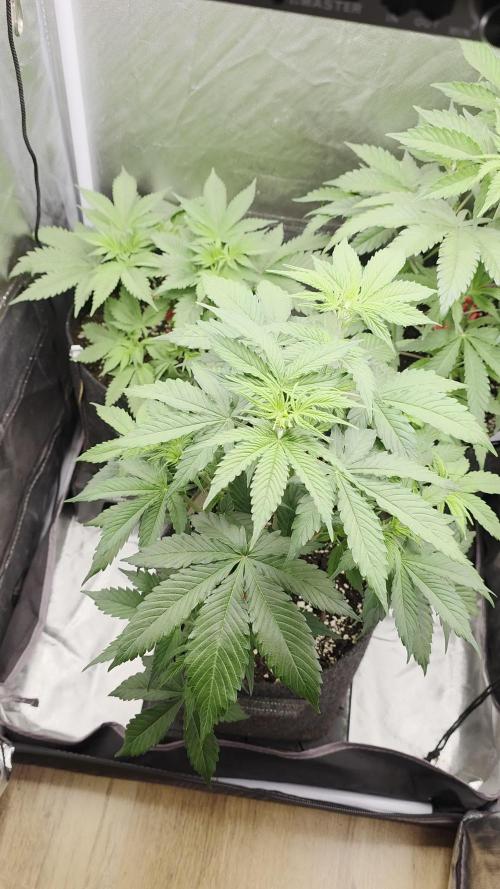
So I’ve over watered them like a idoit and then to top it off the girl on the right all her bottom leaves went droopy and didn’t look so strong so I cut them of , also I’ve noticed some yellowing on the tips of the leaves from the girl on the left but I think that’s due to over watering , anyway I’ve done from watering everyday to when top of the coco is dry nutes are the same just gone from feeding every day to every other day but overall that’s the end of week 3 and I’m still impressed on how there looking AS ALWAYS ANY ADVICE WOULD BE AMAZING
Likes
17
Share
@ipoke_smot420
Follow
Day 78- still not seeing any ambers under the trich-scope
As always, I got to shoutout to my sponsors @Fast_Buds and @atlasseed, and to my friends @seedsman. Thank you all for the amazing genetics🙏🏼💯🤙🏼💚💚💚

Likes
10
Share
@HideAndFly420
Follow
Day 57 this little lady last weekend showed up with some burning on the leaves but I’m. Not really sure it was an excess of nutrient, signals of a deficiency of K and P are also visible. So I just gave oh controlled water with regulator and enzym+ and some calmag, now everything looks fine and i ‘ m sure I t will be great this week.
Tomorrow, feeding day!
Day 59 lady si farting up every day, I’ve been feeding her the last two days. The yellow on the leaves is just because of a water deficiency from the last week, I wanted my lady to absorb everything I gave. On day 57 I gave 1 lt but it was too dry, so on day 58 I gave her another lt and she took it all with PH 6,2 and PPM 1000z
I think I’ve got 20/25 day max left so this will be the last week of fertilising from
Day 70 I’ll start mi flush.
Day 62 today feeding day I finally get my p-boost and k-boost from aptus. She drunk 1 lt with
ph 6,1 and ppm 1090
Let’s see🌱🌱🌱🔥🔥
Likes
38
Share
@Cariboo_OG
Follow
Utopia Haze is a rare heavily sativa dominant hybrid (90% sativa/10% indica) strain created through back crossing Brazilian Sativa strains. This tasty little bud took home 1st Place for Best Sativa in the 2008 High Times’ Cannabis Cup and for good reason – with its potent 18-22% average THC level and long lasting cerebral effects, Utopia Haze is one powerhouse smoke. The Utopia Haze high comes on soon after you finish your first toke, hitting you with a strong cerebral lift that infuses you with a sense of hazy relaxation.
Type: Feminised/Photoperiod
Cultivation: Indoor/Outdoor
Flowering Time (days): 70-75
Indoor Yield (g): Up to 650
Feminised Outdoor Harvest Month: October
Feminised Outdoor Harvest Month Week: 3rd-4th week
Aroma: Citrus, Woody, Pungent, Mint
Effect: Cerebral Lift, Hazy Relaxation, Sleepy
Welcome Everyone to the Final Entry of my Utopia Haze Grow !
There is so much to discuss ! I have been extremely busy as of late trying to get this Harvest together, but i am happy to have it here for you now !
I Seriously under estimated the amount of time, help from others, and my own necessary skills to pull this off.. and i still kind of screwed it up lol !
But its worth noting i have never actually done this before and trying to document it during....was extremely hard.
It is next to impossible to work an iPhone with rubber gloves on !
First I want to discuss everything step by step so before you jump straight into the comments on how the end product is so small in "quantity"
Rest assured i am happy with its"quality"...and thats all that matters to me because Life is a journey not a destination! and i have learned so much from this grow that I couldn't be any happy even if i messed some things up :)
But at the very least I hope you read through this entry in its entirety with an open mind and focus more on the process, rather than just the outcome!
I ran out of Ice & i was only able to wash three times..(normally I've heard you should go sometimes 5-6 washes)
Preparation is Key & things will be much better next round :)
Photos 1-22
These are pretty self explanatory but for those of you just tuning in now.. this is what happens to a very happy plant when you don't have the necessary tools to monitor key components of growing cannabis.. Ph, as well as EC levels play a very key role in the outcome of your grow lol that being said I was just able to save this plant by purchasing both tools but that doesn't mean the plant didn't suffer because of the prior events.. This was a Huge reason behind me choosing to turn this harvest into what i would consider
"Solventless Hash Rosin" from "Ice water extracted Bubble hash".
Pictures 23
The idea here is the process of using "fresh Frozen Cannabis" this has been discussed many a time online on such sites as instagram and here on grow diaries as well.. I personally have Never tried the process so i decided to try it out and make a judgement for myself..
Video 24
The Cannabis has now been in the freezer for 72 hours making it very well frozen.. as you can tell i struggled getting it all into the 25u Screen Wash Bag. One thing of note i would do differently is i will de-stem my next batch as i also believe this played a part in the amount of plant matter that escaped through the sieves.
Photo/Video's 25-28
The idea here is "ice water Seiving" & especially with the bags that I am using here that are only have screen material on the bottom portion of the bag it is very important to have spaces in-between the screens to allow the water to pass directly through the screens into the bottom bucket with the least amount of resistance.. because the hash is so extremely temperature dependant if it gets warm on the side of the bag.. it will stick there and not make it to the bottom to become use able product..
29
You do not need to use as much Ice as i used here lol... the idea is to keep everything very cold..i certainly achieved that but at the sacrifice of using so much that i ended up grinding product and producing "contaminants" but in the end they are just plant matter that i would be smoking when i rolled up my joint either way so.. I'm not super disappointed..
But it should be noted that what you want to achieve here is a Layering effect where you have the wash bag between two small layers of ice while the "water current" washes the Trichomes away allowing them to be separated by the screens setup below :)
Before Starting the machine you should allow some time (i.e.;10-12minutes pre soak to allow the product to become saturated) before the first cycle.
By video 32 I have just ran out of ice lol..
Video 33-34
Here I have a tip for you.. to separate the screens that you sieve through.. cut 5 gallon buckets to stretch them across nice and tight.. it'll make scooping your Bubble that much easier ! i learned this from the many "Frenchy" videos I have watched :)
Picture 35
Here in lays the problem for most people.. drying your hash without loosing vast amounts of "Terpenes" whilst also stay ever vigilant against mold !
Thanks to all those videos I've watched on youtube.. id like to think this was one of my most successful parts of this process..
Things to Note; Terpenes start to seriously evaporate at temperatures 68F or 20C
you need to stay as cold as possible whilst bringing the Relative Humidity in the space down into the 40-30% to stay away from that nasty mold !
I used my cold storage room in the basement.. with a dehumidifier running to keep the space at 45% RH & staying at a constant 15c.
All while spreading the hash as thin as possible across parchment paper, on top of the white screens with a fan moving air across both sides of the paper.
Pictures 36-38
These are some macros i took in the middle of my drying session I fell in love with the colour.
Yes i know the black spots are plant material but they will get caught when i bag the hash & squish the oil out.
Thing to Note; at this stage it is important to ensure you 'micro plane" the hash down as fine as you can whilst staying weary of the temperature... any "chunks" will hold pockets of moisture.. that lead to potential problems..ie; mold ...
Picture/Video 39-41
Successfully planed bubble hash ready to be bagged and Squished !
Picture 42
Ive decided to follow Pedro.. from Pedros Grow Room and double bag to be on the safe side so i don't have any blow outs.
So thats One 25u bag inside one 160u bag ! :)
Pictures 43
This is almost 3 grams of the bubble hash from above, already melting in the bag.. this is where i ran into trouble again lol things started getting to warm in the house and i was only able to get one of the three squish's i did on video :( things started getting sticky.
Picture 44
This is basically just a photo of the equipment I'm using; 3x5 LowTemp Cage in the frame I built myself, with a 20Ton bottle jack.
Something to note here is this is an older Lowtemp model with only a single heating zone which is which i have it closed here heating Both sides of the press :)
As well as the importance of having adequate pressure on your plates.. my rig is very overkill for the size of hash bags..lol
Video 45
Here is the lovely press video.. its didn't quite work the way i wanted either lol my directional folding wasn't quite tight enough for a big "drip" :)
&the Press was set to 65°c
Photo's 46-50 are pretty self explanatory :) I had a blow out.. but still managed to pull an 80% return from the hash once squished...& yes it tasted amazing :)
Was it worth it in the end... that could be debated.. for some..i understand..its not your thing, but for those of us that are interested in making our own concentrates.. free from Solvents...
I wouldn't make it any other way :)
If even ONE of you reading this diary finds it helpful to reference for ANYTHING.....even if its "what not to do" ill consider it a success !
Thanks again for tagging along on this garden adventure.. its been one heck of a journey !
Much Love from B.C. Canada,
Until Next time,
Cariboo

Likes
20
Share
@diversiv0
Follow
Last week I removed several leaves that dried out. Overall the plant is suffering from light exposure and now I have reached the maximum height for the lamp in the tent. The plant did not grow this week staying around 62cm. I found some roots on the surface and covered them with more soil. I have noticed no substantial changes in the buds and I am not sure whether the general dryness is affecting them. I have purchased a ph solution to tackle that issue hope not too late. I am still confident I to get a decent outcome in a couple of weeks.
Likes
13
Share
@Kenpowarrior
Follow
She is still small but lots of flowering. Her ruderalis side is really showing. Have to watch out for that next time. Not so much fan of that. 🤔 so no🌲🌲🌲for me 😔 but love her shape.
Likes
6
Share
@Northern_Ent
Follow
July 19: first night of force flowering last night. Plants in dark garage at 9:30 pm and out again at 7:30 am for 10 h darkness.
Also using 730 nm far red light at transition to dark which puts the plant into dark mode two hours faster so it’s like getting a 26 h day with 12 h of darkness.
Force flowering for 2-3 weeks to make a solid transition into flowering and to get the buds ripening under the stronger summer sun.
July 22: Foliar spray with Epsom salts and potassium silicate this morning. The magnesium in the Epsom salts seems to help with yellowing on the new growth.
July 23: added another loose Scrog net layer. Tied to water bottles to open up the canopy to sunlight.
July 25: watering yesterday included some water leftover over from steaming beets for dinner. That likely contained lots of N because beets are high in nitrate and the plants are very green this morning.
Likes
4
Share
@myketb
Follow
Week 1 Day 1
- Clones #1 and #2 are looking alright, not super strong and slight nutrient deficiency issues, but OK. Will just observe for now.
- These clones are currently under a very mild CFL light (20 cm away and about 200 ppfd measured roughly by phone app - Tent Buddy.)
- Clone #3 still need to be covered to maintain moisture. Yesterday I un-cupped the clone and it wilted a lot. This morning it looks better again after a night of rest under the plastic cup.
- I've checked the run off and these clone's pH are so low, while TDS are so high (pH 5.7 and TDS 800pm). This evening, I flushed them with pH 6.5 water and brought the runoff to about pH 6.0 and 350 ppm)
Week 1 Day 2 - Just foliage spray with mild CalMag this morning. Soil is still moist, so no watering.
Week 1 Day 3 - Just minor watering today. Glad to see the clones are doing well as they are growing a bit everyday. Will transfer them to 3 gallon airpots with new soil mix soon.
Week 1 Day 4 - Foliage spray with mild CalMag and Seaweed. Add 5ml of 250 ppm of balanced NPK nutrients AN B52 for each plant.
Week 1 Day 5 - Foliage spray with mild CalMag and Seaweed. Transfer them to 3 gallon airpots.
Week 1 Day 6 - Foliage spray with mild CalMag and Seaweed. Skip watering. The clones responded OK to the new airpots.
Week 1 Day 7 - TBA

Likes
100
Share
@AsNoriu
Follow
Day 99. All 3 girls down. Wet trim . Can't wait to try them out. Scissors hash was so sweet ...
1.6 kg for wet plant is not bad too I think. Plant A should be biggest in this grow from all strains ... She has to beat 202 g. of AD.
Happy Growing !!!
Likes
5
Share
@Tidzs
Follow
21/11/2022 - Diamo inizio al primo giorno di vegetativa, ancora niente acqua, temperatura e umidità costanti intorno ai 25° e 70% umidità. Probabilmente domani alzero appena il dimmer della lampada visto che qualche piantina sta un pò strecciando.
22/11/2022 - Ancora niente acqua, aumentato il dimmer della lampada al 30%
23/11/2022 - Prima irrigazione, data circa 350ml per vaso con soluzione di acqua osmotica e 4ml/l di Biobizz Root-Juice
26/11/2022 - Irrigato per la seconda volta, stesse quantità e soluzione della volta precedente
27/11/2022 - Ho notato che le piante vicino alla coperta riscaldante stanno crescendo un pò più velocemente delle loro controparti nel lato opposto, per cercare di bilanciare ho cambiato di posizione le piante più vicine alla coperta riscaldante con quelle verso la porta del box, lasciando quelle centrali invariate,


Likes
8
Share
@MrJazza
Follow
Começamos na semana 5, não tenho registos das semanas anteriores, espero quer gostem deste diário em português.
A Planta do meio é a NLA e as em volta as GGA.
Atualização com fotos todos os Sábados.
Resumo DIario:
- Dia 37 - 04/10 : Misturei 50g de guano de morcego (1-15-1) na superfície de cada vaso, reguei cada um deles com 1.5L de agua com Ph ajustado em 6.3, o desenvolvimento está bom, sem nada mais a apontar.
- Dia 38 - 05/10 : Notei um aumento significativo na intensidade do cheiro, estão a crescer bastante bem, não apresentam nenhum problema de nutrição, a NLA, naturalmente, está com a floração mais atrasada.
- Dia 39 - 6/10 : Fiz mais uma rega de 1.5L em cada vaso, o solo estava seco, como já havia fertilizado o solo á 2 dia com guano de morcego, coloquei apenas 3ml/L de CANNA Terra Flores e ajustei o Ph para 6.3. Elas estão a exigir muita agua, é bom sinal.
- Dia 40 - 7/10 : As meninas deram uma boa secada no solo, a intensidade do cheiro está realmente mais forte, estão a florir bem.
- Dia 41 - 8/10 : A terra estava praticamente seca, reparei que uma das GGA está a apresentar a ponta das folhas amarelada/queimada, principalmente nas folhas inferiores, poderá ser possível carência de Nitrogénio, pois é um nutriente móvel que a planta pode levar para as folhas superiores na falta do mesmo, adicionei 2ml/L de CANNA Terra Vega, que é um nutriente baseado em Nitrogénio e Ferro, á solução habitual, ajustei o Ph para 6.3 e reguei cada vaso com 1.5L, vou deixar a terra secar bem em 3/4 dias e acompanhar como reagem.
Likes
19
Share
@Sublyme_ness
Follow
Downward leaf curl on tips. Must investigate. Leads feel a bit papery, need to look at why that is. Not enough n?.. hmm. Loving the shape of the plant though so far and real consistent growth. Thin stem.