
Likes
Comments
Share


@Ferenc
Follow
Getting ready very stinky and sticky plant. Large and side chains are so heavy I needed to tie to.not to bend. Harvest in 2 weeks she is being flushed. ;)


Likes
15
Share


@TAXFR33
Follow
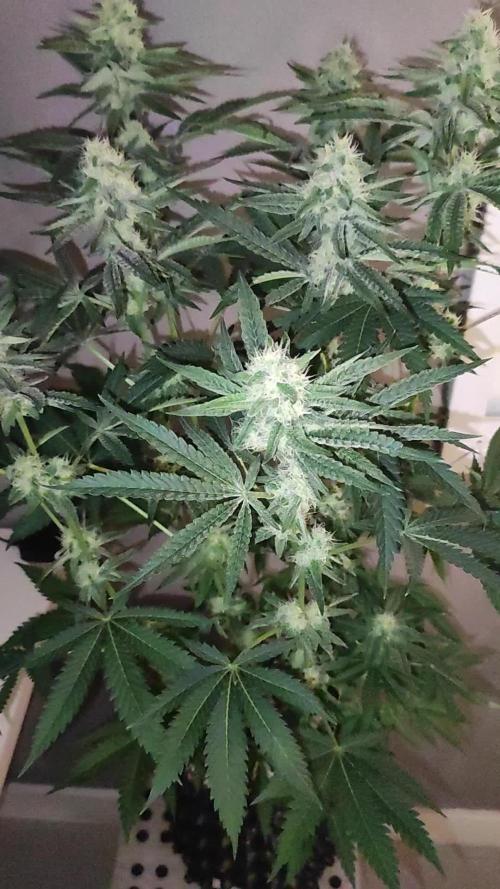
Last update before i harvest in a couple days - 1 week max, very happy with this grow the gorilla cookies is the plant i’m most looking forward to, it’s covered in frost and smells like berries while the orange sherbet has some monster buds 👌🏾 Think fast buds will be my go to for autoflowers from now on

Likes
16
Share


@ChronicFinest
Follow
Wow what a strong weed. The yellowing stopped immediately after repotting and she wasn't stunted at all. I give her 3 liter water every other day. The temps are higher in this season I hope that will not be too much of an effect on yield.
Humidity is OK so mold should stay out too.

Likes
30
Share


@XperencdGmanXG
Follow
well what can i say this is what I saved from the fusarium outbreak that I had with the mother and all the clones. Managed to save 5 clones 2 are with a friend now. I have 3, one is a great specimen and the other 2 are lil clones that could. Round 2 here we go! Wish me luck!

Likes
6
Share


@Newbie5648
Follow
Time to harvest or leave for longer.
Maybe a few more days?
Should I water on not now or just wait?
Soil is dry.
Please let me know your thoughts!
Likes
11
Share


@Skinnytalls420
Follow
Just as difficult to grow as the first time I done Afghan kush but still managed to get some nice purple bud out of it!!!
Likes
2
Share


@Saintvicious
Follow
Looks like a lot of top sights. Afraid stretching too much. Hopefully it fills in.
Likes
49
Share


@masterofsmeagol
Follow
Sorry I couldn't get better pictures but I'll try again tomorrow. This strain certainly deserves it. Very low leaf to bud ratio on this plant. Dark pink or orange stigmas retracted into the buds as they finished and one pheno had the densest nugs I've ever grown. This year realky showed me the difference of quality seeds compared to "local" clones. After a rainstorm on the large fluffier pheno I found a "trapped" bumblebee inside one of the massive colas. I had to help it out. It was literally "stuck" due to the resin. This strain had the most pleasant aroma that stuck with the finished product. Due to the small amount of leaf to bud ratio this plant was a breeze to trim. That being said I still don't have it ALL manicured up but I'm working on it. All plants seemed fairly pest resistant as well. If you enjoy indica strains (90/10) with short flowering times than this should certainly be on your "to grow list." Having these plants totally finish before October was very helpful. According to many local growers (both patients and commercial growers) this was "the worst year for growing cannabis in memory." I've had the best year I've had in decades (probably ever) both quality and quantity wise.

Likes
12
Share


@Rogatch
Follow
In this week I stopped with Alga Bloom - Nutrients. Being busy only with watering PH 6,5. Also I took CO2 generator out the tent. Can't wait to get those little girls milky/ruby :)
Likes
6
Share


@GreenMunchkin
Follow
Day 45 - 26/11 - She is looking very good, leaves a perky and buds are growing.
Day 47 - 28/11 - The trichome production is really starting nicely, I can start smelling her.
Day 49 - 30/11 - She was top dressed with fresh vermicast and a few teaspoon of a top dress mix (at the bottom), all of that was mulched with a layer of erograstus grass.
---------
Top dress mix :
Equal parts Alfalfa meal, Rock dust, Kelp meal, Insect frass.
Likes
10
Share


@DRO420
Follow
Almost doubled in height over the last week. Looking good , feeding full formula now. Switching to flower next week right after they are pushed down with the trellis net or scrog.
Likes
2
Share


@Stevee256
Follow
Oh this week is absolutely fantastic!
Outside is 22 degrees all day with sun..
Some days gorillas is just lay outside..put them out on a fresh air!
The 2x ladies without topping will grow fantastic 160 cm!!!Im so surprised ../picture/
Flowering is hard the trichomes level is good..
The bat guano is powerful nutrient ..my mixture was maybe too strong..so Kalium level is on the max !..
I use clear rain water only this week..
The light stress is continued a bit ..im nervous about that but its on the border ..hopefuly its not decrease my crop.
Wait for the next week
Likes
6
Share


@CleetBigmeat
Follow
D73 - not long left, bit of yellowing up but not too much worrying as I'm flushing them with pHd rainwater.
Both looking like good yielders!
❤️💛💚

Processing
Likes
10
Share


@Fibro_Witch
Follow
Critical Cure is still trucking alone nicely. No sign of bugs or nute issues. I had a friend who had issues with a couple of her Girl Scout Cookies that she's doing. She definitely had some lockout from heavy rain that we've been getting. That's why I'm glad I put down lime, but also got away from using mineral salts, because I think that was definitely an issue last year. Very happy with the results so far of going au naturale!
Likes
72
Share


@JUNGLE_B4RNS
Follow
Third week is starting well, as you can see in the video and on pictures, the stems are strong and the seedlings didn’t go looney for the light like magic beans after being under the "wind" ... (the tip is free bro hit the like button and you won’t get Jack magic beans anymore 😄👍)
Still lifting the pots, they are becoming light, I will certainly water them this week.
Beginning is so awesome, there’s nothing to do except keeping the light at the right distance and lifting the pots 😄
[Day 18]
Readjusting the pots under the light to make sure the plants don’t start to cover each other.
[Day 19]
Topping the plants at the 3rd node.
Water 💦
(P.S: I’m looking for a job in the Cannabis industry as Master Grower , Mineralogist , Quality Control 🐞)


Processing
Likes
14
Share


@BudXs
Follow
Not good news here. Shes a stubby. Still in the garden, but not for long
Likes
8
Share


@CalGonJim
Follow
seeds:
Montel Iced Tea, Body Count, Bubbles Blueberry F4, Ricky’s Hash Plant, Black Tangi Tea → standouts / "otherworldly"
These are clearly your current stars — better structure, resin, and overall quality than most of the others you've tried.
Auto Flowers:
Humboldt Seed Company — best autos you've grown. Extremely resinous, especially the OG Triploid. Top tier for autos.
Fast Buds — very close second. Super fast, nice flavors, reliable. You like them a lot but note they're in a different class (not fair to directly compare to Humboldt).
Why RQS Strains Underperformed
The 7/10 rating and "needed a lot of power to switch to flower" comment is classic for some RQS genetics, especially certain autos or hybrids. Possible reasons:
Genetics: Some RQS lines are finicky about light schedules or have slower/more reluctant flowering responses. Mike Tyson 2.0 and Corkscrew apparently needed the 12/12 flip to finally push.
Light/Environment: With five tents running, light penetration, spectrum, or intensity might not have been ideal for these particular strains. Autos can be sensitive to stress during the transition.
Nutrient response: They may have needed more phosphorus/potassium or different ratios to bulk up properly.
The fact that you had to force Corkscrew into 12/12 at week 20 and it's now only "OK" suggests it was a slower or lower-yielding pheno for your conditions.
Strong Performers
Brothers Grimm → These sound like the real winners in your tent right now. Brothers Grimm has a reputation for unique, high-quality landrace-influenced genetics with excellent resin and flavor profiles. "Otherworldly better" is high praise — they clearly thrive in your setup.
Humboldt Seed Company autos → Excellent choice for resin production. OG Triploid is a standout for trichome density.
Fast Buds → Reliable, fast, flavorful — a safe, consistent auto line.
Recommendations Going Forward
Double down on what works:
Keep running more Brothers Grimm (especially the ones you loved).
Stick with Humboldt for autos when you want maximum resin.
Fast Buds for speed and flavor.
3/30 4am Pink Kush CBD is SLOW.... she never really recovered from early problems, I LOVE this strain, smoke and smell are 10/10. I blew it up early from problems that are NOT MY FAULT. so there.
4/1 12pm We're gonna need a bigger TENT!!!💐🌼Humboldt Seed company email today...Im doing this!!! https://californiahempseeds.com/garden-seeds/


Likes
10
Share

@Bncgrower
Follow
Another week successfully completed... All the plants are developing very well, the flowers are plumping up nicely, and all the plants smell great... Everything is as expected, and now we're closer to the end than before... Happy growing to all! 🌱🌿💪