Likes
Comments
Share
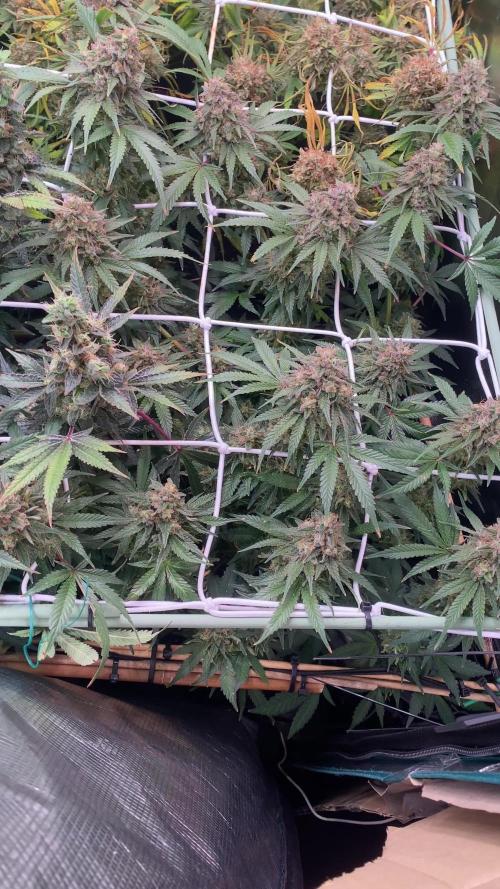
🌸 Week 7 – Flower Stage: When Trouble Knocks, We Learn Grower: Dog Doctor Strain: Super Silver Haze Breeder: Zamnesia Seeds Light: Future of Grow Black Series 600W & ThinkGrow ICL-300 Environment: 8x8 Shared Tent – Controlled by TrolMaster System Temp: 29.4°C (day) / 25.6°C (night) Humidity: 64–68% CO₂: ~720 ppm Soil Temp: 24.8°C Watering: Manual (Hand Watering) Water Mix (per L): • Aptus Regulator – 0.15 ml • Aptus CalMag Boost – 0.25 ml • Aptus All-In-One Liquid – 1 ml • Plagron Power Buds – 1 ml • Plagron Sugar Royal – 1 ml • Plagron Green Sensation – 1 ml ⸻ 🌿 The Week the Storm Passed Through This week brought a little challenge to the garden — bud rot made an appearance. It’s never a welcome guest, but it’s part of the growing journey, and it teaches you more than any perfect run ever could. It started small: a couple of darker spots noticed deep inside one of the colas. Upon closer inspection, we confirmed it — Botrytis cinerea, or as growers call it, bud rot. Thankfully, it was localized and quickly handled, removing all affected material carefully to avoid spreading spores. Despite how dramatic macro photos can make it look, the loss was minimal. The rest of the canopy remains healthy, strong, and radiant under the LEDs. The girls keep thriving like the true champions they are. ⸻ 🧠 Educational Spotlight – What Is Bud Rot (and What It Isn’t) Bud rot is a fungal infection caused by Botrytis cinerea. It thrives in warm, humid, stagnant environments — the kind of microclimate that can form in thick buds during late flower. It usually begins inside the bud, invisible at first, and works its way outward, leaving behind a grayish-brown, dusty rot that can ruin entire flowers if unnoticed. Early warning signs: • Brown or gray fuzz inside the cola • Dry, dead sugar leaves sticking out of healthy buds • A musty or “old hay” smell Prevention is everything: 🌬️ Keep strong airflow through and between plants 💨 Maintain active extraction and oscillating fans 🌡️ Lower humidity to 50% or below during late flower 🌗 Avoid large night/day temperature swings ✂️ Remove excess inner foliage (selective defoliation) For a deep dive into identifying, preventing, and treating bud rot, check out Zamnesia’s excellent guide: 🔗 Zamnesia – Bud Rot: The Cannabis Grower’s Guide - https://www.zamnesia.com/grow-weed/563-bud-rot-cannabis-grower-guide ⸻ 💬 Reflection – The Grower’s Responsibility Let’s be honest — this one’s on me. It’s a new setup, and with every new tent comes a new rhythm to learn. The temperatures are still higher than I’d like, and humidity sometimes pushes the edge. But that’s what growing is — progress through imperfection. The key is to act fast, learn faster, and never let one small setback derail the entire grow. The good news: both Super Silver Haze phenos continue to look absolutely stunning — symmetrical, resilient, and full of that legendary vigor that made this strain an icon. ⸻ 🌸 What to Expect Next As we move into Week 8, we’ll be: • Reducing humidity and increasing airflow • Keeping close watch on moisture and leaf density • Fine-tuning the TrolMaster environment controls • Allowing buds to fatten, harden, and mature into their final form We’re entering the critical ripening phase, where patience and precision make all the difference. ⸻ 🌾 Grower-to-Grower Corner – Preventing Bud Rot Since every grower faces this risk sooner or later, here are a few small habits that make a massive difference: 1. Prune with intent: Create small “air highways” between branches so moisture can escape. 2. Nighttime is key: Rot thrives in cool, humid nights. Keep fans on and air moving even when lights are off. 3. Monitor VPD: Around 1.2–1.4 kPa is ideal for mid-late flower; beyond 1.6 increases risk. 4. Inspect daily: Use your eyes and your nose — the first clue is often a smell, not a sight. 5. Clean the space: Mold spores can live in your tent, filters, and even fans. Sanitize between runs. Remember: Bud rot doesn’t mean failure; it means evolution. Every grow that survives it creates a smarter grower. ⸻ 💚 Closing Thoughts This week was a humbling reminder that even under the best light, nature still has the final say. But she also rewards those who pay attention, act fast, and grow with love. The Super Silver Haze continues to honor her legacy — strong, aromatic, and beautifully structured. Thank you to Zamnesia Seeds, Aptus Holland, Plagron, Future of Grow, ThinkGrow, and TrolMaster for helping make this journey what it is. With roots grounded and hearts steady, we keep going — greener, wiser, stronger. Growers Love to all, 💚 Dog Doctor 📲 Don’t forget to Subscribe and follow me on Instagram and YouTube @DogDoctorOfficial for exclusive content, real-time updates, and behind-the-scenes magic. We’ve got so much more coming, including transplanting and all the amazing techniques that go along with it. You won’t want to miss it. • GrowDiaries Journal: https://growdiaries.com/grower/dogdoctorofficial • Instagram: https://www.instagram.com/dogdoctorofficial/ • YouTube: https://www.youtube.com/@dogdoctorofficial There’s a new series blooming and it’s more than just plants. It’s about process, patience, and paying attention. ⸻ Explore the Gear that Powers My Grow If you’re curious about the tech I’m using, check out these links: • Genetics, gear, nutrients, and more – Zamnesia: https://www.zamnesia.com/ • Environmental control & automation – TrolMaster: https://www.trolmaster.eu/ • Advanced LED lighting – Future of Grow: https://www.futureofgrow.com/ • Root and growth nutrition – Aptus Holland: https://aptus-holland.com/ • Nutrient systems & boosters – Plagron: https://plagron.com/en/ • Soil & substrate excellence – PRO-MIX BX: https://www.pthorticulture.com/en-us/products/pro-mix-bx-mycorrhizae • Curing and storage – Grove Bags: https://grovebags.com/ ⸻ We’ve got much more coming as we move through the grow cycles. Trust me, you won’t want to miss the next steps, let’s push the boundaries of indoor horticulture together! As always, this is shared for educational purposes, aiming to spread understanding and appreciation for this plant. Let’s celebrate it responsibly and continue to learn and grow together. With true love comes happiness. Always believe in yourself, and always do things expecting nothing and with an open heart. Be a giver, and the universe will give back in ways you could never imagine. 💚 Growers love to all 💚
Likes
2
Share
Very hot weather, girls are managing better than I thought. Cleaned up all the girls extra leaves, really needed to get some more airflow through it Cut out 2 small nugs that had a little bit of spiderweb mildew Done nutrients and done instant compost tea
Likes
12
Share
@Kakui
Follow
Veg17, riego 1.3 EC y pH 6.1. Se hizo una muy pequeña defoliación y corte de algunos nodos para empezar a moldear la estructura. Veg18, un par de horas después del LST ya están mostrando la estructura deseada. Veg21, ajuste de LST. Veg22, riego 6.1 pH y EC 1.5.
Likes
8
Share
@Skin_Jim
Follow
Growing this strain was quite cool. A nice small grow or macro grow I should say. The plant seemed quite resilient which is always a good thing. I wish I could have waited another week before harvest but was getting complaints about the smell. Most of all I have to say I am rather impressed with my yield, I thought I would get 10 grams in a 4ltr pot maybe 14 at the most but ended up with 21 grams/ 3 quarters of an ounce, so next grow I'm hoping for an oz!
Likes
8
Share
Motherplant of this clone didn't give same buds as a clone. Shame I don't have mother plants anymore. I would recommend Durban Poison for everyone, I guess more people should feel this strain. This is my favourite sativa from 2019!
Likes
16
Share
@Ensign420
Follow
Introduction - Week 14|07 Summary - Ensign's log, stardate 9437.65, Great week of growing! Wow what a good week! Growth in the main tent has all around been incredible! Submitted my first submission to the Global Grow Cup! Filmed a video of the solo cup container (marked with the ticket/order number) that will be used for the competition. Also had to fill and prove the solo cup holds 2 cups of soil. Now I need to root a clone (for the first time), transplant her into this cup, and submit my 2nd entry before the 30th of this month. As far as my first attempt at cloning, have already begun the rooting process! Managed to take cuttings from 3 out of the 6 phenos in the main tent (the first cutting was also my first time topping). Soaked the cuttings for two days before planting them into Coco Coins. So far everything has gone surprisingly well! The clones are now rooting under the propagation dome with the vents fully closed. Will check for roots soon! At the end of the week, growth was just raging! Was planning on flipping to flower in a week, but decided to begin the first week of flower next week! Thus this is the last week of veg. Plan to flip to 12/12 next Monday! Onwards to next week! [START OF WEEK 14|07] ========================================================== Garlic Budder #1 - WEEK 14|07 - Full Veg Wk5 Garlic Budder #2 - WEEK 14|07 - Full Veg Wk2 Garlic Budder #3 - WEEK 07 - Full Veg Wk5 Garlic Budder #4 - WEEK 06 - Full Veg Wk4 06/03/24 → 06/09/24 This Week's Estimated Goals ---------------------------------------------------------------------------------------------- DLI: ~26 mol/m²/d PPFD: ~400 μmol/m²/s VPD: ~1.0 kPa This Week's Meter Readings & Averages [Lights On: 16:00 - 10:00] ---------------------------------------------------------------------------------------------- DLI: 24.56 mol/m²/d PPFD: 379 μmol/m²/s VPD: 0.91 kPa Soil %: [32.7, 37.6, 37.9, 34.1] ========================================================== Day 01 - Monday - 06/03/24 - Total Days: 098 ----------------------------------- Daily Averages [~23:00] - Temps: 80.7°F [27.1°C] - Humidity: 74.4% - VPD: 0.90 kPa - Soil %: [31, 34, 39, 35] ----------------------------------- - [09:57]: Quick morning check! --- #1 is looking a bit droopy, but almost lights off (at 10:00) so not concerned. --- Nice! Mainly wanted to check on #4 and she is looking great! She’s perked back up and looking good! - [23:08]: Evening check. --- Wow! It’s a jungle in here! --- #1 has gotten too big? Nah!? Keep on growing girl! --- #2 is growing and definitely getting bigger! Growth just looking really weird. --- #3 has continued to get larger and is looking quite uniform in growth! --- #4 is growing and looking perky again! --- Even the original #1 and #2 phenos (in the back) are looking good! --- Wow! #4 is really getting close to the light. - [23:14]: Checked down both fill tubes. --- Both reservoirs were completely dry! - [23:27]: Checked the Ecowitt soil moisture sensor data: --- 30% - [CH01 EB1 - Garlic Budder #1] --- 34% - [CH02 EB2 - Garlic Budder #2] --- 39% - [CH03 GFP - Garlic Budder #3] --- 32% - [CH04 FPT - Garlic Budder #4] - [23:32]: Poured 4 cups of distilled water down EB1’s fill tube. --- Poured 2 cups of distilled water down EB2’s fill tube. - [23:38]: Checked the humidifiers. --- Refilled the 4X4’s humidifier with distilled water. --- Tomorrow, plan to defoliate and start cloning for the first time! --- Going to take multiple cuttings from both #1 and #4 for sure, but still deciding on the rest. --- Getting hyped! Day 02 - Tuesday - 06/04/24 - Total Days: 099 ----------------------------------- Daily Averages [~23:00] - Temps: 81.4°F [27.4°C] - Humidity: 74.3% - VPD: 0.93 kPa - Soil %: [29, 35, 38, 32] ----------------------------------- - [11:59]: Time to film the first entry for the Global Grow Cup! --- Going to be using BuildASoil 3.0 potting soil. --- Filming the video using a stand and my phone. --- This video is mainly to establish the container that the plant will be grown in. Also to prove that the container is a 16oz container and that it can hold 2 cups of soil. --- The ticket (order) number also had to be written on the cup. - [12:36]: Done! --- The video had to be done in one continuous shot with no edits (my original submission does not have the logo). --- There was also a photo that needed to be shot which shows the cup filled with 2 cups of soil (just like the video, the original image submission did not have the logo). --- I think I did everything correctly, but also sent an email for verification of submission and validation. --- Getting hyped! --- [*smokes a bowl] --- Going to defoliate today along with for the first-time, going to take cuttings for clones! --- After a bit of online research, decided to split the cloning process into two days. --- Today going to take cuttings and will soak them in a solution of aloe for 24hrs. Afterwards will change the water out and use straight distilled water. --- Then in a couple days, plan to transplant into coco plugs (Coco Coins) for rooting. --- For optimal results, also be using a rooting hormone (Clonex). --- Well.. Here goes nothing! - [17:01]: Evening check. --- Wow! #1 is looking huge! Her main top is stretching above the lower canopy which is continuing to bush out. --- #2 is growing along. Growth is gnarly and a bit droopy, but she’s getting taller! --- #3 is looking great! Still a bit small, but she is continuing to get larger. --- #4 looks like she needs a watering. --- Both plants in the back are also looking surprisingly great as well! - [17:05]: Checked down both fill tubes. --- Both reservoirs were completely dry! --- As far as today's defoliation, going to leave #2 and #3 alone and will focus my defoliation and cloning on the rest of the plants. --- This will be my first attempt at cloning, also going to try topping for the first time today. --- No pressure Ensign. What can possibly go wrong right? - [17:27]: Time to start the cloning and defoliation process! --- Filled a measuring cup with 3 cups of distilled water. ------ Added 3/4tsp of Horticultural Aloe ------ Added 1 more cup of distilled water --- Mixed the solution and poured an even amount into three separate solo cups. --- Made sure to mark two of the cups (#1 and #4). The unmarked one will be for any other clones from amongst the 6 phenos (if any at all). - [17:43]: Time to top and defoliate #1! --- Using a pair of brand new trimmers (AC Infinity), --- Gently cut the main stalk to even out the canopy. --- Then trimmed and cleaned most of the nodes leaving the top node or two. --- Also trimmed the leaf fingers a bit before placing the top cutting into the cup of aloe solution. --- Now for the rest of the cuttings! --- [~45 minutes later] - [18:32]: Managed to finish defoliating and cutting the rest of the clones. --- Took two more lower cuttings from #1 (3 clones total). --- Took 3 lower cuttings from #4 --- While defoliating, decided to try and clone the original #2 pheno as well. Took 4 small cuttings. --- Similar to the top cutting, trimmed and cleaned each lower node for each cutting before placing them into the cups. --- Before finishing up the 2nd cutting, I noticed the first cutting (the top cut that was also trimmed) was drooping. --- So I did not trim and the leaf fingers for the other cuttings. --- In total there were 10 cuttings taken for potential clones. --- My main focus was to take cuttings and to clean up all the lower growth from both #1 and #4. --- Defoliated and cleaned up the back original phenos as well (also trimmed back the cover crop). - [18:35]: Temporarily placed the cuttings onto the floor of the 4x4 tent. --- Took the trimmings (about 3 cups) and spread them onto the top mulch of #1 and #2. --- Time to set the environmental controls for the 3x3 veg tent. - [18:43]: Within the AC Infinity App, --- For the Veg Tent [3x3] controller, --- Adjusted the 'Vegetative [18/6]' Schedule for the grow light. ------ Set the Mode to ‘On Mode’ ------ Set the START/END times to 04:00PM/10:00AM ------ Set the MAX to 1 --- The IonBoard S33 is now utilizing around 60.8W (at intensity 1 out of 10). --- Adjusted the 'Vegetative [18/6]' Schedule for the exhaust fan. ------ Increased the Humidity’s HIGH trigger value from 81% to 87% --- Adjusted the 'Vegetative [18/6]' Schedule for the humidifier. ------ Decreased the VPD target value from 1.5kPa to 0.8kPa - [18:52]: Moved the cuttings into the 3x3 veg tent. --- It begins! I think. --- Going to let these cutting drink some aloe for a day before switching to straight distilled water. --- Hmm. Could be the white floor of the 3x3 veg tent, but have noticed the S33 has a whiter spectrum whereas the FC-6500 seems to be warmer in color. --- Anyways, - [18:58]: Poured 4 cups of distilled water down EB1’s fill tube. --- Poured 2 cups of distilled water down EB2’s fill tube. - [19:06]: Filled a pump sprayer with 5 cups of distilled water. --- Focused mainly on the straw mulch of #4. --- But also misted the straw mulch for the rest of the plants a bit. - [19:12]: Checked the humidifiers. --- Refilled the humidifiers with distilled water. - [19:44]: Going to be using Clonex rooting gel before planting the cuttings into Coco Coins (pre-soaked with microbes and aloe). But before that begins, going to transfer the Clonex gel into a squeeze bottle. --- Gently peeled back the seal on the original Clonex bottle. Just enough make a tiny opening, --- Then slowly and carefully poured the gel into an empty squeeze bottle. --- Also removed the sticker from the original bottle and placed it onto the new one. - [19:54]: Perfect! --- Instead of applying the gel to the cutting, going to be applying the gel to the Coco Coin. --- This squeeze bottle will make applying the gel a lot easier. --- Will take PPFD readings tomorrow. --- Also will change out the aloe solution to distilled water. --- I really hope I didn’t screw things up before they could even begin. --- Don’t die on me ladies! --- Please. Day 03 - Wednesday - 06/05/24 - Total Days: 100 ----------------------------------- Daily Averages [~23:00] - Temps: 81.9°F [27.7°C] - Humidity: 75.5% - VPD: 0.90 kPa - Soil %: [29, 36, 38, 36] ----------------------------------- - [09:40]: Quick morning check! --- #1 is looking a bit droopy, but looking okay. Topping is a high stress technique so going to take some time to recover. Don’t plan on flipping the main 4x4 tent to flower for a good week or so which should be enough time. --- #4 looks great! The defoliation seems to have no effect on growth. Nice! - [09:41]: Also quickly checked on the 3x3 veg tent, --- Nice! The cuttings are looking great! --- No yellowing and they all seemed to have turned up towards the light. --- So far so good! - [22:53]: Evening check. --- #1 is continuing to dominate this grow! She has spread wide and looking incredible! --- #2 is looking gnarly, but getting there. --- #3 is getting larger! But still a runt. By far, her leaves are the darkest of the bunch, but she is still growing! --- #4 looks happy and growing along beautifully! Wow! - [22:55]: Checked down both fill tubes. --- Both reservoirs were completely dry! - [22:59]: Poured 5 cups of distilled water down EB1’s fill tube. --- Poured 2 cups of distilled water down EB2’s fill tube. - [23:05]: Checked on the 3x3 veg tent. --- Ooo yea! The cuttings are still green! Nice! - [23:07]: Took PPFD readings. --- The cuttings were around 121 μmol/m²/s which gives a DLI of 7.84 mol/m²/d --- Nice! These levels are on the lower range for seedlings (~100-300), perfect! I think. - [23:14]: Swapped the aloe water out to straight distilled water. --- Going to let these cuttings soak for one more day before planting. --- Please don’t die girls! - [23:15]: Checked the humidifiers. --- Refilled the humidifiers with distilled water. --- Ooo yea! --- Tomorrow is the big rooting day! Day 04 - Thursday - 06/06/24 - Total Days: 101 ----------------------------------- Daily Averages [~23:00] - Temps: 81.9°F [27.7°C] - Humidity: 75.2% - VPD: 0.91 kPa - Soil %: [32, 38, 38, 34] ----------------------------------- - [16:20]: Evening check. --- #1 is a bit droopy, but growth is looking green and healthy. --- #2 is looking bigger! She’s also looking sort of droopy. --- #3 is growing along nicely! Looking good girl! --- #4 is looking great! A bit droopy but plan to water today. - [16:23]: Checked down both fill tubes. --- EB1's reservoir still has some water. --- EB2's reservoir was completely dry! - [16:23]: Checked the Ecowitt soil moisture sensor data: --- 28% - [CH01 EB1 - Garlic Budder #1] --- 36% - [CH02 EB2 - Garlic Budder #2] --- 37% - [CH03 GFP - Garlic Budder #3] --- 30% - [CH04 FPT - Garlic Budder #4] - [16:30]: Using a pump sprayer, --- Misted the straw mulch of #4 with 6 cups of distilled water. --- Focused mainly on the straw mulch. --- Also misted the straw mulch of #3 (in the grassroots fabric pot) a bit. - [16:43]: Poured 5 cups of distilled water down EB1’s fill tube. --- Poured 3 cups of distilled water down EB2’s fill tube. - [16:52]: Checked the Ecowitt soil moisture sensor data: --- 56% - [CH01 EB1 - Garlic Budder #1] --- 44% - [CH02 EB2 - Garlic Budder #2] --- 40% - [CH03 GFP - Garlic Budder #3] --- 45% - [CH04 FPT - Garlic Budder #4] - [17:01]: Took general PPFD readings. --- #1 was around 379 μmol/m²/s which gives a DLI of 24.56 mol/m²/d --- #2 was around 333 μmol/m²/s which gives a DLI of 21.58 mol/m²/d --- #3 was around 293 μmol/m²/s which gives a DLI of 18.99 mol/m²/d --- #4 was around 378 μmol/m²/s which gives a DLI of 24.49 mol/m²/d - [17:09]: Took the weekly height and light distance measurements. --- #1 was about 21" tall. --- #2 was about 13.5" tall. --- #3 was about 9.5" tall. --- #4 was about 19.25" tall. --- Hmm.. - [17:19]: Adjusted the right oscillating fan a bit. --- Re-angled the CloudRay S6 oscillating fan upwards. Been noticing that the air has been hitting the tops of the plants so easing off a bit (#1 is still getting hit, but she’s huge so not too worried). - [17:23]: Back to the measurements! --- #1 was about 9.5" away from the grow light. --- #2 was about 17" away from the grow light. --- #3 was about 17.5" away from the grow light. --- #4 was about 11.5" away from the grow light. - [17:46]: Checked on the 3x3 veg tent. --- Cuttings are still green! They do look a bit droopy but no signs of yellowing. --- Okay! - [17:55]: Time to begin the rooting process! --- For my first attempt at rooting, going to be using Coco Coins pre-soaked in saponins, microbes and aloe. --- To further help with rooting, going to also be using Clonex rooting gel. --- Filled a measuring cup with 4 cups of distilled water. ------ Added half of 1/64tsp of Quillaja Saponaria Extract [60] ------ Added 1/16tsp of Horticultural Aloe ------ Added 1/8tsp of Mycrobe Complete --- Mixed the solution thoroughly. --- Time for the Coco Coins! --- 10 cuttings means 10 Coco Coins. - [18:09]: Dropped 10 Coco Coins into the measuring cup. --- The coins immediately started to expand. --- A bit too much.. Oops! --- Poured the solution and Coco Coins into a pitcher. --- Added 2 cups of distilled water to the solution (now at 6 cups). --- Great! The coins are pretty much fully expanded, but going to wait a bit longer to fully saturate each coin. --- [~20-30 minutes later] - [18:42]: Great! --- Took the seedling and flood tray from the AC Infinity propagation dome and placed all 10 Coco Coins into the slots. --- Gave each Coco Coin a quick shake to remove excess solution. The coins were not dripping with solution but still pretty saturated. --- Arranged them into 3 groups with the cuttings in mind. --- Also tried to keep the pre-made holes intact. --- Time to inoculate the Coco Coins! - [18:54]: Using a squeeze bottle, --- While keeping the nozzle from making contact with the coco, gently filled each pre-made hole with Clonex rooting gel. Just enough gel to fully cover the hole of each coco coin. - [19:00]: Time to plant the cuttings! --- Gave each cup a misting of distilled water. Focused on wetting the top growth with water. --- Okay! --- To avoid mixing cuttings up. - [19:01]: Starting with the original #2 pheno cup, --- For each cutting, --- Using a pair of clean trimmers, made a final 45° cut about 1/2" from a bottom node. --- Then stripped away and scared the protective membrane below the node before planting. --- Made sure the node was about 1/2" below the surface of the coco. --- To help with planting, while inserting each cutting, gave the Coco Coin a gentle squeeze to loosen the coco. This also helped to ensure the coco and gel was in good contact with the cutting. --- Once the cutting was planted into the Coco Coin, made sure to place back in the same spot (made sure to keep the cuttings in their groupings). --- Once a cup was complete, made sure to keep the label with the group. --- Re-misted the top growth as needed to keep it wet. --- Also wiped the trimmers with isopropyl alcohol in between cuttings (plan to use 10% bleach solution for next time). --- Repeated this process until all 10 cuttings were cut, planted, and in the tray. --- The coco coins fit perfectly into the tray and don’t reach the bottom. Nice! --- The bottom air gap is important. --- Poured a bit of distilled water through one of the empty slots into the bottom of the tray. Just enough to fill the bottom of the tray, but not enough to reach any of the Coco Coins (~1/4cup). - [19:35]: Placed the propagation tray with cuttings into the 3x3 veg tent. --- Placed the first layer of the propagation dome on before giving the sides a misting of distilled water. --- Also sprayed the top of the propagation dome before covering the cuttings. --- Vents are all fully closed. - [19:40]: Placed the bar lights onto the top of the dome before configuring the controller. ------ Set the START/END times to 04:00PM/10:00AM ------ Set the bar light’s intensity to 2 (out of 10). --- Also made sure the propagation light controller’s time was in sync with the Controller 69 Pro. - [19:47]: Took PPFD readings. --- The cuttings were around 136 μmol/m²/s which gives a DLI of 8.81 mol/m²/d --- The PPFD levels are similar to the floor. --- Perfect! --- Going leave the IonBoard S33 on during this rooting process. --- Will check back tomorrow to cycle the air under the dome. - [19:56]: Checked the humidifiers. --- Refilled the humidifiers with distilled water. - [20:17]: Quick night check! --- Ooo yea! Growth is raging and looking perky! --- Mainly checked on #1 and #4 which were looking incredible! --- Keep on growing ladies! Day 05 - Friday - 06/07/24 - Total Days: 102 ----------------------------------- Daily Averages [~23:00] - Temps: 82.7°F [28.2°C] - Humidity: 76.2% - VPD: 0.89 kPa - Soil %: [37, 40, 38, 35] ----------------------------------- - [10:03]: Decided to increase the ambient temp in the 3x3 veg tent. --- Within the AC Infinity App, --- For the Veg Tent [3x3] controller, --- Adjusted the 'Vegetative [18/6]' Schedule for the heater. ------ Increased the Temp target value from 78°F to 82°F --- Hopefully this will help to keep the veg tent at a more consistent temp. - [22:26]: Evening check. --- Ooo yea! The garden is looking incredible! --- #1 is looking perky and just bushing out! Wow! --- #2 is getting big! Growth is weird and leaf fingers are huge! Just going to let her grow. --- #4 is looking happy and growing along like a champ! Nodes are starting branch out and she is turning into a bush! - [10:28]: Checked down both fill tubes. --- Both reservoirs were completely dry! - [22:33]: Poured 5 cups of distilled water down EB1’s fill tube. --- Poured 3 cups of distilled water down EB2’s fill tube. - [22:40]: Checked on the propagation dome (inside the 3x3). --- Ah yea! Looking great ladies! --- Lifted the top of the dome to let some fresh air in for a bit. --- Wow! --- Leaves still look nice and green! --- So far everything looks great! --- Just going to continue on! - [22:53]: Checked the humidifiers. --- Refilled the humidifiers with distilled water. - [11:01]: Decided to adjust the humidifier for the 3x3. --- Within the AC Infinity App, --- For the Veg Tent [3x3] controller, --- Adjusted the 'Vegetative [18/6]' Schedule for the humidifier. ------ Increased the VPD target value from 0.8kPa to 1.5kPa --- The higher VPD level will essentially turn the humidifier off. --- I won’t be needing the humidifier for a good week so might as well save the water. Day 06 - Saturday - 06/08/24 - Total Days: 103 ----------------------------------- Daily Averages [~23:00] - Temps: 81.6°F [27.6°C] - Humidity: 74.9% - VPD: 0.91 kPa - Soil %: [35, 40, 37, 31] ----------------------------------- - [07:40]: Quick morning check! --- #1 and #4 are looking perky and happy! --- Also checked on the propagation dome, --- All cutting still look green! Hyped! - [20:02]: Evening check. --- Wow the garden is raging with growth! --- #1 has blown up! She has clearly recovered and growth is ramping up again! --- #2 is stretching upwards! --- #3 is now the smallest of the 4, but still getting larger! --- #4 is looking incredible! Wow! Growth looks perky and happy! - [20:05]: Checked down both fill tubes. --- Both reservoirs were completely dry! - [20:10]: Poured 6 cups of distilled water down EB1’s fill tube. --- Poured 2 cups of distilled water down EB2’s fill tube. - [20:16]: Checked the Ecowitt soil moisture sensor data: --- 35% - [CH01 EB1 - Garlic Budder #1] --- 40% - [CH02 EB2 - Garlic Budder #2] --- 36% - [CH03 GFP - Garlic Budder #3] --- 27% - [CH04 FPT - Garlic Budder #4] - [20:19]: Using a pump sprayer, --- Misted the straw mulch of #4 with 5 cups of distilled water. --- Focused mainly on the straw mulch. --- Also misted the mulch of #3 a bit (in the fabric pot). - [20:27]: Checked propagation dome (in the 3x3), --- To cycle the air under the dome, lifted the top off for a bit. --- Ooo yea! Everything is still green and looking great! --- Keep on rooting ladies! --- Oops! - [21:45]: Checked the humidifiers. --- Refilled the humidifiers with distilled water. Day 07 - Sunday - 06/09/24 - Total Days: 104 ----------------------------------- Daily Averages [~23:00] - Temps: 81.5°F [27.5°C] - Humidity: 74.8% - VPD: 0.91 kPa - Soil %: [36, 40, 37, 36] ----------------------------------- - [08:18]: Quick morning check! --- Nice! The main tent is looking great! #1 and #4 are both raging with growth! --- Checked on the propagation dome (inside the 3x3) and the clones are still looking green! --- Wow! Everything is going almost too well! Just keep on growing! - [19:08]: Evening check. --- Garden is just exploding with growth! Seems everyone has fully recovered from the defoliation and topping! --- Wow #1 is bushed out and looking incredible! --- #2 is growing really starting to get large! Growth still is funky, but stoked none-the-less. --- #3 is starting to fill in the pot! Getting larger! --- Wow! #4 is getting taller and looks healthy and green! - [19:12]: Checked down both fill tubes. --- Both reservoirs were completely dry! --- Wow the canopy is really starting to get taller and closer to the light. May need to raise it up soon. --- Absolutely surprised how low the light levels have been throughout this entire cycle. Barely moved the light and have not increased the intensity past 2 (out of 10). Less is really more. --- Anyways! - [19:18]: Checked the Ecowitt soil moisture sensor data: --- 36% - [CH01 EB1 - Garlic Budder #1] --- 41% - [CH02 EB2 - Garlic Budder #2] --- 37% - [CH03 GFP - Garlic Budder #3] --- 34% - [CH04 FPT - Garlic Budder #4] - [19:19]: Poured 6 cups of distilled water down EB1’s fill tube. --- Poured 3 cups of distilled water down EB2’s fill tube. - [19:24]: Checked propagation dome (in the 3x3), --- To refresh the air, lifted the top off for a bit. --- Sweet! Still green! Wow! --- Using a spray bottle, misted the top growth with distilled water. - [20:35]: Checked the humidifiers. --- Refilled the humidifiers with distilled water. --- Wow what a week! --- Growth has been just insane in the 4x4 tent! All plants have fully recovered and have just exploded with growth. --- I think it’s time to flip to flower! --- Also, I’m absolutely baffled about how well the cloning process has been going. --- So far no issues! --- Not complaining, but just surprised. Keep on growing ladies! --- If all goes well, should have fully rooted clones soon ready for transplanting (into solo cups of course). --- Absolutely hyped for next week! --- Maximum warp Ensign, Engage! [END OF WEEK 14|07]
Processing
Likes
15
Share
They havent grown much this week as the sun has been busy else where 🙄 This week should be better,,, I hope
Likes
Comments
Share
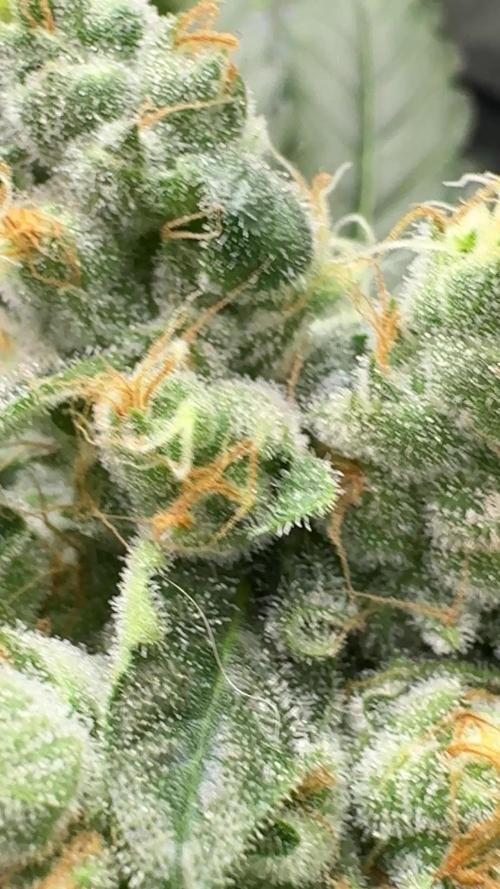
Zamnesia's Lemon Cherry Gelato is a very versatile plant, beautiful, fast-growing, and clones very well. We started from seed, and everything went very quickly, and the start of flowering is very promising. We're in an 11-liter square pot, with little vegetative growth and growing upright. Techniques chosen: the plant was left to grow upright, meaning only a little tidying up the lower parts to prevent unnecessary growth and to give the upper buds that potency they deserve. We're 100% organic and 1000% Plagron, as always. The soil we've chosen is the recently launched Plagron Bio LightMix, which will allow us to get started more smoothly and reliably, without the sudden changes that liquid fertilizers can cause. A week is more than enough, so let's not overdo it. We're in the early stages of flowering, but we're well-equipped with fertilizers and additives. We've added: - Power Roots 1 ml/l (Always use it for the first two weeks of flowering, especially after transplanting) - Pure Zym 1 ml/l - Silic Rock 1 ml/l - CalMag Pro 1 ml/l - Sugar Royal 1 ml/l - Alga Bloom 4 ml/l - Power Buds 1 ml/l Once a week as a foliar spray: (until the first two weeks of flowering) - Vita Race 5 ml/l Choose your favorite style and calculate your results on the website: www.plagron.com Our new 720W Spider King lamp from Vanguard Hydroponics is now at 80% Z - https://www.zamnesia.io/en/531-growshop A rocket start looks more than promising. Give it a try. Z - https://www.zamnesia.io/en/11242-zamnesia-seeds-lemon-cherry-gelato.html Z - Lemon Cherry Gelato is an extraordinary hybrid capable of offering a complete and satisfying experience to all growers and cannabis enthusiasts. This premium strain is the result of crossing Sunset Sherbet and Girl Scout Cookies, two strains renowned for their high quality and delicious aromas. With a genetic makeup composed of 60% indica and 40% sativa, Lemon Cherry Gelato produces stimulating and dynamic effects. With 26% THC, it infuses deeply relaxing vibes, keeping the mind clear and alert. Lemon Cherry Gelato adapts easily to any growing environment. Indoor plants maintain a compact structure, reaching 110 cm in height, making them ideal for limited spaces. Outdoors, this strain grows up to 140 cm. Extremely adaptable, this strain responds well to cultivation techniques such as topping and low-stress training (LST), allowing growers to optimize space and increase final yields. Indoors, a minimum of 600 g/m² is possible after a flowering period of 8-9 weeks. Outdoors, plants will reach maturity in September and, in optimal conditions, will yield around 1000 g each. Thanks to its innate resistance, Lemon Cherry Gelato is perfect for both beginners and experienced growers. You already know this, but I recommend it: here you will find many beautiful things, essentially "the best that nature has to offer." Z - www.zamnesia.com Music // www.radionula.com + Feng Shui Music + Frequencies 432 Hz
Likes
16
Share
Flowering day 42 since time change to 12/12 h . Hey guys :-) A lot happened this week :-). The buds develop really nicely . The scent wafts through the whole room when I open the tent 💚. This week was poured 3 times with 1 l each (nutrients see table above) This week there was the maximum amount of fertilizer, which will be slowly reduced from next week :-) . Have fun with the update and stay healthy 🙏🏻 👇🏼👇🏼👇🏼👇🏼👇🏼👇🏼👇🏼👇🏼👇🏼👇🏼👇🏼👇🏼 You can buy this Nutrients at : https://greenbuzzliquids.com/en/shop/ With the discount code: Made_in_Germany you get a discount of 15% on all products from an order value of 100 euros. 👇🏼👇🏼👇🏼👇🏼👇🏼👇🏼👇🏼👇🏼👇🏼👇🏼👇🏼👇🏼 You can buy this strain at : https://www.ripperseeds.com/en/feminized/kmintz-feminized-cannabis-seeds Water 💧 💧💧 Osmosis water mixed with normal water (24 hours stale that the chlorine evaporates) to 0.2 EC. Add Cal / Mag to 0.4 Ec Ph with Organic Ph - to 5.8 - 6.5 MadeInGermany
Likes
11
Share
@UrbanBoer
Follow
Finally almost a year later and she finally retires 😭😭😭😭😭to emotional she did not want to miss out on the summertime heat and the beginning of autumn, 70 grams, the plastic bag is 3 grams. Loving her… she is my 2nd best strain this harvest, the smell
Likes
52
Share
Its time to prepare for war. *Blows bagpipe* FISH SH!T THE ORGANIC SOIL CONDITIONER (used twice before and always noticed instantly) Fish Shit is a living product! It provides a complex Microbial profile that includes thousands of different species of bacteria, fungi, and protozoa. This profile is closer to a natural ecosystem than anything you will find on the market. Fish Shit helps release essential oils and terpenes which contribute to the building of a myriad of flavonoids. Flavanoids play a key role in the development of the most potent aromas and tasteful flavors of a plant and its fruit. Fish Shit contains beneficial microorganisms that help plants maximize nutrient uptake. It does this by transforming nutrients into more usable forms and keeping these nutrients in the soil longer. During photosynthesis plants naturally produce exudates (chemicals that are secreted through their roots). Through these exudates, plants can attract the types of good bacteria that are beneficial to them at different points in their growing cycle. These good bacteria cover the roots and act as a barrier to the invasion of disease-causing organisms that may harm the plant. What Are Enzymes? Before we dive headfirst into how, exactly, enzymes can benefit cannabis plants, it helps to understand a little about what these microscopic proteins do. Essentially, enzymes facilitate chemical reactions. They do so by binding with a substrate and forming or breaking molecular bonds. In this context, the substrate is the molecule upon which an enzyme acts to boost the efficiency of a reaction. •substrate /sŭb′strāt″/ •noun •The material or substance on which an enzyme acts. A surface on which an organism grows or is attached. An underlying layer; a substratum. Enzymes are proteins with complex 3D shapes that feature regions called active sites. When the substrate binds to these active sites, it forms an enzyme-substrate complex that causes a chemical reaction to take place, temporarily changing the structure of the enzyme and ultimately causing molecules to either come together or break apart. As a result, molecular products are released, and the enzyme returns to its original shape. Specific enzymes are capable of binding with certain substrates, as the substrate fits into the active site more or less via a lock-and-key principle. Although, new research suggests a more accurate theory of "induced fit", in which enzymes and substrates undergo structural changes to facilitate the reaction. If you take the human body as an example, we have an abundance of enzymes in our saliva and digestive system. These molecules bind with substrates in these regions (food particles), working to break down the food we eat into usable parts before converting them to energy. Enzymes in cannabis work in a similar way to the example highlighted above. Typically, enzymes occur in soil naturally, but if your soil mix is lacking organic material, or you're growing hydroponically, then adding enzymes directly to the substrate is crucial. By using them in cannabis growing, enzymes not only help break down essential nutrients into smaller, more readily available pieces, but they also support the digestion of dead root cells, clearing a direct path for nutrients. Overall, enzymes make it easier for your cannabis plants to absorb all the elements they need to reach their full potential. For growers, a plant that reaches its full potential means a bucketload of juicy buds come harvest. This is essential if you want to reuse a pot with old systems left over like mine. Common plant enzymes include: •Cellulase •Xylanase •Beta-glucosidase •Hemicellulase •Amidase Amino acids are a crucial, yet basic unit of protein, and they contain an amino group and a carboxylic group. They play an extensive role in the gene expression process, which includes an adjustment of protein functions that facilitate messenger RNA Nitrogen, phosphorus, and potassium are the three main pillars of nutrient solutions and fertilizers, but there are countless other nutrients that your cannabis plants need to produce the best possible harvest. Amino acids are one of them. You may have noticed that amino acids get a lot of attention from bodybuilders and other athletes. That’s because they play a key role in the synthesis of protein, which, as you probably know, is super important for sports recovery and muscle growth. Amino acids are the building blocks of protein and the foundation of both plant and animal life. But what do amino acids do for cannabis? WHY IS PROTEIN IMPORTANT FOR CANNABIS? Just like proteins are important for the human body, they are equally important for the growth and development of plants. For example, proteins help plants: •Facilitate the growth of intracellular plant structures •Promote energy generation •Stimulate metabolic processes •Facilitate the absorption and transportation of nutrients So, where do plants get these vital proteins from? Well, unlike humans, plants can’t source proteins or amino acids from other organisms. Instead, they need to create their own amino acids, and then use these to build protein. That's why gardeners, much like athletes, go wild for amino acid supplements. Amino acids help plants by… • Increasing their production of chlorophyll, which ultimately improves their ability to photosynthesize • Serving as an easily absorbable form of nitrogen • Stimulating the synthesis of key vitamins • Improving their resistance to pests and diseases • Boosting the strength of their cells Amino acids also serve as the precursors to auxins, a group of plant hormones produced in the meristems—the apex of the stems where new leaves and stems are born. Auxins play a key role in the plant, activating genes for plant growth and development by triggering a multitude of vital plant functions. In other words, they determine what its size and architecture will look like. Auxins influence the development of branches, flowers, and roots, and even help to regulate the photoperiod response of the plant. Some amino acids, like cysteine, also work together with antioxidants like glutathione to help cannabis plants deal with oxidative stress, which can be caused by high-intensity lighting, some nutrient solutions, and high levels of CO₂. Unlike humans, plants can synthesize all the amino acids they need to survive and develop properly. Unfortunately, however, amino acid synthesis is a really high-energy process, and plants may struggle to produce enough amino acids when exposed to stress. WHAT FACTORS AFFECT A PLANT’S ABILITY TO SYNTHESISE AMINO ACIDS? Any kind of stress can affect a plant’s ability to produce enough amino acids. This includes: • Drought • Temperature extremes • Poor soil health • Pests • Diseases • Poor lighting • Lack of space • Poor root health WHAT DOES ALL OF THIS MEAN FOR WEED PLANTS? If you want to push your plants to their extreme in terms of floral growth and resin production, you should look into amino acid fertilizers. By making amino acids readily available to your plants, they’ll be able to use crucial energy to grow and bloom, rather than focusing on synthesizing amino acids themselves. Game of Inches, this is another Plants can absorb amino acids via their roots and leaves. They can also benefit from amino acids during both their vegetative and flowering phases. The fastest way for plants to absorb amino acids is via their leaves. The foliar application of amino acids is believed to improve the transportation of nutrients, increase transpiration, and boost photosynthesis. Hence, I recommend feeding your plants with foliar amino acid fertilizers. When doing so, however, carefully measure the amount of fertilizer you use, as—like with any nutrient—overfeeding can damage your plants. FOLIAR FEED AND SOIL SOAK • 1 crushed queen anne carrot • Add 2 tbsp of NPK Raw powdered water-soluble cane molasses • 20ml h2o2 • 1 crushed radish • 0.25 tsp NPK Enzymes • 0.25 tsp NPK Amino Acids • 50ml coconut water ( nature's own amniotic fluid packed with amino, enzymes ) + The sound of songbirds. Onto the predators 1250 -Green Lacewings Lacewings are extremely voracious predatory insects that feed on several pests. In adulthood, it feeds on pollen and nectar. In the larval stage, it feeds on aphids, thrips, and mealybugs at all stages of growth. It can also attack spider mites in moderate quantities. It is initially an aphid predator, but very effectively controls thrips and mealybugs infestations. It is so voracious that in the absence of prey, it will feed on its congeners. Lacewings are cannibalistic if there is no food available for them. It is therefore important to introduce them into an infestation situation, and not just preventively. •congener /kŏn′jə-nər/ •noun •A member of the same kind, class, or group. •An organism belonging to the same taxonomic genus as another organism. •A thing of the same kind as. or nearly allied to, another; specifically, in botany and zoology, a plant or an animal belonging to the same genus as another or to one nearly allied. Ideal temperature 20°C – 26°C Ideal humidity 60% – 70% Predatory stage life cycle 21 days Introduction rate 4 weeks Storage Refrigerator Use Immediately Are there any specific instructions on how to use this predator? Lacewings are available on small paper cards that you can hang to plant stems. On the cards are dozens of eggs ready to hatch. There are also sterile eggs they can feed on once they have hatched before they are ready to disperse in the foliage. It is important to use them quickly upon receipt to avoid cannibalism. If you don't use them right away, you can store the cards in the refrigerator for 24 to 48 hours to prevent the eggs from hatching too quickly. Avoid storing them for longer than this or you risk losing eggs. 1250 eggs are divided into 7.5 cards, 2500 eggs on 15 cards, and 5000 on 30 cards. The application rate is one card per square meter of growing surface. Is this predator best used for preventive or curative treatments? Lacewings are used as a curative solution. Anything else I should know? Lacewing eggs hatch approximately 24-72 hours after the cards are exposed to room temperature. When they emerge, the lacewings are just 1.5-2 mm long. They are very small so they are difficult to see. Once hatched, they will stay on the cards for a few hours and then disperse in the foliage. You quickly lose sight of them if you have not witnessed the hatching. They then live in the foliage for about 3 weeks. Often, you will see them towards the end of their larval cycle. After feeding for 3 weeks, they will triple and even quadruple in size. At that point, they are easier to see. But they remain very discreet insects, it is not abnormal not to see them. Egg carcasses left behind on the cards do not disappear after the hatching has happened. It's normal to see eggs still on the cards. Visually it is very similar before and after hatching. Also, on the boxes, there are sterile ephestia eggs which are used to feed the lacewings once hatched. Not all lacewing eggs are viable either. Only a certain percentage of lacewing eggs will hatch. Once hatched, the eggs are white. You can observe this using a magnifying glass. With, 5000 Stratiolaelaps Scimitus It is used to prevent or control thrips pupae, fungus gnats larvae, and root mealybugs in the soil. It can also be used for red mites in bird farms or hen houses. The adult is about 1 mm long and is medium brown with a beige triangle on its back. Another fun fact about them is they can survive without prey. They can eat algae and plant debris. This is why they can reproduce and stay in plants for long periods. Ideal temperature 15°C – 23°C Predatory stage life cycle 18 days Introduction rate 2 weeks Storage Room temperature Use Within one week Are there any specific instructions on how to use this predator? Sprinkle directly on the growing media. They can live in all types of substrates like potting soil, coconut fiber, rock wool, cedar mulch, etc. Stratiolaelaps establish easily so they are permanently fighting pests. One introduction is generally enough unless you have an infestation. In this case, introduce them at least twice at a 2-week interval for best results. If you grow your plants in a 100% mineral substrate, it will have to be released more often since there is less organic matter than in traditional soil. Do I need to take any specific precautions? Stratiolaelaps breed in the top layer of the soil. So it is important not to disturb them in the first days following their introduction. They don't like temperatures below 8 ° C. So be sure not to introduce them in a water-saturated or cold environment. Release them 24-48 hours after your last watering. They are very sensitive to chemical acaricides and diatomaceous earth. These methods are incompatible with their use.
Likes
8
Share
@Dysons12
Follow
I missed last week unfortunately due to a few things going on so there is quite a step up. ****It’s been in flower 9-10 days so far and all bar 3 are flowering nicely please look at the pictures of the plants that just don’t seem to be budding? Are they duds or slow developers? Am I wasting my time or will they start too do you think?**** They are getting tall now and I have had to crank the extraction up a bit. Over the course of next week I am going to put them back into the smaller tents (half in each) with a scrog net to even the canopy out and add support them if they continue to grow taller Whacked the nutrients right up to near on 1500ppm and so far so good this 2nd week of flower they have shot up. Watering 5-600ml per 24 hours but to be honest I am going to up that over the coming days to near 800ml as they are almost drying out before I water again. Perhaps twice daily may come sooner than I think
Likes
4
Share
@Cajungas
Follow
So I started flower this week we've been flowering now for about 5 days I have around 10 or 12 tops around 26 to 28 in away from a plant with my light I have them at 75% flower production and stacking is looking nice I did some defoliation and I'm brewing a kelp extract and molasses tea for it all in all everything looks nice
Likes
8
Share
Der eine Trieb hängt ein wenig noch nach, anonsten steht sie super da. Ein paar Sticks angebracht um ein wenig Richtung zu geben.
Likes
15
Share
@No_Clout
Follow
It’s been a while since updating as of work and also a broken phone but so far their looking alright, only problem I have is abit high humidity but they seem fine. (Night humidity: 40-45%) and (Day Humidity 55-60%) . I even clipped a nugget last week and the ash was thick and white without a flush which is pretty impressive in my opinion but I think I will be starting to flush in the next week or two.
Likes
3
Share
@BunnyBud
Follow
Week 3 – Vegetative Stage | Tester Log The plant has now entered week 3 of vegetative growth. A light feeding schedule with base nutrients and CalMag supplementation was introduced early to support healthy metabolic activity. The plant shows good vigor and compact morphology, with short internodal spacing and symmetrical lateral development, indicating efficient light exposure and stable growth. Leaf color is mostly uniform healthy green. A slight observation: the new emerging leaves show very light yellowing on the tips. At the moment it’s unclear whether this is caused by light proximity or a very mild nutrient excess, but it remains minimal and will be monitored and adjusted if necessary. The seedling was kept under 12h light during the first week for acclimation, then switched to 18h light, which is currently maintained to optimize vegetative growth. Overall the Sticky Orange XXL Auto continues to show healthy and stable early development going into the next growth phase. 🌱