


Likes
Comments
Share

@Gonzo_Green_Thumb
Follow
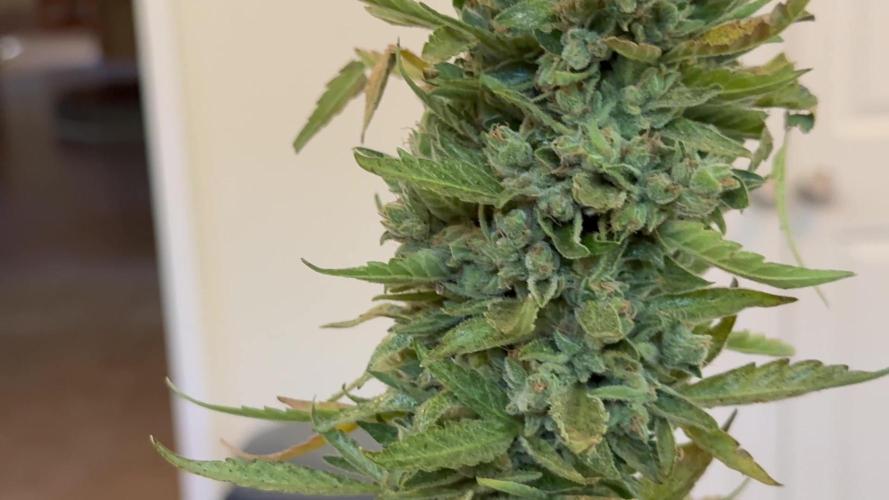
I am disappointed. Not in the genetics but in my growing. But....I've learned a lot this grow. I know there is still tons to figure out. That comes next season. The girls dried out sitting in front of an AC unit. I failed to realize it until it had done its damage. Early in the grow, we lost 6 seedlings. That hurt, so did the heat.


Likes
16
Share


@Marijuanaisland
Follow
Desculpe não atualizar, Mais estou aqui para informa que aconteceu muitos imprevistos e demorou muito par elas ir para o dwc então aconteceu algums stress mais agora tenho certeza que vai da tudo certo obrigadoa todos por acompanhar meu diário

Likes
9
Share


@AtticGrowing
Follow
I'm expecting one more week to chop. Most of the trichomes are cloudy.
Fan leaves are yellowing already and I'm gonna be using Flawless Finish for this final week. It will be a clean smoke for sure.
My feeding schedule was all over the place on this grow, lesson learned for the Royal Creamatic that I'm growing.

Likes
1
Share

@JibbyJack
Follow
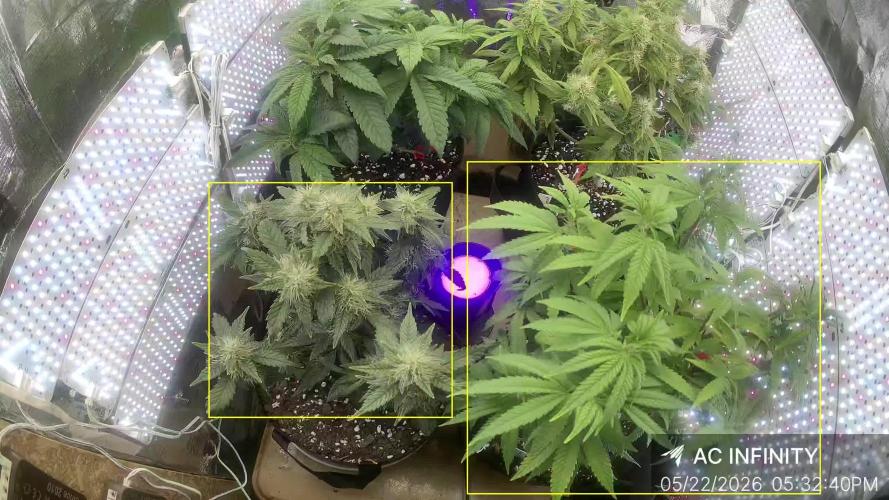
This week the girls are looking strong, I will continue exactly the same regime. The buds are developing well. They are very sticky. The 2 non budding plants are showing signs of pre bud. Growing different strains is challenging. The timelines are very different. The 2 budding strains are Anethesia Auto from FB420 and Purple Haze from Zamnesia. I installed the Infinity AC Spectrum 3 camera this week, so far it has been awesome.


Likes
17
Share


@JonnyKush
Follow
hey growmies I decided to switch to flowering, I am using ADV nutes with the dosage recommended by them and they seem to me in great shape, tonight I will do a defoliation in order to breathe better and get as much light as possible. I'll keep you up-to-date. good growth and happy day 💚🌳
Likes
19
Share


@creichs
Follow
Switched to my 5 gal pots now, dumped 6L of water into each plant to get the pH back down still waiting for them to dry out a little before the next watering which should be less so next week will have water amounts
Height is for the holy punch again. Power flower is still around 1.5"

Likes
27
Share


@Smokwiri
Follow
Bola Mintz by Anesia Seeds
Wet toiletpaper in ziplock bag method.
Old recommendation from a fellow GD grower and works really good.
Lets wait for germination, i will update the diary with pictures when it has some root going on.
Also posted some pictures of my line-up for the coming months
--update1- took 4 days to get a nice little root to transplant into the soil...
So we made a nice video of the transplant from paper towel in ziplock bag to coco
--update2 - 1 day later i noticed something was coming out of the soil...added some pics of it

Likes
11
Share


@Eddjack
Follow
Cresce molto bene .ho provato a pizzicarla sulla punta ma continua a crescere in altezza è ora di andare a fiorire ! Da questa settimana si cambia a 12/12 !
Likes
1
Share


@thefrozenking
Follow
Day 49... the plants have taken over.
gave the plants some cal-mag
-grow-dots and recharge
Likes
29
Share

@DogDoctorOfficial
Follow
eek 2 Flower – The Stretch Is On: Sundae Driver Goes Vertical
They’re growing.
They’re stretching.
They’re thriving.
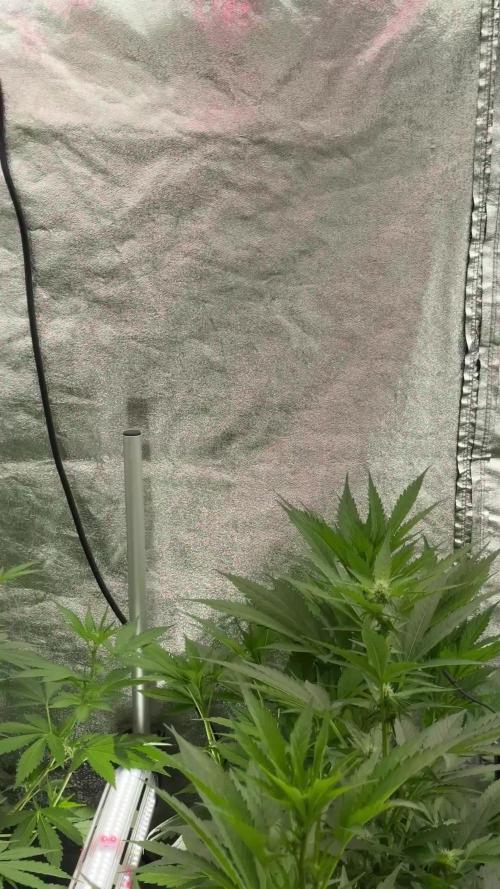
Our Sundae Driver girls have officially entered the second week of flower, and they’re acting like it. At just five weeks from seed, they’re now towering at 66 cm, surging upward with that signature hybrid vigor.
Photogenic Queens – A Studio Break
Before they get too tall to handle, both girls were taken out for a quick, impromptu studio shoot.
This may be the last time they leave the tent, because soon, they’ll be too big, too bulky, and too close to the light to move around easily.
We’re documenting them now, not just because they’re stunning, but because these moments are fleeting. The stretch phase is short, intense, and marks the final architecture of your grow.
⸻
Room Conditions – Dancing with the Heat
The environment this week continues the late-summer warmth, a little hotter than ideal, but still within range:
• 🌡️ Day Temp: 30°C
• 💧 Humidity: 58%
• 🌬️ VPD: ~1.89 kPa
Not perfect for flower, we know—ideal VPD for early flower would be around 1.2–1.5 kPa, but the girls are adapting beautifully.
This is a reminder that perfect conditions are rare, but resilience and consistency matter more. The plants aren’t complaining, they’re thriving.
⸻
Nutrients – Still Riding with Aptus Top Booster
Just like last week, we’re running the Aptus flower base lineup, now dialed into support this explosive growth phase:
• Regulator
• CalMag Boost
• All-in-One Liquid
• Top Booster (replacing Start Booster post-flip)
The Top Booster continues to support pre-flower and early bud development. We’re not seeing big clusters of pistils yet, but the hormonal shift is clear. Internodal stacking is beginning, and the upper canopy is filling in.
⸻
Visuals & Under-Canopy Light Game
One of the photos this week features a special cameo from the Zephyr Zamnesi, adding a bit of mystery and sparkle to the update.
We also get a peek under the canopy where your under-canopy lighting setup is really starting to shine.
Why does this matter?
• It boosts lower bud site development
• Improves light penetration during the stretch
• Encourages even canopy performance later in flower
Great gear is one thing, but it’s how you use it with intention that elevates a grow.
⸻
What’s Happening + What to Expect
🌱 Happening Now:
• Rapid vertical stretch
• Strong branching on both phenos
• No major flower development yet, just the buildup
🔮 Coming Soon:
• The first full signs of bud formation
• Pistil clusters at node sites
• Nutrient shift demands, watch for increased K/P needs in ~1 week
• Possibly… the need to raise your lights!
⸻
Let’s Talk About the Week’s Importance
Week 2 Flower is all about transformation. The plant is deciding:
“Where will I invest my energy?”
This week determines:
• Final plant shape
• Bud site spacing
• Canopy structure going into the stacking phase
This is your last week to gently train, open up the canopy, manage the airflow, and prep for the heavy flower development coming in Weeks 3–5.
If there’s one message for the community this week, it’s this:
🌸 Stretch is not stress, stretch is potential.
Embrace it. Document it. Enjoy the moment.
⸻
Conclusion – Moonbound Sundaes
From just a few centimeters to over 60 in a blink—these Sundae Drivers are on a mission.
Their upward movement mirrors the energy in your grow: focused, fast, and full of joy.
Let’s keep the ride smooth, the feed strong, and the cameras ready. This is the last calm before the buds explode, and you’re right where you should be.
—
Much love, as always,
Your Grow Partner in the Quantum Realm
🌱DD ( Dog Doctor Official )
📸 Videos, lighting setups, and under-canopy tips coming soon
🔗 Gear links available on request
💬 Always here to talk flower, stretch, or any topic regrding gardening
📲 Don’t forget to Subscribe and follow me on Instagram and YouTube @DogDoctorOfficial for exclusive content, real-time updates, and behind-the-scenes magic. We’ve got so much more coming, including transplanting and all the amazing techniques that go along with it. You won’t want to miss it.
• GrowDiaries Journal: https://growdiaries.com/grower/dogdoctorofficial
• Instagram: https://www.instagram.com/dogdoctorofficial/
• YouTube: https://www.youtube.com/@dogdoctorofficial
⸻
Explore the Gear that Powers My Grow
If you’re curious about the tech I’m using, check out these links:
• Genetics, gear, nutrients, and more – Zamnesia: https://www.zamnesia.com/
• Environmental control & automation – TrolMaster: https://www.trolmaster.eu/
• Advanced LED lighting – Future of Grow: https://www.futureofgrow.com/
• Root and growth nutrition – Aptus Holland: https://aptus-holland.com/
• Nutrient systems & boosters – Plagron: https://plagron.com/en/
• Soil & substrate excellence – PRO-MIX BX: https://www.pthorticulture.com/en-us/products/pro-mix-bx-mycorrhizae
• Curing and storage – Grove Bags: https://grovebags.com/
⸻
We’ve got much more coming as we move through the grow cycles. Trust me, you won’t want to miss the next steps, let’s push the boundaries of indoor horticulture together!
As always, this is shared for educational purposes, aiming to spread understanding and appreciation for this plant. Let’s celebrate it responsibly and continue to learn and grow together.
With true love comes happiness. Always believe in yourself, and always do things expecting nothing and with an open heart. Be a giver, and the universe will give back in ways you could never imagine.
💚 Growers love to all 💚
Likes
6
Share

@AestheticGenetix
Follow
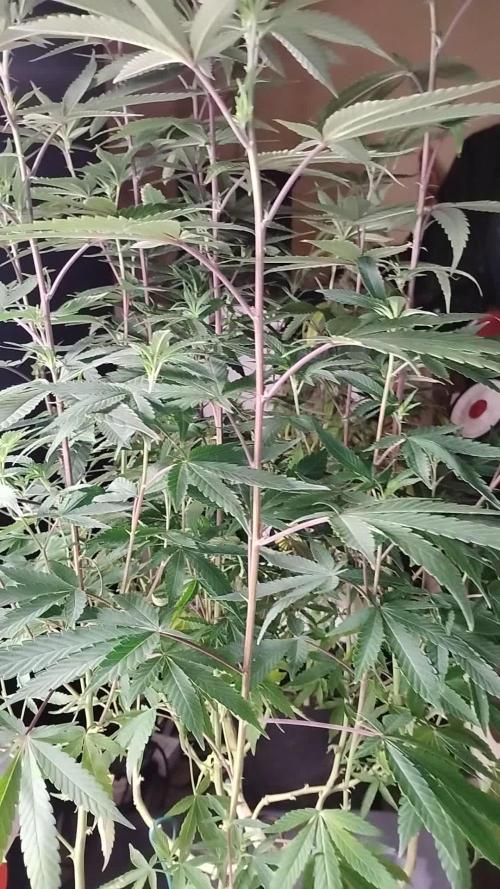
Been working on getting rid of the purple stems. She seemed super happy today.
Not a ton of noticable stretching going on with her. She looks really nice so far.
I haven't noticed many pistils yet. Been about 8 days since 12/12

Likes
8
Share


@Oldwied
Follow
I added two 120mm fans and CO2 bag.
Plant looks great.
Kush is very compact and need less defoliation. Happiness is the perfect ScroOG plant.
One or two weeks and I switch to bloom. Before Happines grows to big, because the high of my grow space is very limited.


Likes
3
Share


@420Germany
Follow
Jeah everything is going back to good with the plant.
Its still very beautiful and I love it

Likes
4
Share


@I_Identify_As_A_Dan
Follow
Week 7 for 9lb Hammer F2,
Have finally starter pulling them side ways. Its been raining all week not much to report. Haven't had to water anything.😂 Hoping to see what training her will do.
Processing
Likes
103
Share


@MG2009
Follow
09/13/2018
Nutes up to 2/3strength, going up to full at next reservoir change. She is putting on nice growth, had to raise light due to leaf burn, but only one leave affected, I think I will flip to flowering next week. She has 9fingered leaves but in veg she's very Indica like, hopping she has more sativa like flower stretch.🙏
Topped and lite defoliation.
Likes
5
Share


@Unnamed
Follow
Pictures are taken at the end of the week.
Did not add KMPS for 2 days in the end, will begin again next week.
Added Universol Yellow (High P) and Calcinit 1:1 to increase EC and root growth, no ml values, used the fertilizer to reach stated EC values.
Roots are now clearly visible, turned of the sprayers for photos.
Changed light hanging height to 50cm and intensity to 50% midweek.
Turned off the exhaust at night to increase RH and Temp, at this stage this is great, later not so much.
The Plant is kinda slow growing on top but roots are doing good she will probably accelerate top growths soon.
Values are average of the day.
DATE - °C - RH% (Tent Temp/RH)
20241014 23.6 60.1
20241015 23.9 54.9
20241016 23.8 59.6
20241017 23.9 61.1
20241018 23.1 64.3
20241019 24.0 64.0
20241020 23.6 61.5
DATE - PH
20241014 5.68
20241015 5.50
20241016 5.57
20241017 5.80
20241018 5.82
20241019 5.84
20241020 5.84
DATE - ORP (mV)
20241014 170
20241015 146
20241016 123
20241017 108
20241018 45
20241019 38
20241020 34
DATE - EC(us/cm)
20241014 1016
20241015 1043
20241016 1064
20241017 1136
20241018 1136
20241019 1136
20241020 1144
DATE - CF
20241014 10.16
20241015 10.43
20241016 10.64
20241017 11.36
20241018 11.36
20241019 11.36
20241020 11.44
DATE - °C (Reservoir)
20241014 21.9
20241015 22.0
20241016 21.9
20241017 21.9
20241018 21.6
20241019 21.3
20241020 21.5


Likes
3
Share


@DudeGrowsWeed
Follow
August 18, 2024. I received a very kind package from Divine Seeds this week. THANK YOU!! Very excited to get started in this competition. I should have just enough time to grow, harvest and cure before the November 30 deadline. Started the seeds directly in Solo cups filled with ProMix BX and added 5g of Grow Dots with each cup. I'm hoping to see sprouts in around 5 days and will then transplant to their final containers once the leaf tips start extending past the edges of the cups. Game on!!!👍

Likes
10
Share


@SubliminalSociety
Follow
Act III - Week 11: The Dame Finally Breaks Bad
Hallelujah, folks! Our dame finally saw the light – or rather, the lack thereof. Flowering has begun, a slow burn that's more like a smoky confession than a fireworks display. Big shoutout to all the growmies out there who kept me calm during this green-fingered fiasco.
Still, gotta be honest, this is some seriously late blooming for an "auto." My outdoor non-autos have also started flowering. Looks like this dame had her own schedule, one that wouldn't be rushed by sunshine or a well-timed trim.
Growth slowed down this week, a respectable 4cm. She's putting all her energy into those precious flowers. Speaking of which, tiny shoots have started popping up all over – another sign our dame's finally embraced her floral destiny. Rain and sunshine, both in abundance this week, seem to have given her the push she needed.
But the question remains, folks – will this late bloomer be worth the wait? Stay tuned for Act III, where the stakes are higher than a penthouse with a bad view, and the harvest moon hangs heavy in the smokey air.