


Likes
Comments
Share

@Northern_Ent
Follow
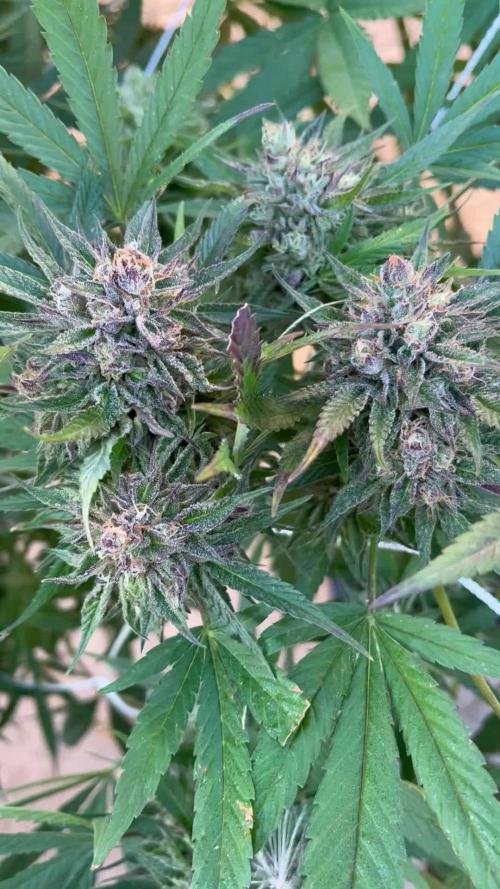
Sep 13: took a second round of buds. Have now taken off 2 kg of wet buds with 1 kg fresh frozen and 1 kg done as ice water hash. This is equivalent to 500 g dry bids already taken off of this plant with another big chunk still to go.
Very nice hard buds off of this plant.
Sep 19: the remaining lower buds turned purple last night and look great. Will harvest the rest of it tomorrow morning.

Likes
37
Share


@William137
Follow
Buds getting alot bigger now and loads of crystals on them 😍 had to move things around in the tent for the 4 biggest ones to have some more room, quite a few leaves turning yellow and dropping off recently (i hope this is normal) all the plants are differant sizes so im not going to update the plants size

Likes
35
Share


@bypado_farm
Follow
They look good, they are drinking good aswell, every 2 days 1 L each plant
Likes
2
Share


@Ganjagrandaddy
Follow
Hi all , after a very long break to use up the supplies I had accumulated after the perpetual year growing autos , u am now in rapid need and trying to beat the UK powercut threats coming . I have been sitting on these seeds a while since @exoticseed gifted them too me many moons ago. I was not going to run a diary as it is a one off grow to resupply only and I hate quitting the site while not growing.
I had themi n 18 hour days for 4 weeks instead of the planned 3 weeks veg troops. ( timer issue-sorted now). I did very little training as maxing the crop is not the driver for this run. I am not defoliating either as I want to use all those powerhouse , photosynthetic fan leaves to keep rhe lowers at least converting some available light. hoping for not too much popcorn at harvest so I will be moving limbs around to keep the light throughout the canopy. I did top and fim the ladies to stop them getting too lengthy and pushing the light height. The longer flowering cycle of these girls at 11 weeks was an oversight when I needed speed but I also know that long flowering allows some really nice characteristics to emerge in yields and budswell. I am using the dehumidifier now to keep the moisture around 40% max to avoid those fatty buds from attracting any mould spores when they get chunky. They are a berry cross so I expect a nice tang of a hit from them at harvest and cure but already they are really pushing their perfume main term smell. The buds that are forming are far apart at present but have a great potential to fill put with 6 weeks still to grow and the addition of the @shogun products I genuinely love using ,should give a good end result. The girls have behaved perfectly so far and shown no issues at all . They have remained that beautiful solent green that comes with mega crop use and really benefits the photosynthetic process and its continously cycle. I use my own blend of a living soil but have not re-enlivened it as it is a one off grow so cod not maintain the bio life at harvest time. I hope that everyone has endured the past 3 years of this madness called the world and that your growing has kept you sane. any comments appreciated and don't be afraid to be open and honest. we only learn when we make errors or work on limited knowledge. That's what makes grow diaries such a great app. have fun folks . be blessed and enjoy the pics and video.


Likes
8
Share


@Aircoholic
Follow
Growing well, so far. The added silica shows its effect - the stem is absolutely massive and solid, don't think LST is an option. I want to do either Topping or FIMing, but am not sure yet, which one. The decision will be shown in the pictures that I'll add, once the procedure is done.
UPDATE: I decided to top Banana Kush Auto, as seen in the added photos and video.

Likes
30
Share


@BillMonroe
Follow
Harvest update in 2 weeks or so :)
I wanted to let them go a bit longer but the mildew was going to take over so I chopped the plants and rinsed them in water + H2O2.
Lots of lessons learned ... Lots of bud hanging on the vine. Good luck to everyone


Likes
41
Share

@gr3g4l
Follow
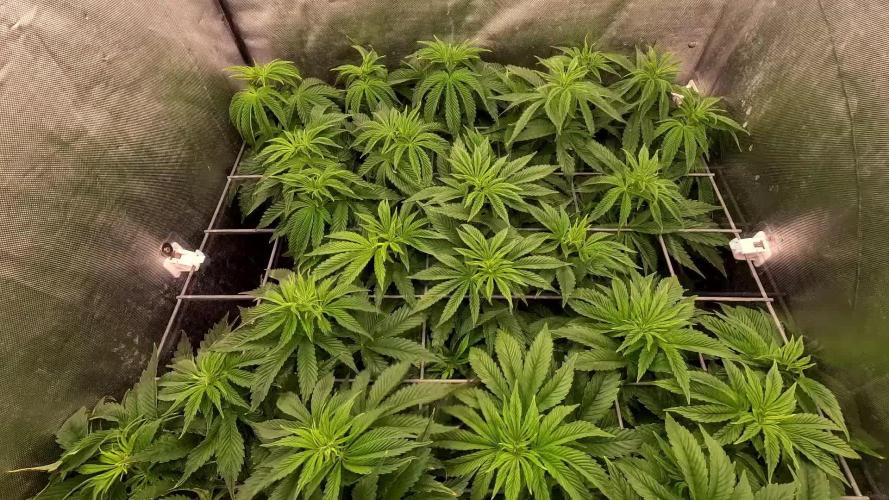
I couldn't finish, but something is something.
no pude terminar pero algo es algo


Likes
24
Share


@PrairieFrostGrow
Follow
***** Week 4 Veg - December 26/20 to Jan 1/21 *****
The girls were transplanted on Christmas day, after three weeks in the solo cups from seed. They had been growing well in cups but I must admit that I feel the root mass should have been larger after that time period. I am working with a new nutrient line that I have not used before and have not been adding microbes to the feed schedule thus far.........or hardly any. I feel this is why the root system, while looking healthy, is looking too small. Over the next couple weeks will ensure they get lots of microbes in the 1 gal pots to fill those up with roots before moving to 5 gal pots.......the last upsize for this girls. Counting my weeks for finish I am wishing that I had started these girls a couple of weeks sooner so they may not get to veg in the 5 gal pots for a couple of weeks before flipping to flower.
For these girls it is still pretty early on in their lives and not many exciting things to happen the first month of seedlings. We have done one upsize and another to go. Keep the feeding in line and follow the week 1 veg feeding for these girls, bringing up the ppm closer to 700ppm range.
Overall, happy with first couple of weeks of veg. Need to get more roots going, we will, but otherwise just give them the time to mature and take it easy......they will come along😀 She is looking very nice and even so far and keeps catching my eye when I open the tent😂😎
Little more detail.......
Dec 26/20, Day 22 Veg
- Dry out day after being transplanted yesterday.
- Pots were still heavy.
- Let the microbes in the media do their thing and start pushing root growth harder than what has been happening.
Dec 27/20, Day 23 Veg
- Gave the girls a little splash of the left over nutes from two days ago to add a little oxygen and they can take the extra microbes and bacteria right now😀
- 200ml with Microbial Mass and Piranha @ 2ml/L = 650ppm and 5.7pH
- They are really happy today!!!! Loving the bigger pot to let those valuable roots expand into nice fluffy new coco and soak up the nutrients👍
- This girl has always had wider fan leaf blades than the other two girls. She is shorter but wider.......hell, kind of like me
Dec 28/20, Day 24 Veg
- feeding day today with more water to get some runoff from the 1 gal pots. They have not been watered to runoff yet.😀
- 0.5L each girl with the full line for this week. No other additives, just the IPP line = 700ppm and 5.7pH
- seems a little high to jump from around 300ppm to 700 but will follow the companies recommendations👍
Dec 29/20, Day 25 Veg
- Dry out day.
- they are happy today......not much to add otherwise today
Dec 30/20, Day 26 Veg
- going to give them another day without watering.
- I feel like I should be watering today but I am not as I am not sure how much moisture they will have consumed and the roots need some air to breath so holding off.
- think it is a CalMag only feeding tomorrow.
Dec 31/20, Day 27 Veg
- feed day today since it has been a couple of days.
- 500ml with CalMag @ 2ml, Gold Storm @ 7ml, Sea Storm @ 5ml, Blackstorm @ 2ml, Vitamin B @ 0.5ml = 525ppm and 5.7pH
- keeping the humic and fluvic acids going in, plus Kelp and CalMag👍
- the girls are happy and seeing forward movement everyday, looking for more aggressive though from the girls.
Jan 1/21, Day 28 Veg
- doing very well......like really well💪
- didn’t push them today and left them alone for watering, pots of course still had some weight and I didn’t expect them to need today.
- Optic Folier Overgrow given today. Folier spray to give them just an extra boost since everything is otherwise dialed in👍
Finishing off the week very strong!!!!!! They have been looking very healthy and perky everyday. The roots are a concern and will be taking it easy on the nutrients for another week yet and keep up the microbes and beneficials. Will get them in line......my hope is too keep their time in the 1 gals down to two weeks max......maybe 10 days??
Looking pretty good ETS as we move through the first upsize and get veg going here. She has been very steady right from the start and continues with steady growth in early veg. Her branching is growing laterally and keeping short node spacing in her growth, perfect!......again, still pretty early on but its all good so far😎


Likes
51
Share


@Silverback_Guerilla
Follow
1/24 - 1/28:
Fed on 1/28. The SO's and MW's have entered the harvest window. and both the Platonium and Velvet Sugah Bref are right behind them, so it was the last feeding for everybody except maybe the GG4.

Likes
3
Share


@Ddddgbbb
Follow
Flushing water + sugars as u can see thc is almost on peak milky mostly soon amber will hit we will enjoy that gp!! Buds are not small so it will take some time to ripen fully tops already purple

Likes
4
Share


Likes
1
Share

@Organic710
Follow
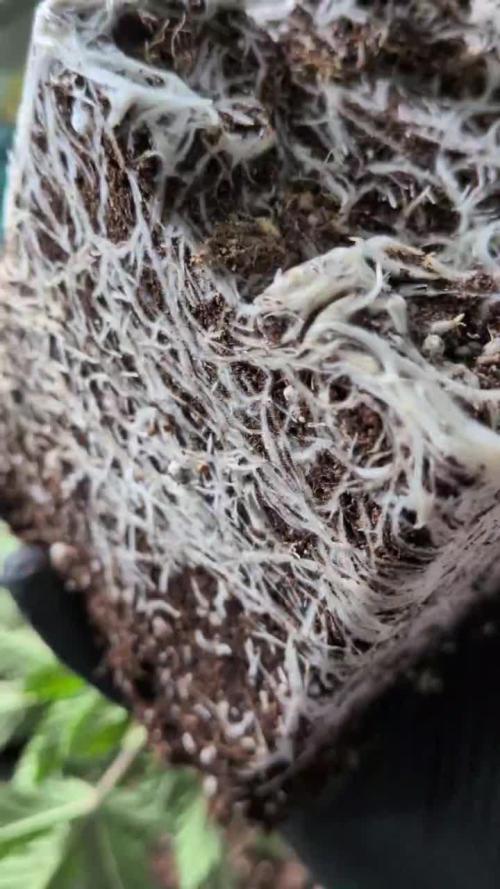
Transplanted the 2x Mentha de Croco into 11L livingsoil pots with 4-3-4 and some charge. Psycho myco at the rootzone and watered with microbes and mono silicic acid 💪
Mammoth lighting has hooked you guys up with a 5% discount code which will help me massively. Use code : KEYOG at checkout on the official Mammoth website. Stock worldwide with warehouses USA/EU etc so fast discret shipping. Also they sponsor legal operations and even offer loans of upto 500k for medical investments so if your legal facility could do with a future proof upgrade then consider Mammoth lighting. Made by professionals for the geeks and freaks of nature 😇

Likes
13
Share


@tresplantes
Follow
Everything looking Great so far
I transplanted in clean white 6l Plastic pots filled with 70 coco 30 perlite hydro mix from plagron
Since im Unding athena you can see the planst grow so fast from Day to Day


Likes
4
Share


@eldruida_lamota
Follow
Que pasa familia, vamos con la cosecha de estas Papaya Zoap F1 de Sweetseeds.
Esta variedad me resultó bastante sencilla de cultivar, y si no la maltratas crece sana a mi parecer, la flor se ve increíble, tiene una cantidad de resina considerable y unos tonos muy peculiares, se ven muy apetecibles.
El olor que desprende es muy peculiar es muy dulce y empalagoso, a mi parecer, no pinta nada mal, las flores están muy prietas y la tricomada es inmejorable.
La única queja que voy a tener es que de las 3 plantas que las 3 huelen muy bien , 1 está llena de semillas, así que haré hash con esa planta. De ahí las 7 estrellas sobre 10, de no ser por eso dudaría en un 9 pero es que me parece una putada meses trabajando y pfff, repleta de seeds. Lástima por esa planta , las otras 2 muy top, van sin semilla y no se follo nada.
Hasta aquí todo, Buenos humos 💨💨💨

Likes
10
Share


