


Likes
Comments
Share

@HazeLiebhaber
Follow
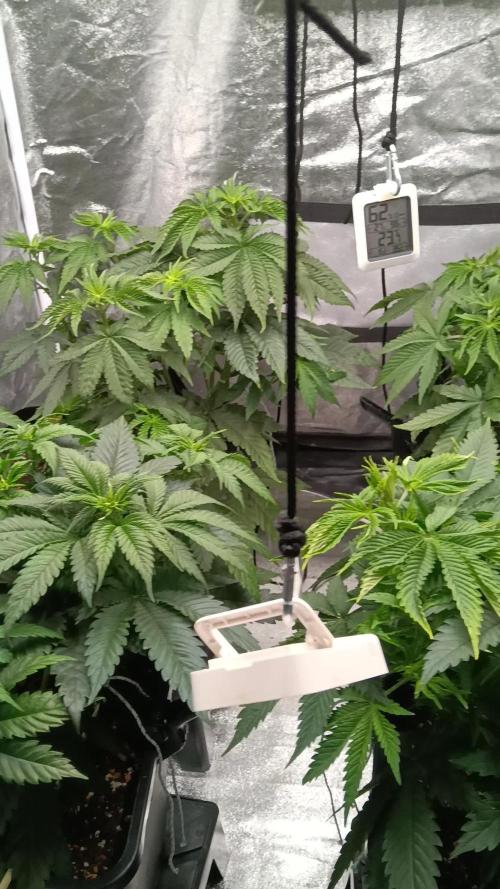
Der KISS ist das Licht wohl etwas zu stark. Die obersten Blätter waren leicht nach oben gerollt und mir zu hell. Auch bei Lemon Orange konnte ich das beobachten, sobald der Abstand zur Lampe weniger als 40cm war. Ansonsten sehen die Ladies gut aus. Sonntag geht es dann wahrscheinlich in die Blüte.



Likes
65
Share


@Roberts
Follow
Gold Sativa is growing well. Colas are starting to develop. Lotscof stretching is going on. Doing a solution change ever 4 to 5 days. She is in a New Level Hydro bucket, under a Spider Farmer SE5000 light at 80 percent. Thank you New Level Hydro, Spider Farmer, and Quebec Seeds. 🤜🤛🌱🌱🌱
Thank you grow diaries community for the 👇likes👇, follows, comments, and subscriptions on my YouTube channel👇. ❄️🌱🍻 Happy Growing 🌱🌱🌱
https://youtube.com/channel/UCAhN7yRzWLpcaRHhMIQ7X4g
SE5000
https://amzn.to/3qFpAML
Spider Farmer Official Website Links:
US&Worldwide: https://www.spider-farmer.com
UK: https://spiderfarmer.co.uk
CA: https://spiderfarmer.ca
EU: https://spiderfarmer.eu
AU: https://spiderfarmer.com.au
Coupon Code: saveurcash
Www.newlevelhydro.com
Www.hygrozyme.com

Likes
22
Share

@nonick123
Follow
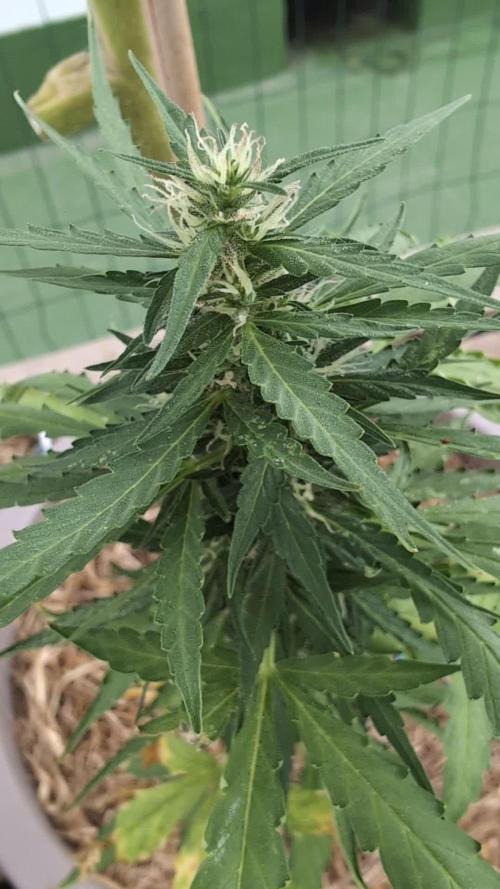
En este caso es un diario un poco distinto...
Tengo en mi terraza (outdoor) una maceta de unos 25 litros, con sustrato reciclado de todos los ciclos hechos con BIOTABS este invierno pasado
Durante todo el invierno / primavera, he ido añadiendo a esta maceta los "restos" de estas macetas del indoor, cargados de vida, sustratos y materia orgánica
Cada vez que añadía sustrato reciclado, añadía / renovaba la capa de mulch (heno) para proteger la micro-vida
Además, ha estado protegido por un techo de metacrilato todo el invierno, para evitar que las lluvias torrenciales de mi zona se llevasen los nutrientes
He mantenido este sustrato húmedo con Agua RO
A principios de mayo, planté una tomatera (tomate canario) en esta maceta
Alrededor del 26 de mayo, decidí dejar caer aleatoriamente una semilla de Gorilla Z Auto que me regaló mi amigo StackFarms
Unos días después, nacía con fuerza y vigor una pequeña plántula! 😍💥
Esta maceta se mantiene hidratada con un sistema de riego por goteo (TEMU) muy ingenioso: Utiliza un gotero medico como se usan en los hospitales!
Este sistema ha demostrado (en mis pruebas) ser bastante consistente en el riego diario!
La maceta con la tomatera + Gorilla Z Auto se mantiene hidratada con 1 Litro de H2O diario (RO o agua declorada, depende como me pille)
A divertirse con este experimento!
🚀 FastBuds 15% DISCOUNT code "NONICK" 2fast4buds.com @fastbuds.official
💦 BioTabs 15% DISCOUNT code "GDBT420" biotabs.nl/en/shop/ @biotabs_official
🌱Substrate PRO-MIX HP BACILLUS + MYCORRHIZAE @promixmitch @promixgrowers_unfiltered

Likes
30
Share


@CHILLING_RACOONS
Follow
Here we are to show you LSD by Seeds Mafia, one of the strongest strain I ever tried.
Plant is developing good, I'm thinking to top her next week but I want to avoid to wait one more week to switch to flowering.
It has some deficiencies, but I'm trying to recover it as good as possible.
✅ VEGETATIVE week #4 (LAST WEEK)
30/12 SWITCH 12/12H
📅this week goes from 26/12 to 01/01.📅
💡💡💡Viparspectra XS2000 is working at 50% power.
💉🔍Fertilization schedule:🔍💉
26/12 3ml/lt TOP VEG
30/12 TOP MASS 0.2ml/L + 2.2 ml/L TOP VEG
31/12 SENSI CAL MAG EXTRA 2ml/L foliar spray
WE ARE BACK!!!
We are back after a little pause.
We take a break because we were too busy to post high quality diaries. In the last diaries we tried to post as good as possible and we have to publish about 6 or 8 diaries (in addition to these that we will publish shortly). We opened also an educational Instagram page, we growed a lot in a short amount of time BUT, Instagram suspended our account and we lost all our posts, I was so sad and disappointed... a lot of work lost in a night....
Now we started a new grow with six awesome strains!!!!!
In this diary you will see our journey with LSD by Seeds Mafia under the AWESOME XS2000 by Viparspectra 🤩
LSD Feminized is one of the most powerful marijuana varieties, reaching a 26% THC content. It produces a very strong and lasting effect. In addition, it is a highly adaptable variety that grows easily under almost any condition, it is very resistant to both mold and pests.
DATA SHEET:
Sex: Feminized
Grows: Indoor, Outdoor, Greenhouse
Height: ≈ 120 - 200 cm
Yield: ≈ 600 - 700 gr m2
Flowering time: 8 - 9 weeks
Complete life cycle: October
Cannabis Genetics: Skunk #1 X Mazar
THC: 26%
Type: Indica
💸💸💸💸💸 Here you can buy seeds of this top shelf strain: https://seedsmafia.com/en/feminized-cannabis-seeds/lsd-feminized-.html
🔧💡OUR SET UP💡🔧
✔️ 💲💲💲VIPARSPECTRA 🚀🚀🚀🌕🌕
ViparSpectra®️ XS2000 240W Infrared Full Spectrum LED Grow Light:
Excellent ratio between wattage and ppfd, excellent light penetraton, perfect light spectrum (it also has IR 🤩) and it has the best build quality on the market. Until now, built quality is really awesome. You can touch that quality. Materials are really strong, excellent driver and the best leds on the market. Heat dissipation is perfect, the lamp is never too hot and it has a passive dissipator so you will have zero noise. It also has IP65 certification. I like that this lamp is bigger than others, so the 240w of power are well distribuited on the space. Viparspectra has an awesome customer service, and shipping was creazy fast!
This awesome brand also offers 3 years warranty.
This lamp has no rivals.
A special thanks to Emily of Viparspectra ❤️❤️❤️❤️
HERE YOU CAN BUY THIS PROFESSIONAL LIGHT: https://www.viparspectra.com/products/xs-series-xs2000 or https://amzn.to/3dyUoJl
and here you can buy other awesome stuff: https://www.viparspectra.com
✔️ 💲💲💲MARSHYDRO 🚀🚀🚀🌕🌕
📦120X120 GROW TENT: an awesome box, easy and fast to assembly. Made by strong materials, solid zips and it is totally lightproof. The position of holes is optimal and the two lateral windows will make easier the work inside the box. There is also a double end, so you are 100% sure that dirt or liquids will not spill out. You can find it here: https://www.mars-hydro.com/grow-tent/buy-mars-hydro-grow-tent-48x48x80-1680d-4-x-4-size-keeps-all-light-in-top-quality-1680d-canvas-is-tear-proof-and-double-stitched-light-blocking-fast-installation-for-sale
💡TS 600 FULL SPECTRUM 100W LED GROW LIGHT : with this light you will achieve excellent buds, you will not need anything more. This lamp replace a 150w HPS lamp, but, with this Led Light you will smoke bigger, harder and tastier buds because Led have a complete spectrum and a powerful light penetration, so your plants will work as much as possible to make you happy. Psssssss it it extremely cheap and it is only 100w, your bills will never be too high, YOU HAVE NO EXCUSES!! Here if you want this little beast: https://www.mars-hydro.com/led-grow-light/mars-ts-series-led-grow-light/mars-tsw-600-led-full-spectrum-hydroponic-led-grow-light
Thank you Eleen of Marshydro❤️❤️❤️❤️
💣Quantum board - 480w - 4x120w Boards by Zhoangshan Koray Opto-Electronic Ltd.
Samsung LM301B 288 led/board 3000K 0dB noise
+24led/board led Osram 660nm
Efficiency 2.6 umol/J 220 lm/w
Driver: Meanwell HLG-480H-36B
💣Quantum board - 240w - 2x120w Boards by Shenzen Yuanhui Led Ltd.
Samsung LM301H 504 led 3500K 0dB noise
+24led/board led Osram 660nm
Efficiency 2.7 umol/J 220 lm/w
Driver: Meanwell HLG-240H-48B
-ESTRACTION FAN:
Blauberg 125 Turbo Pro Series
Maximum air flow: 430-560 m³ / h 50W 32-44 dBA
-FANS:
A)OSCILLATING FAN D.15cm 2 speeds 20w
B) COMPUTER FAN Sunon DP200A – 230V 20w (Strong, reliable and quiet)
C)Cornawall Electronics Multifan Turbo, three speeds, can be used both on support surfaces and mounted on the wall. High capacity, about 740 m3 / h. High silence and reliability.
💊💉💊FEEDINGS:
We used BioBizz light Mix
TOP CROP:
-DEEPER UNDERGROUND: to stimulate roots system
-TOP VEG: for a excellent growth in the vegetative phase
-GREEN EXPLOSION: to promote creation of bud sites and to allow a faster growth
-MICRO VITA: bacterias for equilibrate the soil and to make the plant healty
-BIG ONE: to stimulate bud sites and to stimulate resin production
-TOP BLOOM: to achieve excellent big and hard buds
-TOP CANDY: to feed the buds with molasses for a tastier smoke and to gain weight
-TOP BUD: to enlarge buds and to gain weight
PLAGRON: PK 13-14 to have big and hard buds and to feed plants with lower effort
ADVANCED NUTRIENTS: Sensi Cal-Mag Extra-> for cal mag deficiency
GROTEK: CAL MAG for cal mag deficiency
HESI: PowerZyme to clean and balance the soil. It feeds the plant cleaning the soil.
GHE: - Final Part (ex Ripen) accelerate the final flowering phase, dissolves minerals in excess
- Flash Clean to flush the plant and to be sure that all excesses are out from plant and pot
These two products improve A LOT the smoke of our babies
-PURPINATOR to stimulate flavonoids and to have a better taste and smell.
____________________________________________________________________________________________
🙏❤️ THANK YOU FOR BEING HERE ❤️🙏
Please leave a comment with your opinions, it is very important to us to have a comparison.
If you like our job, tap the weed button and follow us. It will be really appreciated.🙏
We want to thank again everyone that help us in our project. You support us to support our dream. ❤️
SPREAD THE LOVE OF THIS PLANT ALL AROUND THE WORLD
🌿Thank you again🌿
❤️Sweet hugs❤️
👨🌾CHILLING_RACOONS👩🌾

Likes
12
Share


@MrVic98
Follow
Never got around to updating this. Grow was a good learning experience that will help coming grows go much more smoothly. Despite taking forever and having a fair few deficiencies throughout, the quality of bud turned out great, better than anything you can get in my location anyway. Mates loved it.

Likes
36
Share


@MadeInGermany
Follow
Flowering day 49
since time change
to 12/12 h.
Hey everyone 😀.
Another wonderful week goes by 👍.
Both phenotypes are developing very well 😀.
This week, 1 g enhancer per liter of water was added.
That was the last time since they will be flushed next week :-).
The trichomes are 60: milky, 10% amber and 30% clear.
I think the harvest will take place in 12-17 days 👍.
I'm very curious which phenotype tastes better in the end 😍 since both smell very tasty ☺️.
I wish you all the best until the next update 👍 stay healthy and let it grow 🍀
You can buy this Strain at :
https://sweetseeds.es/de/sweet-skunk-f1-fast-version/
Type:
Sweet Skunk F1 Fast Version
☝️🏼
Genetics:
Sweet Skunk Auto (SWS34)
X
Early Skunk
👍
Vega lamp:
2 x Todogrow Led
Quantum Board 100 W
💡
Bloom Lamp :
2 x Todogrow Led
Cxb 3590 COB 3500 K 205W
💡💡☝️🏼
Soil :
Canna Coco Professional +
☝️🏼
Fertilizer:
Green House Powder Feeding
☝️🏼🌱
Water:
Osmosis water mixed with normal water (24 hours stale that the chlorine evaporates) to 0.2 EC. Add Cal / Mag to 0.4 Ec Ph with Organic Ph - to 5.5 - 5.8 .

Processing
Likes
7
Share


@Kushizlez
Follow
Day 42-49
(Day 42) Just watered today but couldn’t go until runoff because I didn’t have enough RO. I forgot to add the probiotic too. Nonetheless, everything is starting to recover from those weird deficiencies and is looking super healthy. Plants are really bushing out now too. I had to top the zkittlez and BBB#3 again as they are just getting too big. Nothing is definitively showing sex yet but I’m seeing clues. Shouldn’t be long now. If I get 4 females or less I will use 10gal pots, 5-7 fem 5gal pots and 8-12 3gal pots.
I need to stop overwatering. Even though it doesn’t look too overwatered, it is much better to water a little bit each day at lights on. This will help keep the humidity down as well as deliver optimal oxygen to the roots speeding up plant growth considerably.
(Day 45) Gave an EM1 spray down today. The beneficial bacteria is said to overpopulate surfaces so powdery mildew and septoria can’t form. Something seems to be really working as I haven’t seen any yet.
(Day 47) I sealed up the tent and am running both dehumidifiers and it’s keeping the RH around a safe 70% night and day which is right on track with VPD. Plants are all looking super healthy. Deficiencies have pretty much all cleared up. Cold nights I’m running 600w and warmer nights I’ll run 400w.
I was asking around Instagram about white ash/good burn and a few different people assured me it has to do with mineral content of the soil. I was told the three best products for clean ash is glacial rock dust/basalt, oyster shell flour and langbeinite. I already have langbeinite so I’ll grab the other amendments today and top dress.
I grabbed the amendments and also got some Destiny Organics dark matter super soil, coco and some beneficial nematodes. Top dressed each amendment except langbeinite and mulched in some coco coir.
(Day 48) My shelf came in today and I think it may be to big for the 4x4 tent. Each square is 12”, not the 11.8” advertised. I could wipe down my flower room and set it up in there which would give my plants a good adjustment to the new lights before I flip. Or I could set it up in the veg tent but that seems like a huge hassle as the need to be moved and flipped soon anyway. I wish they would show sex already so I can toss out the plants I’m not keeping.
For flower I am considering starting over fresh with the new Destiny soil and coco mixed with some amendments. I’m concerned that my current mix might be too hot. I could also dilute it with the Destiny/coco mix. Those little bulb mites that came in with the worm castings are a little concerning as well. Some say they are just beneficial composters aka “worm bin mites” and others are telling me they’re predatory bulb mites which destroy crops like garlic. I’m leaning towards beneficial composters but in another grow I watched them devour a seedling before it sprouted. Gotta check the current roots but the plants aren’t quite ready to be transplanted.
(Day 49) Got everything in the flower tent wiped down and sprayed with alcohol then EM1 few hours later. Got the shelf set up and got all my temp controls set up and running. I put the controllers outside the tent this time and will patch any light leaks. Gave a lite compost tea at 830ppm and a velokelp foliar spray at 6ml/L. This will be the last veg feeding before I transplant into their final containers on the 31st.
BCTG#2 is a confirmed male and I pulled him. No one else is showing definitively. Roots looked super healthy with very few mites but I’m not 100% convinced they’re all clean. I saw a few mites on leaves today too.
Saw a bit of droop after the move but they all look happy just a few hours later.
Took a few clones from some sucker branches on a few of the blackberries.
Likes
17
Share

@ZhulenejJohny
Follow
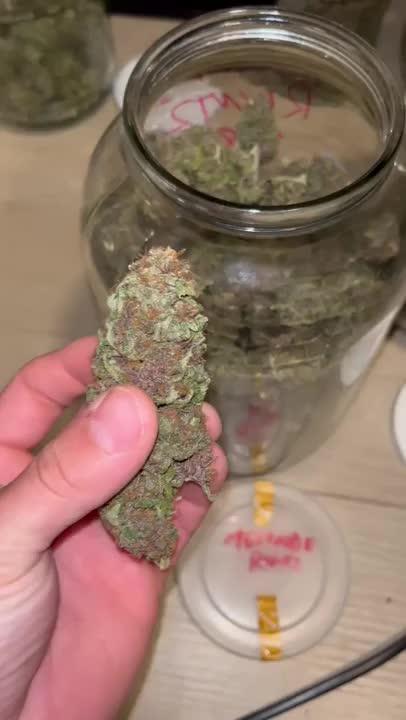
A je to konec dámy a pánové. Byl to náročnej grow skrz vedra, ale s výsledkem jsem spoko. Tak zase u dalšího dobrodružství! Peace 👽


Likes
1
Share


Likes
14
Share


@Chronigmatic
Follow
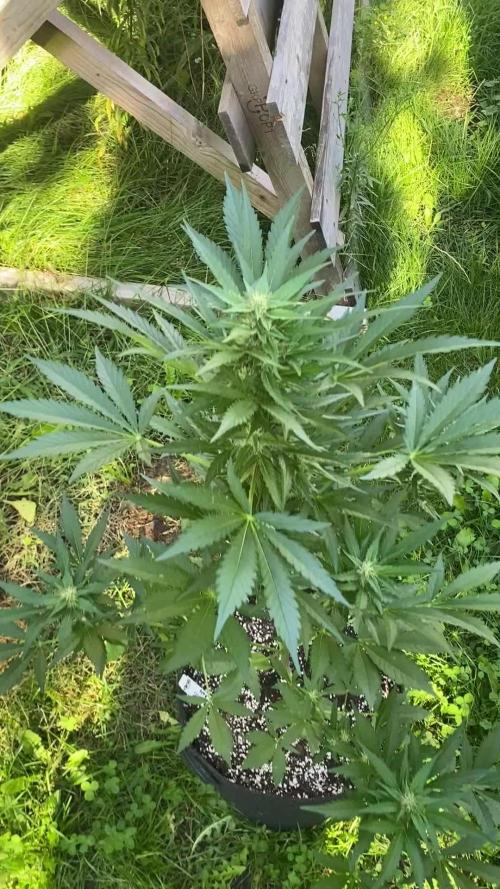
First time doing lst not the most clean one but great results. Super fast flowering. And exciting vegetative. Super recommendable strain.

Likes
2
Share


@bbs42
Follow
Day 23, been QCing the buds and lots defoliation the past 2 days. Getting caked in Trich and some nice bright orange hair poping out. Added trimmed buds to mulch layer. No fan leaves in mulch


Likes
74
Share


@PureMedicin
Follow
Not much to report here been watering every 4-5 day to keep a good dry period to try and promote some trichome production without much succes on #1. I am now starting to think, it might have been a bad seed (Genetics) that i got. It have certainly been a big experience to grow my first seeds ever and to get an okay result out of it so far. Been keeping Nitrogen use down to a minimum. Been flusing my soil plants for the first time at the middle of this week
Likes
14
Share


@carlitospiratahaze
Follow
Todo llegó al fin de los finales con un bosque de gran aroma a madera envejecida!
Realmente delicioso el sabor a madera con fondo incienso que hace salibar en tu fondo paladar y que cuando acabas el join te deja sequedad en el paladar.
Las plantas respondieron muy bien a los últimos días de calor sofocante y la gran cantidad de fertilizante que acabaron siendo sofocadas al gran lavado de raíces de 14 días
Las plantas acabaron llegando casi todas en un 90% al final dos quedaron muy atacadas por las arañas y viendo los días restantes las retiré del armario quedando estas fuera en exterior en la que también. Sacaré provecho con extracciones .
Buenos resultados con los que acabamos este cultivo .
Likes
16
Share


@Bigbombbudz
Follow
The 4 Blueberry Hill were grown with 2 Banana Pudding all from Herbiesheadshop...Love all there seeds they have to offer...these were Herbiesseeds..the Banana Pudding came in the desert mix and the Blueberry Hill came in there female pack...I was happy with the grow they are not the biggest producer's, ( I've had way bigger) but all together the taste and the buzz are all there on both.....Seeing these came from Herbies line and never grew any from them, I was happy....No problems throughout besides some bananas popping out on one of the Banana Pudding plants...go figure.....But it did no harm do to the girls almost being done and not enough time for that to hurt the plants....
The total bud time from the time I changed the light cycle...was 52 days for the first Blueberry Hill, then 53 for a Banana Pudding, then 54 and 55...Then the last plant I waited and let ripen up which she didn't come down until day 68 with all kinds of amber on her.
The total amounts on the 4 Blueberry Hill dried, Jared, and burped.....I don't weigh wet weed....was 24 ounces. 2 plants produced a little over 7 oz a piece....1 plant produced 6 oz and the smallest one that is first in the video produced a little over 4 oz....Not a bad little grow..
Until next time, smoke a fatty, help out your fellow grower.

Likes
10
Share


@candiedamberfarms
Follow
Bloom has begun. I have two plants that are Sedona shorter than the other three but still very happy with each of them. There is a favorite which is in the center. I like her structure, bounce back from the heat and training. She’s absolutely lovely. I’ve also been bottom watering/feeding. They love it. The roots have creeped out from the bottom of the power pots.
Processing
Likes
2
Share


Likes
42
Share


@Ukfarmer420
Follow
So starting the shogun dragon force for 2 weeks now as I got recommended this instead of the final part ripener, so I hope there's a nice difference, the plants are smelling amazing now. I will keep you all updated and add more pics soon.
Likes
24
Share


@Zurban_Poison
Follow
Hi people!
Bruce turned out to be a very disobedient girl)) she stubbornly strives for the top! but at the top there is no more space)) for this) after the first supercropping last week, I had to do 1 more supercropping this week .. hope this will stop her and soon she will start growing wide and not high))) she has a lot of buds and veto! I think she will not give a bad harvest!)) and of course seeds)))
Please watch the video😏

Likes
9
Share


@Growinator
Follow
Endlich ist es soweit, die letzten Pflanzen wurden zum trocknen aufgehangen und die ersten Pflanzen bereits probiert. Ich habe 3 Pflanzen an Tag 65 geerntet, 3 Pflanzen an Tag 67 und 3 Nachzügler heute an Tag 73. Pro Pflanze gabs getrocknet und getrimmt 30-40g. Die größte Pflanze hängt noch zum trocknen aber rechne mit ca. 50g getrcoknet.
Likes
7
Share


@KannaKullektiv
Follow
Hiiigh friends 🙌
Welcome to week 4. 😍
They have grown well in size and the one on the far left has overtaken her two sisters although she shows signs of a deficiency. 😊
I have noticed a calcium magnesium deficiency because I only water with osmosis water. What to you think?
See you next week. 👋
Arturo for KannaKullektiv
🙏