



Likes
18
Share


@Nune2021
Follow
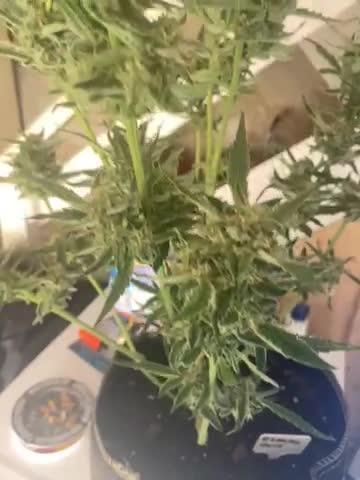
Hey Leute ich hab bei den Pflanzen Ungeziefer bemerkt kann nur aus der plagron Erde vom Grow Shop sein Trauermücken thripse bei zwei Pflanzen außert sich das Schon negativ die Pflanze sieht kränklich aus gelb Stich von oben nach unten überdüngung ausgeschlossen, hab die Pflanzen mit combo neem behandelt 4 Tage gewartet und wieder behandelt das Pflanzbild der Zustand kann auch davon kommen !!! sobald die Pflanzen sich erholt haben schick ich die endlich in die Blüte

Likes
10
Share




Likes
21
Share


@JohnnyBlaz3
Follow
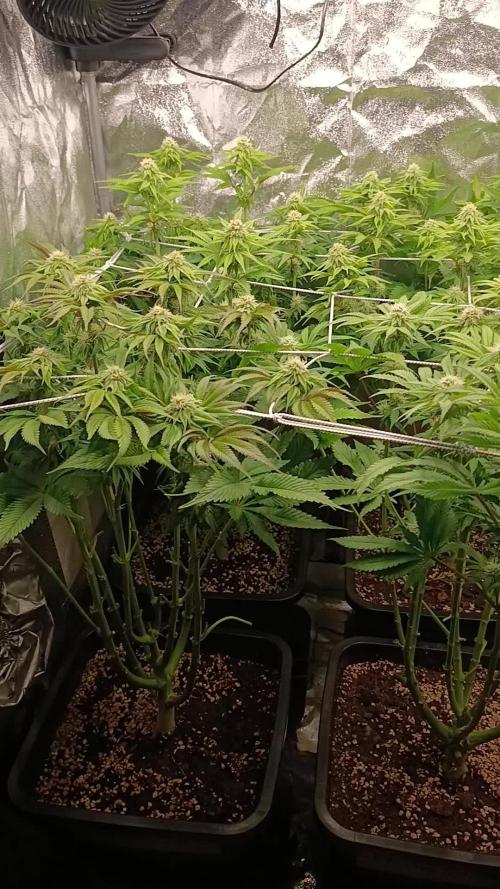
Shes close!! lol I think I might be missing a week oh well lol she is the plumpest auto in the tent of the 4 by far!!! she lookin thiiiickkkkkkk. shes got about 5 giant colas, lots of trichs and stanks real good!!! indoor and outdoor have their own goals but this is obviously alot higher quality than outdoor! The next update could quite possibly be the harvest 😎
Likes
33
Share


@NanoGrow
Follow
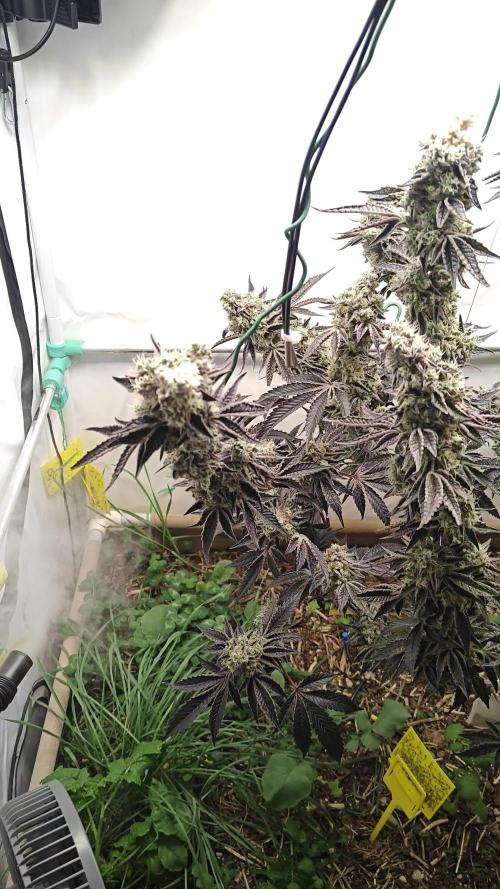
Day 71. Starting to show some purple, which was unexpected! Removed a few leaves that were overlapping.
Day 74:
Today was a bit heart breaking. We found a spot with botrytis/stem rot starting to set in.
It appears we have discovered it fairly early.
After searching treatments, we ended up doing a mix of them to try and avoid losses.
Obviously cutting the branch off would be the most obvious choice, but we are trying to keep her as is and do some experiments in the name of growing science.
We dusted with cinnamon, which has proven to be efficient in terms of anti-fungal properties, and let it sit for a couple hours.
Then, we decided to remove the spot where the rot is showing up. We sprayed with H2o2, scraped out the affected area as much as possible, sprayed again and wiped dry. We then sealed the wound with candle wax. We also spread some more cinnamon on other susceptible entry points for fungus, mostly where leaves had been cut or where the stem was more fragile.
We really hope this turns out well and we win this fight against the dreaded fungi.
We suspect the raise in humidity this week triggered it. She was in the 30s to 40% last week, but the weather changed and she rose about 60% these last couple days.
Pray for us, grower friends.
Day 75: Had to remove the side branch that was connected to the main stem at the spot where the rot appeared. 😕 Patched her up and am praying this is the last of the consequences of this situation.. Pushing as much as we can to avoid and chop her early..
Day 77:
Gave her the final haircut. 😊
Mold situation appears to be under control. Looking frosty as fuck!

Likes
Comments
Share


@SelfCultivationGrower
Follow
After this wild bushy stretch I had to do Late HST to keep them tops from burning

Likes
8
Share


@4F1M6
Follow
Stretch is done and flowers are piling on now! I treated with lost coast as a preventative. I kept the feed the same but it will be altered end of grow week. Canopy is getting hella full can't wait to watch these colas stack on. Until next update. Happy growing and stay lit fam.

Likes
3
Share


@OldskoolHed
Follow
Had to tie down some mains diagonally. She has more stretch than her mother for sure. Smells super skunky with that sweet candy in the background right now. Feeding every other day.
Likes
12
Share


@CampaCavallo
Follow
4ª settimana di fioritura alla CAMPACAVALLO in collaborazione con TENT-X 🤖⚡🍋
Abbiamo ripulito un po' la parte bassa della bella CRITICAL LEMON ⚡🍋
con la app LUX misuriamo circa 60000 lux🌞
Inizia a bere come un cammello la ragazza 🐫... Circa 1 litro al giorno 🍺




Likes
10
Share


@Lazuli
Follow
The smell was new for me its amazing that Fastbuds strains always smell exactly like the name they give them


Likes
22
Share


@CampExotic
Follow
Checking trichomes for cloudy looks. Still got a ways to go
Flushing started 1/1/21
Reading trichomes is tough


Likes
20
Share

@DogDoctorOfficial
Follow
Grow Report — Nectar Drip
GrowDiaries Week 10 (Actual Week ~6–7 from Seed)
First things first, a small clarification for anyone following the diary closely.
On GrowDiaries this report appears as Week 10, but in reality the plants are around week 6–7 from seed. The reason is simple: the first entry in the diary was created during germination and no photos were uploaded at that moment, so the timeline shifted a little on the platform.
So for accuracy:
plants are currently around week 6–7 from seed and well into early flower.
Now let’s talk about what has been happening.
⸻
Quick Recap
For anyone just arriving to the diary, here’s the short version of the journey so far.
The goal of this run has always been simple:
grow healthy plants, observe them carefully, and share the process honestly.
The environment has been kept stable and relatively simple:
• 12/12 from seed
• balanced feeding schedule
• steady environmental control
• minimal intervention unless the plants ask for it
Up until now we mostly focused on guiding growth and observation, allowing the plants to express themselves naturally while keeping the canopy organized.
And they are doing exactly that.
⸻
This Week — The Garden Is Exploding
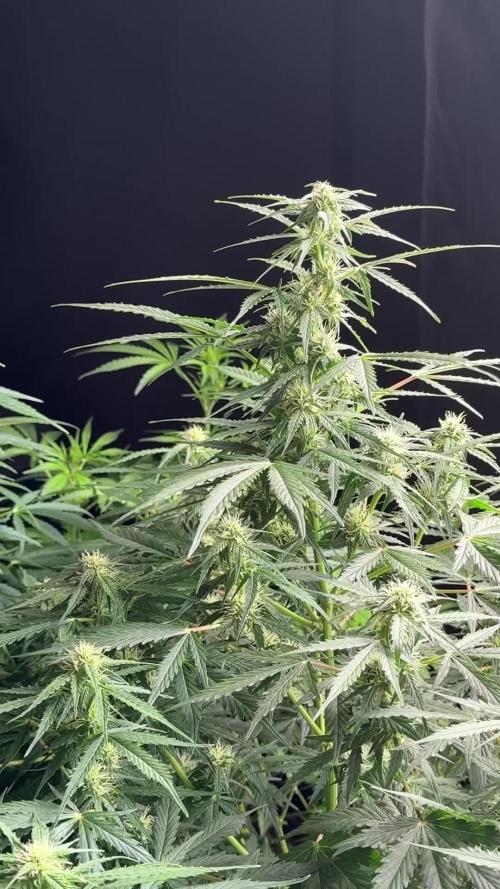
This week the girls are looking absolutely incredible.
Structure is strong.
Color is perfect.
Leaf health is excellent.
And the most exciting part:
trichomes are already everywhere.
Even at this stage the plants are starting to sparkle. Resin production is clearly ramping up and the flowers are stacking beautifully.
Height is now roughly around one meter to a little over one meter, creating a very healthy canopy without stretching out of control.
Honestly, these are beautiful specimens and a joy to watch develop.
⸻
Defoliation — Why We Did It Now
This week we performed a targeted defoliation.
This was not done because the plants were struggling or because something was wrong.
We did it by choice and by timing.
The reasoning is simple:
It is often easier and less stressful to remove certain leaves earlier in flower rather than waiting until the canopy becomes dense and airflow becomes restricted.
So we removed only what was necessary to:
• improve light penetration
• increase air movement inside the canopy
• reduce future humidity pockets
• allow the flowers to develop in a more open environment
Nothing aggressive.
Nothing excessive.
Just removing leaves that were clearly blocking key flower sites.
This kind of intervention is always a balance. Different growers prefer different approaches, but in this case it felt like the right moment to open the canopy a bit.
Now we observe how the plants respond.
⸻
First Structural Training
This week also marks the first time we applied some stronger structural training to these girls.
Until now the plants were mostly guided and allowed to develop naturally.
At this stage we introduced a bit more direction to the structure so the canopy develops evenly and future flower sites receive better light exposure.
Again, nothing extreme.
The idea is simply to help the plant organize itself for the next weeks of flowering.
The real feedback from this will come in the next report, where we will see how they react.
⸻
Environmental Conditions
The room is currently running around:
Temperature: ~28°C
Relative Humidity: ~68%
Outside conditions at the moment are:
~10°C with about 87% humidity
Considering the outside environment, we are actually very happy with how stable the room is staying.
But one thing worth mentioning:
We don’t chase room VPD numbers too aggressively.
What really matters is leaf VPD and plant response.
Plants tell the truth much better than charts do.
Right now the plants look extremely happy:
• strong leaves
• no stress signals
• steady growth
• excellent resin development
So the environment is clearly working for them.
⸻
Nutrients
Feeding remains exactly the same for now.
No changes this week.
The current nutrient schedule continues to support healthy growth and there is no reason to modify something that is clearly working.
Sometimes the best move in the garden is simply:
don’t change what isn’t broken.
⸻
Introducing a New Team Member
This week we also officially welcomed a new member to the team:
Mr. Baggy.
He has already been making appearances around the garden and many of you may have spotted him in some of the photos.
He’s now officially part of the crew and helping around the studio and garden.
Please give him a warm welcome when you see him around the diary.
He’s a cool guy and we’re happy to have him with us.
⸻
Gratitude
As always, huge appreciation to everyone who takes time to visit this diary.
To the:
• longtime followers
• new visitors
• curious growers
• supporters
• skeptics
• lovers
• haters
Everyone has a space here.
If energy crosses paths here, something is being exchanged and that always has value.
Special thanks as well to:
• the breeders behind these genetics
• the GrowDiaries platform
• the entire GD community
And of course to the sponsors supporting the project.
⸻
What To Expect Next
Over the next weeks we will mainly observe how the plants respond to the structural adjustments made this week.
Things we’ll be watching closely:
• flower stacking
• resin development
• canopy response after defoliation
• structural balance of the plants
If everything continues like this, the next weeks should be very exciting.
The girls are clearly entering the phase where the flowers start building real weight and character.
And we’ll be here documenting every step.
🙏 Thank you for your patience and continued support.
FOR DISCOUNT CODES AND MORE JUST FOLLOW THE LINK https://website.beacons.ai/dogdoctorofficial
📲 Don’t forget to Subscribe and follow me on Instagram and YouTube @DogDoctorOfficial for exclusive content, real-time updates, and behind-the-scenes magic. We’ve got so much more coming, including transplanting and all the amazing techniques that go along with it. You won’t want to miss it.
GrowDiaries Journal: https://growdiaries.com/grower/dogdoctorofficial
Instagram: https://www.instagram.com/dogdoctorofficial/
YouTube: https://www.youtube.com/@dogdoctorofficial Deleted by Youtube
Vimeo : https://vimeo.com/dogdoctorofficial Under construction stay tuned ⸻
Explore the Gear that Powers My Grow
If you’re curious about the tech I’m using, check out these links:
🔆 Lighting & Environmental Control
• Future of Grow — Advanced LED lighting technology
https://www.futureofgrow.com/
DISCOUNT CODE: DOG20
• Lumiflora — Under-canopy LED lighting
https://lumiflorade.com/
• TrollMaster — Environmental controllers and automation gear (past collaboration)
⸻
Genetics
• Zamnesia Seeds — Genetics used in this project
https://www.zamnesia.com/
⸻
🌱 Soil, Substrates, Boosters & Root Support
• Plagron — Substrates, bio mixes, and supportive products
https://plagron.com/en/
⸻
🎒 Storage, Curing & Preservation
• Grove Bags — Curing and storage solutions
https://grovebags.com/
⸻
Straw Baggy Links
🌍 Website
https://www.strawbaggy.com/?ref=339 10% discount code for our Community - Dogdoctor10
📸 Instagram
https://www.instagram.com/straw_baggy/
⸻
📸 Photography Equipment & Tools
(Not sponsors, but part of my creative toolkit)
• Sony A6700
• Sony full-frame macro lens + few more
• Stacking photography workflow - learning
• iPhone (for behind-the-scenes shots)
We’ve got much more coming as we move through the grow cycles. Trust me, you won’t want to miss the next steps, let’s push the boundaries of indoor horticulture together!
As always, this is shared for educational purposes, aiming to spread understanding and appreciation for this plant. Let’s celebrate it responsibly and continue to learn and grow together.
With true love comes happiness. Always believe in yourself, and always do things expecting nothing and with an open heart. Be a giver, and the universe will give back in ways you could never imagine.
💚 Growers love to all 💚
📸 P.S. – The Eye Behind the Lens
All photos in this diary (for now — except for the ones showing the camera, which I took with an iPhone) are taken with a Sony A6700 paired with a Sony full-frame macro lens and a few more.
Photography is part of the story — it’s how we share the fine textures, the glow, and the quiet details that words can’t always capture.
I’ve also started experimenting with photo stacking — a technique where multiple images, each taken at a slightly different focus point, are layered together to create one perfectly sharp image from front to back.
It’s not digital enhancement or AI; it’s pure photography — a way to reveal the plant’s beauty in microscopic depth, from trichome to petal.
You’ll even see a few shots of "ghost me" capturing the shots — camera, lens, setup — because every grow deserves not just to be cultivated, but documented like art.
FOR DISCOUNT CODES AND MORE JUST FOLLOW THE LINK https://website.beacons.ai/dogdoctorofficial
NEW DISCORD - Official Server Invite Link : https://discord.gg/ksjAkA5T74

Likes
167
Share


@DeepWaterGrower
Follow
⭐ TrolMaster tracking ⭐
I started to track my crop during week 15, when I got the Tent-X TCS-1 by TrolMaster. First impression was: this is too professional for me, I can't handle setting it up and using it well. Then I started reading some posts on Instagram, I visited their site and in 5 minutes my cultivation experience took a huge step forward with disarming simplicity, I couldn't believe it.
I have uploaded tracking videos from the TrolMaster app for each week from the 15th to the 19th, as well as the two weeks of drying stage.
⭐ Controller Chronicles ⭐
Day after day I appreciated the clarity and precision for data, access to all settings and instant readings by connecting a WIFI router to the controller's LAN port. I loved the possibility to dim my lamps remotely, or even automatically based on the temperature in the box!
🌱 GERMINATION (2 days)
Seeds in a glass of EC 0.4 tap water for 10 hours, then in root riots and under the lamp. They sprouted after 48 hours from dry seed.
🌿 GROWING STAGE (10 weeks and half)
I decided to give these plants a long vegetative growth and this allowed me to do a lot of training on both.
Starting from the 4th veg week I started with defoliation sessions every two weeks, for a total of four during the entire vegetative phase. The last defoliation was done a couple of days before the switch, in order to allow the lower parts of the plant to get as much light as possible.
Furthermore I did Topping on week 6, cutting the apical branch, then on week 8 I did Topping again on several sites, as well as SuperCropping on the highest branches to make the canopy uniform.
The light cycle I used is 18/6 and the last two veg weeks I lowered the light hours to 16/8 first and 14/10 then.
During the veg stage I made 4 DWC change, PH was always between 5.5 and 6, about EC I started with 0.6 and was 1.4 on the last veg week.
🌸 FLOWERING STAGE (9 weeks)
I started this phase after 36 hours of darkness, I then changed the DWCs solution (adding a flowering stimulator).
Then I mounted the ScrOG-net about 50 cm from the base of the plants and I wove the phenotype #1 through the net occupying at least 60% of the available space; the phenotype #2 stretched shortly after the switch and I used the net only to widen the central branches.
They showed the pre-flowers two weeks after the switch, then I made two defoliations on week 3 and 5 flo.
During the last four weeks of flowering (weeks 6-9) I simply paid attention to the PH-EC levels to provide the roots with optimal conditions. I then kept the TEMP-RH-VPD-PPFD values under control and this also thanks to the Tent-X controller by TrolMaster which allows me to provide optimal conditions also above.
I chopped them when trichomes were about 85% milky and 15% amber.
During the flowering stage PH was always between 5.8 and 6.2, about EC I started with 2 and was 2.3 on the last week before flush.
✅ HARVEST
- From dry seed to harvest: 140 days (2 days germination + 75 days veg + 63 days flo).
- Chopped after 4 days flush and 48 hours in dark;
- Wet trim, removed fan leaves.
✅ DRYING STAGE
- Time: 14 days;
- Average: 20° C - 50% RH.
- After that I made a dry trim, removed branches and sugar leaves.
⚖️ DRY WEIGHT
- Phenotype #1: 230 gr buds + 25 gr larf;
- Phenotype #2: 105 gr buds + 50 gr larf.
So, the overall dry weight is: 335 gr buds + 75 gr larf.
✅ CURING STAGE
- Curing is done after 30 days with Boveda 62%.


Likes
10
Share


@The_Bearded_Grower
Follow
had to harvest a bit early as it looks like it turned hermy on me .... hope the clones dont do the same
update- Turns out I harvested a little early for nothing but it's not a huge deal seeing as it was in flush anyway.
Update- today is Sunday it's been 3 days in the drying period and I came to the conclusion at the buds had so much resin on them that if I did not remove the leaves it would be exceedingly difficult to do so in a couple days I'm not sure what the updated weight would be
update - here we have it ladies and gentlemen finish the Harvest putting them into cure now I pulled a tiny butt off and had a small hit and I must say it feels nice and a very little bit got me quite High. I'd say the high feels more in the frontal cortex of my mind

Likes
63
Share


@Canna96
Follow
Hey now, so this week went very well, I topped one of them for the last time on day 22,, and I wanted to top again but I started seeing some white pistils so I decided not to. I am now feeding 3 times per day with a total EC of 1.4 I am giving .4 to Cal Mag and 1.0 to Maxi Gro. I am also utilizing LST to try and keep an even canopy. I felt like my last grow produced far too many fluffy buds, so I am trying to focus on fewer bud sites, and denser colas. I am also testing the runoff and I am getting readings of 1.5 to 1.6 so I am good with that. Thanks for checking out my diary, be safe and blaze on!
