


Likes
Comments
Share


Likes
17
Share


@WhiteWidow
Follow
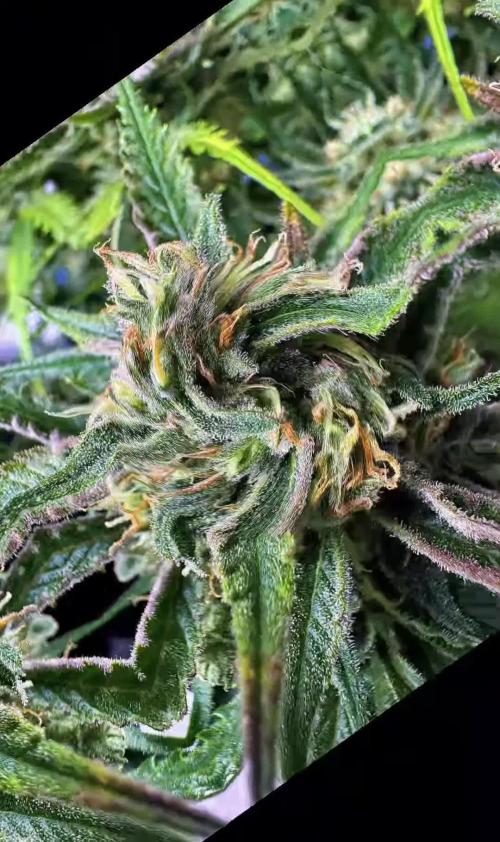
Perfectly healthy maybe not as dark color as the other plant but thata the diversity we enjoy in this sport of growing.
Showing no signs of deffinciecies or overfeeding / burning, handled the stress like a true champ!

Likes
40
Share


@420DeepGrow
Follow
Buena semana, quiza un poco alta en nutrientes a si que a partir de ahora aplicare la mitad en todos los riegos a ver como se comportan
Las plantas responden muy bien a los nutrientes y crecen bastante bien.
📅Dia 35: agua Ec 250 Ph 6.5
📅 Dia 36: Revive + Calmag, 300 ml nutrientes a EC 830 y PH 6.5
📅 Dia 37: Nutrientes, EC 850 PH 6.5
📅Dia 38: Nutrientes, EC 750 PH 6.5
📅Dia 39: Agua + CalMag + Enzimas EC 400 PH 6.2
📅Dia 40: Agua EC 250 PH 6.5
📅Dia 41: Agua EC 500 PH 6.5


Likes
2
Share


@Green_Peace
Follow
She's a little shorter than the others in the tent so I didn't top her again this week, but is looking healthy with full green leaves. Had to go out of town for a while which is why there was a little standing water in the video. Don't usually do this but was rushing before heading out for a few days.
This plant is now on the left in the timelapse video.
Enjoy!


Likes
85
Share


@Grey_Wolf
Follow
How To Make and Use Organic Super Soil
Seedsman Seeds Peyote Wifi Harvest
Well here we are at the conclusion to many months of planning and preparation plus another 23 weeks of Growing.
I Did a lot of reading and researching super soils and how they are made before I decided to actually make some . Then I thought to myself I should document the whole process from start to finish in diary form.
This way any other growers who are interested can have a basic idea of where to start.
and the likely conditions they may face.
All of this began way back in August of 2019
when I first mixed the super soil mix (which can be found by looking at week one)
aproximately Three months after that I started
this grow and 23 weeks later Here we are at the end. Along the way I described the methods I was using to keep the soil fully active and
productive at all times. Plus also some of my pre planning tips for flowering time.
For example in week four....
I innoculated with the Mycorrhizal kit as instructed on the packaging next week I'll give the soil some help by feeding some seaweed solution mixed with mollasses and worm castings. This will provide a boost for both the plant via the roots and also benefit the millions of tiny microbes that live within the soil.
Simply mixing and using the super soil as is will still work fine however by keeping the soil in perfect health as well as the Plant itself will pay dividends come harvest time.
Week Six....
It can pay to plan ahead now for when the plant gets bigger and will need support. With this in mind I am going to use a premade wire Tomato type cage that is 1.5m high.
This will hopefully provide enough support for the plants frame when it goes into Flower Next year.
Planning ahead can sometimes help prevent potential issues from effecting your grow. Some things to think about and plan ahead for are as I mentioned Plant stability and support when it gets bigger.
Week nine.....
Planning ahead still I decided to dig a big hole aprox 1.5 meters by 80cm and to a depth of about 4 foot .
Took a few hours of digging and shovelling but the end result with the plant lowered down into it makes it worth my effort and Back pain that will follow 😏
By doing this I have created a much cooler Root zone by having the pot well below surface level But Ive also knocked 4 feet off the overall plants profile which will aid me in my
other concerns being Security.
Week thirteen....
Diamotaceous Earth acts as a bug deterrent and can't hurt the plant in any way. I also mix some into the worm tea that I feed straight to the soil as Diatomaceous Earth is a fantastic source of Silica which we all know is extremely beneficial to your Plants Health.
As Far as my super soil is concerned , so far I have not needed to feed the plants any fertilisers as the soil is providing everything the plant needs.
All ive been adding is biodynamic food for the soil itself to keep everything under the surface happy and well nourished.
Once flowering begins next month I will need to add an organic Booster to the soil that will replace any depleted resources.
***** But not everything went smoothly in fact I did the most damage to the plant in
Week 17 I decided to be stupid and spray all my girls with potassium bicarbonate thinking it would "mold proof" my plants WRONG all
did was burn the absolute shit out of the leaves.
From then on it was a constant struggle to get this girl to produce anything because along with the foliar burning I also had to contend with next to no sunshine for many days at a
time plus the constant leaf dropping no doubt
reduced my potential yield.
****** Not everything was Doom and gloom either in fact by Week twenty one....
The Quality however is definately showing itself, with every single bud covered in visible frosty looking trichomes.
The smell is really really Funky with undertones of spices. So even tho I'll probably only get around half of what I was hoping for ,the bud that I do get will be straight up fire. 👌
In the Final week before I chopped ....
The Buds although very delicate and light, look very Frosty and Delectable.
As for the super soil it is absolutely chock full of nutritional value so I will use it to Grow a fine crop of Broad beans this coming Winter. The growing of Legumes in the soil will actually benefit the soils health in many ways including making the nitrogen within the soil more readily available.
**** On the 18th of March 2020 I chopped her
down and hung the plant upside down in the
greenhouse overnight. Next day I removed all
the buds and stripped them off the branches.
The buds then went into a hanging drying rack
until adequately Dried for the trimming.
After the first trim the buds went into paper
bags for more drying time (aprox 3-5 days depending on temp rh weather etc) They then got a bit more of a trim and went into the Jars for Curing.
I have had quite a few bongs of this already
and I must say it is Really good hey!!
So in Conclusion I hope that this Diary may help somebody who may be interested in growing
organically with soil outdoors or indoors
as well as provide an insight into how the
use of all natural ingrediants can produce
Good buds. Whilst this particular plant didn't get Big buds the Quality was outstanding and
you only need to check out some of the other
plants I have growing in the same soil mix
as to the validity of of its Fertility.
Now we come to the End of this Grow I'd like to thank a few growers who offered advice and/or support along the way @ROM101
@Med_in_Tropic @F4m0u5 @Shooey @MagicMan
@Spinnnn Thanks guys I appreciate it
Also thankyou you for reading this Diary
and please leave a like at the end if you
liked it
Cheers Grey_Wolf
Post harvest notes ; its now the 1st of May and the Broad beans and Peas that I planted in the super soil are doing very nicely this will not only provide me and my family
quality organic food for our table but also the growing of legumes helps fix nitrogen to the soil and keeps it living and healthy for the next time I need it for canna 👍💪 Best way to be folks
self sustainable and recycling your soil mixes will help reduce our footprint on the planet and save us money too 👍
So what are you waiting for Grab some basic organic ingrediants and make yourself some Organic super soil 👍👌
##### Final update for this diary 31st May 2020
It's been just over 2 months since I harvested this Peyote Wifi plant and the buds have been curing for that time .
Today I chose a bud to test and I am blown away by the perplexity of the high and taste profile , Bloody amazing 👍#######
Thats it folks All over now after 3 months of making the soil then another 24 weeks of growing the plant and then another 2 months of curing to get to here 31st May 2020
It was a great fun grow and I hope I have inspired some of you to try making your own batch of Organic super soil 👍
Likes
11
Share


@JolliGrowz27
Follow
3 Phenos of Wedding Glue. Dense Nugs
I tried three types of training intensities. Pheno 1 I topped all cola sites twice for more tops. Pheno 2 I topped each site once. Pheno 3 I topped the main cola once and tied down the whole plant. Pheno 1 will have the the biggest harvest. Pheno 2 will have the most trichomes and turning purple. Pheno 3 has the largest orange colas. Going to push the trichomes this time.
The trichomes are finally starting to turn milky. They were clear for a long time it seemed. I am anxious to harvest these plants and try the flower.


Likes
11
Share


@Mazgoth
Follow
Really resistance to anything that is causing her stress and as always really good yields even in worst case scenarios.

Likes
64
Share


@BrediniGreeny
Follow
4/18/25
They started a new week now so to say🙂.
They are all looking wonderful, between 11 and 12 cm tall. 😍🍅🍅💚
Grow babbbbiieess😍🍅💚
4/21/25
So I transplanted them today in a soil mix with 70% tomatoes soil (store bought) and 30% old soil with perlite. Also on top of the soil i put some volcanic stone.
They got their spot on the balcony now and my "little balcony garden" concept is starting to take shape. Almost done but all the plants must now just grow😊🌱💚
They got watered with plain water PHed down to about PH 6.🍅🍅❤️💚🌱
4/23/25
They are all super happy and bathing in the sun. They look strong, lush and growing. My balcony garden concept is coming slowly true. 😁😍
Grow babieees growwwwwww💚🍅😍😍
Likes
29
Share


@Rangaku
Follow
Pulled and trimmed and drying out , had a great run with no dramas , top Genetics on display here the fruit is fruity , sticky and packs a real punch . Will grow again no doubt . Thanks heaps weedseedexpress

Likes
6
Share


@Headies
Follow
So we got some very bushy plants. I topped them three times and trained them sideways and the plant focused it's energy on growing out sideways.
Likes
16
Share


@Dunk_Junk
Follow
Wow she's grown loads this week.
22cm vertical growth.
Flowering going full steam ahead!! 😎 💪

Likes
2
Share


@el_cultivito
Follow
Got some sealant to properly seal my DIY CO2 generator and lil maggie seems to like it. Her buds are starting to swell up.
For the CO2 generator I did the following:
2 Liter Bottle -> 1 Liter Bottle -> Fan
(Fermenting) -> (Water Filter) -> (Distribute)
Ingredients:
Sugar - 3/4 Cup
Yeast - 1 Teaspoon
Water - 6 Cups
Step 1:
Add 6 cups of room temperature water to the 2 liter bottle.
Step 2:
Add 3/4 cup of sugar to the water and mix until sugar is fully dissolved.
Step 3:
Add 1 teaspoon of yeast and let sit until bubbles appear in water filter bottle.
Step 4:
Direct the end hose to the plant canopy. CO2 is heavy so it falls, use fan to blow it to the plant canopy.

Processing
Likes
20
Share


@CanadianFillmore
Follow
Start of week 4 of flowering. Week 3 went well, even with temps reaching 35°c in the closet. I've since added another fan to circulate more air, temps have dropped down to 31°c. Despite the heat stress, the plants are growing rather well and bud sites are developing nicely. Light defoliation again this feeding. Based on the heat issues, I need to upgrade my exhaust fan, 100 CFM isn't enough to get ride of the heat.


Likes
10
Share


@RookieGrower65
Follow
Set up a second 3x3 tent and put GGs in one tent, BBs in the second. Alternating watering and nutrients every 48 hours. PH 6.3 for both.

Likes
43
Share


@GODSGIFT_2005_JM
Follow
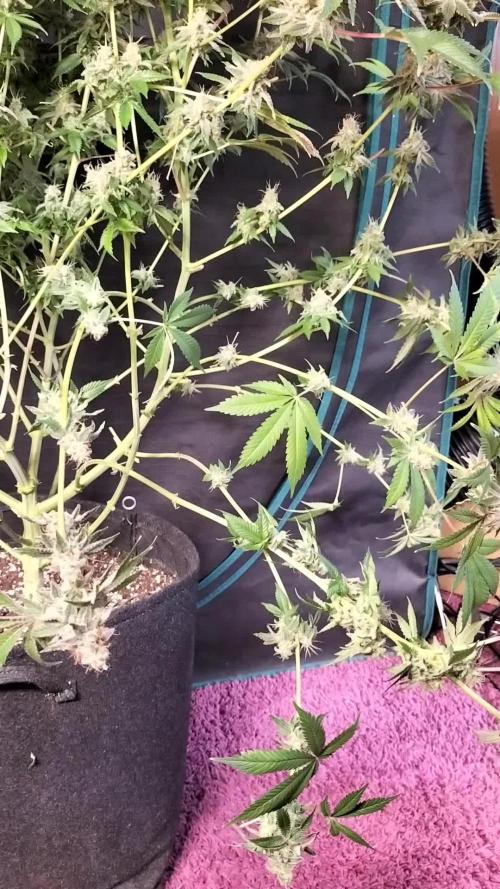
📸 some macro shots
🍼Greenhouse Feeding BioGrow & Bio Enhancer
⛺️MARSHYDRO
The ⛺️ has a small door 🚪 on the sides which is useful for mid section groom room work. 🤩
☀️ MARSHYDRO FC 3000 LED 300W
☀️Also special thanks to VIPERSPECTRA P2000 (200W) & XS2000(240w) LED growlights
🌱 FastBuds 420

Likes
23
Share


@Firepharmer
Follow
Love this strain!! Nutty and meaty spicy terps one one of my favourite to medicate with and grow
Both plants where grown in 1 gallon pots so nothing to big of a yield but was expected with the small pots . One plant was canna nutrients one was remo nutrients

