
Likes
3
Share


@HookahCli
Follow
d68
Llevamos todo el mes de abril con lluvias y las plantas no reciben las horas de sol que quieren, por desgracia, la planta de LST ha sacado unos pistilos y para que no continúe con la floración le tendré que hacer una poda apical.
El resto de plantas parece estar bien respecto a esto, pero voy a estar observando a Mimosa Evo, puede que le pase lo mismo que a la LSD.
d69
Le he hecho la poda apical por la mañana a la LSD.
He realizado poda apical a Mimosa Evo.
He regado con 8L de agua a estas 4 plantas y 2 más, he utilizado la mezcla de arriba.
d71
Parece que crecen bien, todavía estoy dudoso porque LSD parrce que quiere sacar flores, la dejare una semana a ver como progresa, Meganuska necesita agua, esta muy liviana la maceta será la única que se riege hasta la proxima semana.
Estan empezando a llegar los insectos, la semana que viene empezare con los preventivos.


Likes
2
Share

@HoneyBlunt42
Follow
Day 90
The Sativa plant is beautifully swollen at the top. I've watered it minimally for the last three days.
Today I'll mix up the solution and add a 1 g/l Bio Enchanter. It's alkaline (pH 8), so I'll first dilute 15 liters of the solution with 2 ml/l CalMag in the aquapot to 250 PPM. Then I'll lower the pH to 5.0, as recommended by the fertilizer manufacturer. After that, I'll dissolve a capful—one and a half liters of black powder. These 15 liters should be used within 24 hours.
My slightly drying bushes will appreciate a third of the pot's volume being watered.
The stems are showing red spots—it looks like I need to add 1-2 g/l Bio Bloom to the coco and mix 2-5 liters of the coco into the top layer. After bending and pruning, the plants feel stronger and healthier.
To correct the nitrogen deficiency, I'll also add a liter of Simplex Start Up 4 ml/l.
Day 95
They're doing well after moving to their new space. I didn't change the photoperiod to avoid stress. Yesterday, I didn't water them at all because they were experiencing water deficiencies. Today, I watered each plant 2 liters of solution, 10% of the solution before draining. I also added a weak concentration of Simplex Coco mineral fertilizer, 1 ml/l.

Processing
Likes
8
Share


@MountainFlowers
Follow
Flowering week 3 --->
Indoor plant:
Nothing special this week.
She stop to grow and she start to develop more bigger flowers with strong smell 😍.
The soil dry out quickliy compered to last week. I waterd it with 4lt of water (pH 6.5) and half tab of EASY BLOOM BOOSTER TABLET from Royal Queen Seeds.
Temperature grow box---> 22-26 °C
Umidity grow box ---> 45 - 55 %
Outdoor plants:
The plants look more healty and bushy💪 thenks to the beautifull weather.
They grow bigger and develop some small flowers. They will probably not produce bigger and dense flower😢 but
currently my plan is to harvest the ladies more late possible(to get the best result) and to continue water them with 6.5 pH water and Atami 1 Component every time they dry out.
This week i waterd them with 1.5 lt of 6.5 pH water and Atami 1 Component for each plant.

Likes
33
Share


@StickyFingah420
Follow
Día 88 y penúltimo antes del corte.
Ya se aplicó Flawless Finish para un acabado impecable como su nombre lo indica. Siempre prefiero hacer el lavado de raiz solo aplicando agua en las últimas 2 semanas, pero esta vez lo hice aplicando el finalizador y luego los últimos riegos con agua purificada.
La verdad es que estoy contento con los resultados de esta nena, que es hermosa por cierto, desprende olores ácidos, cítricos, dulces.
Los colores son hermosos y las flores están rebosantes de tricomas, lo que la vuelve muy vistosa.
Es todo por ahora, estaré manteniendoles informados en estos últimos días.
Buenos humos! 👽

Likes
24
Share


@BearBuds
Follow
We have made it to the end of Week 6. Conditions in the tent have improved DRAMATICALLY. The heat wave has finally passed and the temperature has finally leveled out. Not only that, the super weird monsoon weather that we were having has also passed and now the humidity is not rising above 60%. This turn for the best is really showing and also fixing the pH problem I had also probably helped a lot. The color of the buds is really coming through now. They are showing lots of light blues and a little orange and I am loving it. I am planning on pushing the nutrients a little higher these next two weeks, around 750-850 PPM. Hoping to give them a larger shot of overdrive to keep them pushing these last 2 or 3 weeks. Overall I am SO excited for this plant, I can't wait to see what her harvest will bring!!!

Processing
Likes
10
Share


@DeezyEnt
Follow
the photos are all of NL#1 because that plant has all of the attention. it got transplanted, i know "dont transplant an auto".. kill me for it. anyway.. that was a HORRIBLE!!!! Experience and I HIGHLY RECOMMEND not doing this if you have no clue what you are doing. I almost lost a Plant... why was i transplanting in the first place? well first of all as a new grower what did i do? I over Fed the plants 😆.. and they were not happy. i tried flushing but that made it worse so i needed to add new soil to hopefully dilute some of the nutes. The transplant from a 5 gallon bucket was not and will never be a task for one person to do alone. some roots got ripped she got banged around a but then the entire plant went droopy and it was like hell trying to get it to stand again.
NL#2 is doing okay just a flush and it is doing fine i hope.

Likes
17
Share


@EGPharouh
Follow
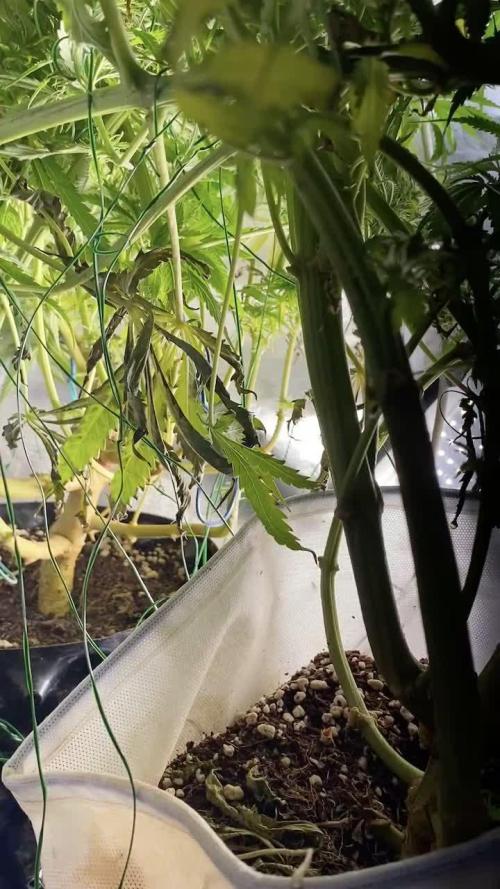
Did some LST... I did a small mistake with not filling the pot all the way...

Likes
4
Share

@sunshinegroww
Follow
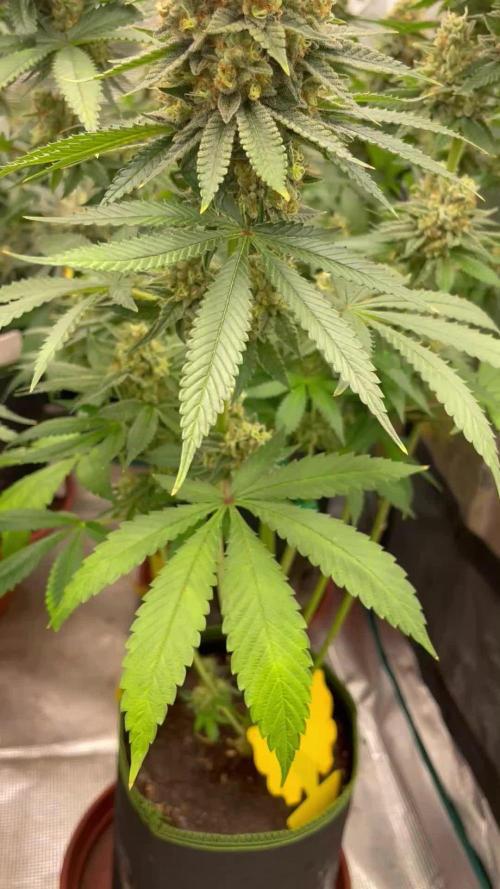
A week before chop super big and heavy buds sticky as hell currently in flush mode so starting to fade slowly love it

Likes
4
Share


@jojopfoh
Follow
The fade has begun as this strain is 60-70 days. The buds are vey dense, frosty and sticky. many ot he leaves have now faded and some havr fallen off. It has a very sweet smell

Likes
13
Share


@FlavoursUk
Follow
So, eventful week.
Prior to putting my seeds into my system, my light and rdwc system was left on as I was dialling in the growing environment before placing the seeds as a final home. My only issue was I had a light leak BEFORE putting the foil top covers on the clay pebbles. Long story short, I got algae which ended up turning to root rot.
I spotted it very swiftly and did a res change adding beneficial bacteria to the system along with the base products of remo nutrients. A few days later new growth and recovery is taking place.
Day 16- Fully back on track, new roots shooting out into the water and the growth rate has picked up as it should.
Foliar feeding twice a day for a little boost until the root system establishes a bit more. Huge changes in just a day. Can't wait to see what a week's growth looks like.
Really loving the sunset/sunrise feature on the trolmaster, something I got to experience watching recently!
Watching by closely to make sure everything stays in track.
Stay tuned for the next one 😉

Likes
7
Share


@Cannabiszimba
Follow
iniciando segunda semana de flora eu dei uma defoliada pra priorizar os galhos maiores e diminuir a umidade ali no meio. vamos ver como ela reage.

Likes
10
Share


@hersh666
Follow
I started flushing because i found 2 leaf with mildew. Have cutting the two leaf and have put my tente exhaust out of my room. Plus have add a extra fan.
Likes
9
Share


@Rizik86
Follow
Day 58 - Checked PPM 1,300.
Day 59 - Checked PPM 1,300. Got lucky <<<
Day 60 - Checked PPM 830. buds are swelling.
Day 61 - Added 10 mL of 10 mL of CalMag Micro Grow and Bloom. Added 5 mL of Bud Candy Sensizym Big Bud Nirvana Rhino Skin and B-52. PPM is 1,560.
Day 63 - Checked PPM 667.
Likes
6
Share


@Ninjabuds
Follow
Permant marker the one seedling I could not be more happy with. It has a distinct different look to it than any other plant in the tent with strong growth going on. I'm sad about the other seedling thou the 1st set of leaves were kinda deformed and it has like a spiral thing going on where new growth comes from. Hopefully it comes back around, I always like seeing atleast 2 phenos of a strain I feel it gives you a better idea of what a strain is.
It's looking like a good start to a week the plants are strong they are getting to the point I can let the dried dry out completely. I'm thinking by the end of this week the plants will be starting to be sold.
Last week I put all the plants into my bigger 2x4 tent with my medicgrow mini sun 2 the 500w version. Only a few of the plants were ready for that light. Seems like the only plants that really have good resistance and have a strong start are the weedseedsexpress.com seeds. Shout out to weedseedsexpress.com for the strong plants.
I ended up putting all the plants back into my 2x2 tent with the 55w amazon light it has alot more blue light in its spectrum. It's kinda weird b4 I switched the plants to the 2x4 tent they were getting 220umol under my amazon 55w led then when I put them under the 500w light 25% strength about 50in from plants and they were getting only about 195umol in that tent but it was stressing most the plants. I assume a larger light has more side lighting hitting the plants. I think when useing larger lights it's good to measure umols from the top but also coming from the sides. I think durring seedling stage they only need about 50% the umols coming from the side the plants as the top is receiving.
When I put the plants back in the small tent about the same umols as they were getting b4 the switch and they were still a little stressed. So for a few days I put the small light at the top the tent giving them 100umols for a few hrs then 130umols the rest the day.

Likes
5
Share


@Lasninasverdes
Follow
En nada empiezan la semana 9. Estoy orgullosos de mis niñas van muy bien😍

Likes
38
Share


Likes
Comments
Share


@eldruida_lamota
Follow
Vamos familia, actualizamos la segunda semana de floración de estas Black Rainbow de Seedstockers, salieron las 3 de 3, 100% ratio éxito.
Aplicamos varios productos de Agrobeta, que son increíbles para aportar una buena alimentación a las plantas.
Temperatura y humedad dentro de los rangos correctos dentro de la etapa de floración.
La tierra utilizada es al mix top crop, por cambiar.
De 3 ejemplares seleccioné los 2 mejores para completar el indoor y trasplanté directamente a macetas de 7 litros, cambien el fotoperiodo a 12/12 y aplique una buena poda de ramas bajas, se ven bien sanas las plantas, tienen un buen color y progresan a muy buen ritmo por el momento, ya empezaron a formarse las flores.
Agrobeta:
https://www.agrobeta.com/agrobetatiendaonline/36-abonos-canamo
Hasta aquí todo, Buenos humos 💨💨💨

Likes
3
Share


@DeeDeeKushner
Follow
Easy grow and the overall quality is great. I feel like I definitely could yield way more if I did way more training. If included trim and shake, this planted yield 2 ozs which isn’t bad for sharing space with 3 other plants in a 2x2 space. I have a few more seeds of this strain and will be growing them again definitely. I’ll catch yall on the next one ☝️🏾
Likes
16
Share


@GrapevineGrower2
Follow
Well, week 9 of flower in the books and she is done as of this posting on 5/19 (day 63). She finished up well and the trichome development has nice mix of milky with a little amber. She's is extremely frosty and gives off a super strong smell of fruity goodness. She'll be cut down today, so stay tuned for the subsequent harvest report and pics.
All in all, first time DWC bucket grow went well, in my estimation. It's a lot of work, but the results speak for themselves. I learned a lot with respect to monitoring ph, ppm, and ppfd readings, as well as reading my plant for visual cues. I eventually understood I needed daily readings b/c growing hydro conditions can change on a dime, especially for someone new to this growing method. But once I found my stride, the process became easier. Another lesson learned was how much space is needed for vegetative and flower stretch. I literally had to move the buckets from the original 2x4 tent to the larger 3x3. And that is where she finished up.
First time growing using Ethos seeds, which


