


Likes
Comments
Share

@eldruida_lamota
Follow
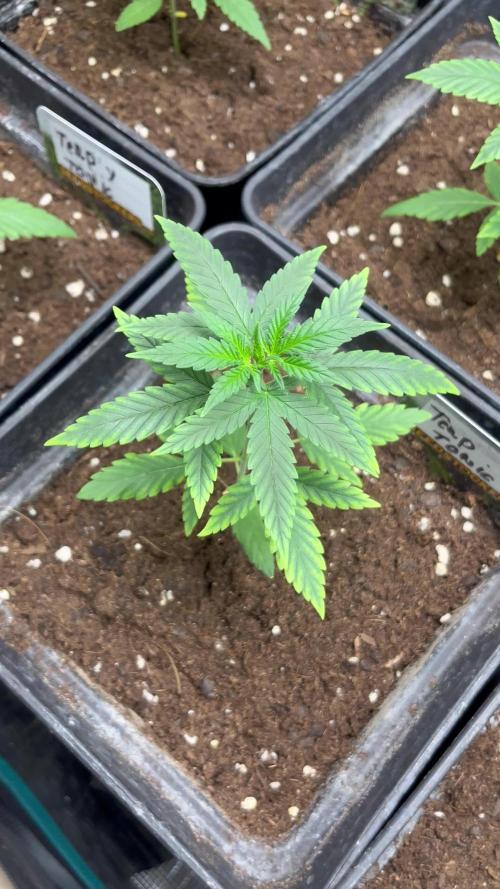
Vamos familia, actualizamos la cuarta semana de vida de estas Terploc & Tonic de Seedstockers.
Tuve problemas con la temperatura que estuvo alta 28/26 grados y humedad dentro de los rangos correctos, la única queja es la temperatura por empezar pronto, 16 horas luz, 8 oscuridad, estiraron un poco, pero van lentas por el momento, que cojan fuerza.
El trasplante a sido realizado a la maceta definitiva, 7L con sustrato Top crop.
Hasta aquí todo, Buenos humos 💨💨💨

Likes
42
Share

@RakonGrow
Follow
+
data+charts online rakongrow.lima.zone/growme-mango-kush-auto-015.html
Tag 92:
und sie werden fetter, da der dünger gerade perfekt ist. nein ich hab auch keine ahnung wann da welches problem kommt. es ist einfach so . ich schüttel immer gleich , aber es kommen verschiedene ergebnise lol . eigentlich hab ich im lager auch kaum temperatur problem . ja irgendwas ist immer lol . nur was .
+

Likes
8
Share


@AUTOBUDDHA
Follow
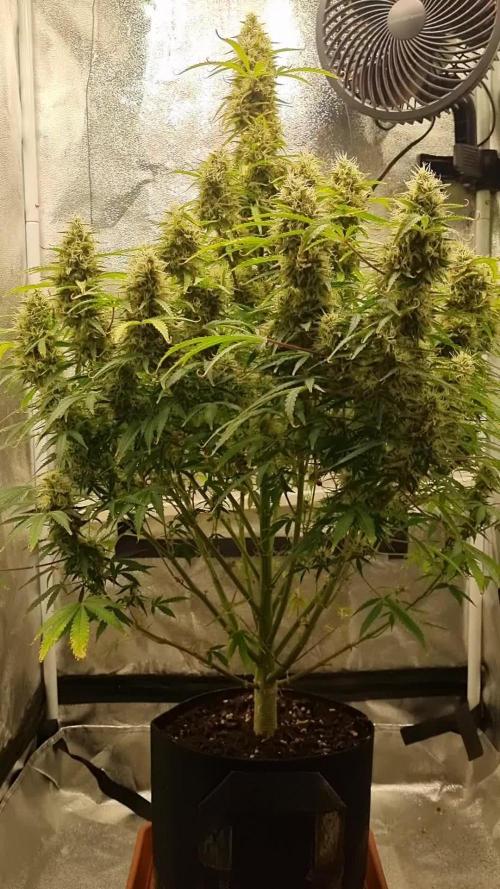
Defoliated this week. Ladies are filling back in nicely.
Tons of bud sites. Very happy with this batch so far! Nutrients every watering this week. These girls will now get one watering of just ph water, then the next watering will be the last watering with nitrogen. After that, we kick the bloom phase into overdrive. They will get micro, bloom, and advanced big bud. Every watering, for the rest of their lives.
Grow-5ml
Micro- 5ml
Bloom- 5ml
Recharge once a week..
What a bush!!!! Super heavy stalks and my gosh. Still vegging!
What a yield this girl will be!!!

Likes
Comments
Share

@Budhunter
Follow
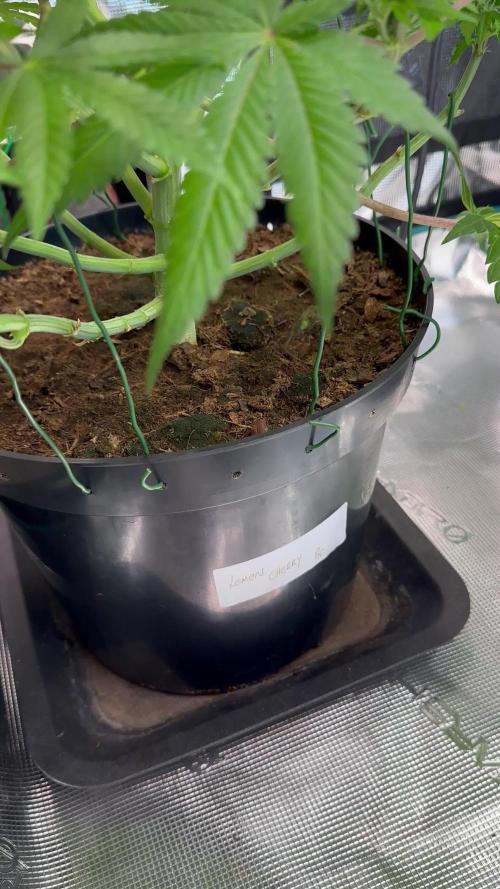
Week 4 flower - Day 27 of flowering - Day 83 of life
Lemon cherry pie is a medium size plant(at least mine 😅) lots of buds sides and they are getting frosty. Not as big as I wish but they are getting tasty and smelly. Let’s go
Likes
49
Share

@masterofsmeagol
Follow
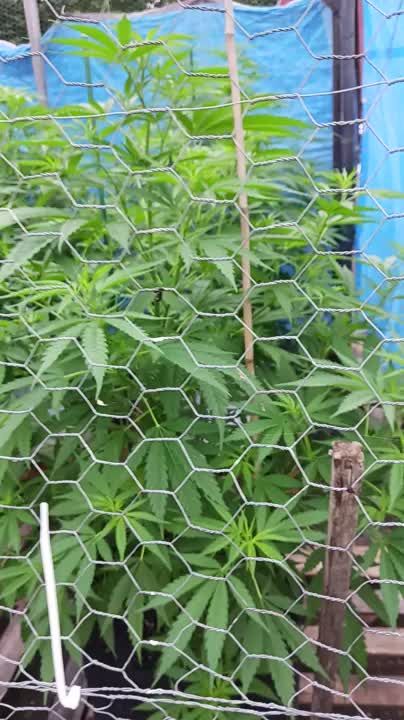
7/11 Got half in of rain last night. Glad I didn't water. Ph of rain water is very acidic. Added supports to the blueberry cheese in the 50. I just used string and went diagonal and attached to the cage. Wrote a ton but it disappeared. Anyway looking at previous diaries I was wrong about senescence. It wad the life cycle of those earwigs that did that to my plants (see other diaries). This soil mix is amazing. These plants gave only gotten like two small feeds of big bloom. I showed my commercial buddy and I'll keep it between us what was said but it made me feel really good. I'm considering either expanding the cage in one direction with some lumber I already have or moving a couple outside tge cage. That way I have more room. He said he's seen plants structurally similar reach huge heights (14f) so I'm just trying to avoid future problems. I at least need to get the trellis on. I hope poor that's food enough. Did a real nice video this morning but nothing wanted to upload and it just uploaded the same one twice. I'll try again and hopfully it will go up. If not I'll put it up tomorrow.
7/12 Dad has surgery this morning. I did a quick video and took some pictures. I need to do some rearranging with the plants and cut a pallet to fit in the back. Then I can put a vertical trellis up. Haven't decided if I'll add on to the cage, remove a couple plants or just rearrange things but I'm leaning towards the later. They will need water again and I'm wondering if I should start nutrients but everything looks so good. By this time on past diaries I'd be losing all my leaves bu now. MI think it wad part ear wigs and part to many nutes. This soil mix is taking these plants through veg. I'll probably do a feeding soon but it will be organic and it will he small like a big bloom or ancient amber. Im leaning towards not using growbig this year as my plants seem to be doing great without it. We'll see. I'll keep this updated.
UPDATE: Went back over and gave plants a full watering. Some were slightly drooping. I was going to add nutes but decided against it as I didn't see any deficiency. So far NO Earwigs! I comed through the plants and I did find a jpn beetle which I happily killed. I mixed up 8 gallons of water and gave it to the 11 plants so it wasn't quite a gallon a plant. I need to rearrange the plants so I have room to move around. I also need to cut another pallet and use the spaces I'm not. Trellis needs to go up.
7/13 I think I've got the watering amount down. Now just to find how often which will depend on weather. I've watered very little this year. They loved that gallon. I was going to use big bloom and kelp me/you but looking at my garden I decided not too. My buddy asked what i was addingvthings for and to wait fir what i added to do what I wanted it to do. I see no nutrient deficiencies so why add anything? I think this soil mixture will get me all tgexway through veg. I dont plan on using much in fliwer either. Definitely good genetics. I really need to cut that palley and move the 1 10gallon to the far back coener. It will open thibgs up so much better. The garden looked so beautiful this morning. Getting very aromatic. I started untangling trellis netting but had to leave. I'll update what I do. Happy growing folks
UPDATE: Went back over as I had a slight intuition that I needed to check the garden. I found and killed at least 7 jpn beetles. That's what's been making holes. They tried to escape and bounced off a tarp but I got it. I went through the interiors and found two pillars. If these beetles are gonna be around I'm ordering a net. I'm also close to positive I'm going to extend my cage in the back a few feet. Things are getting unmanageable in here. My buddy said I'll be having problems soon if I don't do something. I'll document what I decide to do.
7/14 Found ONE jpn beetle in the garden this morning. I can manage those well enough. The birds help too. I check my garden multiple times a day so I manually remove many pests. However I've noticed some thrip damage on a leaf and a leafhopper damage on "A" leaf so there are "some" pests around but not enough to spray shit. A couple wasps were doing there job while I was there. Supposed to get thunder storms after three and tonight. Supposed to get over a half inch of rain tonight. I lifted the bags and decided to hold off and let mother nature take care of it as the bags weren't totally dry. Only problem I really have is space. I AM moving that 10gallon (that's the same size as some 20's) in the back. There's 27in not being used and a few feet the other way. My buddy cautioned me that I'm going to have problems since my plants are so crowded. I agree with him. I spoke with me father and we have most materials to extend my cage four feet in the back. I think that's my plan. I'll extend the structure before the stretch then I can put up the supports. We'll see how this goes.
UPDATE: Went back over to check the girls as I had a feeling I ought to. When I got there I saw that a couple of the blueberry cheese were pretty light (liftng the smart pot) but the others seemed to be fine. ONE 10th planet was light like that and the purple punch in the 10 gallon was as well. Each plant thar needed it got at least a half gallon of water. I'm waiting to see if we get the thunderstorms and the half inch of rain. I watered the MASSIVE blueberry cheese in the 50 but I only gave it 1 pitcher which is like 1/4 gallon or so. Don't know why I even gave it that. Looked fine but the soil WAS pretty dry. Next year I'm giving myself way more room. I was running trying to chase these jpn beetles. This time I have the dawn and water and a measuring cup to knock them in. This ain't my first rodeo. I did notice some bright yellow streaks on a leaf edge and I'm hoping it's not septoria. I doubt it but I have an anxiety disorder and I worry. I hope I can get the cage extended sooner rather than later. It's getting hard to move in there and more importantly I can't take any more plant pathogen problems. I'm considering starting a plant doctor regimen just to be safe.
7/15 Got a bunch of rain last night. No jpn beetles in the garden and not really much damage. I did notice this (I think it's leaf hoppers) that leave those dots close together on a leaf so it appears I've got a variety of pests. I'm considering how to approach this. I mean the damage is very minimal but I don't want it to get out of hand. Another thing I need to look out for is leaf septoria or any other fungal pathogens. I believe that has been part of my problems in the past. I think that's what caused my earlier grows to drop all their leaves so quick. I think I'm being overly cautious but its very crowded in there. With my father just getting out of surgery the girls will need to wait a little bit before before I can extend the cage. I could still cut the pallet and move the 1 10gallon and that would give more room. I rearranged a LITTLE BIT so they have a little more room but I've really got to get this cage extended.
UPDATE: IT Rained so hard I had to pull the car over. We hydroplanned the whole way home. After working ob my house I went to see what the damage would be like. NOT A SINGLE BREAK THAT I COULD SEE. I took a video but since the wifi here sucks I'll have to upload it tomorrow. Walking around in the cage even if I cant get it extended I think I'll be OK. It obviously will open me up to lots more issues but at the very least I can reorganize before I build on. The 10 gal purple punch would fit perfectly in the back and I have a pallet I can cut to fit it in place. Putting that one back and pulling the others forward will be much better than what I've got going on now. I'm also thinking about running an extension cord and putting fans under the canopy or at an angle to keep the wind moving. Just thinking outloud. However after that storm the girls looked as happy as I've ever seen them. All happy praying to the sun, thankful for the much needed rain. Mother nature does a pretty good job with out me messing with it. I've noticed a couple interior lowest leaves turn yellow and die like a nitrogen deficiency but everything else is fine. Also noticed a leaf that looked like a p deficiency but again, it was the VERY bottom leaf on ONE plant. Again the rest of everything looks fantastic. I'll keep an eye out for anymore nutrient deficiencies and if anyone that reads this sees some please let me know. I should've taken stills since they looked so good but I got it on video.
7/16 It POURED last night and throughout the day. TORRENTIAL rain. The branch breaking sheet rain that us outdoor growers learned to fear. My plants aren't trellised currently. I know what I need to do now. I have a pallet to put in the back corner and I'm moving the purple punch in the 10 there. And pulling others forward where there's more room. Then when I extend it (it's gotta be done this week) everything g will be in their proper place and I can just throw on a vertical trellis. I also noticed more (leafhopper) damage on a leaf. Different leaf of the same plant so I'm considering spraying something. I have a number of products but I was trying not to use them. Luckily I have these diaries so I can look back and see certain plants reactions to certain nutes or fungacide/insecticide/nutes and the doses used. I haven't been using much but if my plants will remain cramped I'm going to start the plant doctor. I'm seeing more pillar damage too but BT is super narrow so I'm thinking when I fo spray for pests I might use cap jack and be done with it. Then I can apply the BT in flower if it's necessary. I took a video but I have to wait until tomorrow to upload. I took a quick snapshot though.
7/17 Despite the torrential rain I don't have any breaks. I'm noticing more pest damage though. Another leaf on the same plant had those closely shaped round circles. I forget what pest it is but it's there. Caterpillars are there I'm sure so I may do a preclcentative spray. Just unsure what I'm going to use. I lost a COUPLE very bottom interior leaves that look like they just got used up. After this rain I think think the plants might benefit from a feeding. Probably next water after they dry out. I REALLY need that cage extended. I expressed that today and it should be done this week. I'm looking for pallets today. I have the little one that I can put in the back which will allow me to move the 10 gallon and move the other forward. That will help some but I need more room. I'll update as I go.
UPDATE: GOT A SMALL PALLET AND IT FIT PERFECT IN THE BACK ROW. I MOVED THE PURPLE PUNCH IN THE 10 GALLON ONTO IT. I SHIFTED A BUNCHVIF THINGS AROUND. I ROTATED ON BLUEBERRY CHEESE 180 DEGREES SO IT WOULD FIR BETTER. CROP ROTATION IS GOOD ANYWAY. I TOOK VIDEOS AND YOU CAN NOW SEE THE ROWS MUCH BETTER. 2 WITH 3 and 1 WITH 4. IT'S SIGNIFICANTLY BETTER THAN IT WAS. I CAN GET AROUND ALL SIDES OF EVERY PLANT NOW. GRANTED THE LARGE 50 IN THE BACK IS GOING TO HAVE SOME TROUBLE BUT ILL JUST STAKE IT TO THE CAGE. IT WILL GROW TOWARDS THE SUN ANYWAY. IM SUPRISED I DIDN'T LOSE A BUNCH OF LEAVES AFTER THIS RAIN. MOVING THINGS AROUND AND LOOKING ON THE INTERIOR OF PLANTS I FOUND A COUPLE LEAVES THAT HAD BEEN USED UP. I REMOVED A COUPKE LEAVES THAT HAD DONE THEIR JOB. I'LL UPDATE AS I GO ALONG.


Likes
15
Share


@Sid93
Follow
Amazing smell sticky crystal I started giving Big Buds and hopefully in a few days they will be greasy and big 🔥🔥🔥

Likes
31
Share


@Chubbs
Follow
SuperSativaSeedClub
PurplePunchOG Auto
Week 5 update for these 3 little ladies. They all seem to be growing at different rates but over all seem healthy. I've decided to do a defoliation on all three, topped two and did some LST training so it's definitely been an eventful week. I'll start introducing some General Hydroponics 3 part Flora series in the coming feedings. Over all Happy Growing.

Likes
103
Share


@Zurban_Poison
Follow
Hello everybody!
everything is just great! even there is nothing to say so much everything is good)))
I think it's not long left to wait for the harvest .. 2-3 weeks maximum!)

Likes
9
Share


@SSKNFbyHAZE
Follow
Throughout the week, I give compost tea, and fermented plant juice once each ^^
Hope you guys have a wonderful day today ^^v
*** Please Like, comment & share ***
Highly appreciated -----/-----<@
Processing
Likes
12
Share


@jennamontana
Follow
Growbox 100x100x200 cm // 900W VIPARSPECTRA LED // Biobizz light mix // 185m3 exhaust air system // FAN 40W
1-3 days // Germination and Planting into 0,5l Cups of Biobizz light mix
DAY 1 Plants coming out doing well





Likes
2
Share


@GrowChico
Follow
She is looking really good. I transplanted her to my springpot autopot system.
The pot is a nature's living soil and fox farms ocean forest.

Likes
31
Share


@JeyGanesha
Follow
Questa gorilla cookie cresce ben forte..spero arrivi al termine senza nessun intoppo....
Siamo arrivati alla fine della3 settimana. Tt procedere alla grande
Likes
11
Share


@Grumpygrower121
Follow
03-11-2023 Day 54
Not much to report at the moment . Waiting for the Trichomes to do their thing and start turning. I have around 10 days left on grow.
03-16-2023 Day 59
most of the trichomes are milky however I did not see a single amber one yet. The plants are looking phenomenal , they seem to be putting the last weight on. I will put the girls under 48h of Darkness to finish them off . At the first signs of Amber trichomes I will stop watering.
Processing
Likes
8
Share


@leliantu
Follow
Se cosecho la mas pequeña de las Northern Light. Finalmente salieron 68 gramos en verde y 13 gramos en seco de esa planta (escribo esto con 2 meses de desfase perdonen los pocos detalles).
Likes
3
Share

@Bobaloo
Follow
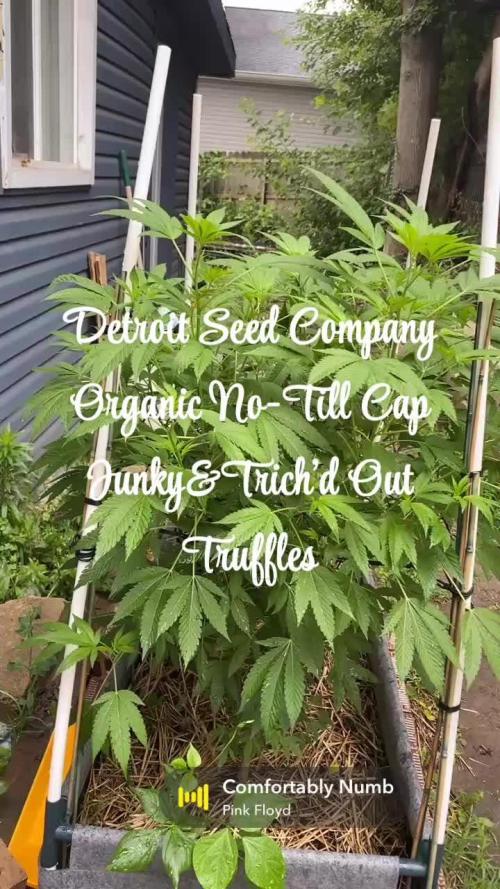
Still pre flower in my area I suspect it will start to bloom in three weeks or less

Likes
31
Share

@Sadhus
Follow
**Semaine 7 : Septième Semaine de Floraison – Phase Bulking Avancé (1-7 avril 2026)**
**Note :** Mise à jour hebdomadaire. Tout reste RAS, les plantes continuent leur bulking de manière très propre et homogène. Données consolidées TrolMaster + GrowOps (semaine 7 / semaine 11 globale).
### Contexte et Objectifs de la Semaine
On est maintenant en **bulking avancé**. Les buds ont pris beaucoup de volume, les calices sont bien gonflés et la production de trichomes s’intensifie. Le stretch est terminé depuis longtemps, toute l’énergie est concentrée sur le remplissage floral, la densité et la résine.
Steering : **végétatif maintenu** (irrigations fréquentes, runoff 20-30 %, dryback nuit 8-12 %, VWC stable).
Objectifs : continuer le gonflement maximal des buds, booster la résine et les terpènes avec UV 90 min/jour, garder une stabilité parfaite des paramètres et éviter tout stress qui pourrait freiner la prise de poids finale.
**Petit point éducatif : Bulking avancé et rôle des boosters**
En semaine 7, la plante entre dans la phase où les buds « prennent du poids » rapidement. Le steering végétatif reste essentiel car il permet une absorption continue et élevée des nutriments sans stress hydrique excessif.
La combinaison actuelle (Cocos A+B + PK 13/14 + Sugar Royal + Green Sensation + Pure Zym + Silica Force + Cal-Mag Amino) est particulièrement adaptée :
- PK 13/14 et Sugar Royal alimentent directement la formation des fleurs et augmentent le poids sec.
- Green Sensation + Pure Zym stimulent le métabolisme et la santé racinaire en coco.
- Silica Force renforce les parois cellulaires (meilleure résistance et densité).
- Cal-Mag Amino prévient les carences classiques en flo (jaunissement bas ou pointe brûlée).
Maintenir EC autour de 2.6 et pH 5.8-6.0 évite les lockouts tout en permettant un uptake optimal. C’est le moment où on voit vraiment le retour sur investissement des boosters.
### Observations des Plantes
La plante dominante mesure toujours **150 cm** et domine clairement avec une structure massive, une canopée dense et une vigueur impressionnante. Le stretch est complètement stabilisé.
Les buds continuent de grossir de manière visible, les calices sont bien remplis et les trichomes se multiplient (brillance sucrée de plus en plus prononcée sur les sites supérieurs et moyens). Pistils commencent à changer de couleur et à s’enrouler.
Santé générale : excellente, feuillage vert profond, aucune feuille jaune ou nécrosée, zéro pest, zéro signe de stress ou carence. La plante secondaire suit correctement. Clones restent vigoureux. Les plantes sont pleinement concentrées sur le gonflement et la résine.
### Paramètres Environnementaux (TrolMaster + GrowOps – synthèse semaine 7)
- **Température jour** : 23-25 °C (moyenne live ~23.3 °C, cible 24 °C)
- **Température nuit** : 18-20 °C
- **Humidité jour** : 64-74 % (live ~58.9 %, cible 62 %)
- **Humidité nuit** : 49-59 %
- **VPD** : 0.8-1.2 kPa (live 0.94 kPa → idéal pour bulking)
- **PPFD moyen** : 750-777 (max ~814) → DLI 32 mol/m²/jour (optimal)
- **UV Light** : 90 min/jour (maintenu)
- **Far Red Light** : 30 min en fin de cycle
- **CO₂** : setpoint 900 ppm jour (enrichment actif)
- **EC solution** : 2.6 mS/cm (live 1.85-2.95 selon moments)
- **pH solution** : 5.8-6.0 (live 6.43, runoff 5.8-6.2)
- **Runoff EC** : 4-5 mS/cm
- **Irrigation** : Fréquente (4-5 cycles/jour)
- **Runoff % daily** : 20-30 %
- **Night dryback** : 8-12 %
- **Steering** : Végétatif confirmé
### Nutrition et Irrigation (Soupe actuelle)
**Nutriments utilisés cette semaine (doses par litre) :**
- Cocos A → 1 ml
- Cocos B → 1 ml
- CANNA PK 13/14 → 1 ml
- Green Sensation → 0.1 ml
- Pure Zym → 1 ml
- Sugar Royal → 1 ml
- Cal-Mag Amino → 1 ml
- Silica Force → 1 ml
- pH- → 0.5 ml (ajustement à 5.8-6.0)
Eau à ~20 °C, temp solution ~15-18 °C.
Irrigation fréquente avec dryback contrôlé → excellent équilibre pour maintenir le bulking sans excès ni carence.
### Problèmes et Ajustements
**RAS total.**
Aucune alerte GrowOps, aucune intervention nécessaire. Les paramètres restent très stables, le steering végétatif fonctionne à merveille et les plantes répondent parfaitement aux boosters. Aucun signe de fatigue ou de ralentissement.
### Plans pour la Semaine 8
- Maintenir steering végétatif + EC 2.6 (possible léger ajustement PK selon gonflement)
- UV rester à 90 min/jour
- Défoliation légère et ciblée (seulement les fan leaves qui bloquent vraiment la lumière sur les buds inférieurs)
- Photos rapprochées pour suivre l’évolution des trichomes et de la densité
- Commencer à réfléchir à la date de flush (généralement semaines 8-9 selon maturité des trichomes)
Ce journal sera mis à jour hebdomadairement.
#GrowLegendary #Zamnesia #Plagron #EternityGrowCup2
Les buds gonflent bien, les trichomes se développent et la plante dominante à 150 cm reste superbe. On approche du pic de résine, tout se passe idéalement ! 🌱✨
Likes
46
Share


@Miss_Greenthumbs_Garden
Follow
Strain . Blackberry gum 💜
Breeder. Seedstockers 🐿️🧡
Lighting sponsorship . Marshydro Ts1000 & Ts600
Soil & nutrients . Biobizz . ( lightmix) grow and heaven 😍 and biobizz heaven and topmax
Likes
92
Share


@DogDoctorOfficial
Follow
Week 8 Veg – Go Big or Go Home! 🌱💪
Hey, Grow Fam! 🌿 What an intense week it’s been in the grow room! This was one of those “go big or go home” moments, and I decided to take it to the extreme. I’m holding off on flipping to flower for just one more week because the plants are filling up the space beautifully—I can’t help but push things to their limits and see just how much these ladies can give! 😎✨
This week was all about maximizing growth and creating the best canopy I can. I did a light defoliation, just here and there to open things up a bit, and then came the bending—LOTS of bending. 🌱 I’m working hard to create an even canopy, though with all these different genetics, we’ll see how close I get! 🤞 Regardless, I’m giving it my all, and I’m super pumped to see how everything will respond in the next stage. The final touch this week? I ended it with a bold 36 hours of darkness to prepare for the big flip next week—flower mode, here we come! 🌸
What Went Down This Week:
1. Canopy Work – Bending and training all over the place to try and keep things even. It’s a real challenge with different genetics, but the payoff is going to be worth it!
2. Defoliation – Just a little bit of leaf removal here and there to help with airflow and light penetration, prepping them for that final veg stretch.
3. 36 Hours of Darkness – Closed out the week with a full day and a half of darkness. The 36 hours of darkness is a technique I like to use to help signal to the plants that it’s time to transition from veg to flower. 🌒 By giving them an extended dark period, I’m mimicking the natural shift from summer to fall, when daylight hours start to shorten. This kick-starts the plants’ flowering hormones (phytochrome), helping them shift into flower mode more smoothly and quickly.
In my experience, this method helps speed up the flip, reduces early flowering stress, and often leads to a more uniform bloom across the canopy. It’s like giving the plants a little nudge to let them know, “Hey, it’s time to bloom!” 🌸
This technique is especially useful for growers like me who want to maximize the efficiency and performance of their plants. 😊
4. TrolMaster + App Love – As always, the TrolMaster app continues to blow me away. We’re going to dive deep into it below, but trust me, this app makes managing everything a breeze! 👇
Next week, we’re flipping to flower! I’m beyond excited for what’s to come, and I can already tell these plants are ready to explode with growth in flower mode. Stay tuned, because we’re about to see some serious action in the grow room! 🌸🔥
Thank you all for the continued support! 🙏 Don’t forget to check out my social media accounts for real-time updates, behind-the-scenes magic, and all the details on how this journey unfolds. Whether you’re new or have been here from the start, I appreciate every one of you. Let’s keep pushing the limits of indoor horticulture together!
🌱💚 Growers Love 💚🌱
#TrolMasterChronicles #ThinkGrowLED #SeedToHarvest #DogDoctorOfficial #AptusPlantTech #Autopots #IndoorHorticulture #ControlledEnvironment #GrowTech #PositiveVibesOnly
DogDoctorOfficial
P.S. – Let’s Talk TrolMaster + App
If you haven’t explored the TrolMaster App yet, you’re missing out! This app gives me complete control and real-time feedback on my entire setup, from the environment to CO2 levels, humidity, light, and beyond. Every parameter is at my fingertips, and it’s all synced with the controllers. I love how easy it is to dial in the details, especially during these crucial stages.
But what really gets me is the precision. 🌡️📲 With the app, I can track trends, get alerts if anything is off, and make changes on the fly—whether I’m in the room or halfway across the world. This kind of power and convenience has totally transformed how I manage my grow. Whether you’re a beginner or an expert, having this level of control is a game-changer. And as I dive deeper into flower, it’s going to be my best friend in keeping everything dialed in.
Discount Codes so you can save big on your next check out 💚💚💚
Kannabia - DOGDOCTOR 30% off
SeedsmanSeeds - DOGDOCTOR 10% off
CannaKan- DOGDOCTOR 15% off
terpyz.eu - DOCTOR 15% off
The Neutralizer - PORKIT5-DOG 15% off
As always thank you all for stopping by, for the love and for it all , this journey of mine wold just not be the same without you guys, the love and support is very much appreciated and i fell honored and so joyful with you all in my life 🙏
With true love comes happiness 💚🙏 Always believe in your self and always do things expecting nothing and with an open heart , be a giver and the universe will give back to you in ways you could not even imagine so 💚
Friendly reminder all you see here is pure research and for educational purposes only
Growers Love to you all 💚💚💚


Likes
2
Share


@TheBudWhisperer
Follow
12 days to full transplantable roots. Right on schedule as expected. Moved 6 of the 12 clones (1 per plant) into a new 45L Rez that I cobbled together in an evening. Just small enough to fit into the cabinet. Hopefully the roots don’t choke each other out for territory while we work to reveg, re-flower and ultimately seed em all for the new F3 line. We’ll pick the best buds from the lot for the next testing run once we see what the pheno variation looks like from the main run in the tent. It’s a process and annoyance not to be yielding bud off a grow cycle but it is what it is if you want your own signature stuff. Alls good for now. Let’s just hope that the 6 coats of paint I threw on the lid is enough to keep out the grow light penetration🤞. Shoulda used black, whatever.