


Processing
Likes
Comments
Share


@GanjaFarmerGrow
Follow
So far so good...
flowering really nice...
starting to smell really good...
feeding her modestly and going to keep it that way...
Fingers crossed 🙏

Likes
25
Share


@XperencdGmanXG
Follow
She seems to be doing a lot better since the foliar spray last week. Leaves are a dark green now and the stalks are more malleable due to the silica. Did another Silica foliar spray this week as well. 12 gal of water and it is supposed to rain on them today. Fingers crossed!


Likes
6
Share


Likes
6
Share

@Scandic
Follow
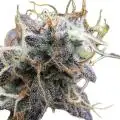
Smell is getting stronger and buds are developing. Only Bloom nutes from now on until flushing. Crystals are beginning to show the Nature of this strain. Im expecting frosty buds!


Likes
5
Share


Likes
13
Share


@BedroomGrower
Follow
We have now reached the first day of August and it is time to make new crops. The Zkittlez that has completed its vital coclo under the LED lamp has become a fantastic plant and will be collected tomorrow along with the Purple Glam Kush. In the last few days I have received my new Focus V Carta concentrator vaporizer and I really recommend it to anyone who loves to concentrate. I'm using it for my BHO and Rosin and it's really cool. I also recently discovered how to dissolve my concentrates to create e-liquids from smoking with electronic cigarettes and I will soon make a video about it. Meanwhile I made a second video that you can see on my DHO extraction method using only freshly picked buds. As you can see from the images all the plants are in good health and the queen of my garden is currently the LSD-25 of FastBuds. A beautiful, very fragrant and very productive plant that certainly becomes part of the varieties that I will continue to grow every month.
Even the plant that has just begun to bloom shows all its purple shades. If the effect once smoked is as reported in the producers' description (it should have psychedelic properties) it will surely become my favorite strain for this year 😋
August 4 Nice Updates: I'm really studying a lot these days and I'm improving my skills in creating concentrates. In the coming weeks I will also show you my attempt to decompose and reassemble cannabis at will. I will use my DHO for THC, derivatives and terpenes, buy a ready-made wax containing 70% CBD and isolated crystals of CBD at 99.9% and additional extracts of marijuana terpens for flavor. Everything will be dissolved with a few drops of a PEG solution similar to products like Wax Liquidizer or the Shatter Batter you have in the USA, but as I wrote I will show you in the coming weeks. As far as my girls are concerned, in the last few days I have collected the Purple Glam Kush and the beautiful Zkittlez that bloomed under the LED lamp. I also posted new images of the beautiful LSD-25. Since I decided to create new concentrates at each harvest I will divide the buds into three categories. I will smoke the medium and large buds and I will use the smaller ones and the first quality scraps to make my concentrates. With all the other scraps I will instead make hashish with the ice-olator method. I take this opportunity to wish you all happy summer holidays! 😎
August 7: I was uploading the results images when I realized something must have gone wrong when I uploaded my last video and it was still in conversion, I reupladed it. Results: with about 40 grams of top quality scraps I obtained 4.5 grams of DHO and with second quality scraps mixed with 17.5 grams of cleaned hashish I got 7.1 grams of DHO. We both lack small amounts that I have smoked these days, say about half a gram of one and a half gram of the other. Despite having used different materials both have similar color and texture. The taste of hashish feels very little and gives a note of freshness to the concentrate. Obviously both have a very powerful effect. As for the plants collected, I obtained 122 grams from the Purple Glam Kush and 157 from the Zkittlez 😉
Likes
44
Share


@BudsBanditUK
Follow
The plants seemed to be hungry this week even though they have been given the correct dose of dry amendments. I have started to feed them my usual Organic feed as well. They are now putting on weight and colour. Removed some dead leaves and they seem ok. Also starting to smell now.

Likes
5
Share


@Ensign420
Follow
Greetings fellow growers 🖖 and welcome to my first grow ever. This adventure actually started several months ago when I decided to stop buying flower from dispensaries and just grow my own bud. How hard can it be!?
This is actually my second seed of this strain. The first bean sadly died due to over watering (sorry girl, RIP). I was literally watering the cube to the point where water was dripping from the bottom, then heavily sprayed the humidity dome and tray with the vents completely closed. Everyday. Multiple times. I never let the dome or try dry out. So after about 8 days of not sprouting, there was a funky smell of rot. So that was that.
Later I learned that rockwool retains a lot of water and can easily drown seeds. So a wet/dry cycle is best for rockwool germination.
So even after hours of researching and digging through forums and tutorial videos, I was still under prepared for this journey. Did not consider how delicate the germination phase is. Oh well. Lesson learned. Reset and try again!
I hope everyone is safe and stoned during this corona crisis. Just like everyone else in the world, I want this pandemic to be over with. But in the meantime, let's grow some weed! 🖖
[START OF WEEK 01]
Day 01 - Monday - 08/03/20 - Total Days: 001
-----------------------------------
- [0830]: Light Schedule: 24Hrs/0
--- Soaked cube in 5.5 PH water for 10 min. Did not shake water out.
--- NO NUTES! Only PH'd down to control the PH levels.
--- Did not use the default hole (way too deep).
--- Flipped cube upside down and made a shallow hole for the seed (less than 0.25" deep).
--- Placed seed in and pinched hole close. No additional water added.
--- Sprayed the tray and dome with straight water (5.5 PH).
--- Vents are cracked opened a for ventilation (about 1/4 opened each).
--- Distance between the light and tray was 53"
--- AC was set to 80 °F
--- Exhaust fan was set to 86 °F
--- Room average temp was at 85 °F
--- Dome humidity was at 85-99% when sprayed.
--- Allowing to completely dry before respraying.
- [2200]: Dome and tray were completely dry! Sprayed only tray and dome with more water.
Day 02 - Tuesday - 08/04/20 - Total Days: 002
-----------------------------------
- [0845]: Sprayed dome and tray in the morning. Everything was dry.
--- Hoping for the best!
- [2130]: Everything was dry again, so sprayed dome and tray at night along with a light spray on the cube.
Day 03 - Wednesday - 08/05/20 - Total Days: 003
-----------------------------------
- [0830]: Everything was dry again. Resprayed dome and tray. Slightly sprayed cube.
- [2125]: Hooo damn!! She popped! Am little stub is visible! Resprayed dome and tray again.
--- Still going 24/0 for lights.
- [+0033]: Just checked up on her and I swear she grew a bit taller! Getting excited!
Day 04 - Thursday - 08/06/20 - Total Days: 004
-----------------------------------
- [0845]: Wow! Went from a little stub to fully sprouted overnight! Everything was pretty dry again so resprayed dome and tray.
- [2200]: Tap root is visible! Over 1" long too! Just resprayed dome and tray again.
-- Going to prep for hydroton transplant tomorrow!
Day 05 - Friday - 08/07/20 - Total Days: 005
-----------------------------------
- [0930]: She keeps growing!
-- Added a bit of CalMag to the spray bottle (8 drops to 650ml of distilled water). Resprayed dome and tray. Water was at a 5.4 PH with 141 PPM.
- [1045]: Prepped the bubble bucket with 4.5gal of water. Water is high enough to reach about 0.25" above the bottom of the net pot.
--- Added 3 drops of Superthrive
--- Added 3.5ml of CaliMagic
--- Added 2ml Hydroguard
--- Then PH'd down to 5.6
--- Solution Strengh: 120 PPM
--- Water chiller is set to 20 °C
- [1100]: Transplant time!
--- Filled the net basket 1/3 with hydroton. When placed in the bucket, air bubbles are not visible, but are slightly below the surface (slight digging will reveal the water/bubbles below).
--- Removed plastic on rockwool cube and placed in basket, then filled around and covered with hydroton. Making sure to block any light from passing through the net pot and into the nutrient solution.
--- Covered with a half-bottle dome sprayed with the CalMag water from earlier.
--- Hoping for the best!
- [1300]: Raised Bucket 5" higher. Now light distance is 48" to top of bucket.
- [1820]: Lowered tent exhaust temp to 76 °F
--- Lowered AC to 75 °F
--- Raised bucket even higher so light distance is 30" to top of bucket.
- [2300]: Looking good!
--- Sprayed dome and surrounding hydroton with more CalMag water.
--- Attached timer to light! So new 18 Hrs On/6 Hrs Off light schedule.
--- Lights On: [1600] (4pm)
--- Lights Off: [+1000] (10am the next day)
--- Decided to go with lights on during the evening/night and off during the later mornings/afternoon (the hottest part of the day) to see if temps can be controlled better.
--- Please survive girl!
Day 06 - Saturday - 08/08/20 - Total Days: 006
-----------------------------------
- [0800]: Everything was dry. Resprayed hydroton and dome.
- [2000]: Here first night cycle seemed to go well! Get'n taller!
--- Dry again. Removed the dome.
--- PH went up to 6.5 so PH'd down to 5.7
--- Ran the top feed drip ring for a bout a minute to wet the hydroton and rockwool with the nutient solution.
---Too scared to leave the top feed on 24hrs (I don't want over water her and cause dampening-off). Will let dry before re-watering.
- [2100]: After closer inspection, I think she's looking a bit yellow.
--- Decided to add a bit of grow nutes to the bubbler solution.
--- Added 2ml of Sensi Grow A
--- Added 2ml of Sensi Grow B
--- Solution strength after adding more nutes: 176 PPM
--- PH went up to 6
--- I hope that the extra chelating properties of the 'PH Perfect' solution is enough of a buffer for proper nutrient uptake.
Day 07 - Sunday - 08/09/20 - Total Days: 007
-----------------------------------
- [0800]: Water dropped a bit (mostly due to evaporation) so solution strength was at 190.
--- Checked PH again. Was still at 6, so PH'd down to 5.4
--- Ran the top feed for a minute to wet the hydroton a bit.
- [0915]: Since she's looking perky but still a bit yellow. So decided to up the nutrient concentration even more before lights out.
--- Added 2ml more of Sensi Grow A
--- Added 2ml more of Sensi Grow B
--- Solution strength after adding more nutes: 199 PPM
--- PH went up to 5.8
- [1700]: Checked nutrients.
--- PH: 5.9
--- Solution strength: 202 PPM
--- Added 4ml of Voodoo Juice
--- Added 4ml of B-52
--- PH after adding more nutes: 5.9
--- Solution strength after adding more nutes: 238 PPM
- [2130]: Decided to make a new foliar spray to address the continued yellowing.
--- Started with 500ml of distilled water.
--- Added 3 drops of CaliMagic
--- Added 3 drops of Sensi Grow A
--- Added 3 drops of Sensi Grow B
--- Added 3 drops of B-52
--- Added 1 drop of Superthrive
--- Solution strength: 164 PPM
--- PH was at 5.9 and did not adjust.
--- Gave her one spray.
--- Also sprayed the surrounding hydroton.
[END OF WEEK 01]

Likes
9
Share


Likes
28
Share


@Willy_Balls
Follow
Cruising along.
Two gorilla girls are very sativa pheno and are way behind in maturation.
We will see how I will handle that.
Some #indica leaning phenos are maturing nice and fast.
I'm reducing EC to 1.4 gradually. I think some of them will have to be on plain water next week to have them ready for harvest.
Cheers everyone! Have a nice Sunday! 😎


Likes
25
Share


@Gutismoke102
Follow
Performed some light lst and topped all plants, then feed some recharge. They bounced back pretty fast they didn’t show no signs of stress so that’s a good thing. I’m give them one more week in the 1 gallons and then transplant to 3 gallon Keep up this grow is epic

Likes
11
Share


@Nutrient_gro
Follow
Just been adding water when dry. Adding some pure worm castings top dresses. Will be adding Gaia green all purpose in a week or 2 when needed.
Likes
1
Share

@CptnNugz
Follow
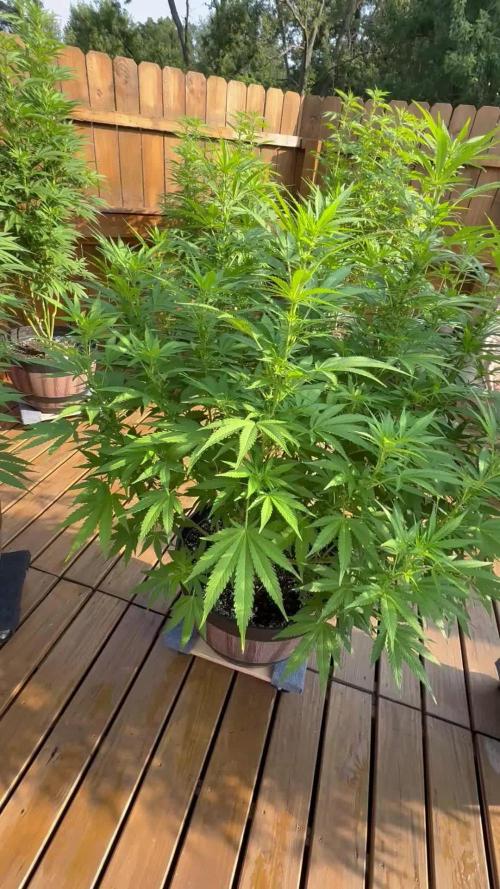
Plants are super healthy. Busted out my Greengro hybrid bloom as it’s higher in phosphorus and potassium to help build these flowers. This has been a very easy grow. These seeds from Spliff seeds have been very healthy all through veg. Check them out and give them a try. The pictures speak volumes about the health of their plants. Now we see what these buds are like. The plants already smell strong I can only imagine how the aroma and taste will be of the buds.

Likes
12
Share


@MisterSix
Follow
The bud form this week, still little pink mix with the green bud
The temp is going up on this week at around 30-34 but that's not the problem with the development so far
PPM is 1000-1150 with late stage bloom nutes.
it might finish next week imo.
Likes
17
Share


@Salgeezi
Follow
Finally got a bigger tent. They are much happier. Almost seems like it put them fully into flowering. I'm feeding around 1200 ec but the runoff keeps climbing to almost double. I will flush to about 800. Within a few days it's back up to 2000 Ec. Am I missing something here??

Likes
12
Share


@3adli
Follow
Watching my baby grow all symmetrical with somehow a fast pace..
Started using 2.0gm/liter instead of 1.5gm/liter of 19/19/19 NPK powder on day 38 (25.Nov.2018).
Likes
6
Share

@BossberryFarms
Follow
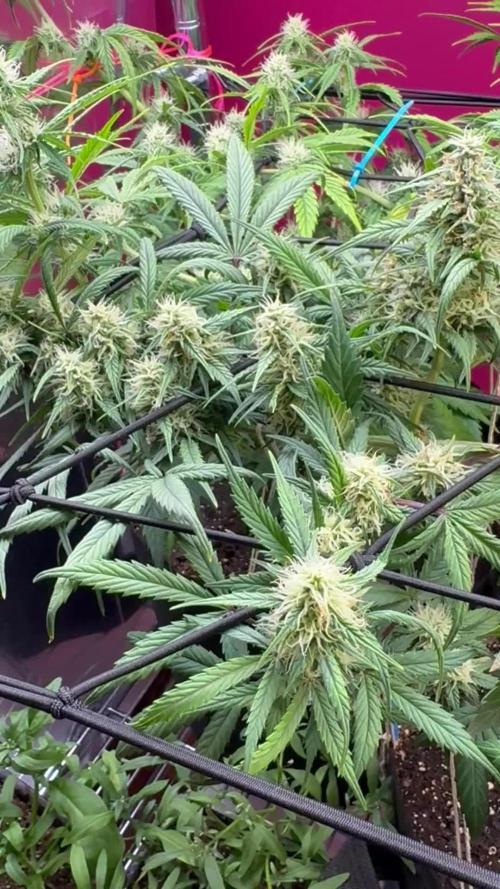
Welcome to Week 8! All seems to be going well. Two of the Apple Betty plants have fan leaves that are yellowing, but I think it’s because they are getting close to harvest time (about 2 weeks out).
I’m trying to maintain a temp of 75-80F and 60% humidity.
