


Likes
Comments
Share

@Phaleg
Follow
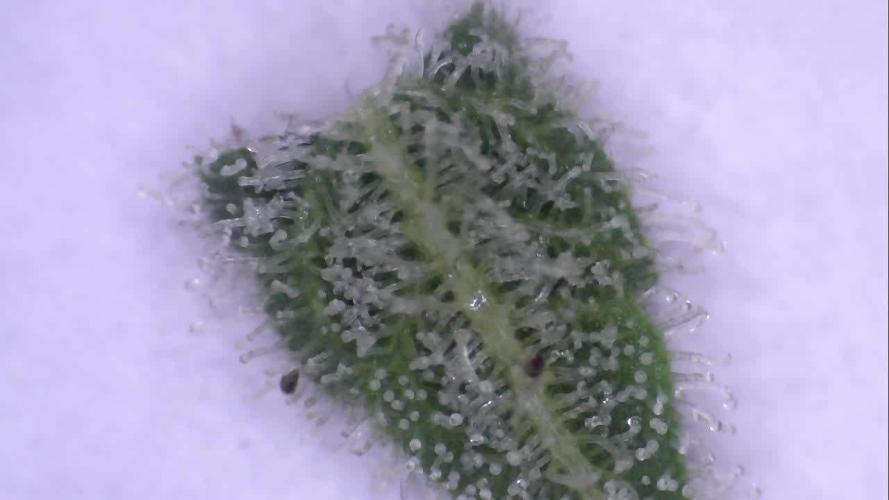
Today was the day, unfortunately about a week in advance because of an infestation of Mites that reached the buds of all 4 plants left.
After reasoning, interrogating AI and watching a video, I had to harvest in advance and I decided to do a washing with H2O2 as per this video explanation of Jorge Cervantes, available at this link (https://youtu.be/S7jE7qzfgQs?si=eC6klOXkWz9eBJO3).
I am providing photos and video also of this step I made.

Processing
Likes
15
Share


@DeStarr_GhettoGrows100
Follow
Great Week! Girls are getting bigger and loving there new light. LST is going well. They are showing there sex and will be going into there stretching phase

Likes
19
Share


@Spiritual_Herb
Follow
This new week started better as with some flushes I brought the runoff back to 6.5/7, the plant seems to be growing well


Likes
44
Share


@PotCasso
Follow
This was the last run I’ll be doing of this girl she finished beautifully nothing bad to say about the strain. When I scroll down the yield increased exponentially


Processing
Likes
32
Share


@Hawkbo
Follow
I still have to go thru all the photos but wanted to get the video up for all of them first. If your interested in the pics come back at the end of today and they will be up it just takes a while. Noticing more seeds poppin thru, I hope it's from the moonshine cookies pollen cuz the female turned out bomb and the male wasnt too bad either so they might be decent seeds. Started the flush on the citradellic and the other ones might have got their last feed yesterday. Should be finishing up next week and the week after.
These are interesting growing plants. I took cuts but the one I like disappeared somehow or got its name tag mixed up I'm not sure but I'm kinda pissed about it. I honestly cant describe the smell it just smells like dank bud. The pistils are so dark but the lowers look like the could fill in a little more so I gave it one more feed yesterday and I think I'll start the flush on all of them when they dry out.
Likes
9
Share


@Chubbs
Follow
These ladies are growing amazing, so good I had to bend the tops and mainline them a little. I had to tie them down to themselves as they're trying to regrow upwards. They're definitely in full flower now and looking amazing besides some crispy edges on the leafs because of the heat. All in all Happy Growing.
Likes
50
Share


@crimsonecho
Follow
well everything is going alright.
nothing to complain about.
destroyers are getting a lighter shade in the new growth but still pretty much healthy, just a more natural sativa color.
maybe around this time i could have thought about topdressing but i’m more inclined to let them go on with straight water just to see how this mix runs till finish with just water and no extra inputs. though who knows i may just decide to topdress tomorrow haha
others seem happy and healthy as well. watered the dinachem pot yesterday with about 4l of distilled water and destroyers got 4l each 2 days before that. caribe and cannalope pot is still pretty heavy.
see y’all next week
edit; yesterday we had a blackout so timers were set back an hour so i guess when i opened the tent today light had just turned on because they were holding a less intense praying pose so just checked back 3 hrs later now and looks fine now. added those photos as well.


Likes
9
Share

@BennyBud2210
Follow
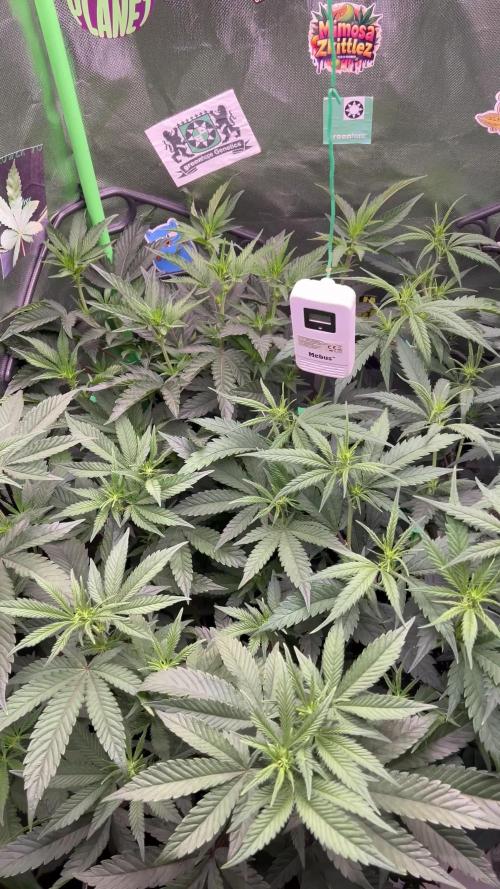
Alles wächst super vor sich hin 😇😎💪🏻
Diese Woche ist die erste Blütewoche. Also Umstellung auf 12/12🌞🌚



Likes
5
Share


@Falcon123
Follow
Gelly Cream Cake & Slurricane #7 S1 from seeds
Platinum S1 & King Sherbet are clones
Gelly Cream Cake & Slurricane #7 S1 techniques were used: Topping + LST + Defoliation
Platinum S1 & King Sherbet techniques were used: LST + Defoliation


Likes
20
Share


@Skunklerman
Follow
Week was great as I saw the end to my fungus gnats and the plants really began to develop their own signature smells.
The monster plant has more myrcene funky smell to it and the smaller bushy plants are hitting hard with fruity earth tones.
This week looked like this:
2/7: nothing
2/8: 1 gal water/pot with 1 tbsp coconut water powder/pot and 1 drop of microbe lite bmc
2/9: nothing
2/10: nothing
2/11: 1 gal water/pot with 1 tbsp aloe flakes/pot. and 1 drop microbe lite bmc. Top dressed with gnarley barley which is sprouted hemp seed, Barley seed and corn seed which i pulverized
2/12: nothing
2/13: .5 gal water/pot and light defoliation
Likes
17
Share


@m0use
Follow
This was a fun project that was a few years in the making and a year later to see if they would last a season for this upload to happen. Before any of this I would bike aorund town grabbing up all the old Ikea solid pine bed slats that I could find and storing them in the basement. I have a lot of wood down there, any size worked as long as I have enough of them. The hot days to find them were the first and last of the months because that's when people where moving in/out. I also kept an eye on the free section on local online classifieds as well. The entire purpose of this was to recycle as much off the streets as I could before buying anything to finalize the project. In the end I only bought sealer, screws and some takeaway/beers. All the wood was 100% free and salvaged off the streets of Toronto saving it from the dumpster bin.
After collecting all the slats for about 2 years I was playing aorund with them on how I wanted to make this work. I had previously done a little project like this before but I messed it up and the boxes where crap. did not last longer then 2 seasons, they where thin and shallow as well could not grow much of anything in them. I Was talking to my friend who is renovating their house and we brainstormed some ideas on the boxes, I found some designs I liked online and said lets make something like this out of what I have here. We tossed out a few of the design features when looking at them as it would have been wasted wood and extra work not needed. If I had more wood them maybe it could have been an option but simple was the name of the game. They taught me what I needed to know like how the miter saw and sander worked, plus all the other tools I was using. They did help out with a table saw and creating the triangle support joints in the corners, They used some pine left overs they had while making a staircase indoors. I did not feel up to the task of using a table saw given all the relatives I know who have lost a finger to them.
In the end we decided the design would be three boards high and take an alternating pattern on corners. layer one short, layer 2 long, layer 3 short. Went with a galvanized and painted deck screw so it can take the weathering. Ran into some problems like making everything level as some of the boards were warped and other ones had undesired aspects like knots and tacky sticker goo I could not remove. So I used them for the base that will not been seen so much. Clamped everything down and called it a day.
Once it was all done and over with, I then brought them back home from my buddies work garage and started to seal them. I went with a boiled linseed oil as its a food safe option should the wood degrade into the soil I will plant in them. I will need to reapply it to the boxes year after year but the main coat is the most important one and I put it on 3 layers with a good dry in between coats. the inside of the boxes that where coated did not degrade at all as the sun did not hit them so it will not need a new coat just the outside. Overall the end result was very impressive for myself, I've never taken a woodworking class ever and It was a near perfect outcome for me. Heavy Duty Planter Boxes for all my gardening needs. I made a last min decision to add in a plastic liner to preserve the wood even longer and stapled that into the frame. it has held up quite well and may need replacing end of 2nd or 3rd year out in the sun. Used a thick moisture wrap plastic with UV protectors in its formula.
Lets see what I can grow in them this year!
m0use's haus of projects - garden box edition
Likes
50
Share


@DogDoctorOfficial
Follow
I mean this FBT 2311 is just amazing, she was easy to grow, did not ask for anything , super tough to everything , she as amazing dark colors all over and super dense fruits, just amazing one andi kind a want to know what she is asap hihihihihi
As always thank you all for stopping by and for supporting me on this journey, i am super passion about growing and fell blessed to have you all with me on this new journey <3 <3 <3
Genetics - Fast Buds Tester 2311
Ligth - LUMATEK ZEUS 465 COMPACT PRO
Food - APTUS HOLLAND
#aptus #aptusplanttech #aptusgang #aptusfamily #aptustrueplantscience #inbalancewithnature #trueplantscience #fastbuds #dogdoctorofficial #growerslove
With true love comes happiness <3 <3 <3 Always believe in your self and always do things expecting nothing and with an open heart , be a giver and the universe will give back to you in ways you could not even imagine so <3 <3 <3
All info and full product details can be find in can find @
https://2fast4buds.com/ wen released
https://aptus-holland.com/
https://autopot.co.uk/
https://lumatek-lighting.com/
<3 <3 <3 Growers love to you all <3 <3 <3


Likes
50
Share


@Hou_Stone
Follow
5th week I continue the defoliation for my 3 Noris Cakes. And I missed the cut on one them 😱, but she is slowly recovering...🙌
🌗Switching to flowering this week, I reduced the length of the day by 1 hour each day until reaching 12 hours night time / 12 hours daylight on the 33rd day!🌞
🌺On the 33rd day I apply a layer of organic nutrients mixed with a little soil that I add to the top of each pot.
I added 35 grams of BioBloom to each of my pots🌺
------------------------------------------------------------
💧Watering
I water all my pots the same day but with more or less water.
Simply by lifting them;
A light pot is a dry pot and will need more water,
A heavy pot is a wet pot and will need less water.
On average I water each pot with:
Day 29 : 0.5 L
Day 33 : 1 L with 0.8 grams of bio enhancer/L
I use tap water, adjust the ph to around 6 and water
------------------------------------------------------------
🔥❄️Temperature of the week :
Day : 19-23°C (Humidity : 65-80%)
Night : 14-17°C (Humidity : 75-85%)
Outside the tent it is around 16°C with 70% humidity
The humidity is a little too high, I hope it will drop a little and I won't have a problem with mold during flowering😅🤞
------------------------------------------------------------
🚀Equipment of the week ⭐️ :
Light FC3000 Mars hydro. power 95% at 50cm
Extractor 6 inch Mars Hydro. power 1/10. ON 24/24h
2 fans to circulate the air inside the tent. Each on for 30 minutes then off for 1 hour. this rhythm repeats itself in a loop
I'm removing my heat mat this week.
------------------------------------------------------------
📜Links :
Nori Cake seeds 🌱 :
https://shop.greenhouseseeds.nl/feminised-cannabis-seeds/nori-cake/
Mars Hydro : 5% off with my discount code "houstone5" 💪
https://www.mars-hydro.com/?acc=hou-stone
👨🚀My Instagram❤️️:
https://www.instagram.com/hou_stone420/
------------------------------------------------------------
Tanks for your visit😀💚
Likes
19
Share


@MrWolfe
Follow
This round is going great, I didn't top them the extra time and they have just absolutely loved it. Supercropping has to be the better option. Last round did hit my highest numbers but I feel this is just going to make that feel like amateur hour. These girls are huge and thick, I can't wait to see how some of these Hunts turn out.

Likes
27
Share


Likes
10
Share


Likes
15
Share


@Mcdiggley420
Follow
Seeing big changes this week alls running well introducing the sf1000 in this week for some extra lighting.
Still very slow growth hopefully autos dont start flowering soon going to top some photos at the end of the week and keep them in veg longer so the autos can stay on 18/6 for an extra 2 or 3 weeks. New light and nutes waiting to arrive


Processing
Likes
28
Share


@No_Clout
Follow
27/02/19 - This one is great, I popped the seed 24hrs after the gelato and this one seems to be developing its leaves a lot faster than the rest, so far really happy with DNA and with mills nutrients, it’s a lot easier to mix and I no longer have to use ph down because once all mixed it’s at a 5.8/5.9. 👌🏻
02/03/19 - Just transplanted all into their final pot, just in time I think as it looked like the roots were starting to circle at the bottoms of the pot, sprinkled half a tea spoon of Mykos on each hole prior to the transplant & fed them 2.5 litres each. I was going to saturate the whole pot but I’ll do that next feeding.


