Likes
Comments
Share
@Chucky324
Follow
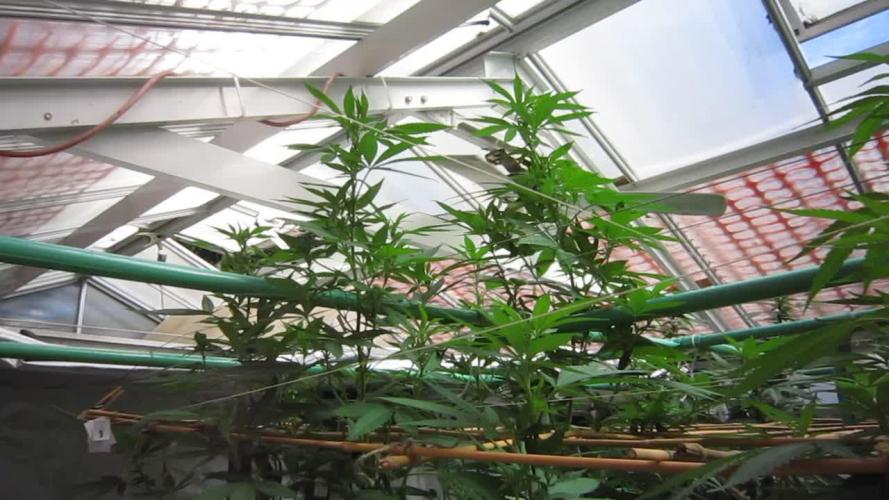
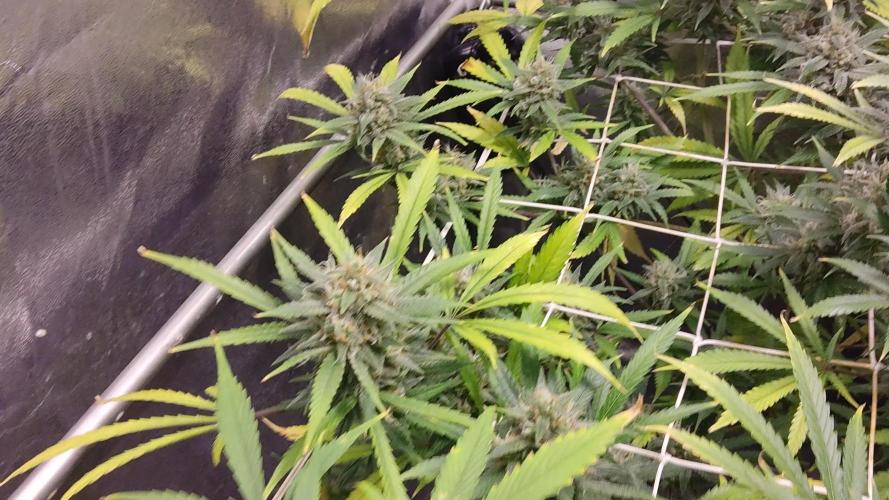
Hello. This is the end of week 2 and the beginning of week 3 of flowering. I think I'm off by a week, it might be the end of the 3 week, but I'll leaves it like it is. It's sometimes hard to tell with outdoor plants , like autos, when they go into flowering, because when the plants go into their first week of flowering they don't show anything different.. It's in the second week that you can see a small difference. But I'll leave it like it is. OK. Got these girls into the main part of the greenhouse on Sun afternoon. Bent a few branches and broke one. Put a few paper splints on a few bent branches but they will heal. Measured them yesterday to find the tallest Plant #4, at 80 inches and Plants #1 and #5 at about 70 inches. Plant #3 is definitely different looking, More indica in that one. Lots of resin and smell too. Plant #3 smell of sour and gas but I can smell the biscuit smell and it can be a bit earthy too. The others are all sativa looking plants, and will probably take longer to finish. Hoping for no white powdery mildew to show. I can see it on some other outdoor plants now but not in here yet. OK. Be Great. Chuck.
Likes
18
Share
Looking strong looking healthy. No complaints. As expected flying along. The conditions above are the tent conditions roughly. But there’s not tent available lol. So these puppies all live under a desk for now with those spider leg LED stations. They’re really cool. Gréât from rotation. As you all know the rules by now here. Parc stays open 24/7. This bud ain’t gonna grow itself. People out there planting trees all day everyday 😂🙏🏼💚
Likes
5
Share
Flowering days 27 since time change to 12 / 12 h Hey guys :-) The ladies look beautiful and are growing very well. The sweet smell starts to blow through the whole tent :-) . This week it was watered 3 times with 1l each (nutrients see table above) Nothing else happened this week. Everything has been checked and verified. A lot fun and stay healthy 💚🙏🏻 👇🏼👇🏼👇🏼👇🏼👇🏼👇🏼👇🏼👇🏼👇🏼👇🏼👇🏼👇🏼 You can buy this Nutrients at : https://greenbuzzliquids.com/en/shop/ With the discount code: Made_in_Germany you get a discount of 15% on all products from an order value of 100 euros. 👇🏼👇🏼👇🏼👇🏼👇🏼👇🏼👇🏼👇🏼👇🏼👇🏼👇🏼👇🏼 You can buy this strain at : https://gardenofgreenseedbank.com/candyland/ Water 💧 💧💧 Osmosis water mixed with normal water (24 hours stale that the chlorine evaporates) to 0.2 EC. Add Cal / Mag to 0.4 Ec Ph with Organic Ph - to 5.8 - 6.5 MadeInGermany
Likes
30
Share
Hi Growmies. I hope we are all well and in the green?. Even though still a little quiet on here at the moment , I hope my video can help someone to try training their plants and watch the results as we progress. It may seem long but I did all 4 girls and wanted to show the hardiness of these amazing species of plants. They have all really settled in over the past week and the reporting did not slow them down too much bit seems. seeing how much the Brice banner had ballonwd along with the Jealousy #1 was an unexpected surprise. Both ladies have enough nodes to really get to work with now . they didn't bat an eyelid at the topping and just of the new growing shoots. The "pop and twist" with thumb and forefinger is a great way of keeping the branches where you ideally want them to stay. it will help create a nodule that will be both string and very good as a distribution point for the uptaken nutes from the soil. The limbs will thicken too and help create the shape that I need before flipping to flowering. The two smaller girls have come back with a brilliant green cour thanks to the mega crop and its magical powers. lol Both are wnow close to their host training points and hopefully will have caught up by the next diary entry. I want to get their tips to the pots edges before that point so that I can create the upward spikes of the chosen flowering limbs. keeping the lower sprouting growth on each limb will.allow all the energy to go into creating hopeful merristems. We want them all to think they are the main stem to get an even boost of available nutrition without feeding lower potential popcorn growth which can be an issue with l.e.d and penetration. The idea is to create a canopy of main buds if we can fool the plant enough. fingers crossed and I hope you can join me on this journey.
Likes
15
Share
@Lontra
Follow
Tag 36: 🌱: Eine neue Woche beginnt und die kleine Lady wächst und wächst. 💧: Die Erde ist immernoch feucht. 💡: Die Beleuchtung ist unverändert (DLI ~40-45, Abstand zur Pflanze ~35cm) Tag 37: 🌱: Auch wenn es wohl nicht der beste Zeitpunkt dafür ist, wurde es mittlerweile doch sehr eng im Gebüsch. Daher habe ich mich entschieden heute doch noch ein mal etwas radikaler zu beschneiden und die schwächsten Triebe, vor allem aus der Mitte, zu entfernen. Zusätzlich wurden auch noch einige Fächerblätter entfernt die andere Blüten zu sehr verschatteten. Ich hoffe sie übersteht diese Tortur. (Beim nächsten mal muss ich die Triebe wohl früher und stärker selektieren...) 💧: Die Erde ist immernoch feucht. 💡: Die Beleuchtung wurde in die (mit Aufhänger) höchste Position gebracht, um den Abstand zur Pflanze aufrecht zu halten (~37cm) und die Intensität angepasst (DLI ~40-45). 🤔: Ein wenig verwundert bin ich, da ich heute plötzlich einige ziemlich violette Blattstiele, vor allem im oberen Bereich entdeckt habe. In Verbindung mit ersten sich leicht gelblich färbenden Blattspitzen, will sie mir wohl etwas mitteilen. Ich weiß nur noch nicht genau was....Sonnenbrand? Zu warm? Zu wenig Phosphor? Ich denke beim nächsten Gießen gibt es als ersten Lösungsversuch etwas mehr vom BioGrow und vom BioBloom. Tag 39: 🌱: Das Blütenwachstum scheint gefühlt etwas gestört zu sein (kein Wunder bei dem Beschneidungsstress zwischendurch). Ansonsten scheint sie sich jedoch wohlzufühlen und noch etwas an Höhe zuzunehmen. Heute gab es daher kleinere LST Anpassungen umd etwas mehr Licht/Luft in die Pflanze zu bekommen und ein einheitlicheres Dach zu erzeugen. 💧: Die Erde war trocken. Gegossen wurden wieder ca. 3 Liter Nährstofflösung. Um etwaigen Mängeln (siehe violette Stiele) vorzubeugen, wurden Bio Grow, Bio Bloom und Top Max auf 100% Düngeschema gesteigert. 💡: Die Beleuchtung wurde in Ihrer Intensität leicht angepasst, bleibt aber weiterhin bei einem DLI von ca. 45 Tag 41: 🌱: Heute wurden einige Blätter aus der Mitte und ganz unten entfernt. Sie streckt sich weiterhin fleißig und arbeitet an ihren so beliebten Buds. Als kleines Extra kam heute auch wieder ein CO2-Beutel in die Box. 💧: Die Erde war noch feucht genug. 💡: Die Beleuchtung ist unverändert. Tag 42: 🌱: Jeden Tag was neues: heute habe ich neben den violetten Blattstielen zum ersten Mal auch violette Stellen an einigen Trieben entdeckt 🤔 Ich hoffe einfach mal, dass dies aufgrund des Phenotyps / der Temperaturen geschieht. 💧: Die Erde war trocken. Gegossen wurden wieder ca. 3 Liter Nährstofflösung nach etwa 100% BioBizz Light Mix Schema. 💡: Die Beleuchtung ist unverändert.
Likes
4
Share
02.04.2025 Tropicana Poison F1 DWC The plants are looking great the tipps of the colas at starting to get purple 💜 I need to invest in to another clip fan because of the humidity on the stem I will never grow in will blocks again ther are going to get reals nasty Hoping for a good harvest
Likes
17
Share
Everything is pretty much the same this week the purple punch is doing up numbers, the zkittles is rite behind it with the gelato struggling. Already germinated some seeds for the summer grow hope the gelato grows better out doors
Likes
12
Share
@GrowGuy97
Follow
Dessert Runtz bred by Exotic Genetics, came out unbelievable! Probably some of the stickiest stinkiest bud I have ever grown the plant gave me no issues at all the entire grow honestly, highly recommend trying their genetics! Will post a smoke report & weight soon! Thanks for following & happy growing friends
Likes
6
Share
Likes
9
Share
Tag 33 - 03.01.2025 Die Orange President zeigt leider einige Mängel. Ich vermute, dass es sich um ein Problem mit Cal/Mag (Calcium und Magnesium) handelt, eventuell auch um einen Stickstoffmangel. Seit kurzem wird der pH-Wert des Wassers angepasst, und bei jedem Gießgang gebe ich Plant BoOoM SiCaMag hinzu. Vielleicht hat jemand von euch Profis noch eine Idee, was die Ursache sein könnte und wie ich am besten vorgehen sollte. Ich freue mich über eure Tipps! 😊
Likes
27
Share
@Bluemels
Follow
Die letzten 2 Wochen laufen nun. Ich gieße die 3 nur noch mit Wasser. Ich versuche die Luftfeuchtigkeit und Temperatur zu senken. Die Blüten sind überall mit Harzdrüsen bedeckt. Sie duften irgendwie appetit anregend 😋
Likes
5
Share
Likes
4
Share
Ever since I started adding nutrients my main flowering plant looks like it’s stressed out. Maybe even slowing of some growth. The one that just started flowering seems to be unbothered. Continuing to try to follow instructions as best as I can but of coarse I can do stupid things like after I feed I once used water without ph correcting it 😒. All good though gotta learn somehow. This strain keeps growing regardless. Might just not hit its maximum potential due to lack of professional know how.
Likes
37
Share
7/23 I already wrote a bunch of shit but my phone wacked out and deleted everything I had written and wouldn't work. I had to water deeply as it's been super hot. I'll write everything thing below. 7/24 I deeply watered everything again. The past few days have been like 90 plus degrees. I think I saw mld on the soil of my plants. Scary. Just fuzzy looking shit on a couple. I did water during the day when I got back from vacation as they were drooping and needed a feed. I'm wondering if it's diatomaceous earth since I've never used it. I thought I had a handle on earwigs but they seem to be inflicting more damage and shred some leaves or chew new bud sites. WPM is still there but I've been hesitant to treat since it's been so fucking hot. Today I saw too leaves tacoed. I'll definitely up the kelp the next feed. Senecios is definitely happening. It looks like a deficiency sometimes but the have grown a tremendous amount in height. I showed a commercial grower and he seconded my opinion. I have a lot of work to do. I have kinda forget the two little clones I took. They are still in 1 gallon pots all rootbound. Thy were extras anyway. That skunk ape plant is a beast and super resilient. I think that's a strain I'll stick with. Super mild and pest resistant. I have videos to add but internet is slow and I need to put the phone down so it can charge. I really need to think about when to switch to bloom nutes. I might need open sesame but it's the only one I don't have and I don't think it will make it or break it if I don't use it 7/25 I've been neglecting my garden the past few mornings due to some family medical problems. I didn't water this morning. I read about the mold on the soil (two bags same strain far from each other) and garden pages say that it's a (good) mold and "the soil is banging!" as in very good soil. And it's just eating the decomposing material. I'll research more but it said something on a cannabis forum to scoop it off the top and treat with vinegar solution. Thing is those are like the best plants lol. It's weird. Maine weather is bi-polar. I also forgot about a couple clones I had taken. They were just extras but still. I might transplant them even though they are still in the 1 gallon. 7/26 I didn't water today and my phone completely shut the bid so no photos or videos either. Next feed I'm switching to bloom. I defoliated what needed it. Eating population seems down but I've still got some pm. I wasn't planning on spraying until Temps are down. Mayve tonight. Once I figure this phone out and point some time at the garden I'll update. I spent quite a while defoliating today. Plants are almost through the stretch. They've been 7/27 fed 3 gallons. Upped grow big to 2tsp per gallon and defoliated what needed it. My blueberry was drooped right over and seems to be "falling" and the roots seemed to he breaking away from the plant due to somevof the strong storms. Itscrhe only plant not supported. I added a stake and tied it back up. Then I topped off the soil with happy frog and mounded it up around the trunk and watered around it. 7/28 I'm still noticing earwig damage. Wr found one in the house. I put out more of those spinosid pelleys and reapplied diatomaceous earth as well as re-applyong petroleum jelly on bottom of plant stalk and branch intersections. PM is still visible. I'm planning to spray either tonight or tomorrow. It will probably be with the organocide. The potassium bicarbonate works good too. I wish either of those worked in earwigs. When the internet is faster I'll upload a video showing the interior of the plant. 7/29 We had brief but torrential rains last night. I defoliated a bucket full of used up leaves. Either that or deficiency that I haven't nailed down. I believe it's senescence since it happens the same time of year according to past journals. However it concerns me that it could possible be related to a time (in (nature) which the earwigs become larger and more aggressive. I don't know. Im guessing. They like to eat the shoots that grow the buds. I need to check soil ph. Some small leaves turn yellow and die. Plants look great and are really transitioning and "stretching" like crazy. I will update further later.
Likes
28
Share
Beginning of week.. Both have some gorgeous flowers.. Purples are already coming out on both. Both are flooding with complex aromas.. ETHOS Cookies is doing great.. Mandarin Cookies is gonna make it to harvest, I'm sure.. So excited! Mid week.. I love how they both are giving off nice purples on the calyces already! Both smell so amazing! It makes me tear up with joy! Not sure when I should start flushing! ETHOS says that you count 9 weeks from flip to 12/12.. Not pistils forming.. Cuz you know, you need to factor in the transition time.. 1 - 2 weeks.. Sometimes 3! But I am super excited to harvest these lovely ladies!!! Next day... Ok.. So the runoff issue has gotten worse for the Mandarin Cookies.. Obviously, with all the def. you can see.. At least 3 that I can see right away.. Calcium.. Potassium.. Phosphorous.. Maybe even a slight Magnesium def. in there too.. Kinda hard to pinpoint when there is multiple showing, yet I am feeding PLENTY of all of them.. She should have no issues.. The runoff pH is now coming out at about 4.9 - 5.2, depending on a good or bad day, I guess.. I have just been puttinf it in at 6.3 every time.. Sometimes (alot now) I get a salt build-up between feedings.. I like to feed, water, feed, water.. Now I need to feed, water, water, feed, water, water... It's really bothering the shit outta me lol.. But the ETHOS Cookies is pretty close to peing on point.. Going in: 6.3 pH.. Runoff: 5.8 - 5.7.. Still in a decent range.. No signs of issues on any leaves.. They are both making some gorgeous nugs tho! Stackin calyces and trichomes lile crazy! And now they are really fattening up! I am so ready for this run to be over and let this medium dry out reeeeally good.. And take it out back Ol' Yeller style.. Yup.. That sounds like a plan.. I have PLENTY of NEW coco coir bricks and perlite that I have been hoarding.. Just like I do with my genetics 😄.. But I feel like you can never have enough.. And I plan on growing cannabis in coco coir till someone takes me out back Ol' Yeller style! End of week.. They are both showing about 50% turned pistils.. The ETHOS Cookies is a little further along.. Not by much.. But the trichomes on the Mandarin Cookies seem a little further along.. Word.. They are both going to be epic smokes for sure! So I believe I will just give both of them small feedings just to get them through the week, then I should be good to start flushing.. On to the next week!...
Likes
92
Share
@SwissKush
Follow
Day 64 really finishing up nicely, she is very thick The ripening blend is doing its job, the leafs are starting their fade a bit This strain loves DWC, super fast growth and development, thanks @Fast_Buds Day 65 smooth and steady, she is up to drinking 6L a day now buds are covered in trichomes Day 66 trichomes are looking 90% white all over the side buds continues to amaze me daily, with the 6L drinking the buds are swelling up, i see a few pistils tips starting to turn pink keeping the temps and the humidity low, 40% humidity Day 67 temps low, 21, 40% humidity is causing massive terpene development, the buds are pouring out resin captured a photo while lights were off Day 68 She is finishing up nicely, changed the DWC for fresh ripening blend, this will be the last pool for the lady The pistils are about 30% brown, trichomes are all white all over. Maybe 2-3 days left. Day 69 The buds are maturing fast, we are in the harvest window. The colas are rock solid, and they are the most sticky ive ever grown from autoflower. Pistils are about 50% pink/orange/brown - trichomes are all white, not seeing any clear. adjusting to lights on 24x7, temperature is low, 20 degrees and ive got the humidity about 45% - time to overdrive and preserve terpenes with the low temps. easy for low temps here, its already -4 outside, my metal air intake hose is very cold drawing in air from outside. Will likely chop the plant tomorrow or the next day, looking to be about perfect - these are next level genetics Uploaded a video Day 70 Finishing another week strong, she will likely be cut tomorrow, pistils about 50% pink orange brown she is enjoying the 24/7 light and cold temps, the buds are getting more covered in resin glands/trichomes
Likes
16
Share
@Ensign420
Follow
Introduction - Week 14|07 Summary - Ensign's log, stardate 9437.65, Great week of growing! Wow what a good week! Growth in the main tent has all around been incredible! Submitted my first submission to the Global Grow Cup! Filmed a video of the solo cup container (marked with the ticket/order number) that will be used for the competition. Also had to fill and prove the solo cup holds 2 cups of soil. Now I need to root a clone (for the first time), transplant her into this cup, and submit my 2nd entry before the 30th of this month. As far as my first attempt at cloning, have already begun the rooting process! Managed to take cuttings from 3 out of the 6 phenos in the main tent (the first cutting was also my first time topping). Soaked the cuttings for two days before planting them into Coco Coins. So far everything has gone surprisingly well! The clones are now rooting under the propagation dome with the vents fully closed. Will check for roots soon! At the end of the week, growth was just raging! Was planning on flipping to flower in a week, but decided to begin the first week of flower next week! Thus this is the last week of veg. Plan to flip to 12/12 next Monday! Onwards to next week! [START OF WEEK 14|07] ========================================================== Garlic Budder #1 - WEEK 14|07 - Full Veg Wk5 Garlic Budder #2 - WEEK 14|07 - Full Veg Wk2 Garlic Budder #3 - WEEK 07 - Full Veg Wk5 Garlic Budder #4 - WEEK 06 - Full Veg Wk4 06/03/24 → 06/09/24 This Week's Estimated Goals ---------------------------------------------------------------------------------------------- DLI: ~26 mol/m²/d PPFD: ~400 μmol/m²/s VPD: ~1.0 kPa This Week's Meter Readings & Averages [Lights On: 16:00 - 10:00] ---------------------------------------------------------------------------------------------- DLI: 24.56 mol/m²/d PPFD: 379 μmol/m²/s VPD: 0.91 kPa Soil %: [32.7, 37.6, 37.9, 34.1] ========================================================== Day 01 - Monday - 06/03/24 - Total Days: 098 ----------------------------------- Daily Averages [~23:00] - Temps: 80.7°F [27.1°C] - Humidity: 74.4% - VPD: 0.90 kPa - Soil %: [31, 34, 39, 35] ----------------------------------- - [09:57]: Quick morning check! --- #1 is looking a bit droopy, but almost lights off (at 10:00) so not concerned. --- Nice! Mainly wanted to check on #4 and she is looking great! She’s perked back up and looking good! - [23:08]: Evening check. --- Wow! It’s a jungle in here! --- #1 has gotten too big? Nah!? Keep on growing girl! --- #2 is growing and definitely getting bigger! Growth just looking really weird. --- #3 has continued to get larger and is looking quite uniform in growth! --- #4 is growing and looking perky again! --- Even the original #1 and #2 phenos (in the back) are looking good! --- Wow! #4 is really getting close to the light. - [23:14]: Checked down both fill tubes. --- Both reservoirs were completely dry! - [23:27]: Checked the Ecowitt soil moisture sensor data: --- 30% - [CH01 EB1 - Garlic Budder #1] --- 34% - [CH02 EB2 - Garlic Budder #2] --- 39% - [CH03 GFP - Garlic Budder #3] --- 32% - [CH04 FPT - Garlic Budder #4] - [23:32]: Poured 4 cups of distilled water down EB1’s fill tube. --- Poured 2 cups of distilled water down EB2’s fill tube. - [23:38]: Checked the humidifiers. --- Refilled the 4X4’s humidifier with distilled water. --- Tomorrow, plan to defoliate and start cloning for the first time! --- Going to take multiple cuttings from both #1 and #4 for sure, but still deciding on the rest. --- Getting hyped! Day 02 - Tuesday - 06/04/24 - Total Days: 099 ----------------------------------- Daily Averages [~23:00] - Temps: 81.4°F [27.4°C] - Humidity: 74.3% - VPD: 0.93 kPa - Soil %: [29, 35, 38, 32] ----------------------------------- - [11:59]: Time to film the first entry for the Global Grow Cup! --- Going to be using BuildASoil 3.0 potting soil. --- Filming the video using a stand and my phone. --- This video is mainly to establish the container that the plant will be grown in. Also to prove that the container is a 16oz container and that it can hold 2 cups of soil. --- The ticket (order) number also had to be written on the cup. - [12:36]: Done! --- The video had to be done in one continuous shot with no edits (my original submission does not have the logo). --- There was also a photo that needed to be shot which shows the cup filled with 2 cups of soil (just like the video, the original image submission did not have the logo). --- I think I did everything correctly, but also sent an email for verification of submission and validation. --- Getting hyped! --- [*smokes a bowl] --- Going to defoliate today along with for the first-time, going to take cuttings for clones! --- After a bit of online research, decided to split the cloning process into two days. --- Today going to take cuttings and will soak them in a solution of aloe for 24hrs. Afterwards will change the water out and use straight distilled water. --- Then in a couple days, plan to transplant into coco plugs (Coco Coins) for rooting. --- For optimal results, also be using a rooting hormone (Clonex). --- Well.. Here goes nothing! - [17:01]: Evening check. --- Wow! #1 is looking huge! Her main top is stretching above the lower canopy which is continuing to bush out. --- #2 is growing along. Growth is gnarly and a bit droopy, but she’s getting taller! --- #3 is looking great! Still a bit small, but she is continuing to get larger. --- #4 looks like she needs a watering. --- Both plants in the back are also looking surprisingly great as well! - [17:05]: Checked down both fill tubes. --- Both reservoirs were completely dry! --- As far as today's defoliation, going to leave #2 and #3 alone and will focus my defoliation and cloning on the rest of the plants. --- This will be my first attempt at cloning, also going to try topping for the first time today. --- No pressure Ensign. What can possibly go wrong right? - [17:27]: Time to start the cloning and defoliation process! --- Filled a measuring cup with 3 cups of distilled water. ------ Added 3/4tsp of Horticultural Aloe ------ Added 1 more cup of distilled water --- Mixed the solution and poured an even amount into three separate solo cups. --- Made sure to mark two of the cups (#1 and #4). The unmarked one will be for any other clones from amongst the 6 phenos (if any at all). - [17:43]: Time to top and defoliate #1! --- Using a pair of brand new trimmers (AC Infinity), --- Gently cut the main stalk to even out the canopy. --- Then trimmed and cleaned most of the nodes leaving the top node or two. --- Also trimmed the leaf fingers a bit before placing the top cutting into the cup of aloe solution. --- Now for the rest of the cuttings! --- [~45 minutes later] - [18:32]: Managed to finish defoliating and cutting the rest of the clones. --- Took two more lower cuttings from #1 (3 clones total). --- Took 3 lower cuttings from #4 --- While defoliating, decided to try and clone the original #2 pheno as well. Took 4 small cuttings. --- Similar to the top cutting, trimmed and cleaned each lower node for each cutting before placing them into the cups. --- Before finishing up the 2nd cutting, I noticed the first cutting (the top cut that was also trimmed) was drooping. --- So I did not trim and the leaf fingers for the other cuttings. --- In total there were 10 cuttings taken for potential clones. --- My main focus was to take cuttings and to clean up all the lower growth from both #1 and #4. --- Defoliated and cleaned up the back original phenos as well (also trimmed back the cover crop). - [18:35]: Temporarily placed the cuttings onto the floor of the 4x4 tent. --- Took the trimmings (about 3 cups) and spread them onto the top mulch of #1 and #2. --- Time to set the environmental controls for the 3x3 veg tent. - [18:43]: Within the AC Infinity App, --- For the Veg Tent [3x3] controller, --- Adjusted the 'Vegetative [18/6]' Schedule for the grow light. ------ Set the Mode to ‘On Mode’ ------ Set the START/END times to 04:00PM/10:00AM ------ Set the MAX to 1 --- The IonBoard S33 is now utilizing around 60.8W (at intensity 1 out of 10). --- Adjusted the 'Vegetative [18/6]' Schedule for the exhaust fan. ------ Increased the Humidity’s HIGH trigger value from 81% to 87% --- Adjusted the 'Vegetative [18/6]' Schedule for the humidifier. ------ Decreased the VPD target value from 1.5kPa to 0.8kPa - [18:52]: Moved the cuttings into the 3x3 veg tent. --- It begins! I think. --- Going to let these cutting drink some aloe for a day before switching to straight distilled water. --- Hmm. Could be the white floor of the 3x3 veg tent, but have noticed the S33 has a whiter spectrum whereas the FC-6500 seems to be warmer in color. --- Anyways, - [18:58]: Poured 4 cups of distilled water down EB1’s fill tube. --- Poured 2 cups of distilled water down EB2’s fill tube. - [19:06]: Filled a pump sprayer with 5 cups of distilled water. --- Focused mainly on the straw mulch of #4. --- But also misted the straw mulch for the rest of the plants a bit. - [19:12]: Checked the humidifiers. --- Refilled the humidifiers with distilled water. - [19:44]: Going to be using Clonex rooting gel before planting the cuttings into Coco Coins (pre-soaked with microbes and aloe). But before that begins, going to transfer the Clonex gel into a squeeze bottle. --- Gently peeled back the seal on the original Clonex bottle. Just enough make a tiny opening, --- Then slowly and carefully poured the gel into an empty squeeze bottle. --- Also removed the sticker from the original bottle and placed it onto the new one. - [19:54]: Perfect! --- Instead of applying the gel to the cutting, going to be applying the gel to the Coco Coin. --- This squeeze bottle will make applying the gel a lot easier. --- Will take PPFD readings tomorrow. --- Also will change out the aloe solution to distilled water. --- I really hope I didn’t screw things up before they could even begin. --- Don’t die on me ladies! --- Please. Day 03 - Wednesday - 06/05/24 - Total Days: 100 ----------------------------------- Daily Averages [~23:00] - Temps: 81.9°F [27.7°C] - Humidity: 75.5% - VPD: 0.90 kPa - Soil %: [29, 36, 38, 36] ----------------------------------- - [09:40]: Quick morning check! --- #1 is looking a bit droopy, but looking okay. Topping is a high stress technique so going to take some time to recover. Don’t plan on flipping the main 4x4 tent to flower for a good week or so which should be enough time. --- #4 looks great! The defoliation seems to have no effect on growth. Nice! - [09:41]: Also quickly checked on the 3x3 veg tent, --- Nice! The cuttings are looking great! --- No yellowing and they all seemed to have turned up towards the light. --- So far so good! - [22:53]: Evening check. --- #1 is continuing to dominate this grow! She has spread wide and looking incredible! --- #2 is looking gnarly, but getting there. --- #3 is getting larger! But still a runt. By far, her leaves are the darkest of the bunch, but she is still growing! --- #4 looks happy and growing along beautifully! Wow! - [22:55]: Checked down both fill tubes. --- Both reservoirs were completely dry! - [22:59]: Poured 5 cups of distilled water down EB1’s fill tube. --- Poured 2 cups of distilled water down EB2’s fill tube. - [23:05]: Checked on the 3x3 veg tent. --- Ooo yea! The cuttings are still green! Nice! - [23:07]: Took PPFD readings. --- The cuttings were around 121 μmol/m²/s which gives a DLI of 7.84 mol/m²/d --- Nice! These levels are on the lower range for seedlings (~100-300), perfect! I think. - [23:14]: Swapped the aloe water out to straight distilled water. --- Going to let these cuttings soak for one more day before planting. --- Please don’t die girls! - [23:15]: Checked the humidifiers. --- Refilled the humidifiers with distilled water. --- Ooo yea! --- Tomorrow is the big rooting day! Day 04 - Thursday - 06/06/24 - Total Days: 101 ----------------------------------- Daily Averages [~23:00] - Temps: 81.9°F [27.7°C] - Humidity: 75.2% - VPD: 0.91 kPa - Soil %: [32, 38, 38, 34] ----------------------------------- - [16:20]: Evening check. --- #1 is a bit droopy, but growth is looking green and healthy. --- #2 is looking bigger! She’s also looking sort of droopy. --- #3 is growing along nicely! Looking good girl! --- #4 is looking great! A bit droopy but plan to water today. - [16:23]: Checked down both fill tubes. --- EB1's reservoir still has some water. --- EB2's reservoir was completely dry! - [16:23]: Checked the Ecowitt soil moisture sensor data: --- 28% - [CH01 EB1 - Garlic Budder #1] --- 36% - [CH02 EB2 - Garlic Budder #2] --- 37% - [CH03 GFP - Garlic Budder #3] --- 30% - [CH04 FPT - Garlic Budder #4] - [16:30]: Using a pump sprayer, --- Misted the straw mulch of #4 with 6 cups of distilled water. --- Focused mainly on the straw mulch. --- Also misted the straw mulch of #3 (in the grassroots fabric pot) a bit. - [16:43]: Poured 5 cups of distilled water down EB1’s fill tube. --- Poured 3 cups of distilled water down EB2’s fill tube. - [16:52]: Checked the Ecowitt soil moisture sensor data: --- 56% - [CH01 EB1 - Garlic Budder #1] --- 44% - [CH02 EB2 - Garlic Budder #2] --- 40% - [CH03 GFP - Garlic Budder #3] --- 45% - [CH04 FPT - Garlic Budder #4] - [17:01]: Took general PPFD readings. --- #1 was around 379 μmol/m²/s which gives a DLI of 24.56 mol/m²/d --- #2 was around 333 μmol/m²/s which gives a DLI of 21.58 mol/m²/d --- #3 was around 293 μmol/m²/s which gives a DLI of 18.99 mol/m²/d --- #4 was around 378 μmol/m²/s which gives a DLI of 24.49 mol/m²/d - [17:09]: Took the weekly height and light distance measurements. --- #1 was about 21" tall. --- #2 was about 13.5" tall. --- #3 was about 9.5" tall. --- #4 was about 19.25" tall. --- Hmm.. - [17:19]: Adjusted the right oscillating fan a bit. --- Re-angled the CloudRay S6 oscillating fan upwards. Been noticing that the air has been hitting the tops of the plants so easing off a bit (#1 is still getting hit, but she’s huge so not too worried). - [17:23]: Back to the measurements! --- #1 was about 9.5" away from the grow light. --- #2 was about 17" away from the grow light. --- #3 was about 17.5" away from the grow light. --- #4 was about 11.5" away from the grow light. - [17:46]: Checked on the 3x3 veg tent. --- Cuttings are still green! They do look a bit droopy but no signs of yellowing. --- Okay! - [17:55]: Time to begin the rooting process! --- For my first attempt at rooting, going to be using Coco Coins pre-soaked in saponins, microbes and aloe. --- To further help with rooting, going to also be using Clonex rooting gel. --- Filled a measuring cup with 4 cups of distilled water. ------ Added half of 1/64tsp of Quillaja Saponaria Extract [60] ------ Added 1/16tsp of Horticultural Aloe ------ Added 1/8tsp of Mycrobe Complete --- Mixed the solution thoroughly. --- Time for the Coco Coins! --- 10 cuttings means 10 Coco Coins. - [18:09]: Dropped 10 Coco Coins into the measuring cup. --- The coins immediately started to expand. --- A bit too much.. Oops! --- Poured the solution and Coco Coins into a pitcher. --- Added 2 cups of distilled water to the solution (now at 6 cups). --- Great! The coins are pretty much fully expanded, but going to wait a bit longer to fully saturate each coin. --- [~20-30 minutes later] - [18:42]: Great! --- Took the seedling and flood tray from the AC Infinity propagation dome and placed all 10 Coco Coins into the slots. --- Gave each Coco Coin a quick shake to remove excess solution. The coins were not dripping with solution but still pretty saturated. --- Arranged them into 3 groups with the cuttings in mind. --- Also tried to keep the pre-made holes intact. --- Time to inoculate the Coco Coins! - [18:54]: Using a squeeze bottle, --- While keeping the nozzle from making contact with the coco, gently filled each pre-made hole with Clonex rooting gel. Just enough gel to fully cover the hole of each coco coin. - [19:00]: Time to plant the cuttings! --- Gave each cup a misting of distilled water. Focused on wetting the top growth with water. --- Okay! --- To avoid mixing cuttings up. - [19:01]: Starting with the original #2 pheno cup, --- For each cutting, --- Using a pair of clean trimmers, made a final 45° cut about 1/2" from a bottom node. --- Then stripped away and scared the protective membrane below the node before planting. --- Made sure the node was about 1/2" below the surface of the coco. --- To help with planting, while inserting each cutting, gave the Coco Coin a gentle squeeze to loosen the coco. This also helped to ensure the coco and gel was in good contact with the cutting. --- Once the cutting was planted into the Coco Coin, made sure to place back in the same spot (made sure to keep the cuttings in their groupings). --- Once a cup was complete, made sure to keep the label with the group. --- Re-misted the top growth as needed to keep it wet. --- Also wiped the trimmers with isopropyl alcohol in between cuttings (plan to use 10% bleach solution for next time). --- Repeated this process until all 10 cuttings were cut, planted, and in the tray. --- The coco coins fit perfectly into the tray and don’t reach the bottom. Nice! --- The bottom air gap is important. --- Poured a bit of distilled water through one of the empty slots into the bottom of the tray. Just enough to fill the bottom of the tray, but not enough to reach any of the Coco Coins (~1/4cup). - [19:35]: Placed the propagation tray with cuttings into the 3x3 veg tent. --- Placed the first layer of the propagation dome on before giving the sides a misting of distilled water. --- Also sprayed the top of the propagation dome before covering the cuttings. --- Vents are all fully closed. - [19:40]: Placed the bar lights onto the top of the dome before configuring the controller. ------ Set the START/END times to 04:00PM/10:00AM ------ Set the bar light’s intensity to 2 (out of 10). --- Also made sure the propagation light controller’s time was in sync with the Controller 69 Pro. - [19:47]: Took PPFD readings. --- The cuttings were around 136 μmol/m²/s which gives a DLI of 8.81 mol/m²/d --- The PPFD levels are similar to the floor. --- Perfect! --- Going leave the IonBoard S33 on during this rooting process. --- Will check back tomorrow to cycle the air under the dome. - [19:56]: Checked the humidifiers. --- Refilled the humidifiers with distilled water. - [20:17]: Quick night check! --- Ooo yea! Growth is raging and looking perky! --- Mainly checked on #1 and #4 which were looking incredible! --- Keep on growing ladies! Day 05 - Friday - 06/07/24 - Total Days: 102 ----------------------------------- Daily Averages [~23:00] - Temps: 82.7°F [28.2°C] - Humidity: 76.2% - VPD: 0.89 kPa - Soil %: [37, 40, 38, 35] ----------------------------------- - [10:03]: Decided to increase the ambient temp in the 3x3 veg tent. --- Within the AC Infinity App, --- For the Veg Tent [3x3] controller, --- Adjusted the 'Vegetative [18/6]' Schedule for the heater. ------ Increased the Temp target value from 78°F to 82°F --- Hopefully this will help to keep the veg tent at a more consistent temp. - [22:26]: Evening check. --- Ooo yea! The garden is looking incredible! --- #1 is looking perky and just bushing out! Wow! --- #2 is getting big! Growth is weird and leaf fingers are huge! Just going to let her grow. --- #4 is looking happy and growing along like a champ! Nodes are starting branch out and she is turning into a bush! - [10:28]: Checked down both fill tubes. --- Both reservoirs were completely dry! - [22:33]: Poured 5 cups of distilled water down EB1’s fill tube. --- Poured 3 cups of distilled water down EB2’s fill tube. - [22:40]: Checked on the propagation dome (inside the 3x3). --- Ah yea! Looking great ladies! --- Lifted the top of the dome to let some fresh air in for a bit. --- Wow! --- Leaves still look nice and green! --- So far everything looks great! --- Just going to continue on! - [22:53]: Checked the humidifiers. --- Refilled the humidifiers with distilled water. - [11:01]: Decided to adjust the humidifier for the 3x3. --- Within the AC Infinity App, --- For the Veg Tent [3x3] controller, --- Adjusted the 'Vegetative [18/6]' Schedule for the humidifier. ------ Increased the VPD target value from 0.8kPa to 1.5kPa --- The higher VPD level will essentially turn the humidifier off. --- I won’t be needing the humidifier for a good week so might as well save the water. Day 06 - Saturday - 06/08/24 - Total Days: 103 ----------------------------------- Daily Averages [~23:00] - Temps: 81.6°F [27.6°C] - Humidity: 74.9% - VPD: 0.91 kPa - Soil %: [35, 40, 37, 31] ----------------------------------- - [07:40]: Quick morning check! --- #1 and #4 are looking perky and happy! --- Also checked on the propagation dome, --- All cutting still look green! Hyped! - [20:02]: Evening check. --- Wow the garden is raging with growth! --- #1 has blown up! She has clearly recovered and growth is ramping up again! --- #2 is stretching upwards! --- #3 is now the smallest of the 4, but still getting larger! --- #4 is looking incredible! Wow! Growth looks perky and happy! - [20:05]: Checked down both fill tubes. --- Both reservoirs were completely dry! - [20:10]: Poured 6 cups of distilled water down EB1’s fill tube. --- Poured 2 cups of distilled water down EB2’s fill tube. - [20:16]: Checked the Ecowitt soil moisture sensor data: --- 35% - [CH01 EB1 - Garlic Budder #1] --- 40% - [CH02 EB2 - Garlic Budder #2] --- 36% - [CH03 GFP - Garlic Budder #3] --- 27% - [CH04 FPT - Garlic Budder #4] - [20:19]: Using a pump sprayer, --- Misted the straw mulch of #4 with 5 cups of distilled water. --- Focused mainly on the straw mulch. --- Also misted the mulch of #3 a bit (in the fabric pot). - [20:27]: Checked propagation dome (in the 3x3), --- To cycle the air under the dome, lifted the top off for a bit. --- Ooo yea! Everything is still green and looking great! --- Keep on rooting ladies! --- Oops! - [21:45]: Checked the humidifiers. --- Refilled the humidifiers with distilled water. Day 07 - Sunday - 06/09/24 - Total Days: 104 ----------------------------------- Daily Averages [~23:00] - Temps: 81.5°F [27.5°C] - Humidity: 74.8% - VPD: 0.91 kPa - Soil %: [36, 40, 37, 36] ----------------------------------- - [08:18]: Quick morning check! --- Nice! The main tent is looking great! #1 and #4 are both raging with growth! --- Checked on the propagation dome (inside the 3x3) and the clones are still looking green! --- Wow! Everything is going almost too well! Just keep on growing! - [19:08]: Evening check. --- Garden is just exploding with growth! Seems everyone has fully recovered from the defoliation and topping! --- Wow #1 is bushed out and looking incredible! --- #2 is growing really starting to get large! Growth still is funky, but stoked none-the-less. --- #3 is starting to fill in the pot! Getting larger! --- Wow! #4 is getting taller and looks healthy and green! - [19:12]: Checked down both fill tubes. --- Both reservoirs were completely dry! --- Wow the canopy is really starting to get taller and closer to the light. May need to raise it up soon. --- Absolutely surprised how low the light levels have been throughout this entire cycle. Barely moved the light and have not increased the intensity past 2 (out of 10). Less is really more. --- Anyways! - [19:18]: Checked the Ecowitt soil moisture sensor data: --- 36% - [CH01 EB1 - Garlic Budder #1] --- 41% - [CH02 EB2 - Garlic Budder #2] --- 37% - [CH03 GFP - Garlic Budder #3] --- 34% - [CH04 FPT - Garlic Budder #4] - [19:19]: Poured 6 cups of distilled water down EB1’s fill tube. --- Poured 3 cups of distilled water down EB2’s fill tube. - [19:24]: Checked propagation dome (in the 3x3), --- To refresh the air, lifted the top off for a bit. --- Sweet! Still green! Wow! --- Using a spray bottle, misted the top growth with distilled water. - [20:35]: Checked the humidifiers. --- Refilled the humidifiers with distilled water. --- Wow what a week! --- Growth has been just insane in the 4x4 tent! All plants have fully recovered and have just exploded with growth. --- I think it’s time to flip to flower! --- Also, I’m absolutely baffled about how well the cloning process has been going. --- So far no issues! --- Not complaining, but just surprised. Keep on growing ladies! --- If all goes well, should have fully rooted clones soon ready for transplanting (into solo cups of course). --- Absolutely hyped for next week! --- Maximum warp Ensign, Engage! [END OF WEEK 14|07]
Likes
3
Share
@Andres
Follow
my other tent was small. She went through stress twice because of my dog. He dug up the roots but she survived. looks strong and healthy.