Check the winners The Grow Awards 2026 🏆
Likes
Comments
Share
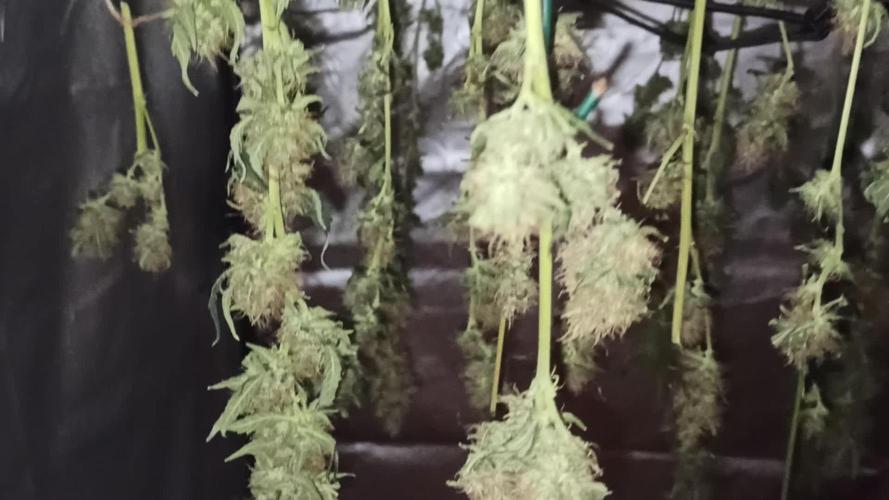
Bueno por fin la cosecha ha salido bien aun que no ha salido realmente como quería pero a pesar de eso estoy contento con muchas ganas de probarla ya
Likes
13
Share
Everything is going good. Some are showing some sort of deficiency . Lowered lights a little bit. Going to start watering every other day. One of the critical thunder autos is like 8 inches tall lol definitely breeding her.
Likes
24
Share
Plants started getting real bushy a couple of days after topping. Low Stress Trained all the plants at the end of the week by tying them down using rubber coated garden wire to spread out the newly grown tops. Also spaced out each plant evenly on the tray and turned on the other 2 PB2000 LED lights I had ready to go.
Likes
38
Share
@Sadhus
Follow
**Semaine 8 : Huitième Semaine de Floraison – Phase Ripening (8-14 avril 2026)** **Note :** Mise à jour hebdomadaire. On entre officiellement dans la phase **ripening** (mûrissement). Les données TrolMaster et GrowOps confirment une transition très propre et contrôlée. Tout se passe bien, sans aucun souci. ### Contexte et Objectifs de la Semaine Semaine 8 sur 12 totales : on passe du bulking pur au **ripening**. L’objectif n’est plus de faire grossir les buds, mais de les densifier, de maximiser la production de trichomes et de laisser la plante terminer sa maturation. Steering : passage progressif vers **génératif** (irrigations moins fréquentes, dryback plus marqué la nuit, baisse progressive de tous les paramètres). Changements appliqués cette semaine : - PPFD diminué progressivement (750 → 550) - Température et humidité baissées - EC réduit (2.6 → 1.5) - UV maintenu à 90 min/jour pour continuer à booster terpènes et résine **Petit tips éducatif : Pourquoi baisser progressivement en ripening ?** En phase ripening (dernières 4-5 semaines), la plante arrête de pousser en taille et concentre son énergie sur la maturation des fleurs. - Baisser le PPFD/DLI évite le stress lumineux et permet aux trichomes de grossir sans brûler. - Baisser la température (surtout la nuit) et l’humidité favorise la synthèse des terpènes et réduit le risque de moisissure. - Réduire l’EC évite l’accumulation de sels en fin de cycle et améliore le goût final. - Passer en steering génératif (dryback plus long) force la plante à « finir » ses buds et à concentrer résine et cannabinoïdes. Fait correctement, cela donne des buds plus compacts, plus frosty et avec un profil terpénique plus prononcé. ### Observations des Plantes La plante dominante reste à **150 cm** avec une structure massive et une canopée bien remplie. Les buds sont **follement frosty** : couverts d’une épaisse couche de trichomes (sugar leaves très blanches), ce qui donne un aspect brillant et collant incroyable. La densité des buds est bonne et devient bien compacte, même si la taille reste raisonnable (j’ai déjà vu des buds plus gros sur d’autres variétés, mais ici la qualité prime). Odeur : très forte et agréable, mélange sucré/épicé/floral typique de Sticky Broccoli. Pistils majoritairement colorés et enroulés. Santé générale : parfaite, vert profond sur les feuilles restantes, zéro pest, zéro carence, zéro stress visible. Les plantes sont en pleine forme et concentrées sur la maturation. ### Paramètres Environnementaux (TrolMaster + GrowOps – synthèse semaine 8) - **Température jour** : 19-21 °C (cible 20 °C, live 20.3 °C) - **Température nuit** : 14-15 °C (baisse nette pour ripening) - **Humidité jour** : 48-58 % (cible 55 %, live 51.5 %) - **Humidité nuit** : 29-39 % - **VPD** : 0.9-1.3 kPa (live 1.16 kPa → bien adapté au ripening) - **PPFD** : 550 (baisse progressive, DLI ~24) - **UV Light** : 90 min/jour (maintenu) - **Far Red Light** : 30 min en fin de cycle - **CO₂** : setpoint 900 ppm jour - **EC solution** : 1.5 mS/cm (live ~1.62) - **pH solution** : 5.8-6.0 (live 6.27) - **Runoff EC** : 2.5-3 mS/cm - **Irrigation** : moins fréquente (transition générative) - **Runoff % daily** : 20-30 % - **Night dryback** : 20-30 % (augmenté pour ripening) - **Steering** : génératif (confirmé cette semaine) ### Nutrition et Irrigation (Soupe actuelle) La recette reste la même que les semaines précédentes, mais avec EC réduit à 1.5 : - Cocos A + B - CANNA PK 13/14 (dose légère) - Green Sensation suprimer - Pure Zym suprimer - Sugar Royal suprimer - Cal-Mag Amino 1 ml - Silica Force 1 ml - pH- pour ajuster Eau à ~20 °C. L’irrigation est maintenant moins fréquente pour accentuer le dryback nocturne et favoriser la concentration des buds. ### Problèmes et Ajustements **RAS total.** Aucune alerte, aucune carence, aucun excès. La baisse progressive de tous les paramètres se fait en douceur et les plantes répondent très bien. Le passage en ripening est maîtrisé. ### Plans pour la Semaine 9 - Continuer à baisser tranquillement : PPFD, température (surtout nuit), humidité et EC - Maintenir UV à 90 min/jour - Défoliation très légère si nécessaire (seulement les feuilles qui bloquent la lumière sur les buds inférieurs) - Photos rapprochées pour suivre la couleur des trichomes (passage vers ambré) - Préparer le flush (généralement à partir de la semaine 9-10 selon maturité) Ce journal sera mis à jour hebdomadairement. #GrowLegendary #Zamnesia #Plagron #EternityGrowCup2 Les buds sont magnifiquement frosty, denses et résineux, avec une odeur qui devient vraiment puissante. La qualité est au rendez-vous, même si la taille reste raisonnable. On continue la descente en douceur vers la récolte ! 🌱✨
Likes
40
Share
@xbrico
Follow
Day 89 - pH thing has been quite steady the last few days, but I think part of the reason is I have been keeping it over 6 (between 6.1 & 6.3) which makes me think it may not be able to feed on something so keeps pH stable (This pH issue could be root acidification with too much Potassium; it seems to coincide with the PK Warrior being added - pH needs to be below 6 for Potassium uptake to happen so I artificially blocked it by keeping pH above 6!!!). EC also going up but not as quick as it was...drops back further than it was when adding RO water (i.e. if it drank 10L and EC went from 1.7 to 1.9, adding 10L back takes it to 1.6). So, as I have been promising myself for the last couple of days, I did a full tank change. Have dropped the feed substantially for the start of week 7 (Which is technically Monday coming). New Nute Strength: Silicon - 1ml/L Sumo Boost - 2ml/L Bloom A - 1.2ml/L Bloom B - 1.2ml/L PK Warrior - 0.4ml/L Sensizym - 2ml/L Fulvic - 2ml/L EC 0.8, pH 5.9 Did have A & B @ 1ml/L but EC was barely 0.7 (Background EC of water is 0.2) so added the touch more A&B so as not to super starve them. Will now monitor pH/EC for the next few days and try to keep levels nice and even for the next 9-10 days before going to week 8 force and week 9 flush and the finishing bulb! ************************************************* Day 85 - Dayum this pH management getting funky now!!! For the last week, pH keeps taking a nose dive (0.5-0.7 a day) with water level dropping and EC rising. Can't work out what the girls are at at all. Apart from lower leaf loss due to light being blocked, the plant is creating some new leaf matter (As you would expect) where light is getting reflected down low but can't work out the pH drops. No matter what EC i set them too, or pH, they only appear to be taking on water...or something micro (Ca/MG or the likes) and leaving the macro's. Topped up tank with some RO (Reclaimed from dehumidifier) water and only added calmag since tank change 3 nights back (It has some N in it for the new green and hopefully just gives what it needs with Ca/Mg). Apart from that, just keeping an eye on things to make sure no burn...dont want to put them on a starve on the beginning of Flower week 6!!!
Likes
5
Share
just about to go into week 9 and i noticed a few midges or so i thought.as the next day there were more ..i noticed that they seemed to be coming out of pot bases.upon closer inspection these turned out to be fungus gnats.(never heard of them. Never had a beastie problem).No idea how or why but problem seems to be sorted as you can see from photos ,sticky traps and plant magic Bugicide
Likes
1
Share
@yollo420
Follow
Seconda settimana crescita fantastica! Aumento dei fertilizzanti.
Likes
14
Share
FOR EVERYTHING MARS HYDRO VISIT: www.mars-hydro.com www.marshydroled.ca PROMO CODE: rocknroll VISIT THE ALIEXPRESS STORE: @marshydro_aliexpress Instagram: @marshydropenny https://youtube.com/channel/UChU5ZWwNi-DvnO3oWVU3ceA Thanks for taking the time to read and check out my diary🤜🤛 FC-E6500 LED GROW LIGHT: FC-E6500 grow light with 3978pcs OSRAM BridgeLux Diodes & Moso Driver, market-leading PPF 2.7 µmol/J, Max 2.5g yield/watt with 30% higher Average PPE, more cost-effective when compared to same style type lights. Only consumes 650W, perfectly cover 5x5ft (personal), 4x4ft (commercial) grow space. Innovative Precise Uniform Lighting-Built-in removable bars interval & dimmability enable the exact & dynamic PPFD control over each of the plant growing stages, FC-E6500 detachable bars deliverSuperior Heat Dissipation: Real Aluminum heatsink together with 6 slim profile passive cooled bars (THINNER & LARGER surface) and detachable Meanwell Driver, create less heat. save 50% hydro than other old grow lights! Driver can be mounted remotely on the side of a grow tent/rack or on an adjacent wall to remove heat from grow space. Full Spectrum UV IR LED: With Yield Max spectrum (660nm Osram enhanced Deep Red,2800k-5000k,730-740nm IR,380-410nm UV LEDs), Average PPFD the FC-E6500 LED grow lamp enables cultivators to produce BIG FAT Dense Buds, perfect for full-cycle hydroponic, soil, grow tent/grow room. Dimmable Commercial Grow Light: Cost-efficient, easy dimming & daisy chain With a max up to 20 lights, IP65 Waterproof, master light easily controls the rest. Perfect for commercial & home horticulture. FC4800 LED GROW LIGHT: GET THE MAX FROM MARS👍: Welcome one of  the newest members of the Mars Hydro family🤜🤛🤘. The Mars Hydro FC 4800 480W LED Grow Light can accommodate up to a 4' x 4' area for flowering. It has OVER 2000 LED chips consisting of the best selling Samsung LM301B diodes which has a Luminous Efficacy of: 220 lm/W 0.2 W, 3 V mid power, Osram 660nm Diodes, Infrared light and UV LIGHT👍. It boasts the incredible efficiency of 2.8 µmol/J, maximum 2.5gram yield per watt with 30% higher Average PPFD. This High-intensity spectrum is beneficial for plants at all stages - from veg to bloom, and creates Big dense Buds👍. achieve 50% higher yields & quality compared with the old lights! Only consumes 480W for 4x4ft personal grows, and 3x3ft for commerical grow. It comes with a dimmer and daisy chain function with a  maximum of up to 15 lights, the master light controls the rest👍. Wide 6-bar design offers even & wide canopy coverage and can maximizes your grow space. slim 180° FOLDABLE DESIGN... YES I SAID FOLDABLE🤘🤣 , making it compact and easy to install, it's IP65 WATERPROOF and will give you no worries while growing in a humid environment and makes it a flexible high performance commercial grow light for enormous  SUPER FROSTY yields.😛😛😛. MARS GETS EM FROSTY BOYS👍 AWESOME HEAT DISSIPATION: The Low energy consumption FC4800 growing light has 6 passive-cooled bars and an aluminum heat-sink a removable driver  you can upgrade later or have it outside your tent. with zero noise  you can save up to 50% in your electricity bill compared to HID's or HPS lights! It also has a removable driver so you can upgrade it in the future or have it outside your grow space for better heat control in your growroom👍 UPGRADED FULL SPECTRUM: Yield Max Spectrum with enhanced red (Top-Bin Samsung 3000k-5000knm, Osram 660nm Deep Red), speed up blooming & fruiting, perfectly suited for full-cycle growing. The FC4800 LED grow lamp was born for Big Buds, perfect for commercial, grow tent, grow room, hydroponics, and all soil grows.👍 THE BEST SAMSUNG DIODES: THE FC4800 has Top Bin genuine Samsung Osram Diodes, combined with remarkable 2.8 µmol/J Efficacy, 30% higher Average PPFD, 50% less energy consumption, to maximize your yields. They give you a TRUSTED 3 years warranty 100% Satisfactory guaranteed!!! TSW2000 LED GROW LIGHT: INCREASE YIELD AND CROP QUALITY WITH MARS HYDRO LED GROW LIGHTS: NEWEST SMD LED technology provides the highest PAR/LUMEN output (1122umol@18") and can make you get 30% higher yield compared to OLD blurple led lights.  Max 2.5g yield per wattage and achieve maximum quality and quantity, much better than traditional HPS grow systems LOW ENERGY CONSUMPTION LED GROW LIGHT: Consuming only 300W true output with 684 LEDS! It saves up to 50% energy than other led grow lights. Perfect for 3.5x3.5ft bloom stage, 4x4ft veg stage. Over 90% light energy can be absorbed by plants, it will have higher intensity in a MARS HYDRO grow tent with diamond design mylar, or by crossing over using multiple TSW2000 HIGH EFFICIENCY FULL SPECTRUM INDOOR GROW: 3000K 5000K and IR 660nm 760nm RED, makes it close to natural light, highly engineered to provide improved growing performance for plants at all stages of growing, rapid plant response from seed to flower; Uniform and wide-beam light distribution for your plant's optimal growth 8x8 1680D GROW TENT The MARS HYDRO 8x8 Grow Tent interior is made of a unique diamond design mylar which is highly reflective. (Other companies mylar and reflective rate is as low as 50%, and it won't provide efficient light. They use thick 1680D oxford canvas, and being double stitched, it is tear proof and perfect for locking in the light. Their grow tent keeps 100% of the light inside the tent and helps your plants absorb more light. EXTRA-THICK material means No light leaks or rips at all.👍 Strong Stable metal corner adapters and poles are the trustful supporters of the tent. It's very sturdy, neither rusting or paint flaking off. quick and easy tool-free setup. They use heavy-duty metal zippers, with double layer black lining, by far the best on the market which creates a light-proof seal. The Easy observation windows are made by double layers of cloth. Observe the growing conditions of your plants without opening the tent and avoid disturbing your plants. The observation windows also serves to dissipate heat and ventilate the air. The tent includes 2 removable waterproof floor trays to hold soil and water. The removable tray can be taken out to wash easily. They guarantee the grow tents are easy to install even if you've never done something like this before. Clear Instructions and no tools needed! They also offer 30-day unconditional refunds for quality problems. Just contact their friendly 24 hours customer service 👍
Likes
3
Share
@Lelex95
Follow
Pour le jasmin et le soulubol c'est 1 gouttes jasmin 2 gouttes solubol dans 5 litres d'eau ça aide pour la production de résine .
Likes
2
Share
@dwotTV
Follow
Transplanted in the afternoon of 10/23 because they were rooting out of the pucks. Got some humidity dome cups coming tomorrow and another inline fan to handle intake to try to dial in things a bit more. Fugue State #2, in the black pot is still a bit shell shocked, hopefully it opens up soon. Well both #2 and #3 damped off / shell shocked to death, so there's just one left, c'est la vie. #1 is trucking along well and ready for week 2. Sprayed with Neem Oil on 10/24 Fed Light Fox Farms Blend on 10/25 Treated with NemAttack on 10/26
Likes
75
Share
@Dedon
Follow
Hi everyone ! everything is going well, except i have burn some leafs with light ( i was too greedy and put the light too close ) but it's only on 2 or 3 leafs so it's ok. i can't wait !! i wanna taste it 😍😍😍
Likes
13
Share
@KirbyFarm
Follow
This was my first outdoor autoflower experience. Very happy with the results. Buds could have had a better taste in my opinion but that is just preference.
Likes
Comments
Share
Flowering week 5. PH: 6.1 / Saturday - Sunday EC: 1.44 PH: 6.0 EC: 1.52 / Ec lifted on Monday
Likes
4
Share
Las fotos son justo despues de regar con te de compost
Processing
Likes
10
Share
@CreoWeed
Follow
Hey guys, this other week went very cool, I start reducing the nuts to the minimum and I can see really how fattening are the buds. Now I can see some pretty milky trichomes, and just few cloudy, so I consider to chop in max 2 full weeks... (71 total days from seed) but anyway I'll adapt to how the plant is at that time. The smell it's absolutely, insanely strong and ill need to buy ASAP a carbon filter to reduce it. The only issue encountered in this grow was keeping low the humidity, and in fact I was not really able to do so as it stands at 55-65...but without noticing any mold issue on flowers. Can wait to update this post next week! Stay tuned, stay high!
Likes
7
Share
Week 4 was actually pretty smooth. she was showing nitrogen and potassium deficiencies because she was being terribly underfed and because i had weened her off the veg nutes WAY too soon. I found the dyna gro nutrient schedule and ive been following that. i will definitely be following the schedule much better next round as i wasnt actually aware they had a schedule out. Shes currently week 5 day 1 and shes already fat af and super trichomey.s he still got at least 2 weeks left. she might be ready by week 7 honestly tho who knows guess well see. Ive been giving her 1 gal each time of dechlorinated tap water just straight water. it has been phd to 6.6 ph. runoff tested at 6.3 ph. will probably flush one last time before continuing the bloom feed.
Likes
37
Share
After germinating the seeds are transplanted into small pots with soil (see tutorial in VIDEO above). The soil is prepared with water mixed with a little bit of BIO NOVA Roots (0,5 ml/l), which aids the development of the seedling. Transplanting is very easy now, because they have grown a STRAIGHT tap-root while hanging during the SERIOUS' WAY of germination. This straight root allows for easy potting of the seeds. Simply make a little hole in the center of the soil with your pinky finger and carefully place the germinated seed with the white root pointing DOWNWARDS into the hole. Best is to lay it onto one side-wall of the hole with the seed shell right at the surface. Then I push the other side inwards and enclose the whole root with soil. At the end only the top of the seed-shell peeks out of the soil. IT IS VERY IMPORTANT to plant the seeds NOT TO DEEP into the soil. The seedling only needs extra strength to work itself upwards thru the soil and you run the risk of the soil drying out and the seed dying off. When you PLANT THE SEED VERY SHALLOW into the soil (=with the top of the seed-shell still peeking out) your seedling can grow out right away and you have a small plant already 24 hours after putting the seed into the soil. The small seedling sometimes still has the seed-shell on its 'head', it normally falls off by itself, but sometimes you have to carefully help and take it off with your finger nails. Be careful to NOT clip of the seedling accidentally when you do this! The seed-shall has an inner lining, which feeds the small seedling when it germinates. This inner lining sometimes gets tangled around the stem of the small seedling after the shell has fallen off. This little skin MUST be taken off the stem right away! Once it dries up, it gets hard and can strangulate the seedling around the stem. In order to avoid this, the skin must be taken off as soon as possible! I show it in the pics above and also made a video about taking off the inner lining of the seed.