


Likes
Comments
Share

@SkunkyDog420
Follow
Hallo zusammen 🤙.
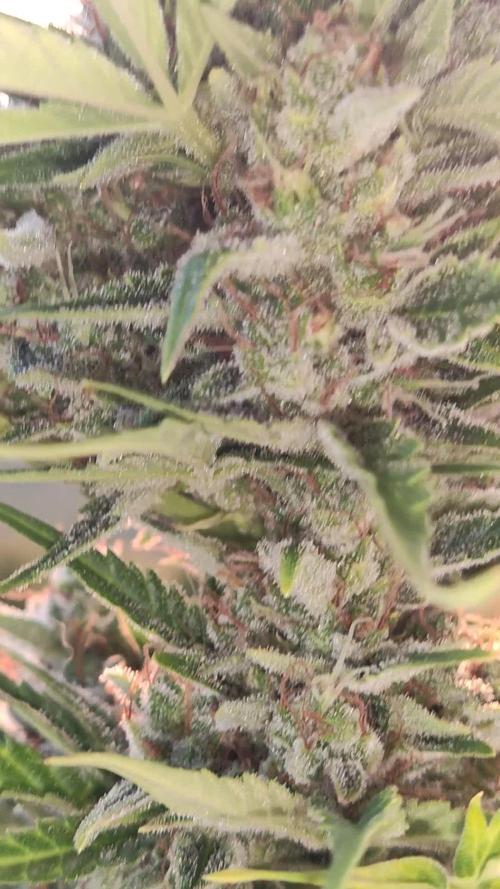
Sie wächst sehr schön und macht keine Probleme.
Rabattcode für den BIOTABS-Webshop https://biotabs.nl/en/shop/ GDBT420, damit erhalten Sie 15 Prozent

Likes
4
Share


@Charly_grower
Follow
💚Bueno esta gorilla auto está tardando un poco pero valdrá la pena, creó ! Jajajaj ! Su olor es terroso no es tan pasoso .. esperó que engordé mucho más 👽

Likes
12
Share


@RainerWinklerGrow
Follow
Very Beautiful, Purple Buds, nice smell, smooth smoke and good high, can only recommed growing 3 more rn


Likes
19
Share


@Ganjagrandaddy
Follow
Day 33 from Seed: In general these ladies have just got on with it this week while I worried about some of the other girls. Their training has been a breeze so far and they have been made more pliable by the silica. I have now stopped using the Mega crop in the Los soil now the pot is making it's own nutes but I will keep my eye on them for any paling and need to re feed with the Mc. The coco girls are on 1g/L to see how they settle into that now.
#1is doing brilliantly and her size indicates she will be a great yielder. She is quick to turn her heads back up once pinned so I will need a fast hand to keep up.
#2 The runt of the whole pack. I dont know why she is so small besides some evidence of def on her initial growing leaves. Her new growth looks a lot better but I think she will need less strength feed than the others. Her structure looks good but she is very small I general compared.
#3 was my expected star of the grow room but is now not in the front row anymore. She is perfect and growing great. training has been easy with her and her sites are plentiful too. I think she will be the biggest of the Smoothies.
I am very happy with their progress so far . great work Fast buds.

Likes
1
Share


@therealgrowmie
Follow
We’re in the midst of the bulking phase now, with a few buds stacking up nicely.
Unfortunately, the plant on the left has sparser bud distribution. Compared to other auto genetics, these three plants also show a broad variety in growth structure and phenological traits.
Also, overall plant health isn’t entirely satisfying, with high temperatures being the Main cause. The leaves are showing several stress-related issues like mild tip burn, nitrogen deficiency, and some cal-mag problems. But hey - we’re here to grow buds, not leaves! 😄
That said, the fade is to be expected as the plants start to cannibalize themselves for nutrients. The stretch is also in its final phase, so we’re likely 3 to 4 weeks away from harvest.
---
Quick rundown on everything else:
Watering: 1500ml every third day
Fertilizer: According to the BioBizz schedule
Light intensity: ~1000 PPFD
VPD: ~1.62 kPa
Temperature: ~28°C
Relative humidity: ~55%


Likes
29
Share


@HighZenBerg
Follow
Here we go again !
Welcome to my grow diary. This time I was gifted with a single seed of Sensi Amnesia Feminized by Sensi Seeds.
To celebrate the upcoming legalisation in Germany, I dedicate my diary to all my fellow German pot heads. We almost reached our goal !! 👏
As always, I got started and throw the seed in a cup of water and let it soak for 24 hours.
After that, she was directly transplanted in a little pot with BioBizz Light Mix soil.
To keep temperature and humidity up, she will spend the first days in a little propagator
Update: germination successful !
We mark 11/27/2021 as her day 1
Update 2: the lady gained hight quickly. That’s why I reduced the light distance to 40cm.
Temperature at day: 25-27 C
Temperature at night: 19 C
Humidity kept around 65%
Germination week was without problems. No Temperature or humidity issues at all. She got a bit tall in her first days.
Keep in touch !
Cheers HighZenBerg

Likes
1
Share
@ElCapitol
Follow
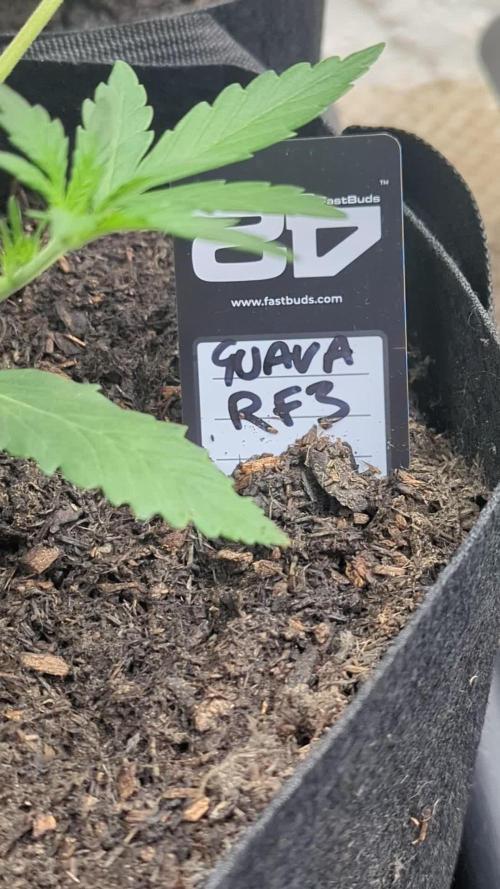
Huge growth in just one week, very good strong plant. I hope her buds as as potent:)
No issues so far, she's tall so maybe a little training or topping will have to be carried out.


Likes
9
Share

@Salokin
Follow
Week 4 | LSD Auto
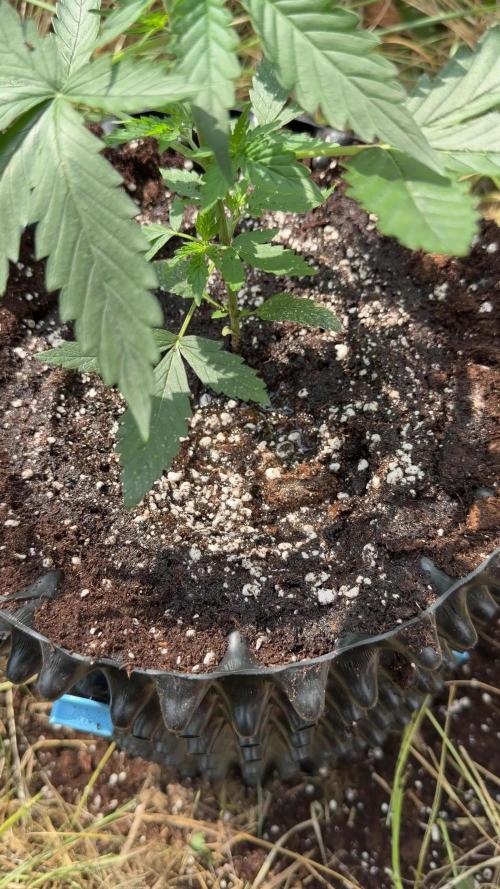
Decision made. After three weeks of side-by-side comparison, one plant clearly outperformed her two siblings in vigour, structure and overall development. The other two have been discarded, and the winner has now moved outside — straight into a 12L airpot, bottomless, set in the garden next to the 46 Kush.
**RootX** was applied again at this transplant, delivering mycorrhiza (*Glomus intraradices*), *Trichoderma harzianum*, 13 strains of *Bacillus spp.*, humic acids, amino acids and vitamins straight into the new root zone — giving her the same strong start outdoors that got her through the indoor selection phase. She got 300ml of water on transplant day to settle in.
Last recorded indoors before the move: Week 4, height 18cm, light schedule at 17 hours, EC 1.5 mS/cm, pH 6.2. Now she's outside and adjusting to natural light and the elements.
She's settling in well, leaves looking healthy and well-watered. Updates every Sunday. Stay tuned.


Likes
22
Share


@Weedbadk
Follow
Día 1 y todas germinaron súper rápido 3 días
Día 5 desde puesta en sustrato
Ya todas están arriba
Estoy solo pulverizando el sustrato
Temperatura 23c humedad 75%
Likes
4
Share


@HowtoBubatz
Follow
Looks like the stretch has officially come to an end and with it, the first signs of trichome production have started to show up!✨
Unfortunately, the plant stayed pretty small despite being in a 20L pot, which is a bit of a bummer. I was hoping for more size, but hey let’s see what she can deliver in quality! Sometimes the small ones pack the biggest punch. 😏
Excited to see how the buds develop from here!😊


Likes
11
Share


@DixTheReal
Follow
Giorno 57 - procede bene, ho tolto qualche foglia morta sotto, l’odore é davvero troppo forte anche fuori dalla grow box, comprerò Ona Gel
Giorno 58 - ho continuato a defogliare sempre su “CARAMEL” le foglie morte, domani irrigherò
Giorno 59 - fornisco 0,5 L di acqua a testa, procede bene, i fiori di “CARAMEL” sono rimasti nettamente più piccoli a causa delle carenze
Giorno 60 - prima rilevazione dei Tricomi al microscopio, ancora trasparenti, credo che ci vorranno ancora 10 giorni prima del taglio…
Giorno 61 - procede bene, domani darò ancora acqua
Giorno 62 - alla fine non ho dato ancora acqua, la daró domani, hanno iniziato a ingiallirsi le foglie di “CREAM” e manifestare carenze, spero di raccogliere tra una settimana
Giorno 63 - fornisco 1 litro di acqua a testa. Le foglie di “CREAM” hanno macchie marrone rotonde, carenza di calcio, mi hanno consigliato di dare CalMag ma ormai sono a fine ciclo e attendo di raccogliere
Likes
2
Share


@ChronicHedonism
Follow
Been flushing for the past 2 weeks. Accidentally missed a watering and the leaves did not appreciate it.

Likes
4
Share


@Weedhi_75
Follow
Voy a tener que cortar para tener aireación, apareció hongo, 30%de la planta se va de ✂️ Se ve tricomas dorados en las hojas de los cogollos 🍻

Likes
120
Share


@NugLife420
Follow
Well, these ladies are growing like weeds! 😃
I am getting ready to do their second topping. They seem to be taking nutrients well. I am planning on vegging them out for at least 3 more weeks. Going to have some monsters! 😎 Sincerely, thanks for all the support. 🙂


Likes
40
Share


@MadeInGermany
Follow
Info:
Unfortunately, I had to find out that my account is used for fake pages in social media.
I am only active here on growdiaries.
I am not on facebook instagram twitter etc All accounts except this one are fake.
Flowering day 50
since time change
to 12/12 hrs.
Hey everyone ☺️.
Another nice week goes by.
The buds keep getting thicker and smell better ;-).
This week the water was poured twice with 1.2 l each time.
One of them with GHSC enhancer.
Otherwise everything was cleaned and checked.
lots of fun and stay healthy 🙏🏻
You can buy this Strain at :
https://sweetseeds.es/de/cream-caramel/
Type:
Cream Caramel
☝️🏼
Genetics:
Blue Black
x
Maple Leaf Indica
x
White Rhino
👍
Vega lamp:
2 x Todogrow Led
Quantum Board 100 W
💡
Bloom Lamp :
2 x Todogrow Led
Cxb 3590 COB 3500 K 205W
💡💡☝️🏼
Soil :
Bio Bizz Coco
☝️🏼
Fertilizer:
Green House Powder Feeding
☝️🏼🌱
Water:
Osmosis water mixed with normal water (24 hours stale that the chlorine evaporates) to 0.2 EC. Add Cal / Mag to 0.4 Ec Ph with Organic Ph - to 5.8 .
Likes
42
Share

@MadeInGermany
Follow
Hey everyone 😀.
These weeks they have continued to develop very well 👍.
They have made a huge leap forward since they were repotted 😃.
They will be topped again this week, and will then move to the flower tent next week 😍.
I am very curious to see how it will develop until next week.
I wish you a lot of fun with the new update, stay healthy 🙏🏻 and let it grow 🌱🍀
You can buy this Strain at :
https://sweetseeds.es/de/cream-caramel/
Type:
Cream Caramel
☝️🏼
Genetics:
Blue Black
x
Maple Leaf Indica
x
White Rhino
👍
Vega lamp:
2 x Todogrow Led
Quantum Board 100 W
💡
Bloom Lamp :
2 x Todogrow Led
Cxb 3590 COB 3500 K 205W
💡💡☝️🏼
Soil :
Canna Coco Professional +
☝️🏼
Fertilizer:
Green House Powder Feeding
☝️🏼🌱
Water:
Osmosis water mixed with normal water (24 hours stale that the chlorine evaporates) to 0.2 EC. Add Cal / Mag to 0.4 Ec Ph with Organic Ph - to 5.5 - 5.8 .
Likes
4
Share


@m0use
Follow
Alright going to compile all the results of the different harvests into this one report. Its easier to have all the pics in one place. They are all autoflowers, Best grown outdoors in my area as they finish on time and just before the rainy season where molds and WPM takes over anything.
So there is a lot happening in the pics. Took a pick of the planter after I harvested and of the plants hanging up, Some of them are in the bags from the freezer. All the plants where trimmed wet and frozen fresh expect the Blue Dream, They will all be getting turned into Bubble Hash once the weather gets a bit colder in my area. Will do it on the desk when its aorund 0c so freeze point but nothing to crazy.
Side notes, One plant grew a weird colourization thing and have dark and light leaves on one branch. looked kinda neat, and one of the plants I found a bunch of hatched eggs "maybe butterfly??" on one of the undersides leaves. Will not know harvest weights or anything till after I transform it all into the hash. Most of the plants weed and not weed grew roots outside of the planters and across the deck boards, kinda fun to see when moving the planters. Had a velcro like effect to them.
Many of the plants did not even survive a week past germination or did not germinate at all. I did not included these into the report and most of them where from older seeds. One of them was not but it is a strain I have known to be a little bitch unless everything is perfect and easy. so not the best genetics overall.
Out of the ones I did grow and that survived they are listed below.
Fast Buds CBD 20:1
This plant grew small in both containers it was placed in and did not excel very much, it had an ok growth pattern but nothing to write home about, Likely best suited for an indoor growing environment. vs outdoors, Need to try this one again in a better pot or indoors. Curious about its flavours and potential when given more of a ideal environment.
Exotic Seeds Strawberry Cola
This plant did well in the small container it had, Made some nice looking buds for what it was dealing with, Did not have the best sun vs some of the other plants and showed a bit of WPM at the end of the harvest on one of its leaves. If it was grown is a large container like some of the other well performing plants im sure it would be a bit better but still a squat plant, perfect for my stealthy grows where you need things contained a bit more.
Ganja Farmer Blue Dream
Did well, had a few of them growing in smaller pots and one in a big pot. the smaller ones where not worth doing anything with, really needs its own pot not shared and good amount of medium. it will thrives. Plant had no real issues and grew well.
Ganja Farmer Gorilla Cookies
This was the best performing auto out of them, It had the bigger plant and took up the most room. It was in a planter with a smaller plant and it did not make it. The Gorilla Cookies overtook it and excelled heavily. Great buds and nice frost, if I had more I would grow this one again. TBH any of the Gorilla line up from Ganja Farmer has been very impressive outdoors for me. I have tried a few of their other strains and had some issues from smaller plants and pests but the Gorilla mixes and lineup is a winner for sure. Would recommend this to anyone who just wants to set it and forget it and feed every so often.
Fast Buds Apricot
This was the 2nd best performing plant, it was just a bit smaller then the Gaja Farmer plants and they where located beside each others planter boxes. The Apricot did share its space with another plant that grew to a descent size so it was share more of its resources then the cookies. another good option to have for an outdoor grow, just let it be and harvest end of it all. Great smells and looks, would grow it again for the smell alone its nice when you walk past it and bump it then waft the sweet nectar of the plant.
Seedstockers Blackberry Gum
Very tasty plant and excellent aroma off of it. It came out strong and grew very well. It was planted with another seedstockers plant that did similar and had a great overall success. Of the two plant that popped off one was more fruity then the other and the other was more sour. All of the plants I grew from SeedStockers this year where great growers and produces. Will do them again and again if I have the chance to. They don't seem to have duds in the seed like the others ones did, and they where just as old as the oldest ones. So they last for a while.
Seedstockers CBD 1:1 Silver Lime Haze
This was the plant growing inside the same container as the blackberry gum. It had a great hazy smell, sour and hints of cirtus. Like the other Seedstocker seeds it had two that popped up and one of them was more diesel. When trimming this one it was oliy as fuck. I have no doubt if I pressed this stuff for rosin it would be a heavy producer. Love the 1:1 ratio of CBD to THC and think more strains need to do this. I remever reading something saying when there is aorund 1-2% CBD in the weed it can make its effects even stronger.
Fast Buds OG Kush + SeedStockers O.G. Kush
these two where to be a grow off between each other and find out what one is best. They had similar growth to each other and one of them go so top heavy it bent over. I will know more about these ones once I crack the bags and give them a test once all the processing is done. OG Kush was one of the first ever strains I grew and did it very well under low wattage and blue light. It has a special spot in my heart even if I did not like the high or taste all that much as many others do.
Well that is it for now. I may comeback and edit of this and add more bits. Any questions let me know in the comments or send me a DM.
