


Likes
Comments
Share

@Marijuanaut
Follow
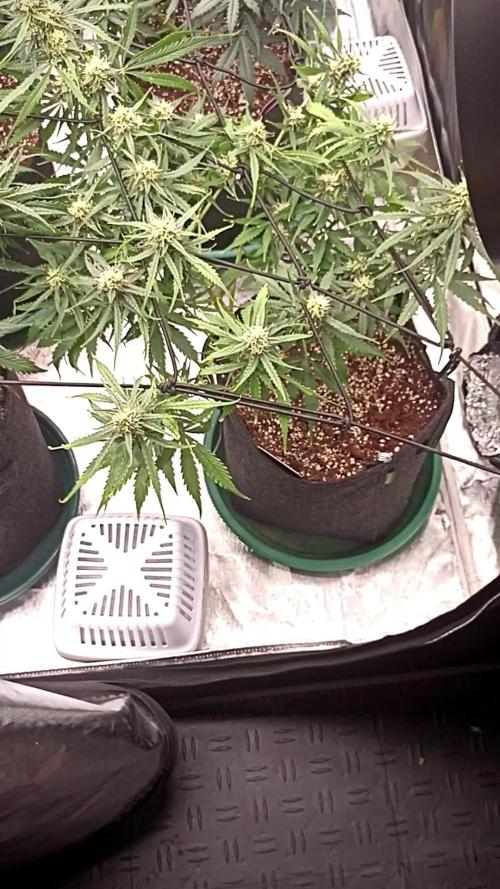
Look awful... I know! 😔
Wasn't planning to LST these, but one of them was stretching more than I had anticipated... seemed pretty flexible still so decided to give it a go! 😅
I know its a bit late in the process, but lets see how they respond! 😉
Group video included to compensate. 😎

Likes
4
Share


@Northern_Ent
Follow
Sep 8: surprise hailstorm last night did some damage. Heavy buds were causing the stems to topple so harvested first round. First round 270 g wet.

Likes
13
Share


@KAPT_SAVE_Da_HOE
Follow
She's nearing harvest and has about 2 weeks maybe less. Depends how desperate I get for smoke. Could be gone next week.
Likes
23
Share


@drzoidberg
Follow
little bit of yellowing on a couple bottom leaves going to give some cal/mag and see if that helps have been slowly clipping leaves off the plants as needed trying to keep from stressing her out so i have been tucking when i can

Likes
2
Share


@gr3g4l
Follow
A los 15 dias terminé deshaciéndome de la nº6 y resitué las plantas dejando en medio la segunda más peque , la nº2.
A los 17 dias una poda de apicales nº1 nº3 nº4 y nº5 . La nº 2 la dejé para que crezca un poco más y así también poder hacer la poda sin dificultad.
A los 19 dias podé el apical de la nº2. La del medio.
After 15 days, I finished removing plant #6 and rearranged the plants, leaving the second smallest one, #2, in the middle.
After 17 days, I performed apical pruning on plants #1, #3, #4, and #5. I left #2 to grow a little more so I could also prune it more easily.
At 19 days I pruned the apical bud of number 2. The middle one.

Likes
32
Share


@Weediz
Follow
Day 55: I have finally moved the girls inside the tent :) On 1 of the 2 girls I see some brown spots, and some yellowing and are thinking something is wrong here? I think it might be a Mag + Calcium Deficiency and I think I should up the PH a bit, but what du you guys think? The other girl looks healthy and fine, although I see some light-green color, but not too much. It might be a beginning of what the other girl is suffering from. I have not measured my run-off water for some time, as I am having trouble with my meter, and are falling back to the color-tester (drops) which are far from accurate. I also got my reverse osmosis system, and I now get 0.08 EC water. My water was 0.9 EC before so I'm happy with that. Also the PH has dropped from 8.5+ to around 7.0-7.5 so I think I am able to make a more stable PH change with acetic acid
Thank you for all the answers!. I am now going for ph 6-6.5, and I have also increased the nutrients I use, as I am now using RO water. I am also setting up my lamp from Mars Hydro today, pictures follows tomorrow

Likes
4
Share

@cangrowz
Follow
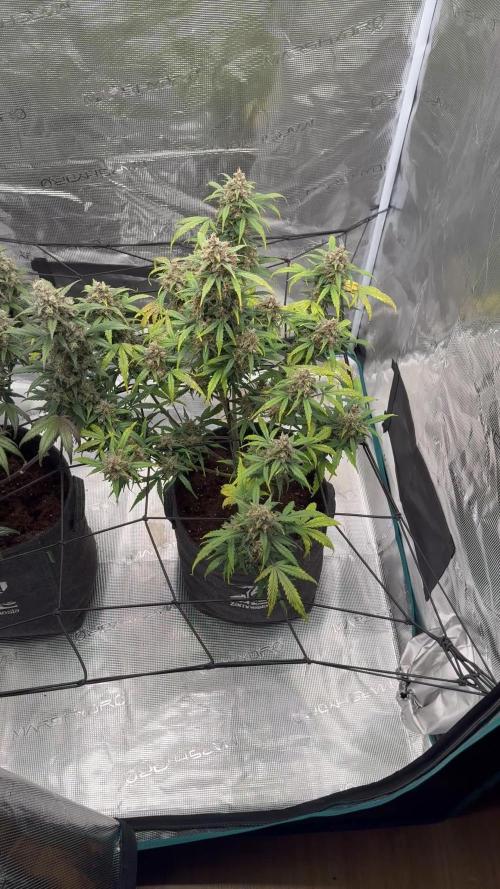
So wir neigen uns dem Ende von diesem Grow, Denke eine Woche lasse ich sie noch stehen. Dachte nicht die beiden bauen nochmal so auf. So im großen und ganzen bin ich sehr zufrieden mit dem Grow gewesen. Einen letzten Nachtrag nach der Ernte mache ich noch. Der nächste Run wird Lemon Haze :)

Likes
41
Share


@PrairieFrostGrow
Follow
********** Week 2 of flower, Days 8 to 14 - Sept 26 to Oct 2/20 ***********
It has been an exciting week with finding a crack in a main stem and started plus we added new supplemental nutrients to the feed as well. These girls are starting to push out some frost now as well. Overall, they are a little more squat than the other girls in the same tent but these girls are looking awesome. Buds are setting and starting to stack more as well😃 Pretty solid growth and bud sites for week 2 flower.
Her leaf tips have been up and she is happy........she is happy all the time other than the first half hour of waking up😃👍 Very nice little girls to grow so far. The branching is certainly a little more lateral/horizontal than other strains I have grown. Could be that I was a little more aggressive with topping and tying down and they simply didn’t need it. She is not a long lanky strain and is making nice little bush shapes. She won’t have many colas but should be thick guys. C471 should be fewer and thicker while C472 will have a couple more colas but likely the main ones won’t be as thick as C471.......time will tell🧐
On Sept 28 I found a crack and had to do some repairs. Cream 471 was worse off the Gorilla Girl 4 with her cracked stem. GG4 was caught early enough that she didn’t separate much at the base. Looks to be as though I have caused the issue by topping the main stem a little too low😢 Coming back though now and when she was tied together and looked after she is bouncing back, its crazy how these plants can heal themselves😀💪👍 Took the tips from fellow growers and decided to try and fabric something with some cushion so that the straps holding the branches together don't cut into the branches. Needed another tool of the trade.......DYNAVAP to calm the nerves😀 because the grow has been going well and this set back has me pissed off as it is grower error😡 Seems to have worked out pretty well though and will keep our fingers crossed that the end result will be a frostier girl👊🤞
Switching the PK booster at the end of the week to Big Bud and started to add Rezin from Green Planet. Not much for Bud Factor X left so will run with Terpinator and Rezin as a replcement.
2nd layer of SCROG netting added early in the week, Sept 27/20. They are pushing out a good amount of leaves now and stretching so need to provide that added support for down the road.
IPM spray again this week, last opportunity, with Plant Therapy. There has been something in the tent and I think I have killed them. One more shot though to make sure and before there are too many bud sites. Love this product!!!!!! Works so well at getting rid of thrips and mites.
Little more detail........
Sept 26/20, Day 8
- Little heavier feed as they have not been watered for two days
- 4L - CalMag @ 2ml, Sensi Bloom, B52, Bud Candy, Bud Ignitor @ 1ml
- 830ppm and 5.7pH
- will start to let the pH rise bit now over next couple of weeks
Sept 27/20, Day 9
- 2nd SCROG layer added.
Sept 28/20, Day 10
- more microbes today
- 4 L - Microbial Mass @ 1.5ml, CalMag @ 1ml
- 290ppm and 6.3pH
- pH was a little high but left it...wasn't moving and then boom,,,,,,,oh well.
- Good amount of runoff today.
Sept 30/20, Day 12
- Heavier feeding today
- 5L - CalMag, Vitathrive, Rezin @ 2ml Rhino Skin, Bud Candy, B52, Sensi Bloom @ 1ml.
- repaired the cracked stem a little better tonight......was not sure how this girl will work out. Crack is fairly substantial.
- Try and keep the paper towels wet now so the humidity is high around the wound.
- Should have left a little more branch from the node above when cutting the top.
Oct 1/20, Day 13
- Switching PK booster today to Big Bud......these two girls are past bud ignitor.....already stacking.
- 3L - CalMag, Sensi Bloom, B52, Bud Candy, Big Bud @ 1ml
- 665ppm and 5.9pH
- IPM spray tonight again with Plant Therapy. Think I have seen some bug damage on Cream 47 girls.
That takes us to the end of week 11 in growth and week 2 of flower. Time will go quick now that we are off and running. Will be done feeding by early week 7. Want a good flush and leeching on these girls to get all the nutes out. I have been missing it by a few days on the last few auto runs and want this photo run to be better as I have a better track of weeks and when she will be done..........should be done by the end of week 9, about 7 more weeks.
Cheers Growmies and have a great week. Thanks very much to Mr_Motalovah and spacecadet55 for sharing your comments on cracking the main stems. Should be avoidable next time and appreciate the knowledge🙏👍 Nice strain Sweet Seeds.......these girls have my curiosity and can’t wait for the smells to start more as well!!!!👍🙏
Likes
28
Share


@Bongman
Follow
Into week three of flowering:
- Need to up CalMg this week cause all my last grows with this strain the plants were stressing and showing signs of Mg deficiency I think.
- The buds are stacking up pretty tight.
- The top of the plant is showing some red veins AGAIN, don't know if it is genetics? Or is it too much light? ANY SUGGESTIONS?
- Usually what happens is that after week three top of plant will show red veins and some leaves will turn light green yellow. What type of deficiency is this?
Thanks in advance for the help.
Happy growing,
BM
4TwenTee
*****Update on LIGHT STRESS:*****
Okay I think I got this figured out. Since my plant is showing the following symptoms:
- Slow yellowing of top of cannopy
- Fan leaves pointing up in a steep angle
- Leaves are tacoing up a bit with sharp pointy serrated leaves pointing up
- Veins are turning purple and some leaves are showing green veins and yellowing of outer part of the leaf
REASONS FOR THE SYMPTOMS:
- Since the light is too close to the top of the canopy, although my light is running at around 60% and it is at least a meter away from the light. I think because this was a mother and basically she is accustomed to top canopy PAR of around 180-220 and she was measuring around 600PAR so that is just too much for the plant to handle. So I've lowered the light output so the top canopy is around 420 PAR.
- Also my humidity is pretty high at around 72% so I lowered it to around 65%
- The reason why the leaves are tacoing up to the light is because the canopy cannot take the high PAR, the temp at the top of the canopy is only 76F so that is acceptable, but the plant is trying the sweat due to the high PAR, but because the humidity was also too high it was not sweating as much as it should.
- The reason why a light stressed plant shows different deficiencies eg. magnesium and phosphate is due to the "extra sweating" that takes place, cannabis plants don't choose what they intake, if they need more water to sweat, extra nutrients will be absorbed and this will lockout some of the other nutrients in the solution.
**End of week update:
Tried multiple changes but still no luck on getting rid of red leaf stem.
- Added a 1 hour sunrise and sundown light regiment
- Decreased Humidity to 65% from low 70's
- Top of canopy PAR decreased from 600 to 350.
Leaves red stems still not going away and top of canopy still trying to get rid of moisture with fan leaves pointing up.
If anyone can chime in that would be great thanks.


Likes
5
Share


@killerjoint
Follow
10-8-2024 TOP DRESSING AND WORM TEA.....
NOTHING MORE
10-9-2024 22ND DAYS INTO FLOWERING
SMELLS CRAZY ON THESE STRAIN
GETTING SOME SNOW ON TOP
LET'S GO
10-11-2024 DO NOT HAVE ANY PEST BUT JUST IN CASE
NATURESGOODGUYS HOOK ME UP WITH LADYBUGS
JUST GOT HANGING PATCH ABOUT /WITH SHIPPING
10-14-24 NOTHING TO DO...JUST WATER (PH6.6)AND WATCHING THE PLANTS.......
COPY CAT GENETIX STRAINS ARE CRAZY!!!!!!!!


Likes
35
Share


@forgettenseedling
Follow
Pflanzen sehen ok aus
Eine zeigt leichte Wachstumsstörung bzw. defizite, die anderen wachsen recht gut
Gab in den ersten Tagen ein Bewässerungsproblem mit überwässerung deshalb musste die Erde für ein paar tage erst wieder trocknen bis ich erneut gießen konnte.

Likes
7
Share


@KaeptenEinsicht
Follow
26.8. Mal abwarten was in den 2 Wochen noch passiert Ein oder Zwei Pflänzchen werden wahrscheinlich länger brauchen.... Abwarten und Tee Trinken ;D
28.8. Sie sind bis jetzt 44 Tage in der Blüte ;D
Likes
7
Share

@Rangaku
Follow
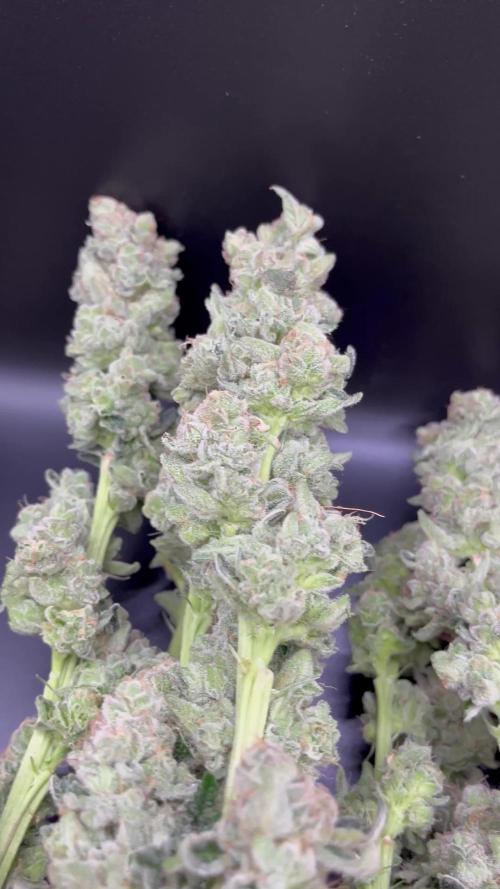
Pulled her out of the tent with a 10% amber trichomes, she’s megga frosty and sticky . Bit different this one from others of grown but uniquely brilliant. Buds are dense as anything , and from the sneaky smoke I had she’s potent as . I’ll add some more pics once I’ve trimmed the buds up and got em hanging.
Likes
32
Share


@WhiteWidow
Follow
All good here. Today i did some more defoliation, leaf tucking, and watering, lights were flipped 1.6.
Plants are healthy, growing like maniacs and drinking 3 liters every 3rd day
Countdown begins :)))


Likes
5
Share


@UhhDoiigreen
Follow
Received final hair cut beginning of week6 of flowering looking strong and amazing.

Likes
31
Share


@MadeInGermany
Follow
Hey everyone 😃
The time has come , On flowering day 67 the harvest was carried out 😍.
After spending two days in the darkroom at 62% humidity, they were now harvested cleanly by hand 😃.
After harvesting, they were laid out on the net as usual, where they can now slowly dry again for about 7-10 days at 62%.
Then they come with 62% in jars for 2-4 weeks, and then the 58% boveda packs are put in 👍.
Of course, I will come to the phenotypes themselves in detail in the last update.
Until then, I wish you all the best, stay healthy 🙏🏻 and let it grow 🍀👋
You can buy this Strain at
https://www.barneysfarm.com/blue-cheese-34
You can buy the fertilizer at
https://www.greenbuzzliquids.com/
Type:
Blue Cheese
☝️🏼
Genetics:
Blueberry
X
Original Cheese
👍
Vega lamp:
2 x Todogrow Led
Quantum Board 100 W
💡
Bloom Lamp :
2 x Todogrow Led
Cxb 3590 COB 3500 K 205W
💡💡☝️🏼
Soil :
Canna Coco Professional +
☝️🏼
Fertilizer:
Green Buzz Liquids :
Organic Grow Liquid
Organic Bloom Liquid
Organic more PK
More Roots
Fast Buds
Humic Acid Plus
Growzyme Big Fruits
Clean Fruits
Cal / Mag
Organic Ph - Pulver
☝️🏼🌱
Water:
Osmosis water mixed with normal water (24 hours stale that the chlorine evaporates) to 0.2 - 0.4 EC. Add Cal / Mag 2 ml per l water every 2 waterings . Ph with Organic Ph - Pulver to 5.8 .

Likes
58
Share


@AsNoriu
Follow
Day 74. One more victim of war against bud rot. Prevention needs sacrifices sometimes...
Day 78. Second was sacrificed for more space too ;)))
Day 84. First girl is Jared . Fantastic bud quality !!!
Day 88. I said fantastic quality about first one ??? ;))) That's till I touched second !!!
Purple phenotype is pure joy for eyes !!!
Happy Growing !!!
Likes
5
Share

@JVKdopegrow
Follow
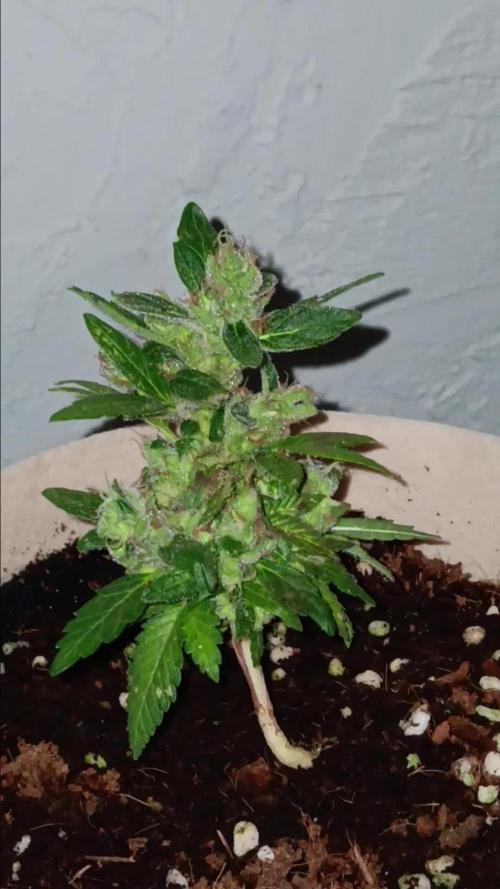
For a couple of runts I think I'll end up with a couple of blunts! Tight little buds. Lots of resin and great scent. I kind if wish I could just keep them going but they are nearing the end.

Likes
11
Share

@DogDoctorOfficial
Follow
🌱 White Widow – Week 3 | Structure, Strength & Setup
Genetics: White Widow (Zamnesia Seeds)
Light Schedule: 11/13 (Flower From Seed)
Stage: Week 3 – Preflower (no signs yet)
Structure: Compact, Healthy | Heading into 4th Node
Feeding: Aptus Full Recipe
Lighting: ThinkGrow Model One Bars + Future of Grow Black Series 600W
Control: Full TrolMaster Ecosystem
⸻
Three Weeks In – Compact & Confident
Here we are, Week 3, and White Widow is showing us her best early form. She’s:
• Tight in internodal spacing
• Vibrant in color and leaf health
• Low & strong, with no stretching yet
• Just pushing into her fourth node and still no signs of flowering, exactly what we’d hope in this phase, given our light cycle
She’s not rushing—she’s setting her foundation.
In an 11/13 light cycle, some might expect earlier preflower signs, but not all strains respond immediately. And honestly? I’m loving this slower, more intentional rhythm. She’s taking her time, and that usually means she’ll stack smart, not wild.
⸻
💧 Feeding Routine – Gentle, Consistent Support
Even though she’s rooted in a rich super soil blend, we’re continuing to assist her via the feed water with a light, targeted Aptus mix:
Current Feed Recipe:
• Aptus Regulator – 0.15 ml/L
• CalMag Boost – 0.25 ml/L
• All-in-One Liquid – 1 ml/L
• Start Booster – 0.25 ml/L
This isn’t about force-feeding, this is about helping the soil activate and harmonize, giving her what she needs before she starts asking for more. The mix keeps her cell structure strong, supports microbial life, and encourages consistent early root development.
She’s loving it and it shows.
⸻
💡 The Environment – Light & Movement
This week, she’s been bouncing between two active grow zones, as we continue to refine the entire setup. It’s all managed within the TrolMaster ecosystem, offering precision control over both lighting and environment.
She’s currently rotating between:
• ThinkGrow Model One Bars – soft, powerful full-spectrum LED bars with excellent canopy penetration
• Future of Grow Black Series 600W – full spectrum, deep reds for flowering intensity
Both are synced and monitored through TrolMaster, giving us:
• Consistent PPFD targets (250–400 µmol/m²/s for now)
• Environmental tracking for temp, RH, and VPD
• Freedom to adapt space as needed while the grow evolves
🎛️ Why this setup?
Because we’re still dialing in the room and flexibility is everything. She’s adjusting beautifully to these shifts, showing no signs of stress. A real soldier.
⸻
👀 What to Expect / What Not to Expect
Expect:
• More node development, maintaining compact shape
• Flower pre-signs within the next 7–10 days
• Slow, deliberate shift toward stretch (if she chooses to stretch at all)
• Stronger feeding signals as roots fully colonize the pot
Not to Expect (just yet):
• Pistils or heavy flower behavior
• Wild vertical growth
• Deficiency signs (thanks to our balance and microbial boost)
She’s exactly where she needs to be.
⸻
🤝 Gratitude & Shoutouts
Huge thanks to the partners helping this journey become a reality:
🌱 Zamnesia Seeds – for delivering timeless classics like White Widow and keeping the legacy alive
🔧 Aptus Holland – for the precision nutrients that support both living soil and direct feeding
💡 ThinkGrow – for elegant, pro-level light bar systems that keep our canopy even and calm
🚀 Future of Grow – for the Black Series 600W, bringing serious intensity and bloom readiness
🧠 TrolMaster – for letting us control every detail, from light to leaf, with precision and peace of mind
⸻
💚 Final Thoughts – Week 3
This White Widow is more than just a plant, she’s a rebirth after a rough start, a solo performance, and now she’s writing her own pace into this grow.
No rush.
No shortcuts.
Just care, balance, and a slow, steady climb toward bloom.
We’re watching closely, learning daily, and adjusting with love. Thank you for walking this path with us. More to come soon 🌿
#WhiteWidow #ZamnesiaSeeds #Week3Update #ThinkGrow #FutureOfGrow #TrolMasterControlled #AptusPowered #GrowDiaries #11_13FromSeed #FlowerFromSeed #LEDGrow #CannabisCommunity #GrowYourOwn
📲 Don’t forget to Subscribe and follow me on Instagram and YouTube @DogDoctorOfficial for exclusive content, real-time updates, and behind-the-scenes magic. We’ve got so much more coming, including transplanting and all the amazing techniques that go along with it. You won’t want to miss it.
• GrowDiaries Journal: https://growdiaries.com/grower/dogdoctorofficial
• Instagram: https://www.instagram.com/dogdoctorofficial/
• YouTube: https://www.youtube.com/@dogdoctorofficial
⸻
Explore the Gear that Powers My Grow
If you’re curious about the tech I’m using, check out these links:
• Genetics, gear, nutrients, and more – Zamnesia: https://www.zamnesia.com/
• Environmental control & automation – TrolMaster: https://www.trolmaster.eu/
• Advanced LED lighting – Future of Grow: https://www.futureofgrow.com/
• Root and growth nutrition – Aptus Holland: https://aptus-holland.com/
• Nutrient systems & boosters – Plagron: https://plagron.com/en/
• Soil & substrate excellence – PRO-MIX BX: https://www.pthorticulture.com/en-us/products/pro-mix-bx-mycorrhizae
• Curing and storage – Grove Bags: https://grovebags.com/
⸻
We’ve got much more coming as we move through the grow cycles. Trust me, you won’t want to miss the next steps, let’s push the boundaries of indoor horticulture together!
As always, this is shared for educational purposes, aiming to spread understanding and appreciation for this plant. Let’s celebrate it responsibly and continue to learn and grow together.
With true love comes happiness. Always believe in yourself, and always do things expecting nothing and with an open heart. Be a giver, and the universe will give back in ways you could never imagine.
💚 Growers love to all 💚
Likes
10
Share


@Audi_grows98
Follow
Gorilla cookies has been thriving and starting her transition into flower,super excited to see this one chunk up🔥💚
Cherry cola is transitioning very nicely,taking very well to the feedings and all training. Super excited to see this one chunk up as well🔥 Both cultivars are right on schedule and thriving nicely 💚