


Likes
Comments
Share

@MR_S_theGardener
Follow
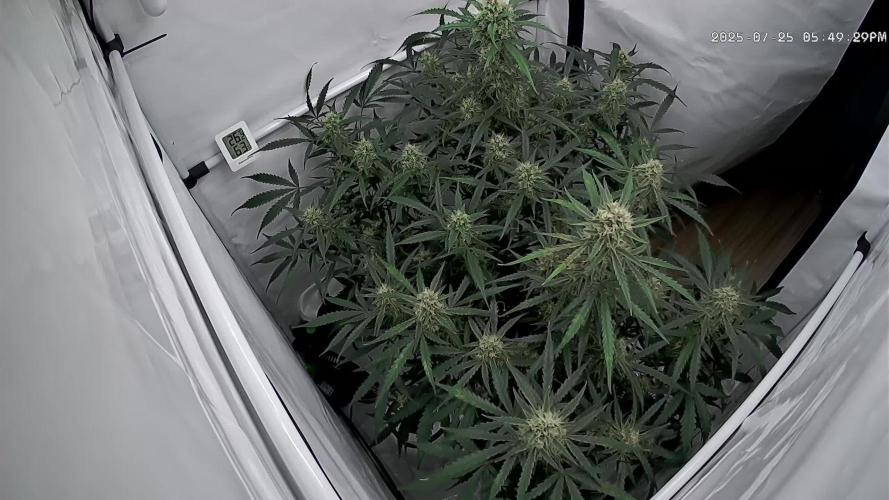
Beide Z-ups haben sich toll entwickelt, sowohl von der Reife als auch in der Masse. Das war die letzte Woche mit Dünger und nächste Woche gibt es gibt es dann nur noch flawless Finish, vielleicht auch noch zwei Wochen.


Likes
10
Share


@BelgianBudtender
Follow
Heya growmies!
not much of note happening, buds slowly fattening up even more, I doubt she has a whole 3 weeks left to be honest.
She's still drinking 3.5 liters of water every day though, maybe she'll get even fatter


Likes
103
Share


@Schnabeldino
Follow
_____ Week 9 | Day 56 - 63 | 2nd week of Flower ______
Day 64 🌞💧
- each Plant 3 Liter, with small drain
- i give her 25% less fertilizer than indicated by Advanced...
Day 68 🌞💧✂️
- each Plant 3 Liter, with small drain
- defoliation and starting with Lollipopping.
____________________________________________________________________________________________
Light - 12/12 h - 560 Watt
- 2x 200 Watt Toplight
- 4 x 40 Watt Lightbars
PPFD - 900 - 1000 µmol
Temp. avg. - 23,0°
Hum. avg. - 64 % RLH

Likes
7
Share

@MrLahey
Follow
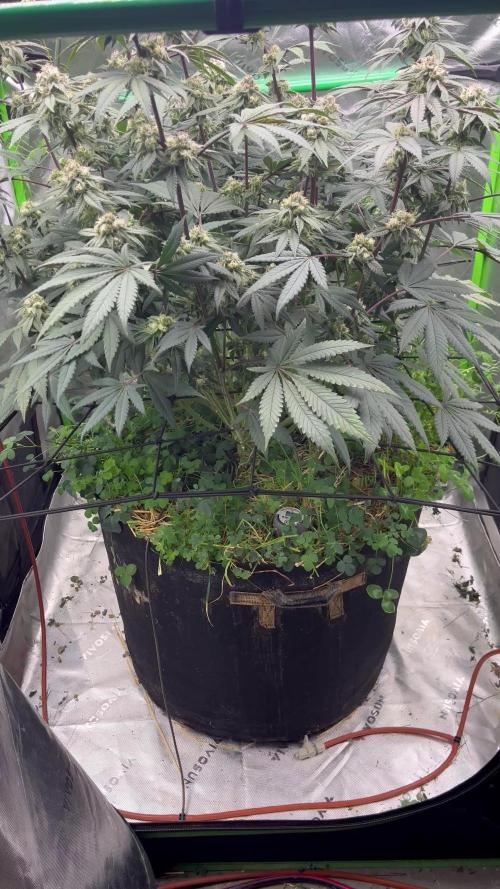
Day 37 of flower and she smells absolutely blissful. 😍
The buds are really starting to look very colorful too and there could easily be another 30 days left before harvest. When she is ready to be chopped I have a feeling she will look amazing. Can’t wait to get my camera out and do some macro focus shots.
This cultivar or phenotype in particular is THIRSTY! It’s possible that the water consumption is also due to the clover but I’d imagine it’s a combination of the clover and the root system of this plant perhaps. She’s still going through a little over 2 gallons of water a day. I bought the blumat to be able to go out of town and not worry about the plant drying out and now I realize I’d need a much bigger reservoir than the 5g bucket I have. I contribute the plants late flower health to the watering consistency of the Blumat. What a game changer proper watering is, haha. All of my flower deficiencies with past plants were really underwatering symptoms from too much dry back maybe.

Likes
7
Share


@Ashbash
Follow
Just trying to maintain a balance now until they stop drinking so much. #1 looking to be a foxtail style plant where as #2 is looking much more leafy so definitely 2 different phenos here.
Starting to get a distinct orange/citrus smell from them :)

Likes
17
Share


@Chucky324
Follow
Hello. This is the end of week 4 and the beginning of week 5 of flowering.
Things are going good this week. I see a few yellow leaves on the bottom which is normal.
It smells like sweet candied mango in here. Wonderful or should I say Delicious!!
I am seeing some small, Thrips signs, on a few leaves, but nothing to worry about.
They are over their trimming/pruning up stress now and are bulking up. I see the resin is in full production now.
They are getting small amounts of food each day from the hydroponic system. And I hand watered with rain water yesterday. Each plant got 2 gallons.
The reservoir lasts 6 days and 7 if I add the dehumidifier water to the reservoir daily. Easy Peasy.
I read this article on hypochlorous acid and wanted to make my own rather than buy stuff to kill pests and handle fungus. I now have something I can whip up in 1 hour that can handle most problems I deal with inside and outside. The article said to use it at 1/2 strength inside and I would put plastic over the pots to keep it off the roots. Sounds good. We'll see.
Be Great. Chuck.

Likes
5
Share

@xTaps
Follow
23.08
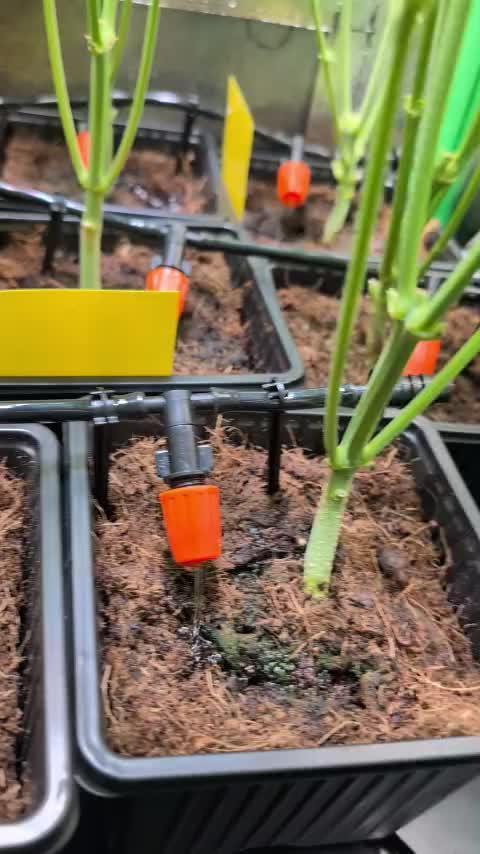
The Drainmaster moved into the tent to control the drain.
Defoliated and lollipopped them.
25.08
First run with the drain system.
Nutrient Solution (Tank):
Volume: 8.5 L
EC: 3.05
pH: 5.5
Nutrients: Advanced Nutrients Micro/Grow/Bloom + CalMag
Irrigation Run:
Pump time: 30 minutes
Total Drain: 5.0 L (≈ 60%)
Drain EC: 2.6
Drain pH: 6.0
🔎 Observations
Drain volume was far too high (target is ~20%).
Drain EC lower than input EC → medium was relatively “empty”, plants absorbed nutrients quickly.
pH drift from 5.5 → 6.0 shows some buffering effect left in the reused substrate, but limited.
Substrate behaves more like coco than soil now (low buffer, fast response).
💡 Insight / Lesson Learned
30 minutes pump time is way too long → resulted in 60% runoff instead of 20%.
For 8 × 1 L pots, a single irrigation event should be ~1.0–1.2 L total, with ~200–250 ml runoff.
Solution: shorten pump time to ~5 minutes and re-test runoff.
Better approach: run shorter, more frequent irrigations (daily) with a lower EC (2.0–2.2), instead of heavy feedings (EC 3.0) only 3× per week.
This will keep EC more stable in the root zone and prevent salt buildup in the tiny 1 L pots.
27.08
Adjusted the pump timer to 5 minutes, gave the first dose of PK13/14.
Processing
Likes
3
Share


@XxBILLZAxX
Follow
Curling is still a problem still :(
A rainy week so high humidity all around... looking tasty though! Buds are getting bigger and sticker!


Likes
5
Share


@CuriosityWebster
Follow
Been a while since I could update, had some personal issues going on
About a week ago I had nutrient lockout on the wedding cheesecake ff and purple bastard eater
Flushed them and now they have been bouncing back
Added a couple more babies into the mix and well as trying clones for the first time


Likes
8
Share


@ElchichodelaGrasa
Follow
Muy satisfecho de esta semana ya que parece que están avanzando todas satisfactoriamente, la única que parece haberse quedado atrás es la Glookies y a parte hemos añadido una Watermelon Zkittlez x Animal Cookies y otra Banana Slurricane, parece que cogen fuerza a pasos agigantados 🔥🔥

Likes
3
Share


@GoodTimesOrganics
Follow
Die Ice Cream Haze performed mega und dass Aroma Profil ist unbeschreiblich.
Süß, ein wenig wie Zuckerwatte und Schockofrüchte mit einem leichten Zitronen Haze Aroma.
Ehrlich gesagt, kann ich es kaum erwarten, diese unfassbar Aromatische Sorte zu testen.
Sehr viele glitzernde Trichome und funkelnde Zuckerblätter.
Ein echter Hingucker.


Likes
38
Share


@Roberts
Follow
This fruity Pebbles started struggling, and had a ph bottom out. I did a solution change on both today. Everything has been looking good beside the last 48 hours. She should be good to go and bouce back immediately🤞🏻. Thank you I Love Growing Marijuana. 🤜🏻🤛🏻🌱🌱🌱
Thank you grow diaries community for the 👇likes👇, follows, comments, and subscriptions on my YouTube channel👇. ❄️🌱🍻
Happy Growing 🌱🌱🌱
https://youtube.com/channel/UCAhN7yRzWLpcaRHhMIQ7X4g

Likes
6
Share


Likes
17
Share


@German_GrowLab
Follow
Einen wunderschönen guten Tag, liebe Grow-Community, und herzlich willkommen zur neunten Woche meines kleinen Outdoorprojekts!
Heute dann doch mal wieder an einem Montag :). Ich habe es nach dem Mary-Jane-Wachenden leider noch nicht nach Hause geschafft. Allerdings habe ich paar Bilder vorproduziert, um hier nicht mit leeren Händen aufzutauchen.
Ich bin die letzte Woche ein wenig durch die heimischen Wälder flaniert und habe den ein oder anderen Schatz bergen können. Aber alles der Reihe nach …
Da ich messbedingt nicht bei den Pflanzen sein konnte und das mit dem Gießdienst an Dritte abgeben mal so, mal so funktioniert. Dachte ich mir, man muss der Verdunstung und der damit einhergehenden Trockenheit etwas entgegensetzen.
Ich habe mich als kurz und knapp für eine Mulchschicht entschieden. Diese schützt nicht nur vor Austrocknung, sondern macht ebenso die obere Erdschicht für die Durchwurzelung brauchbar. Sie ist obendrein ein weiterer Schritt zu einem gesunden Bodennahrungsnetzwerk. Dieses wird durch die in dem auf dem Grünschnitt/Waldlaub enthaltenen Mikroorganismen (Protozonen, Wimperntierchen), welche durch das Belüften im Tank nochmals gefördert werden, noch einmal gestärkt. Last but not least führt der Mulch dazu, dass Schadorganismen das Einfallen in die obere Erdschicht erschwert wird.
Aber was ist drin?
Ähnlich wie schon beim Komposttee wird bakterienreiches organisches Material in einen Tank mit vorzugsweise Regenwasser gegeben und anschließend über einen gewissen Zeitraum belüftet (siehe Woche 5). Der wohl größte Unterschied zum Komposttee ist, dass wir eher auf das Material und nicht auf die Flüssigkeit aus sind. Dieses besteht zu ca. 90 % aus Grünschnitt (in meinem Fall eine Biokleintiermischung) und zu ca. 10 % aus Laub, welches ich in einem wenig bis gar nicht bewanderten Waldstück gesammelt habe.
Die richtige Platzwahl:
Bei der Platzwahl war mir wichtig, einen möglichst naturbelassenen Teil des Waldes auszusuchen, um eine Kontaminierung von bspw. Müll oder Hundeurin zu vermeiden. Ebenso habe ich nach Material Ausschau gehalten, welches schon Kontakt mit einem Pilzmyzel und dem ein oder anderen Regenwurm aufwies. Beides sind Indikatoren für ein gesundes Bodenleben.
Zum Schluss …
Nun einfach alles in einen großen Tank, Wasser drauf und Pumpe an. Belüftet wurde das Ganze für drei Tage. Danach das Material entfernen und luftig um die Pflanzen aus Ringen (leicht in den Boden einarbeiten). Um mit so wenig Waste wie möglich zu arbeiten, habe ich dann noch das Wasser gegossen. Dieses ist sehr reich an Mikroorganismen.
Aber nun (besser spät als nie) noch ein paar Credits:
Und zwar an Flo von Florganics, von dem ich das meiste Wissen um den Komposttee, die Erdmischung sowie auch das Mulchen bezogen habe. All die genannten Themen sind nochmal deutlich detaillierter auf seinem Yt-Kanal (Florganics) zu finden.
Noch ein kurzes Wort zu den Damen:
Soweit sehen alle sehr saftig und grün aus. Mit dem Toppen warte ich noch, bis ich wieder da bin. Alles in allem sollte am Ende doch ein wenig herauskommen (im Optimalfall 50 g/Person).
Das war’s für diese Woche. Euch nun einen schönen Restmontag und einen guten Wochenstart.
Peace


Likes
10
Share


@Mikeinthekeys
Follow
Pulled a sprout out and planted in another pot. started another diary for that one but its not looking so good.