Likes
Comments
Share
Week 10: July 31st Weekly updates: - Stretch is taking off, same with bud formation, no smell really yet, did a good lollipop today, keep finding larf sites. - when stretch halts I am adding 1/3rd dose of monster bloom to one… maybe both.
Likes
15
Share
Apple Strudel is a BEAST!!!💪 She is quite a large auto. Spent the first few weeks of flower growing in size. Hopefully I have raised the light for the last time. Finally starting to fill in & stack some flower. This girl is going produce something special! Already has some nice frost and is smelling yummy! Excited to see what she does in the next few weeks.
Processing
Likes
21
Share
Well 🍪🍪🍪 that's my first one and hopefully I will manage to grow a big healthy girl without too much hassle. I planted the seed on the last day of 2019 and germinated on 4th of January with some emotions. After two days in the germination room I transferred it in the smart pot from RQS which they say it's for 11 l but I managed to fill it with 20 l of organic soil mixed with GROW CAPS. Follow my journey and help me with your advices. What do you think? It's a good start or not so?
Likes
2
Share
I absolutely love to watch them grow! Especially that moment they hit their first growth spurt. I started with RO water that is remineralized for drinking purposes. The ppm is only 18! My tap is 156! So considering they don’t need much water, I’ve been stealing some of our drinking water. The RO water starts at pH of 7. After I add the nutrients, ppm of 249 @ pH of 5.8 while soil is still sweet @ pH of 7 I think my days are off as a new week begins on the last day of the previous week. I am going to leave that for consistency. 04/21 - Noticing some possible nutrient issues with the Fruity Pebbles for several days now. Going to see what she needs. Up front I’m thinking maybe just a super small amount of Amino Acids with a little Epsom Salt. Maybe she is struggling to access the nitrates from the neem cake. IF it’s a issues with nitrogen. We will see. Maybe she would benefit from some extra calcium?… Any ideas are greatly appreciated. Day 22 and I am noticing how these girls have been burning up a lot of potassium lately, dealing with the wind and sun 💨 ☀️, getting pushed around all day. I plant to top dress with some Kelp Meal pretty soon. Day 24 -> 4/22/22- a quote from the weather on today’s red flag warning and dust storm warning. “ HAZARD...Less than a quarter mile visibility with damaging wind in excess of 60 mph. SOURCE...Satellite imagery. IMPACT...Dangerous life-threatening travel.” I’m keeping the girls inside today. Day 26, I was planning to check the runoff on some of these girls, especially the fruity pebbles, however I messed that up as I also top dressed WAY too much of the seaweed bliss. So I flushed with plain RO water at pH of 7 until there was only slight coloration in the runoff. I didn’t check the runoff as a lot has changed with all that flushing. So next watering/feeding I will make sure I check the runoff on multiple plants. So the seaweed bliss with its 17 on potassium, seems to be the most likely culprit for why there is a bronze-ish color on the inside of the new growth. Hopefully a foliar feed of Epsom salts can correct the problem. Inside tent, lights on LOW. Noticing similar pattern in all of them to a degree, most noticeable in the fruity pebbles.
Likes
17
Share
@Hoodoo
Follow
2020-07-05 New week. Reduced nutrients because of the slight burn on plant 2... and plant 1 drinks so quickly that it rapidly raises PPM so I have to actually find the right sweet spot. It's drinking about a gallon a day? Plant 2 is still a week behind and slightly stunted but the flowers are coming out. They are more compact than Plant 01. This is supposed to be the same species but I'm getting 2 very different phenotypes on the exact same nutrients.. not very strong genetics? Not sure. 2020-07-05 2020-07-05 2020-07-08 Forgot to take pics this week! Here you go! Plant 01 has grown so insanely strongly and is producing so many nice looking bud sites, i am blown away!! I have had to 'supercrop' the top by bending the stem very carefully and adding a wire knuckle so that it wouldn't immediately just stand back up overnight. I tried this with 2 experimental colas and they perked back up and stayed laying down. They will slightly obstruct the lower flowers but the tops all looked so promising, I couldn't bring myself to cut them. I will seriously have to cut down on veg time next grow! I can easily stop at week 5 in the future with these seeds and grow up nice buds. 2020-07-11 Updated with yesterday's photos. Changed nutrients today, stuck with 1600 EC for plant 01 and went back down to 1400 for plant 02.
Likes
49
Share
Coming along nicely now apart from alittle cock up yesterday where I accidentally topped her while trying too lst but I have managed too tape the stem in place so I am hoping my little cock up will force the lower branches too shoot upwards while the broken stem heals , This week I had too change my lighting too 600 true watts of kingbo dual optical LED range due too the temps getting closer too 30c than I would like , and by doing so I have now got a constant temp of 27c lights on and 18c lights out, Update on day 4 or week 3 , My little cock up snapping the main stem while trying to lst the tape seems too have really don't the trick , and although snapping the main stem is not ideal lol , It seems I've managed too top this plant and still get too keep the top , the leaves all look fresh and healthy and feed so I will leave the tape on there for two weeks and then try and remove it as all I had too hand was selotape lol The breakage really do not seemed too affect the top 2 nodes at all apart from trigger the lower plant too stretch out , as this break was bad , like hanging on by a thread bad , so really shocked it took too the repair so easily , and as always I had just been leaching the soil with a single feed that lasts them 7 days , my set up is completely automated and I only go too the grow space once a week but I have a WiFi cam inside the grow space so I can check the temps and how dry the pots are just incase I need too increase the feeding , but too be fair these autos seem too have a mad feed at week 7 and 8 and then drink one feed per week , keeping it simple has helped I think as the plants seem too love it , and I don't need too do anything apart from check the camera , And that's just the way I like it , I pay special attention too the temps in my grow space and a calculator in hand for the nutrients , Other than that I leave them alone too do what they do , I will take some end of week 3 pics over the weekend at some point it's abit of a drive so once a week suits me down too the ground , :) Update on day 5 of week 3 well as you can see from the photos this week has had a huge raise in production , the breakage I did too the main stem has completely healed it's self and the plant has bushed right out at the bottom and top of the plant where it broke , So all in all my little cock up has actually helped the plant grow larger , I today gave them a smaller defoliation basically anything covering a branch that could not be tucked under it I removed , This is too get as much light too these spots as possible too get them too develop before flowering starts , But so far so good , temps are good and no nutrient burns on any of the plants , and the results from day one / first feed on green buzz nutrients too this photo today day 5 is dramatic , the photo of all four was before defoliation , but the defoliation has just shown how busy they have this week and the bud sites on this things already is crazy , my next plan this week is too put the net in there and space out all of the branches too give the best spacing between the breaches
Processing
Likes
17
Share
1/14: All 3 are looking great! This morning, I did a foliar application of big bloom and fulvic acid, then about 5 hours later I watered them with about a half-gallon of rainwater each and added armor si, humic acid, endoboost myco/tricho, liquid molasses, and a bunch of cal-mag. Today, I also I wired up and mounted my new samsung sun board strips (660nm/730nm) and my Solacure FlowerPower UVB fixture. I'm running the deep red/far red bud boosters a few hours per day right now, but will run them for the entire photoperiod once I start flowering them. I'll run the UVB for 4 * 15-minute sessions a day for the full flowering cycle, and if they don't protest too much I'll increase each session by 5 minutes and evaluate again. Some strains are more forgiving than others and I've got 5 different strains in this space...so really not sure much time I'll get away with exposing them to the deadly rays without damaging them too much...😈 1/15: I received one of the rapid led/growmau far red initiator pucks today. With the placement of my UVB light, I'm realizing I'll need another far red puck to have even and intense far red coverage, so I'm ordering another with Prime delivery and waiting to start flowering until I receive it. I sprayed them down really well with ph adjusted rainwater tonight to rinse off nutrient build-up from foliar applications. 1/16: I'm really excited to try flowering under 14/10. I grew photos indoors on an off for 15 years before I semi-retired. If I added up all the additional flowering time I could have done through the years if LED technology existed, I'd have had an extra truckload of bud to smoke. I did another application of Axiom Harpin a|b Proteins this evening, right before dark. I'm expecting a big growth burst this week, leading up to the flower stretch. I really need them to trigger under 14/10 within 4 or 5 days🙏 ...if not, I'll switch to 13/11 and wait a few more days🙏😟..if still no pistils are poppin, I'll go to 12/12 and chalk it up as bad luck or varietal indifference to Pr and Pfr manipulation. 1/17: I fed each of them about 3/4 gallon of full strength veg nutes. This will be the last. I'll go with half-strength veg and half-strength bloom for a week, then go with full strength bloom nutrients until I start flushing them in 6-8 weeks. 1/18: I installed the second far-red flowering initiator today and got all my timers configured for flowering: ========================================= timer#1 - power strip with qb's and red boosters 10:00am -12:00am timer#2 - (dual/independent setting) sideA- 3-way cube with uva bars 10am - 3pm 7pm - 11pm sideB- flowerpower uvb 1pm - 1:15pm 4pm - 4:15pm 7pm - 7:15pm 11pm - 11:15pm timer#3 - far red pucks 11:00pm - 12:15am timer#4 - sub-canopy tube 10am - 1pm 3pm - 6pm 8pm - 11pm ======================================== I also did some testing on the timers and sealed myself into the closet to check for any light leaks. All good.👌 1/19: Tonight is their first long night. It's ON!👍 1/20: I watered them today with about a half gallon each. I'm seeing calcium and magnesium deficiencies here and there, so added some boomerang and heavy cal-mag-Fe along with liquid molasses, humic acid, and endoboost myco. I also foliar fed with big bloom and fulvic acid. That's it for week 4-
Likes
30
Share
@Roberts
Follow
Watermelon auto is starting her journey. The first seed that was cracked ended up being a dud. The second seed now has started with no issues. She will be growing under the Medic Grow Mini Sun-2 in Gen 1:11 organo-mineral nutrition. Everything is looking good so far. Thank you Medic Grow, Gen 1:11, and Royal Queen Seeds. 🤜🏻🤛🏻🌱🌱🌱 Thank you grow diaries community for the 👇likes👇, follows, comments, and subscriptions on my YouTube channel👇. ❄️🌱🍻 Happy Growing 🌱🌱🌱 https://youtube.com/channel/UCAhN7yRzWLpcaRHhMIQ7X4g
Processing
Likes
13
Share
@MG2009
Follow
Transplanted to one gallon pots,for further growing, definitely two different phenotype. Gonna look at old pics and narrow down its parents traits. More pics later gotta go to work. Finish update tonight 2/04/18 #1 has pointed more darker leaves. #2 has rounded less pointed paler green leaves. Also purplish traits seen in the stems.
Likes
7
Share
@CheeRz
Follow
Week 7: Flowering Stage – The Frost Factory & Bud Swelling 🦍❄️ ​Development: 🌿 We have officially advanced into Week 7 of bloom, and the Gorilla Z is turning into an absolute masterpiece. The resin production is skyrocketing—the sugar leaves and calyxes are heavily coated in a thick blanket of glittering trichomes, filling the air with a pungent, sweet, and gassy terpene profile. The buds are swelling massively, packing on dense weight and expanding in size along the strong, supportive branches. Almost all of her energy is now locked into final flower maturation and maximizing potency. 🚀📈 ​Setup & Environment: 🌡️ She continues to thrive inside her outdoor greenhouse shelter. The environment is warm and bright, allowing the plant to push its resin defenses to the absolute limit under the natural sun. Excellent passive ventilation is keeping the airflow constant around the dense flower clusters, which is vital for keeping the humidity down inside the heavy canopy during this deep maturation phase. ☀️🌦️ ​Nutrients & Water 💧 ​Watering: Consuming a steady amount of water to keep the metabolic processes active. I am strictly maintaining the wet-to-dry cycle to ensure the root zone stays healthy and properly oxygenated. ​Feed (per Liter): ​Fish·Mix: 3 ml ​Bio·Bloom: 3 ml ​Top·Max: 1 ml ​Acti·Vera: 3 ml ​Bio·Heaven: 3 ml ​CalMag: 1 ml ​Grower’s Notes 💭 ​Goal for this week: Support the peak flower development and monitor trichome cloudiness. The colas are becoming extremely heavy, compact, and sticky to the touch. The genetics are really shining through now with that legendary Gorilla frost combined with a rich, candy-like undertone. We are getting closer to the finish line, and she is looking incredibly promising! 🦍🔥
Likes
9
Share
This was my first time growing a photoperiod and I decided to put her outside along with some autoflowers this past summer. I started Purple Shot Photoperiod Fem. from Exotic Seeds in a one liter air pot and moved her into a 5 gallon phat sack on day 14 when she was 2.5 inches tall.🌱🌱🌱 By the start of week three she was 6.5 inches tall and looking quite happy in her new five gallon home. A short while later she was moved outside to adjust to her new environment.☀️☀️☀️☀️ By day 35 she was 16.5 inches tall and developing a nice bushy structure. She started to flower towards the end of week 10 By week thirteen it was evident this girl was going to be making some nice tight lil nuggets 😁 By week fourteen I could hardly take my eyes off of her as she started to show her fall colors. I harvested her on day 130 18wk 4d She was 43" tall and looking pretty as can be. Her nuggets are not large but they are hard as rocks and sticky as fuck. The original plan was to turn all the outside plants into hash but I like this one too much just the way she is 😋 After a nine day dry and month and a half to cure the dry weight for this girl was 78.50g / 2.80 oz ✌️😎💨
Likes
Comments
Share
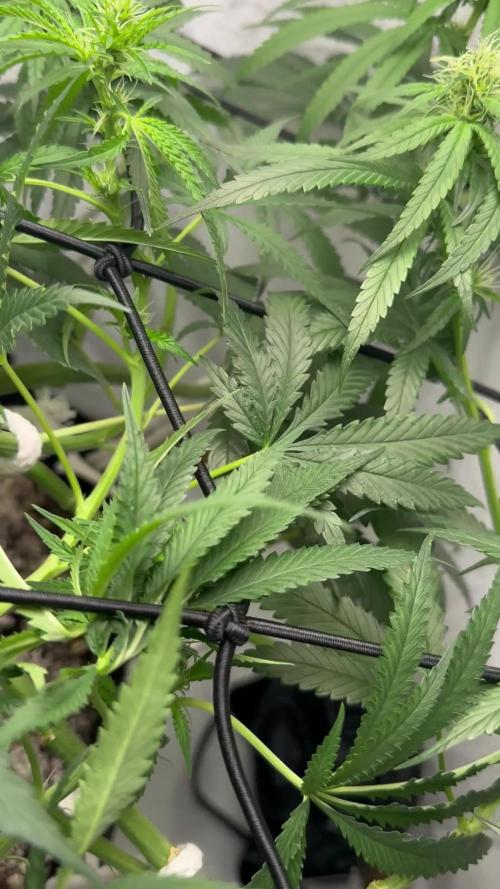
Mildew was detected in the beginning if the week, the plant sprayed with solution of hydro peroxide to kill spores and then solution of apple vinegar to stop prevent new mold. It worked. I thenk the next eeek will be the last. I decreased 5he concentration of the watering solution, especially in Nitrogen part.
Likes
3
Share
@CalGonJim
Follow
5/29 They were done a month ago, SO FAST...I havent been able to move very much or do the grow the way I wanted but I didnt need to do much, pretty easy and GREAT COLORS!!!! Got nice from low power and a small 2 gallon pot, I will go back to 1 gallon next time for small grows gallon is about as good as 2 gallon. IF I do larger 3 to 5 gal they will be really big.
Likes
14
Share
@MrMaabra
Follow
Hallo Leute, diese Woche gab es kein Wurmtee, da sehr wenig davon entstanden ist. Das lag sicher an den vergangenen kalten Tagen und Nächten. Erste Maßnahme: Wurmbox anfüttern, feuchtes Papier und leicht durchmischen, damit die Mikrobiologie beim Zersetzen Reste den Würmern behilflich ist - s. Video 1. Ansonsten ist die Lady erwartungsgemäß in ihrer letzten Phase angekommen, was die herbstliche Färbung anzeigt. Die Pflanze zieht Nährstoffe aus ihren Blättern. Eine Vielzahl der Pistillen sind bereits orange-braun gefärbt - die Ernte ist nicht mehr lange hin - s. Video 2. Es ist jetzt schon ersichtlich, dass die Buds um 1/3 geringer sind, als bei dem Grow davor mit 30 Litern. Das wird auch mein künftiges Set-Up für die Bio Hanferde von Sonnenerde - 30. Die Luftfeuchtigkeit und Temperatur sind weiterhin mit 52% und 23 Grad stabil. Die Leistung der Lampe habe ich für die restlichen zwei Wochen auf 60% erhöht, um die Entwicklung der Buds zu pushen. Der Geruch ist zurückhaltend, aber wehe, man kommt versehentlich an die Blüten, explodiert es förmlich in einer süßen und cremigen Note - unaufdringlich gut. Die Trauermücken sind erledigt und entwickelte sich nicht zu einer größeren Problematik. Ich bin weiterhin zufrieden mit der Gelato Auto. __________ Hi everyone, there was no worm tea this week as very little was produced. This was likely due to the recent cold days and nights. First step: feeding the worm bin, adding damp paper, and mixing it slightly to help the microbiology break down scraps for the worms – see Video 1. Otherwise, as expected, the lady has reached her final stage, indicated by the autumnal colors. The plant is pulling nutrients from its leaves. Many of the pistils have already turned orange-brown – harvest isn't far off now – see Video 2. It’s already apparent that the buds are about 1/3 smaller than in the previous grow using 30 liters. That will be my future setup for the Sonnenerde organic hemp soil – 30 liters. Humidity and temperature remain stable at 52% and 23 degrees. I’ve increased the lamp power to 60% for the remaining two weeks to push the bud development. The scent is subtle, but if you accidentally touch the flowers, it literally explodes with a sweet and creamy note – unassumingly good. The fungus gnats are gone and didn't turn into a major issue. I’m still very happy with the Gelato Auto.
Likes
9
Share
@NanoLeaf
Follow
End of Week 14 (7th week of flower) Cruise control still on. Smooth sailing till the end. Because this is a fully organic grow there is no need for a leaching flush, all I'm doing is giving the ladies PH correct water from now until harvest to naturally deplete the soil from nutrients and flush out the soil slowly this will help bring out some colours as the ladies use up the remaining nutrients stored in their leaves as they reach the end of their life cycle. I have been keeping a cooler average temperature - and also keeping the relative humidity lower. Pest Report: None
Likes
10
Share
Likes
8
Share
Yesterday I planted 5 seeds of Candy Dawg auto in a germination tray using all-purpose potting soil. They are now covered with cling film and are being kept warm. Prayers were said and thanks given for this, the first (serious attempt at an) indoor grow. The aim of this and subsequent grows is to grow high-quality organic indicas so I can make RSO to help my father who is extremely sick after mainstream medicine failed to rid his body of cancer. The video got cut off when the battery died - I just mentioned that flowering plants need their sleep as much as we do :-)). Day 4: 4/5 of the seedlings are above ground! I am making the most of my space by growing a quick batch of microgreens (sunflowers and peas) At the moment they are germinating in the large tray with the weights and bricks on it. It is really dry in there (35% RH) so I filled the tray with water in an attempt to increase the RH. If anything it has gone down not up!! Time for a new plan.
Likes
93
Share
Welcome to the Zamnesia Spring Cup 🏆. Day 62 since time change to 12 / 12h The last week before the harvest has come 🎊. Hey everyone 🤗. The time has come. The last days and hours have struck for this great lady 😃. In the coming days she will move to the darkroom and spend another 48 hours there in complete darkness 😋. Of course, there will be an update before the big update after fermentation 👌. In the last update there is again a detailed description of the individual strain. I'm really looking forward to finally being able to try the strain 😄. It looks beautiful and smells extremely tasty 😍. I wish you all a lot of fun with the last update before the harvest, stay healthy 🙏🏻, and let it grow 🌱🍀 You can buy this Strain and Nutrients at : www.Zamnesia.com Typ: Sour Diesel (Zamnesia) Zamnesia Spring Cup 🏆🏆🏆 Type: Runtz ☝️🏼 Genetics: Zkittlez x Gelato 👍 Vega lamp: 2 x Todogrow Led Quantum Board 100 W 💡 Bloom Lamp : 2 x Todogrow Led Cxb 3590 COB 3500 K 205 W 💡💡☝️🏼 Soil : Canna Bio ☝️🏼 Nutrients : Monster Bud Mix ☝️🏼🌱 Water: Osmosis water mixed with normal water (24 hours stale that the chlorine evaporates) to 0.2 EC. Add Cal / Mag to 0.4 Ec Ph with Organic Ph - to 6.0 - 6.3 💦💧
Likes
2
Share
@gr3g4l
Follow
Inicios penúltima semana Disminuí un poco la cantidad de riego de 600ml/dia a 500ml. pensando que beberian menos pero me quedé corto y volví a regar como venia haciendo hasta final de semana que regué solo con agua de osmosis. La próxima semana todo riego con solo agua y así hago un lavado suavecito. para cosecharlas a los 60- 63 dias.