


Likes
Comments
Share


@Eryan
Follow
Day 51 - Deficiencies have gotten a bit out of hand the previous few days.
Looking at the leaves I was thinking maybe calcium and magnesium deficiency, but it doesn't really make sense to me because I had:
1. Given a decent feeding with the Aptus cal-mag solution.
2. Calcium was already in the soil (pre-fertilized)
3. There is more often too much calcium in soil than too little.
4. There is a not insignificant amount of calcium in the water I use (causes limescale in a lot of things)
So my guess is instead of calcium deficiency, I'm seeing next to some magnesium deficiency, a deficiency of phosphorus.
So a couple of days ago I gave the plant FloraBloom which has both phosphorus and magnesium but no nitrogen or calcium. Today (two days later), the leaves are now feeling a lot less dry / crunchy, which was a supposed symptom of phosphorus deficiency.
I expect to need to wait about two more weeks before harvesting. Maybe around 10 days. The trichomes are still fairly glassy although there's some cloudiness. Pistils are still mainly white though, so I'm expecting some fattening to happen. I don't really like feeding the plants at this point (short before harvest), but the deficiencies were severe enough to me that I'll keep giving FloraBloom this week. Next week I might stop depending on where the trichomes are at.
Smell is excellent, I definitely now understand where the 'mandarin' name comes from. Very similar to a mandarin smell now.
Other than the phosphorus / magnesium issue, the plants seems to be doing well.

Likes
10
Share


@Archieballs
Follow
Both plants are looking good. Trichomes still not completely cloudy but giving nothing but PH water so that as soon as trichomes are right they can be harvested.

Likes
18
Share

@Brotanical
Follow
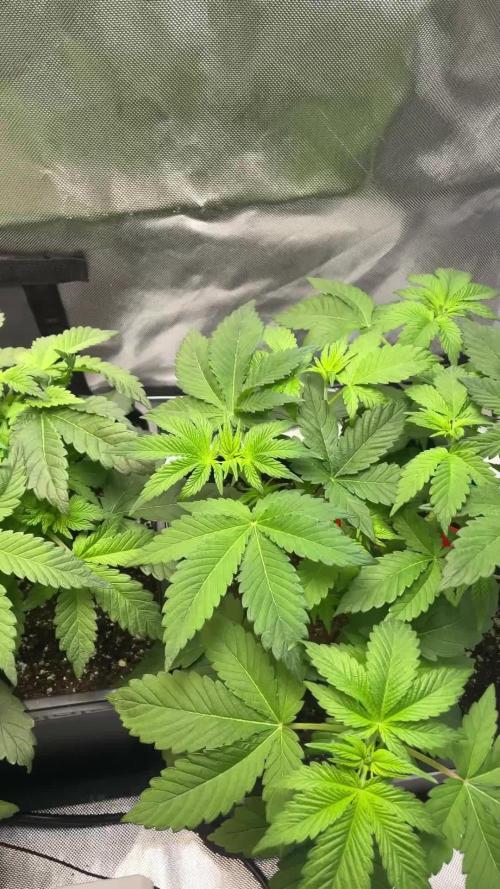
Bisher überzeugt mich eindeutig die Wizard of Bloom etwas mehr es wächst sehr Homogen unter ihr🌱?🏻🙋♂️ aber insgesamt bin ich zufrieden und es geht entspannt weiter
Es wird die RLF stückweise runtergefahren
Das training nicht mehr so aggressiv fortgesetzt um zu versuchen das Canopy flach zu halten
Noch wird TNT gegeben und wir gehen komplett auf Blühcomplex wenn die ersten puschel da sind 👍?☀️

Likes
14
Share


@rando_herber
Follow
This week I defoliated to get my RH to +-50%. I removed fan leaves, low bud sites, and some branches that would not have produced. If anyone regularly grows around 60%-65% RH please let me know if you have run into any issues.
After defoliating the roots still took nutes as if they had more fan leaves and now there is some burn on about 5% of the leaves and their tips, a couple days later. I expect this to stablize this week which I suppose is a benefit of growing organically.

Likes
35
Share


@nonick123
Follow
Día 44 (15/07) Wow! No hay shock de trasplante! 😍💥😁
Todas las ramas se han estirado hacia arriba tras el ajuste de LST y se están formando nuevos nodos rápidamente
Esta combinación de nutrientes de Lurpe + substrato de PRO-MIX HP es una maravilla 😍
Día 45 (16/07) Ayer tuvimos ola de calor (37 ºC) y han aguantado muy bien!
A última hora de la tarde (cuando ya no había sol directo) les apliqué H2O en spray foliarmente para refrescar los estomas
Hoy parece que vuelven las temperaturas estándar para esta época del año: 29 - 30 ºC en las horas centrales del día
Riego con 1 litro de H20 pH 6,5
Día 46 (17/07) Pequeños ajustes de LST
Hay algunas ramas inferiores que no se han formado / estirado mucho
Lo más probable es que haga una buena limpieza este domingo, 7 días después del trasplante, para dejar solo los brotes por encima del 4º nudo
Día 47 (18/07) Riego con 0,5 litro de H20 pH 6,5
Este domingo (día 50) haré limpieza de partes bajas y tal vez también de nuevo topping en las 4-6 ramas principales 😁
Día 48 (19/07) Día de muchísimo calor con 37 ºC. A ver como lo llevan!
Riego con 0,5 litro de H20 pH 6,5
Día 49 (20/07) Para ayudarles a llevar mejor el calor de las horas centrales del día, coloca una malla de sombreo (70%) sobre el invernadero
Lo cierto es que se nota que baja mucho la temperatura debajo de la malla! Van a estar más fresquitas! 😍
Riego con 0,5 litro de H20 pH 6,5
Día 50 (21/07) Training session!
Hago limpieza del tercio inferior de la planta, de todas las ramas y nudos que no superan la línea del dosel marcada por el 4º nudo (1er topping)
También hago topping (2º) a todas las ramas principales
La idea es tener 12 ó 14 colas principales para que no se hagan muy altas
De paso saco unos cuantos clones de las ramas inferiores eliminadas 😁💥
Para superar el estrés, hago las siguientes aplicaciones y riego:
- Riego con 1 Litro de Té Vegetativo de Lurpe Solutions. Preparación: 24 horas con bomba de aire (oxigenación) con ingredientes:
Green Sunrise 8 ml/L + Insect Frass 16 ml/L + Hummus Lombriz 8 ml/L + Melaza 1 ml/L + Kelp Hidrolizado 0,25 g/L
- Aplicación foliar Kelp hidrolizado de Lurpe Solutions a 0,25 ml/l
💦Nutrients by Lurpe Solutions - www.lurpenaturalsolutions.com
🌱Substrate PRO-MIX HP BACILLUS + MYCORRHIZAE - www.pthorticulture.com/en/products/pro-mix-hp-biostimulant-plus-mycorrhizae

Likes
4
Share


@Green_Thumb
Follow
How the time has flown by. She completes her flush this week and will start her dry, Sticky, smelly and buds are thick. Extremely happy with how she handled these last few weeks! Excited to taste her.
Likes
114
Share


@Tropicannibis_Todd
Follow
💩Alrighty Then Growmies We Are Back At it 💩
Well folks we just finished up the last run and so we are back to do it all over again 😁
So what do you say we have some fun 👈 We got some Gorilla Punch 👊 👊 👊 DAY 42
👉 Its been a really crazy couple of week's 😳 So I've had a few issues what's done is done , but I think we are on track and she's doing good 👌
So i gave them a flush and then there normal feeding so hope that fixes it 🤔 Time will tell 🙂
FC4800 from MarsHydro Lights being readjusted and chart updated .........👍👉Added an RU45 too the mix 👍
www.marshydro.ca
👉I used NutriNPK for nutrients for my grows and welcome anyone to give them a try .👈
👉 www.nutrinpk.com 👈
NutriNPK Cal MAG 14-0-14
NutriNPK Grow 28-14-14
NutriNPK Bloom 8-20-30
NutriNPK Bloom Booster 0-52-34
I GOT MULTIPLE DIARIES ON THE GO 😱 please check them out 😎
👉THANKS FOR TAKING THE TIME TO GO OVER MY DIARIES 👈
Would you like to hang with the growdiary community 👉 https://discord.gg/gr4cHGDpdb 👈

Likes
40
Share


@valiotoro
Follow
Hello everyone week 4 has passed 😎
They are very well growing at fast pace and with a beautiful green colour on the leaves🤩
I’m so impressed with the roots structure😳⚡️
For the nutrient my homemade fertiliser 100% bio🌿
For the light schedule they spend around 16 hours outside full of sunlight☀️
Some LST🔗
Its the last week before 12/12
I will force the plants to flower in my garage 100% lightproof😎
See you next week…


Likes
14
Share


@Chuckwaggon420
Follow
These 3 girls have just completly taken over the flowering tent just massive! Keeps changing the light i raise it and they back at it again next couple days! Think they slowing a little possibly as u can see some bud clusters starting to form. That also tells me she is ready for a hair cut to get that light in there more!
They have a great strong kush smell when u do a stem rub but I don't smell anything at tent opening yet. They been getting heavy canna dose of nutrients for the steeach will see if they need another week of that dose if they chase the light again or if going to flower development now.
Food every 2 days around 3 L till runoff at ph of 5.6-5.7. I like how the canna nutrients when ur in correct ph range it foams so u know ur getting close. I have really came to like the stuff. Great results compared to past soil grows. Nutrients being more ready for the plants like force feeding is way faster for growth.
Like I mentioned will do hair cut over next week possibly start to see some more bud development over the next week also. Love yall.
Likes
4
Share


@Autofeather
Follow
So the grow cycle was pretty easy. I work away from home and I sometimes have to leave for 4 days in a row. Before I'd leave for the four days I'd just add 4-6 cups of RO water with some Cal-Mag. When I can back she was always bigger and didn't have any problems. I was lazy this time and never checked the PH of the water. This strain is pretty resilient so props to sweet seeds.
I decided not to LST this plant, it was a little taller than I wanted but grew in a nice shape.
I still cant believe how purple this strain is.
I started to get foxtailing on the top bud not sure what would cause that.
Once again sorry for the lack of pictures. I'll let you know the smoke report later.

Likes
46
Share


@Ju_Bps
Follow
Hello growers,
All was good this week,
Just a bit troubled by my phmetter, I would like check calibrate, and I've uncalibrate it... several water with a bad and very lowest ph, I've seen and solved the problem quickly.
I've put them In 12 12, (09/28)
Stretch in progress, I need to work the lst each day,
I've make defoliation, she look better now.
Next week will be blooming week,
Have a good smoking and growing week :)

Likes
28
Share


@GodZilla_Owner
Follow
This week the time had come, she was ready to be defoliated and chopped down.
And it's now hanging to dry, I'm curious to see how high the yield will be.
Processing
Likes
9
Share


@Northerngarden85
Follow
Another good week
Everything is going to plan
Only slight issue we come across was
Temp drop in lights off period in the small tent we just got another gas environ controller 👌👌 problem solved
But apart from that everything is spot on


Likes
7
Share


@Chubbs
Follow
Hey grow fam, weekly update on these ladies. They've definitely rooted and are starting there journey upward. All are looking great and showing signs of daily growth. I started adding calmag to my feeds and will start grow nutes this week. Over all Happy
Likes
36
Share


@Island
Follow
Week 4
Broad Mite still making victim.
On this week I watered she with water + diatomaceous earth
Still waiting for better days, I hope hv succes 😐
Apparently the diatomaceous earth is working against broadmite 😅
Likes
3
Share


@Bdawg
Follow
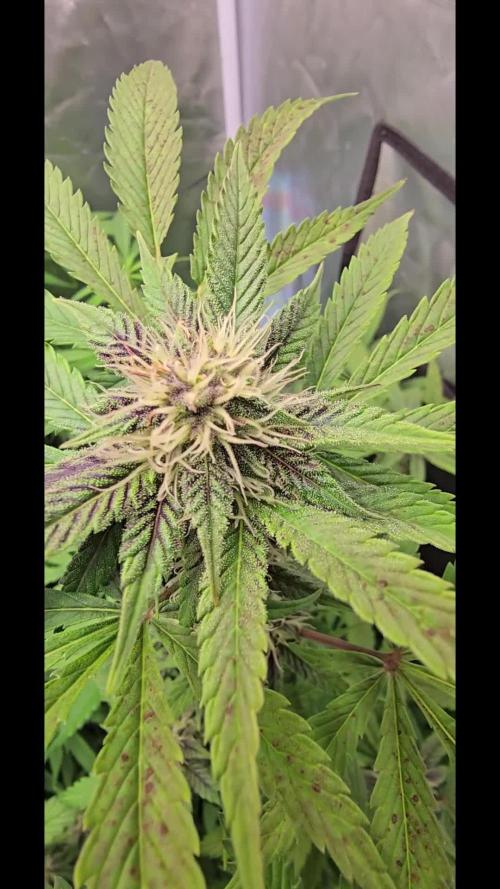
Chopped day 60
Oreoz looking nice
Grape cream cake to
Probably wont do apples and bannana again



Likes
23
Share


Likes
19
Share


@alex1515
Follow
привет всем, вот еще одна неделька пролетела очень быстро, растиха выпила воды 3.5 литра воды за неделю, на этой неделе добавил PK13-14_ надеюсь продолжение роста будет хорошое...
скажите свое мнение по поводу цеветов, нормальные они на этот период или нужно что то изменить