


Likes
3
Share

@NoProbation4Weed
Follow
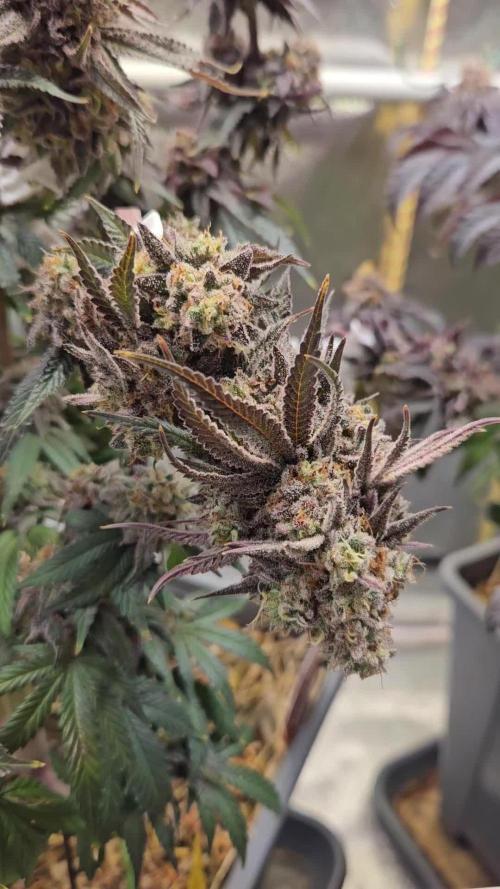
Beautiful Plant and good smell - smells like pungent hop with sweet hints.
this was her last week. Week 10 she got only 10hrs of light for the first 5 days of the week.
Day 66 - Last watering
Day 68 - lights off
Day 70 - harvest

Likes
31
Share


@JeyGanesha
Follow
Hanno iniziato bene la seconda settimana...Om namah shivaya..dal 30 /01/2024 inizierò a fertilizzare tutte le mie piccole......non capisco perché mi ha caricato 2 o più volte i nutrienti di advanced nutrient.....boh!!! Sto provando a cancellare ma invece di cancellare me li ricopia...sto uscendo pazzo..basta lascio così...
OM NAMAH SHIVAYA 🕉️

Likes
9
Share


@eldruida_lamota
Follow
Vamos familia, acabamos ya está 3 semana de floración , que bien vamos con este proyecto, vaya color que tienen y cómo se están formando las flores.
Os recuerdo que les hice limpieza y posiblemente acabe defoliándola alguna semana más adelante.
Es una variedad bastante rápida entre los 57/63 días estará lista.
Agrobeta:
https://www.agrobeta.com/agrobetatiendaonline/36-abonos-canamo
Mars hydro:
Code discount: EL420
https://www.mars-hydro.com/
Las maximas de temperatura no superan los 25 grados y las mínimas no bajan 20, así que no me puedo quejar.
Los niveles de humedad también son los correctos van entre 50%/65% de humedad relativa.
Por supuesto el Ph lo estamos dejando alrededor de 6.
Hasta aquí es todo, buenos humos 💨💨💨.

Likes
31
Share


@THCpapa
Follow
Oh, Week 5 in the fabulous world of my green squad has been nothing short of a horticultural sitcom! I kicked off the festivities with a low-stress training (LST) session that would make any plant yoga instructor proud. Imagine me in my gardening yoga pants, coaching the lower branches like, "Stretch, my green warriors, stretch! We're aiming for a yoga retreat, not a sedentary plant spa!"
I decided it was time for a botanical makeover – no more settling for an average, run-of-the-mill plant. Oh no, my friends, I was determined to turn my green buddy into the Beyoncé of the tent. The plant underwent a transformation that would put any Hollywood diva to shame, becoming a bushier superstar that covered more ground than a celebrity red carpet. I could almost hear the applause from the tiny plant leaves – a standing ovation for the botanical sensation.
But why stop at just a physical transformation? In the spirit of keeping up appearances, I went full-on garden Marie Kondo. It was time to declutter! Any discolored leaves that didn't meet the high standards of my garden's fashion police got the boot. Who needs an unsightly leaf cramping the style of the green kingdom, right? It's all about maintaining that A-list garden aesthetic – the Vogue of the plant world.
In the grand comedy of plant life, Week 5 has been a laugh-out-loud episode filled with beauty, drama, and a touch of horticultural glam. As I stand there, admiring my now Beyoncé-level plant, I can't help but feel like the director of a blockbuster comedy – green leaves fluttering in the wind, tiny plant divas striking poses, and the whole garden stage set for a laugh riot. Stay tuned for the next episode of "Greening Up with THCpapaTHCPAPA" – because when it comes to plants, it's all about the glam and greenery! 🌿💃✨


Likes
42
Share


@MrJoint
Follow
🍁Dicas e sugestões?
Eu e as meninas agradecemos.
DIA 36
Semana começando. Minhas meninas estão felizes e eu também. Aproveitando a chegada da lua cheia para fazer algumas podas de rendimento e limpeza. Estou satisfeito com os avanços.
DAY 37
Hoje foi dia de verificar as podas e a rega com nutrientes. Tudo correndo muito bem.
DAY 38
As meninas estão felizes.
DAY 39
Amanhã será feito o transplante para o final pot.
DAY 40
Transplante realizado para o 7L pot.
DAY 41
Meninas recuperando do transplante.
🎃Obrigado por verificar meu cultivo.

Likes
10
Share


@40Plug
Follow
Everything went alright so far, plants looking healthy. Pistols coming out, buds preparing to grow.
I did a defoliation 2 days ago and removed all lower branches that are not really covered in light

Likes
3
Share


@Growrnotashowr
Follow
Harvested two of the plants for fresh frozen bubble hash. Total for the hash wash is 900 grams of starting material so I should get about 30 grams of high quality rosin. The third and biggest plant has yet to be weighed but will update once the dry?cure is finished

Likes
9
Share


@Mo_Powers
Follow
the 4th week is over and she is doing well. i have started a light LST training. she has gained a good 10 cm in height and she looks healthy and strong.


Likes
74
Share


@AsNoriu
Follow
Day 92. First of 3 girls down. Amazing, super productive strain !!! Loved that girl a lot !
Others still to come...
Day 101. #1 is jared and #2 is chopped, busy day !
Day 111. #2 is Jared. Only Monster girl left. She is still pushing in ex dry tent.
Day 125. Last girl is down !
Day 135. 240 g of nugs from her !!!! My record breaker by a mile !
Happy Growing !!!


Likes
14
Share

@eldruida_lamota
Follow
Vamos familia cuarta semana de vida de estás Punch Pie de RoyalQueenSeeds .
Que ganas tengo de ver el progreso de esta variedad, las plantulas están sanas, se ven con buen color.
La cantidad de agua cada 48h entre riegos.
Esta primera semana ya añadimos nutrientes de la gama Agrobeta.
Tuve problemas de trips en un indoor y tengo todas plagadas pero ya las e tratado con aceite de neem y un insecticida genérico, también añadí tiras de color azul para controlarla, trataré esta semana y la siguiente.(esta semana me llegará el aceite de neem y el jabón potásico)
Trasplanté directamente a macetas de 7 litros.
Estas próximas semanas veremos cómo avanzan.
Mars hydro:
Code discount: EL420
https://www.mars-hydro.com/
Agrobeta:
https://www.agrobeta.com/agrobetatiendaonline/36-abonos-canamo
Hasta aquí todo, Buenos humos 💨💨.

Processing
Likes
21
Share


@Onlypotent420
Follow
Hi all,
Grow area updates:
Nothing major far as area is concerned added Some yoyo’s to the net so it can be raised and lowered easily now. I also noticed I had been following ghp feeding schedule for a recirculating system when mine is drain to waste. Didn’t have in adverse effects on the plants at all actually think they loved it tbh. But I’ll notice the ppm difference on these future updates. I was using way more nutrients then what was needed. Now I get to save money lol.
Blue dream auto:
Def has the faint smell of flowering cannabis now. The branching power from the mixing blue dream and already branchy plant with the ruderalis is def perfect for a scrog set up when you trying to maximize the your yield off one plant. I had to visit the tent 3 times this week to re tuck her down. Did the last tuck Thursday so what you are seeing from the pics today is three days of growth. Crazy!!!! She sitting at about 900 ppm And that’s with cutting the the grow solution some.
Master kush photo:
She popped through the net mid this week and hit her first tuck under today. With how well she reacted to the femm job. I went ahead and topped on the new growth on each branch. Her branch structure is way more sturdy then autos for sure. Leaves are bigger as well. One is the size of my palm lol I have big hands so that’s awesome. She sitting at about 800 ppm and getting less bloom solution.
I’d also like to add I appreciate everyone’s advice far as set up and temp control. It was above 100°F the last couple days. And tent never got over 85 and as soon as the hotter part of the day was over we where back in the 70’s. Ima smoke one for y’all! 🤘🏾 Until next time #StayKited


Processing
Likes
4
Share


@UK420hydrogrow
Follow
ok so ive repotted the clones into bigger pots and im thinking of moving them outside tbh i wanna get rid of this strain has done it for last 2 crops took a few weeks to notice any new growth roots forming etc but now plants are looking good and ready to be vegged properly

Likes
9
Share


@High_Grade_Dadli
Follow
Transplant after week 1so far so go..jus a lil a bat guano no major feeding yet
Likes
36
Share


@MadeInGermany
Follow
Hey everyone ☺️.
After 60 hours, the lady's case was already open :-).
Today the seed was placed in soil :-).
I only use the soil for cultivation because I have it left and it has to go slowly :-).
When repotting, it comes in Canna Coco 👍.
I watered the soil with some Canna Rizotonic before the seeds got 1 cm under the soil :-).
After that, the pot was placed under a hood in which I sprayed clay every day so that the humidity is between 80-90%.
I do this for the first few days until the head looks out of the earth.
From this point on, I open the hood at the upper opening bit by bit every few days so that you can slowly get used to 65% humidity before the hood comes down.
It is also only poured when the roots are right, until then the earth is sprayed. Which training I will use I will decide spontaneously when the time comes :-).
Until then, I wish you all a lot of fun with the update. Let it grow and stay healthy 🙏🏻🍀
You can buy this Strain at :
https://originalsensible.com/original-sensible-seeds-zkittlez~20503
Type:
Zkittlez
☝️🏼
Genetics:
Afghan Kush Indica x Grandaddy Purple x Grapefruit hybrid
👍
Vega lamp:
2 x Todogrow Led
Quantum Board 100 W
💡
Bloom Lamp :
2 x Todogrow Led
Cxb 3590 COB 3500 K 205W
💡💡☝️🏼
Soil :
Canna Coco Professional +
☝️🏼
Fertilizer:
Green House Powder Feeding
☝️🏼🌱
Water:
Osmosis water mixed with normal water (24 hours stale that the chlorine evaporates) to 0.2 EC. Add Cal / Mag to 0.4 Ec Ph with Organic Ph - to 5.5 - 5.8 .

Likes
2
Share

@GingerGarageGrow420
Follow
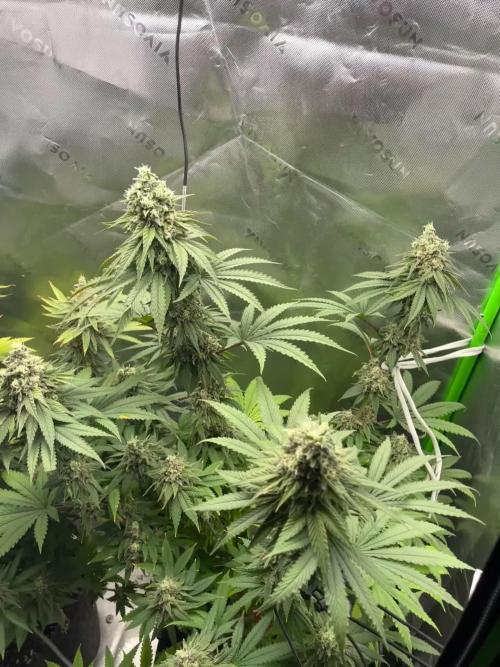
Strain: Fast Buds Rainbow Melon Photo Feminized
Day 58 of Flower
Day: 107 from sprout
Medium: Growers Gold
Light: Vivosun VS2000 at 100%
VPD: 1.5 kPa
Light Distance: 8 inches
Watering: By hand, ~20 oz daily
Nutrients: pH Perfect Advanced Nutrition Grow, Bloom, Micro 3 ml / L and 2 ml / L big bud.
Pistols turning red (50 percent)
35 inches
Likes
18
Share


@GrowingisFunkO
Follow
Week 11 - 05/24 - 05/30
Light - 400 W HPS & 265 W LED
Temperature - 76 +/-3
Humidity - 50 +/-5
D25 Flower - Came back from a long weekend away to some nice growth! Watered with nutrients and tucked some of the larger leaves. Took some measurements since the two strains are growing different.
D28 Flower - The clones have stretched a little bit more but for the most part, I think they are done stretching. Buds are forming nicely and starting to produce a sweet smell!
Royal Gorilla SCROG - 20-22 inch
Clones in Airpots - 24-25 inch
Likes
26
Share


@pifflestikkz
Follow
Day 51
20/08/24 Tuesday
Feed today using de-chlorinated tap water pH 6. With Plagron PK13-14 and power buds.
Noticing the stretch stop, and now packing out there bud sites 💪💚
ACOP , Melonade Runtz have Xmas tree structure where as orange bud is pure tall sativa structure... The Overdose is a compact indica looking dwarf but the bud sites are packing out a punch 👊🤣
Day 54
23/08/24 Friday
Watering only today using de-chlorinated tap water pH 6,
I'm watering in 350ml no run off. 400ml I'm seeing tiny run off.
Day 56
25/08/24 Sunday
Water today using de-chlorinated tap water pH 6. Added bud candy and rhino skin 1ml per litre

Likes
32
Share

@UnorthadoxDude
Follow
Week three of flower is here and the pistils are popping out all over the place now.
The final tuck was done on day 14, two days ago. From here I am just letting them grow out, the second net is just to support the colas as they develop and pack on weight.
Day 16 of flower: Photographed and took a video.
Day 18 fertigated 2.5l each and video
More updates to come later in the week.
If you are on X, please follow me @Unorthadoxdude

Likes
16
Share


@WEEDMANconnect
Follow
So week 15 and she’s been chopped she’s is massive and she smells great the colour oof her is mesmerising I can’t wait to smoke her 🔥🔥🔥💨💨let these hang for 5 days then started removing buds from stalk and gave her a little trim I’ll leave her on nets for a few more days before putting her in jars it’s taken hours to get through these two plants some parts Easyer to trim than others buts it worth the hard work in the end the colours are amazing and the smell is ridiculous so sweet leaves my mouth watering the buds are very dense aswell very happy with her 🍒🍒🔥🔥🔥💨💨💨💨🍒🍇🍇
