


Likes
Comments
Share


@Terp_Bro
Follow
The Plants had a shorter vegetation period than i had the previous runs.
I usually like to „fill up the tent“ mostly with more plant mass.
But the timing wasn’t perfect.
Im still overall happy with the current state.
All organic. Living soil and RO water. And the occasional compost tea. 15l fabric pots wich aren’t ideal for living soil but still work out great so far.
Hope you like it too


Likes
10
Share


@HideAndFly420
Follow
Day 34 this lady is running, I can see flowers getting bigger every day, smell started really really soon this time so I already had to add the Carbon Filter.
I’d like to close the cycle in less then 80 days. It would be great
First flowering fertilisation
Ph 6.2
Ppm 631
Day 37 - 9 of flower 🌸
Started blooming fertilisation, I’m keep Giving all-in one from aptus, i think I lm substitute with super pk and I stop all in one.
Ph 6.2
Ppm 731
As I’m growing an solito in a 9.2 lt pots with all mix nutrients I’m slowing down with all in one and just giving base feedings, I ll decide later if I should give super-pk for the next weeks
Day 40, tomorrow will be feeding days. Sge’s going really well, resin is already showing up on flowers that are several as and colorfull, smell is already there 🤤
Tomorrow update with feedings parameters.
Day 41 feeding day
Aptus regulator 0,15ml/1 lt
Aptus all in one 1,25ml/1lt
Aptus Topbooster 0,3 ml
Aptus enzym + 0,5 ml
Calmag 0,3 ml /L
Ph 6,18
Ppm 756
Let’s see

Likes
2
Share


@Chi_K24
Follow
Hey folks. Into week 12. Just watering plants when needed and also did some preventive maint and sprayed neem oil at 2tbps per 2L of water. Other than that we still on cruise control for now.
Likes
9
Share


@Siriuz
Follow
Alright guys so here we go,
After more and more LST
We finally get to see this lady
Getting thicker and bigger
Thanks GG


Likes
17
Share


@Papastroumf
Follow
Day 58 : She is fattening her buds very much. CO2 stopped for all ladies. As you can see trichomes still are in cloudy period. So she needs couple weeks for sure.
Edit (Day 62) : I watered again with nutrients. She is very stinky and is a heavy smelling lady. She has pine smells. It reminds you pine resin.

Likes
54
Share


@TheWeedaltor
Follow
Plant was almost 190 cm tall and full of big long colas, she gave me a very good harvest 💪🏻💚

Likes
6
Share

@IvanPalma
Follow
Se nota que los cogollos van engordando, como tengo plantas de diferentes clases se nota que las indicas van casi en su final. Las indicas por otro lado las he puesto al fondo del cultivo que son las que mas demoran. Todas en general tienen mucha fuerza pero cada riego recojo un par de hojas que se han caido solas. Al final quite el scrog y las deje sin ello y solo les he sujetado algunas ramas pero creo que van muy bien. En dos semanas mas 2 de estas plantas estarán listas para lavado de raíces.

Likes
27
Share


@RDWCGrowing
Follow
1/20/2023- So much to do pre grow and over the next 16 days, absolute first order of business is that I have to take down my current Grow---TIMBER-- Then I have a list of things I have to get done in order to be ready to start this grow 1 Feb.
With that said
T - 2 days until start 48 hour Flush
T - 2 days until Start 48 hours of Light
T - 4 days until TIMBER!!!
Items that need to be done before 1 Feb 2023
1. I need to clean the tent out
2. I need to clean the equipment- Proper Sanitization between grows in Hydro is a must!!!
3. I need to get the hole in the ceiling above my tent repaired- For my last grow I had a deep sink installed in my grow room, to make Hydroponics a little bit easier and have a water source in the same room. The seals on the pipes they were installing broke and leaked through the ceiling causing some damage all the way across my grow room, I was already weeks into my grow and couldn't risk them working above my tent and it would have been very awkward positon for them to be working in as well, so have to get this done quickly between chop and germination.
4. I have to install my new light- I was using a Vivosun 4000 and for this grow I am switching up to a Spider-farmer SF 7000.
1/20/23- For this upcoming grow I am working with M/F photo seeds so I ordered 4 Sex determination kits. I recieved my my 4 Sex determination testing kits from Rimrock Analytics today. I will be using these to test my plants at week 2 of Veg so that when/if I take clones I know I am taking them off females. As well as I don't want to accidently pollinate my tent during this grow I am looking for big beautiful buds not seeded buds. :-)
1/24/2023- Harvest of current grow- Started at 2:00pm and finshed wet trim and firt batch into the freeze dryer.
1/25/2023- Next batch into the freeze dryer and cleaning all my equipment for this Grow.
T-1 Day until the workers are supposed to be here to fix the hole in the Grow Room.
T-3 days until I instll my new Gorilla Grow Tent and my New Light Spider Farmer SE-7000 for this grow.
T-7 Days until Start of Germination
1/26/2023- Harvest is done ran through the Freeze dryer and dry tim completed.
1/27/2023- Grow Room repairs completed. Hole is gone Letting the paint dry before I install the new tent.
T-2 days until Install the New Gorilla Grow tent and the new Light
T-3 days until I put the hydro equipment in the new tent
T-5 days until Germination
1/29/2023- Day 0- Final Pre Germination activities
Germination Start T-3 days
The paint on the ceiling was dry and it was time to finish prepping for Germination. I got the following items knocked off my list.
New 4X4 Gorilla Grow Tent is up and ready
New Spider Farmer SE-7000 Light is installed- Thanks Moony Grows for the suggestion and for the Code that got me some money off and free shipping (Moonygrows)!! I turned the lights all the way up to max and set the timer to 18/6 0600-0000. I will keep an eye on the temperature and humidity without my plants and see how hot it gets with the new light.
I put my Hydro system back together and put in 40 gallons of water into it, time to monitor for leaks the next few days.
I Setup my cloning machine for Germination Days 3-11
1/30/2023
let me break down the situation, ROOM in the TENT.. Enough said.. No really I tried putting my exhaust system up in the new tent with my new light, The light is so big corner to corner that it really didn't give me enough room for the lights be be raised, with the exahust hanging the buckets my plants are Starting in are 2 and 1/2 feet off the ground, great for plenty of room for roots but not so great for upwards space for the plant to grow. In a 6' 11 tent with the exauhst in side and hanging that only gave me a little over 4 feet of grow room to play with. My last grow if you saw my diary, anyone could tell I was struggling to keep the buds off the lights. No good, Since space was such an issue I was running my carbon filter inside on the ground but It really needed to be up sucking the heat out not shooting the cool out. With that setup I was sucking air through the filter and pushing it out the tent at a bottom exhaust hole cold out. Wasn't doing me any good for my heat. I was hitting temps of up to 85 degrees. I bought a portable AC unit and have been running it in the grow room to try and keep temps below 85 and I have had to lower the power on my lights during grow also not ideal.. With that said a friend of mine MoonyGrows (Check out his diary) took the time to look at my issue send me a picture of my grow tent setup with detailed instructions on how to suck the air out from the top but putting my filter and fan on top of my tent so no room issue and I am sucking the air out from the top where the heat is instead of pushing the air out from the bottom where the cool is... THANK YOU MoonyGrows For taking the time to help me get this straightened out.. Now I have room and I have the exhausts working right and now my temps with everything at 100% are topping out at 80 this dropped the temp by 5 + degrees at 100% max.
T-2 days until Start of Germination
Prepped my seed tray with humidity dome
Prepped my Rapid Rooter plugs. I Used RO water, and I added a few drops of Hydrogen peroxide to Oxygenate the water. I then PH balanced between 5.7-6.0 the same that they will be getting in the Cloning Machine and when they get to thier final grow pod. I perfere the 5.8x range and I hit 5.84 for these rapid rooters. If you want to see a complete video on the process HowWeedGrow has an amzing video that shows step by step how to do it and explains it better than I ever could including how to plant the seeds. Which I will cover when I get to that step on Wed. https://www.howweedgrow.com/how-germinate-weed-seeds-cannabis-rapid-rooters/
1/31/2023
T-1 day until Germination Start
All set and ready have my Rapid Rooter plugs ready to go have my seeds out.. Have my seed tray warming up tonight. Tomorrow morning right into the Rapid Rooter then strait into the tray. I will spray the dome to start the humidity in there.
2/1/2023
Germination Day!!
Let the games begin!
0600am Put the seeds into the Root Riots. And then put the seeded Root Riots into their first home the Seed tray. I have them under the light 24/7. Sprayed the dome
7:30pm Sprayed the Dome to keep humidity going on the dome.
2/2/2023
Day 1 of Germination
Sprayed the Dome in the morning
Sprayed the Dome in the evening
2/3/2023
Day 2 of Germination
Roots are starting to come out the bottom of the root riot plugs and the heads are slowly popping out of Number 4 just below the surface.
Afternoon- Number 4 has popped up
Evening- Number 3 has popped up as well. Happy Dance!!
2/4/2023
Day 3 - Germination
Surprise Surprise Surprise- all 4 have now poked their heads up.. Happy day!! 100% Germination succeeded.
Now major milestone to track is how many are female and how many are male.
I will take look at the roots this afternoon/evening and see if they have enough root to go into the cloning machine for the next 7 days before they go into their Hydro Pods.
Day 3 - Germination - Evening..
Roots looked good and they were tall enough to make it into the cloning machine.
Now that they are all in the cloning machine I have switched the lighting to veg state 18 on 6 off.
2/5/2023
Day 4 - Germination - Morning
All the Ladies (fingers crossed) looking great stretching nicely and look nice and green, Photo synthesis underway....
UPDATE!! After a very interesting POD cast on FSTS by Dr. Bruce Bugsbee from Utah University, I have shifted my lighting to 24 hours on through seedling and then I am going to shift to 20 hours on the rest of Veg.
2/6/2023
Day 5 - Germination
While Checking on my conditions inside the new tent last night, I found that the Humidity was down to 39 Percent. I added an AquaOasis Cool Mist Humidifier, the reason I selected this humidifier is that I needed one that could be turned on and off utilizing my Inkbird Humidity Controller IHC200 that I have my Pro Breeze Dehumidifier currently running with.
Root structures are starting to get there about 1/4 of an inch.
2/7/2023
Day 6 - Germination
Everything seems on track more roots poking out of each today. They are each getting a little taller as well.
Checked in the evening and number 3 was drooping the Root riot plug on the bottome was dry and the roots were not in the water yet. I raised the water just enough that the longest root that was sticking out is now hitting the water.
2/8/2023
Day 7 - Germination
Everything looked good while checking in on them this morning number 3 is now full up and no droop again.
2/9/2023
Day 8 - Germination
T-2 days until Plant into Forever Pods and we start week 1 of Veg .. :-)
Surprising thing to me is that number 1 and 2 were later in popping then 3 and 4 but the roots are growing longer in 1 and 2.
2/10/2023
Day 9 - Germination
Number 1 and Number 2 are definitely ready for transplant today.. Based on how they were yesterday and where they are today I am hoping by tomorrow 3 and 4 are ready. Today they look to me where 1 and 2 did yesterday.. I really hope 3 and 4 catch up by tomorrow since..
T-1 day until transplant to new/ final home for grow.
Need the roots long enough to have some clay down in the basket to keep the root riot out of the water and only roots in the water..
2/11/2023
Day 10 - Germination
Today they got placed in thier forever Home, 7 days from Sprout and 7 days until Week 1 Start.
PPM- 180 this is water out of the Tap
Temp Water: 70.7
Temp Tent: 77
Humidity: 40% I have a humidifier going 24/7 to try and bring this up.. I also have Humidity Domes on each plant.
2/12/2023
Day 11 - Germination
Sprayed the domes, all are looking good.. Nothing much to do at this phase but Keep monitoring the PH level in the system and making sure they have a comfortable home.
T-6 days until Week 1 start
2/13/2023
Day 12 - Germination
Sprayed the domes, They were looking a little yellow today so I moved the light down to assist. Nothing much to do at this phase but Keep monitoring the PH level in the system and making sure they have a comfortable home.
T-5 days until Week 1 start
2/14/2023
Day 13 - Germination
Sprayed the domes, They were looking a little Florissant yellow today, with what looks like slight burn on the tips, I talked with a fellow grower and we agreed that It was probably that I was drowning them, Yes you can drown you plants even in Hydro, but only early on.. :-) It usually happens with the water being too high, which soaks not only the roots but the medium (root Riot plug in this case). I lowered the water from touching the bottom of the pot to about 1" away. This will probably take 3-4 days to resolve. I will continue my daily monitoring.
T-4 days until Week 1 start
2/15/2023
Day 14 - Germination
Sprayed the domes, continue my daily monitoring they look a little darker green instead of lime green now that I lowered the water levels in the system, so I think that I might have resolved the issue but it will take a few days for recovery to happen.
T-3 days until Week 1 start
2/16/2023
Day 15 - Germination
I looked in on them this morning, 3 and 4 look like they are doing well and recovering nicely. Number 1 not so much it has brown spots on the leaves, this very well can still be a side effect of the overwatering but I decide to go ahead and add Nutes earlier than I was planning just incase. I was going to wait until Saturday but I think intervention is necessary now especially after drowning them early on.
I added 1/2 what I am planning on adding for week 1 start. I also think I am going to adjust my chart to add 1/2 2 days after plant from now on. I don't think it would hurt it to have some Nutes to pull from.
.25ml/Gal Calmag = 12.5ml
1ml/gal GH FloraMicro= 50ml
1ml/gal GH FloraGro = 50ml
1ml/gal GH FloraBloom = 50ml
T-2 days until Week 1 start = I will drain the system and start it over on Saturday with Week 1 Nutes.
2/17/2023
Day 16- Germination
I didn't even want to post today after looking in on them this morning, 3 of the 4 are now showing signs of dronwing.. Brown spots on the leaves, the water levels were still too high.. I drained about another inch out of the tanks.. Will see how quick they recover.. I start week 1 tomorrow and will have to ensure my water levels are at least 1" away from the basket on this round.

Likes
35
Share


@InhaleXhale
Follow
Nach langer Zeit ist es endlich soweit, ich habe sie geerntet.
Bei dieser Pflanze habe ich mich dafür entschieden sie gegen den natürlichen Lebenszyklus outdoor eher zum Blühen zu bringen.
Ich pflanzte sie in einen Hanffasersack den ich mit Erde auffüllte. Diesen platzierte ich auf einer Schubkarre.
Wo ich wohne wird es manchmal schon im Oktober sehr kalt, sodass die Wahrscheinlichkeit für eine sichere Ernte realtiv gering ist (at this point i hope the best for my other outdoor plants).
Ich rechnete mir aus wann der perfekte Zeitpunkt zur Ernte ist um noch im Sommer das Resultat genießen zu können.
Ab diesem Zeitpunkt fuhr ich die Schubkarre jeden morgen um 8 Uhr nach draußen und um 18 Uhr wieder nach drinnen um optimale 12 Stunden Lichtzufuhr zu gewährleisten.
Während den letzten Wochen der Blüte sind ein paar männliche Blüten aufgetaucht wie auch bei meinem indoor grow.
Für einige war der Zeitpunkt der Ernte vielleicht zu früh, aber ich finde es so sehr angenehm zu rauchen und auch der Effekt ist in diesem Stadium optimal für mich.
Die einzige Methode die ich hier verwendete ist das Pruning.
Es erspart dir einen Menge Zeit beim beschneiden der Blüten und lenkt die Kraft auf die verbleibenden Blüten, um diese zu stärken.
Nachdem ich bei meinem letzten outdoor grow viel zeit beim trimming verbracht habe, habe ich mir eine Erntemaschine gekauft (look at the video).
Mit dem Ergebnis der Maschine bin ich zufrieden, da ich es per Hand in der gleichen Zeit unmöglich in der Qualität geschafft hätte.
Die Blüten wurden ungefähr 2 Wochen bei guter Durchlüftung getrocknet, um am Ende wurden es 255g.
Für mich persöhnlich ist es ein sehr gutes Ergebnis.
Die Blüten sind schön fest und klebrig mit einem sehr süßlichen Geruch.
Ich habe versucht ein paar schöne Fotos zu machen und habe meine Kreativität spielen lassen (my wife also got a great idea, you can guess which idea was mine ;D)
If you have any questions feel free to ask. Im also open for criticism
I hope you enjoy the pictures and the report stay safe and happy growing.
____
i will update the smoke report soon.





Likes
1
Share


@jojopfoh
Follow
they are all growing great and starting to get taller. a very robust plant and very easy to grow and maintain. they are getiing 1/2 the recommeneded dose of nutrients 3 times a week

Likes
9
Share


@Bread_n_Buds
Follow
And we have arrived at the end, the last lady branded Zamnesia F1 Hybrid has been harvested, she is probably the most beautiful and largest of all and her name is Pineapple Express F1 Hybrid Auto.
I talked about the harvest of the smallest plant last week if you want to go and see the second one go to week 8.
As for this one it is definitely the tallest plant, I still have to weigh the dry buds, but it certainly seems to be the most productive plant, there is really a lot of weed in the dry room.
Lots of weed in a short time guys don't overlook this factor, I know especially new growers love autoflowering plants like crazy and have also specialized in growing them: you can certainly see the advantage of finishing in 8-9 weeks instead of 12. 2 more harvests per year do the math guys that's a lot of more weed.
Lovers of topping on autoflowering plants, an experimental practice for me on these plants and only recommended on strains that respond well and quickly, will be able to finish the plants in reasonable times without stretching out as if they had grown photoperiodic plants.
Guys, if you have to do topping on autoflowering plants, either grow very fast F1 Hybrids or switch to photoperiodic plants, we have excellent strains. It makes no sense to harvest autoflowering plants at week 16, with F1 Hybrids even if you do topping you get to 12. Of course, if you need speed and want to do topping, the advice is to choose those that the breeder indicates as the fastest.
Our Pineapple Express is burning with resin and very productive, see for yourself, James Franco and Seth Rogen would be proud of us.
The main cola has a wonderful shark fin formation that drives me crazy, I photographed it from different angles but when I see the shark fin I become a schoolgirl.
The level of ripeness is medium, halfway through the harvest window we have some amber trichomes, many milky ones but also something transparent still, I could have kept it a little longer but as I said several times: I don't like super ripe plants, the pistils were super ripe so for me it's a symptom of mold lurking, in the growbox now there are 40 degrees.... The heat is not a friend of the quality of the buds and resin. So speed also helps us escape the arrival of the most hostile climates.
Really a lot of grass in a short time and I fill the jars and have good times. SUmmer and autumn are assured, see you for the super harvests of October-November the best of the year.
Strong, fast, stable as promised by Zammi.
https://www.zamnesia.io/it/10681-zamnesia-seeds-pineapple-express-f1-automatic.html
Feeding is by Plagron with the Power Buds - Sugar Royal - Green Sensation + Alga Bloom combo that drives me crazy https://plagron.com
The lights are from Viparspectra p2000 and provide super light www.viparspectra.com/
Tent & Air www.secretjardin.com
Music of the week www.radionula.com
+++ 432 hz frequencies to keep in line my Girls to Gaia.
Site Description
ZAMNESIA SEEDS - PINEAPPLE EXPRESS F1 HYBRID AUTOMATIC: FRUITY FLAVORS AND ENERGETIC EFFECTS
Combining Trainwreck with Hawaiian, Pineapple Express F1 Hybrid Automatic brings a beloved strain to new heights. This autoflowering F1 hybrid cultivar ensures exceptional uniformity, reliability, and stability, making it well-suited to growers of all experience levels. If you haven't checked out the Pineapple Express F1 hybrid Automatic for yourself just yet, now is the time.
GROWING PINEAPPLE EXPRESS F1 HYBRID AUTOMATIC
It takes 8–9 weeks from germination before Pineapple Express F1 hybrid Automatic is ready to harvest. Thankfully, very little effort is required throughout the growing process, aside from a bit of maintenance, to ensure large, high-quality harvests. Thanks to its F1 genetics, Pineapple Express F1 Automatic offers superb resilience and uniformity, meaning all plants will have a similar height and appearance, and will churn out comparably large yields. Reaching heights of 50–70cm, Pineapple Express F1 Automatic is not an overbearing plant and can effortlessly slot into any setup. Once ready to yield, growers can expect returns in the region of 400–550g/m² indoors and up to 200g/plant outdoors.
AROMAS, FLAVORS, AND EFFECTS OF PINEAPPLE EXPRESS F1 HYBRID AUTOMATIC
Just one hit of Pineapple Express F1 hybrid Automatic treats users to a rich assortment of flavors and aromas. This strain offers strong pineapple notes alongside moments of citrus, spice, and pine, making for a mouth-watering blend that's extremely moreish. Bolstered by 21% THC and an array of cannabinoids, Pineapple Express F1 Automatic showcases an energetic and uplifting high that will have you feeling chatty in no time. So if you've been looking for a strain to enjoy with friends, Pineapple Express F1 Automatic might be just the thing.
All F1 Hybrids and more and more and more on
www.zamnesia.io

Likes
11
Share


@adam_pawloski87
Follow
This week has been great! Germination on all 4 Pre 98 Bubbas and 2 Dirty Blondes was a success!! We planted them in there pots an through out the week we gave em each a very light spray down of pure water phd at 6.5 and by Friday they all popped out the soil Let’s go!!!!! Next week we will start light feed on nutrients , so y’all keep them eyes peeled for next updates an I appreciate y’all for following my grow !!😶🌫️💨💨💨🙏🏻💚💯🤙🏻

Likes
57
Share


@LockDownGrow
Follow
Ok so this week I did a defoliation and a tigh down too the netting , I really was not planning on doing such a big defoliation but the leafs became thick and dense and there was almost no light penitration down too the lower branches of the plant , so she is opened right up now and the humidity and temperature has dropped loads and the air is moving alot better around the leaves and branches , I will not take anything more off her now , I have also added Cal mag too the nutrients for this week only , she is well into pre flower now but the stretch has not yet started so I figured it's no or never too defoliate and tigh them down , this grill really has grown right out this week and is unrecognisable from the plant just a few days ago ,
I am very happy with them so far and being new too all this it's all very exciting ,
Thanks for looking :)
Likes
15
Share

@Naujas
Follow
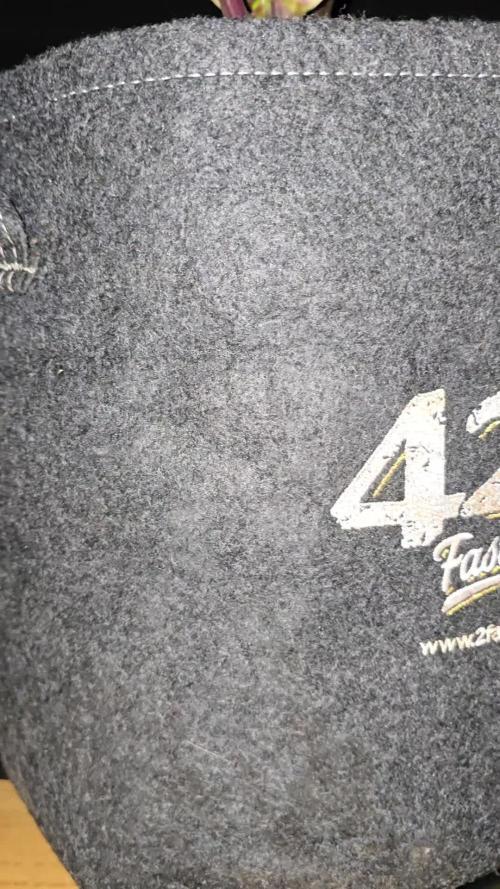
Today marks Day 66 from seed to harvest for my Purple Haze Auto by FastBuds.
Overall, this girl had a smooth and healthy life cycle from start to finish. She responded very well to HST (High Stress Training), which helped create a more open canopy and improved light penetration across the plant. Throughout the grow, she showed strong vigor, good resilience, and steady development.
At harvest, I ended up with 231g of wet buds. The flowers are covered in beautiful, shiny trichomes that give them an impressive frosty appearance. The buds look very promising, with excellent resin production and great bag appeal already visible before drying.
One of the things I enjoyed most about growing this strain was how easy and rewarding it was. She handled training well, stayed healthy throughout the grow, and produced attractive flowers with plenty of sparkle. The aroma became more noticeable toward the end, adding to the excitement of harvest day.
The harvest is now drying, and I'm looking forward to seeing the final dry weight, terpene profile, and smoke quality once curing begins.
So far, I'm very happy with the results and the overall
Likes
17
Share


@JonnyKush
Follow
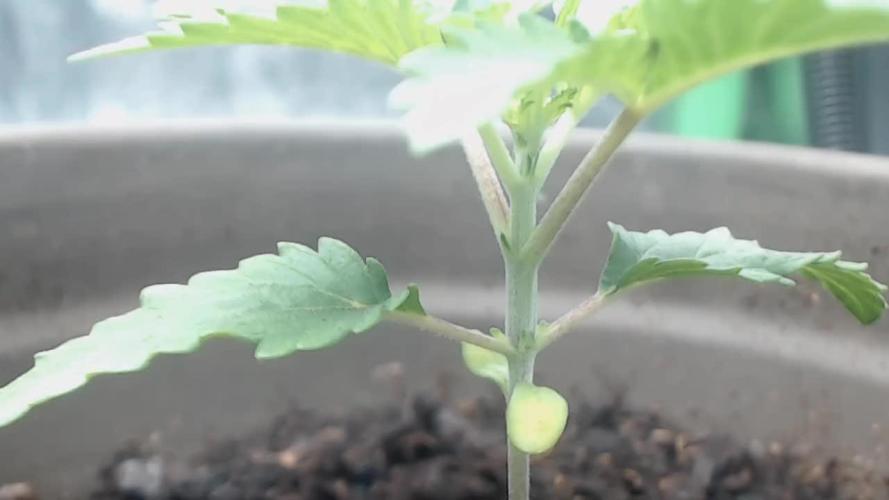
day 73 I was not ready for all this! 🤣🤣 they literally exploded and I started seeing purple on these buds I had to tie them up so the weight of the flowers didn't break the branches. compared to El Patron that I also have in my tent, Purple is much fatter and shorter. they have a very sweet scent and I can't wait to taste it, but alas I will go there a little longer. I have to say that 6 photoperiods are too many for my 1m x 1m x 2m tent. in addition to this I have noticed that they are very hungry. like me and give me some advice. thanks for stopping by, have a nice day and happy cultivation 💜🌳💜🌳💜🌳💜🌳



Likes
21
Share


@northsweed
Follow
the biggest plant on the right is booming, the one in the middle as well and fingers crossed for that one on the left not to die 😃
–––––
for some reason the one on the left does not want to start maturing, maybe stressed her way too much 😞
–––––
today i checked trichomes for the first time and vast majority is still clear eventhough pistils are turning orange 😊
