


Likes
Comments
Share


@Enki_Weed
Follow
Diese schwarze Woche wird noch beschrieben .... in der Bericht der 11 Woch

Likes
6
Share


@Masta
Follow
Je l'ai laissé chez quelqu'un pendant plusieurs semaines donc je n'ai pas beaucoup de photos

Likes
8
Share


@IQuSX
Follow
Hi, topman!
There is week was really difficult!
Damage from buds of fat and unreal brown 🍃 on my Amnesia (A.)…
So, we are continuous!
1/2 bloom from behind.
See more>>

Likes
4
Share


@WuTangVibez
Follow
This Week she's continuing to really strech out and form some pretty nice Buds. I started to Use the "Green Buzz Organic Bloom Liquid" and untill now i'm Happy with it. I am Incredibly Happy with the Strain "Applestrudel" from 420 Fastbuds it's growing Beautiful and starts forming and Packing up pretty decent. I hope you enjoy the Diary, please leave Comments and Questions !

Likes
29
Share


@Greenthumbguru
Follow
Week two shes a fast grower right behind my gc
feed
made me foliar spray
and the second fan has been excellent getting me sum plant ties and a carbon filter weds
this my first grow so can any one help me wit a question how early can you start lst ion want to start too early or wait too late and also like. And i like back follow and i follow back all that good stuff peace good peeps
Likes
21
Share


@puffin_ganja
Follow
Did a medium defoliation in the middle of week 4 prob around day 25. Everything is going smooth and I will most likely add another layer of trellis once they start packing on more weight.

Processing
Likes
16
Share


@LittleBigTrees
Follow
There as big as they can be for my space so I'm switching to 12/12 Ive also switched the IR on as it's supposed to speed up the flowering transition.
It's a new light to me at the moment from geeklight it's 3000k 320w v4 lm301H with added 660nm switchable IR and UV. I've got it 40cm from the plants and have been using a lux meter app on my phone. (don't have par meter) I read online that 50000 max in veg and 65000 to70000 max in veg is about right but I'm just turning it up as I go.
The plants are very compact compared to HPS. My light spread over 120x60cm is really good in comparison to a 440w HPS.
If anyone has experience with quantum boards I'm open to advice?


Likes
2
Share


@Piro420
Follow
Very happy better then the medical dispensary version i got the seed from it made it threw to my grinder and turned out female :D
Likes
10
Share


@Audi_grows98
Follow
Gorilla cookies and cherry cola are both hitting flower hard! The smells are pungent,the buds are sticky and the stems are strong! We’re getting nice fat buds on cherry already and gorilla isn’t too far behind her. They’ve taken very well to the feedings they’ve been given and all training done to them. So far I’m loving both of these strains 🔥🔥


Processing
Likes
12
Share


@GanjaFarmerGrow
Follow
So far so good...
flowering really nice...
starting to smell really good...
feeding her modestly and going to keep it that way...
Fingers crossed 🙏

Likes
3
Share


Likes
107
Share


@DogDoctorOfficial
Follow
Man i am so excited to be trying out the Fast Flowers strains from Fast Buds Genetics this round! I am a passionate grower and always eager to try new genetics to see what they can do. This time, I will be growing the new Purple Lemonade strain and I am beyond excited to see if the quality is just as amazing as their autoflowers.
I have been a fan of Fast Buds for some time now and have grown their autoflower strains before, which have never disappointed me in terms of quality and yield. That's why I am eager to see how their Fast Flowers strains compare, especially the Purple Lemonade.
The name alone sounds so enticing, and I can't wait to see the beautiful purple hues in the buds. I am also curious to see how the lemony flavor and aroma come through in the final product.
I am always striving to produce the best possible buds, and I believe that starting with quality genetics is key. I have high hopes for this round and I am confident that Fast Buds Genetics will not let me down.
As a passionate grower, I put all of my love and attention into my Girls, and I truly believe that this shines through in the quality of my medicine.
To begin with, I didn't want to do anything too fancy, so I decided to start with a seed in a glass of water. It's a simple and effective way to get your seed going, and it's always worked well for me in the past.
After just 28 hours, my little seed had sprouted and was ready to be moved into a soil plug. But, after a day or so, I wasn't quite happy with the way things were going, so I decided to transfer her into direct soil.
Now, I know some people might say that this is a risky move, but I believe that sometimes you just have to follow your instincts. I put my heart and soul into growing my plants, and I wanted to give this little seedling the best possible chance to thrive.
To give her an extra boost, I applied Aptus Holand Mycor Mix to the soil. This stuff is amazing! It contains a blend of beneficial fungi that help to promote healthy root growth and improve nutrient uptake. I knew that with this mix, my little seedling would have everything she needed to grow strong and healthy.
As a grower, I believe that every step of the process is important. From germination to harvest, every decision you make can impact the final product. That's why I put so much love and care into everything I do, especially when it comes to my plants.
I am excited to see what the future holds for my little seedling. I know that with my love and attention, along with the help of Aptus Holand Mycor Mix, she will grow into a beautiful and healthy plant. It's a journey that I am happy to be a part of, and I can't wait to see where it takes us!
As always thank you all for stopping by and for supporting me on this journey, i am super passion about growing and fell blessed to have you all with me on this new journey <3 <3 <3
Genetics - Fast Buds Purple Lemonade FF
Ligth - Lumatek ZEUS 465 COMPACT PRO
Food - Aptus Holland
#aptus #aptusplanttech #aptusgang #aptusfamily #aptustrueplantscience #inbalancewithnature #trueplantscience #fastbuds #dogdoctorofficial #growerslove
With true love comes happiness <3 <3 <3 Always believe in your self and always do things expecting nothing and with an open heart , be a giver and the universe will give back to you in ways you could not even imagine so <3 <3 <3
All info and full product details can be find in can find @
https://2fast4buds.com/ wen released
https://aptus-holland.com/
https://autopot.co.uk/
https://lumatek-lighting.com/
<3 <3 <3 Growers love to you all <3 <3 <3
Likes
9
Share


@FCFLOWER
Follow
It's looking great. Good grow this week from all plant. Took some leafs off for more light on stem and reduce humidity.

Processing
Likes
18
Share


@APOLLO
Follow
Last week in Veg 😶
Defoliated them and took small vegetation off from the base.
Flushed them today as well with above concentrations.
After the switch, I will take Rhyzotonic out of the feed gradually in a week and add Canna Boost.
I have set the time to 12 - 12 now 💤
And I have taken a clone off of Renaissane # 2nd pheno (1st in the row), hopefully it lives, I will keep posted.

Likes
7
Share


@Sabac
Follow
Plantitas sanas.
Hoy cumplen 21 días de flora
Día 22 comienzo con los fertilizantes de engorde.


Likes
13
Share

@Kirsten
Follow
I have gone through the tent this week, and I have removed a lot of the lower branches on the plants, as they're not going to grow into big colas or anything.
So it's better not to waste the plant's energy, developing those to hopefully redirect it into the larger flowers.
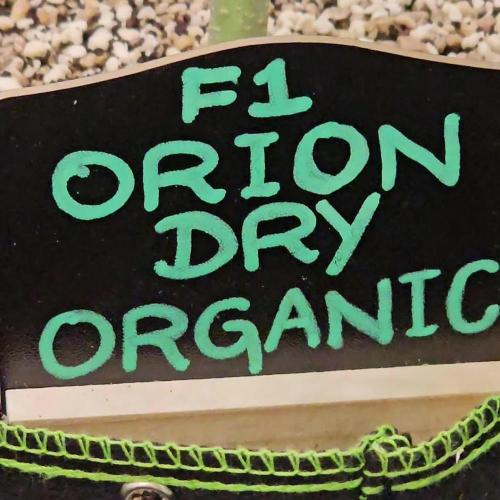
Orion F1 organic, dry amendments.
The plant is really developing the flowers while they look really dense, and like they will be some very top shelf buds!
The buds are beginning to stack on weight now, and hopefully, we'll just see the colas become larger and larger as we go on from here!
I'm really impressed with this plant so far, and the organic dry amendments are really working wonders, and that's been really eye-opening for me during this experiment!
I'm very pleased that Royal Queen Seeds were kind. Enough to allow me to try this experiment with some of the F1 hybrid strains.
It has been, and continues to be an extremely exciting experiment, and I am again learning more and more with each plant.
I cannot wait for harvest and to see what these buds look like after I've dried and trimmed them!
3.8.25:
I watered with 2ltrs of dechlorinated water PH'd to 6.2 with;
💜 1ml Trace
PH: 6.2
PPM: 371
I've just been keeping the medium, not bone dry, but there were some fungus gnats.
So I have let it dry out more than I usually would probably, because I wanted to sprinkle some Diatomaceous Earth on the soil, and it only works when it's dry.
4.8.25:
I watered with 3ltrs of dechlorinated water PH'd to 6.6 with;
💜 3ml Ecothrive Trace
💜 1.25 TSP Ecothrive Biosys
PH: 6.6
PPM: 385
I am going to top dress next week as I checked and it has been exactly a month since I last did one.
Thanks for checking in and hanging out 😁💚✌️🌱🤞🧡
Likes
5
Share

@CannaArchive
Follow
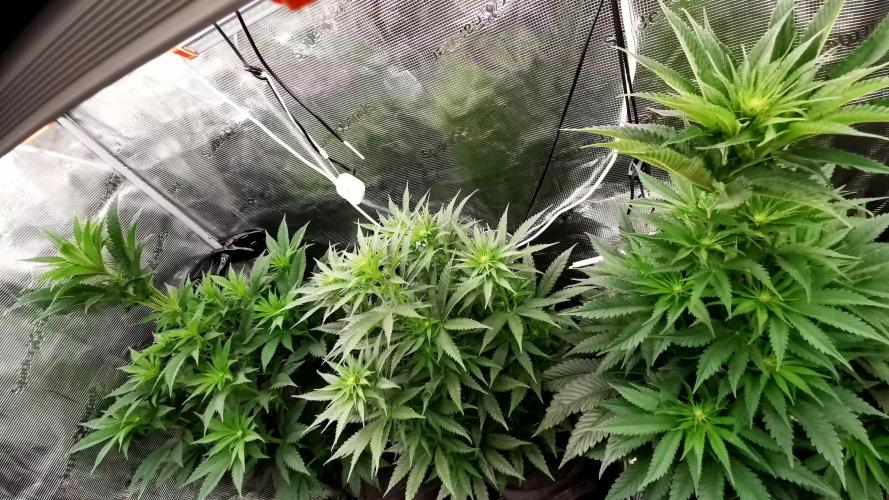
This week marked the transition into flowering as the light cycle was switched to 12/12, officially initiating bloom 🌸
For the first few days both plants continued normal vegetative growth. The stretch became noticeable after about 3 days, marking the beginning of the flowering phase.
• Height approx. ~65 cm
• Both plants taller than the Jelly Donutz
• Early stretch phase beginning
Light intensity was increased to ~750 PPFD ☀️
Clear phenotypic differences continue to develop:
• Pheno #2 shows a thicker main stem and stronger vertical growth, with branches staying closer to the main stem
• Pheno #1 grows more open and spreads more evenly in all directions
Water demand differs slightly between the two:
• Pheno #2 watered every 2 days
• Pheno #1 watered every 2–3 days 💧
Feeding this week:
• 1x BioTabs Bio PK
• Otherwise water + BioBizz CalMag
Environment remained stable:
• 25°C temperature
• ~60% RH 🌡️
Very few to no visible white pistils yet, which is normal this early after the flip. The plants are still transitioning hormonally and focusing on stretch before full flower development.
Overall a smooth and controlled start into bloom, with stretch beginning and clear structural differences between the phenotypes ?🔥

Likes
10
Share

