
Likes
Comments
Share


@WakeAndBake
Follow
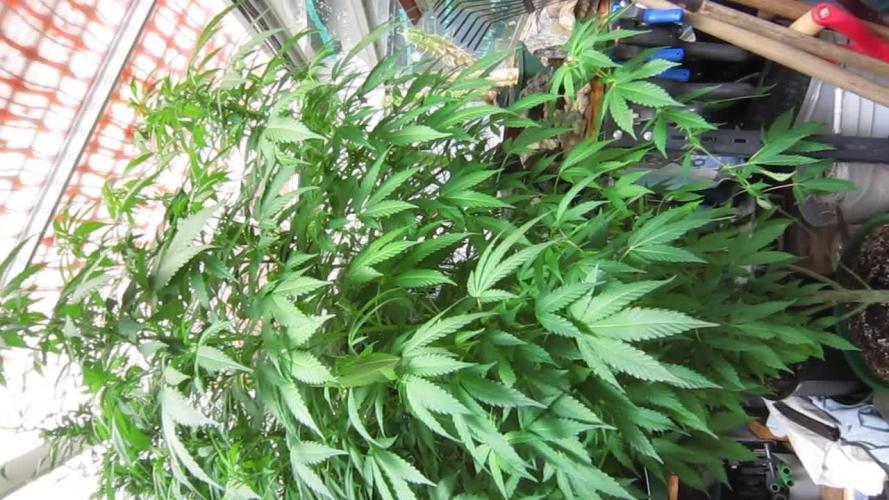
The ladies are going on 12 hours from today and Ready for massive buds can't wait to see them flowering 😍 🙌 🥦🥦🥦🥦🍀🛫👽💪


Likes
6
Share

@Chucky324
Follow
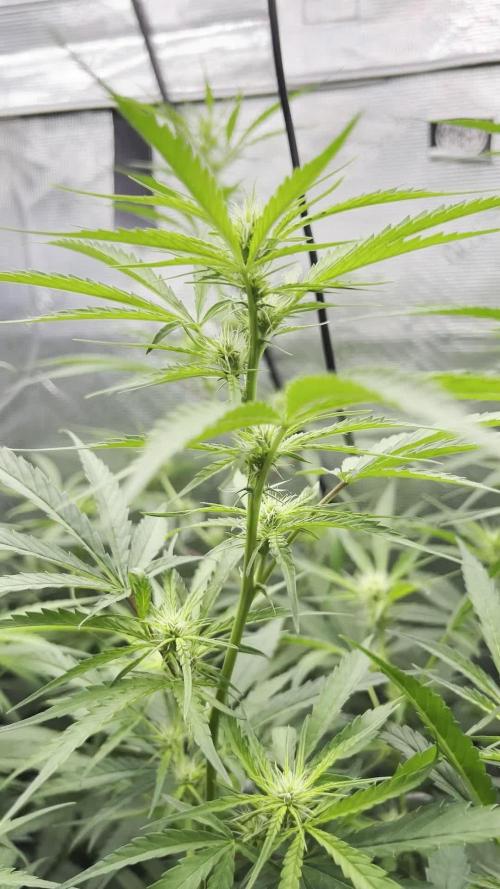
Hello. This the end of the 1st week and the start of the 2nd week of flowering.
Just a fast entry... I'm starting harvesting of the front 1/2 of this greenhouse tomorrow.
So, I'm getting ready for that. These plants have still got 6 or 7 weeks of flowering to go still.
These plant will go in the front of the greenhouse when I'm finished with the harvest in there.
Did a stock rub test of these plants and the smell reminded me of the good old days of buying land race pot.
It smelled like The Columbian sativa from the 1970's... mmm wonderful.
OK. Have Fun.
Chuck.


Likes
27
Share


@Salokin
Follow
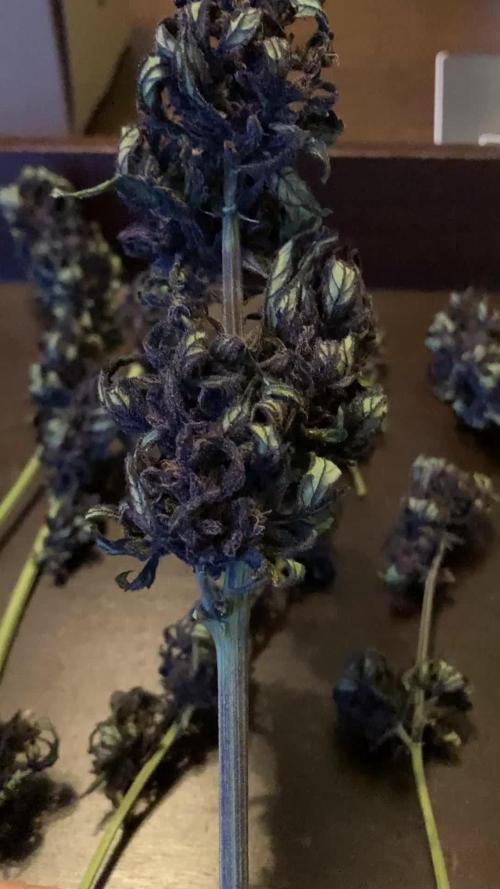
This plant was an absolute joy to trim. This plant consisted of buds and stems only, so I am actually curious what the dry weight will be.


Likes
5
Share

@AustinRon
Follow
TH 1Q2025 - Week 7 - Flower 4
(ON Haze X Original Haze) X Northern Lights #2
“Todd’s Haze”
Objective
- 8 Female Plants, Topped ONCE @ Flip, 12” when topped
- Modified Sea of Green
Seeds Wet: 1139PM, 28.2.2025
Germinated: 2.3.2025
Flip: 21.3.2025
Harvest: 77 Days, DATE: 6.6.2025
_________________________________________
Initiate Auto-Fertigation
LightDistance: [ 19.5, in] # We’re in STRETCH, ~1.5”/day!
11” Top Canopy
- [ ] TM-7: [ 0.125, g] # Prep
- [ ] Fertigation: [12, 12, 6] # [Primer A, Primer B, Silica Skin], Dilute to EC
- [ ] Photosynthesis Plus: [ 6, ml]
__
Fri Apr 18, 2025
TH 1Q25 29:F:4:1
__
Sat Apr 19, 2025
TH 1Q25 30:F:4:2
2000 Watering w/ PCAL 1660
Fertigation: [ 1, gal]
RLA: [ 8.5, 4.2, 3.4]
PCAL 1660: [ 2.5, ml] # Micronized Powder
__
Sun Apr 20, 2025
TH 1Q25 31:F:4:3
Light Distance[TOP]: [ 11, in] # Still Stretching
LightIntensity[TOP]: [ 925, µ], [ 40, mol/day]
LightIntensity[Main]: [ 801, µ], [ 34.6, mol/day]
We’ll Raise EC by 0.1 mS/cm/day till we’re comfortably ~ 2.4 (IFF They’re happy) …
Would like to see overall GREEN both darkening & evening out . . .
Defoliation
- [x] Remove Fan Leaves below Node 7 # Preparation for Understory Lighting
- [x] Remove Branches with TOPS bottom 25% of canopy
Auto-Fertigation Today
- [x] CLEAN Chiller
- [x] Vinegar
- [x] H202
- [x] High Throughput (Blast the interior AFTER Vinegar & H202)
Initial Reservoir Fill: EC: [ 2.0, mS/cm]
- [x] 4 Gallons (Dehu, RO, or Distilled)
- [x] Primer A & B: [ 54, ml]
- [x] Silica Skin GEN 3: [ 27, ml]
- [x] Photosynthesis Plus: [ 24, ml]
While configuring - Ran 2 Gallons of Feed Before UNPLUGGING. ;-}
__
Mon Apr 21, 2025
TH 1Q25 32:F:4:4
- [x] Light Distance[TOP]: [ 9, in] # Still Stretching 1.5 - 2”/Day
Reservoir Fill: EC: [ 2.1, mS/cm]
- [x] 4 Gallons (Dehu, RO, or Distilled)
- [x] Primer A & B: [ 54, ml]
- [x] Silica Skin GEN 3: [ 27, ml]
- [x] Photosynthesis Plus: [ 24, ml]
- [x] SLF-100: [ 20, ml]
We’ll take EC to 2.4 mS/cm (Relatively Heavy) IFF They’re all happy with the ‘upgrade’. ;-}
Picked up 8 gallons of Distilled from HEB. Used for to refresh tank after last nights flush.
Going for NO MORE than 2 Gal/Day.
We’ll feed MORE than necessary to get DOWN TO Optimal delivery.
Irrigation Timer is set to Every 3 Hours, 1 min flow, four times a light period.
__
Tue Apr 22, 2025
TH 1Q25 33:F:4:5
Observation
Vibrant, Uplifted, Rockin’ - 1250 runoff, Grew TWO MORE INCHES, Light Distance 6”
1900: Measure Runoff
- Amount: [ 1250 , ml]
- EC: [ 2.1, mS/cm]
- [x] Harvest Dehu
- [x] Refresh Reservoir - 2 Gallons
- [x] EC: 2.1
- [x] Primer A & B: [ 27, ml]
- [x] Silica Skin GEN 3: [ 14, ml]
- [x] Photosynthesis Plus: [ 12, ml]
- [x] SLF-100: [ 10, ml]
__
Wed Apr 23, 2025
TH 1Q25 34:F:4:6

Plants Look GREAT!
Plants stretched 2 - 3” last night. If we don’t stop, we’ll need to supercrop the Exceptions.
Cleaned MANIFOLD FILTER - Had GRANULAR feel, on top of a little slime. Will check Thursday.
Doubled IRRIGATION TIME from one to two minutes x 5 Irrigations. We had negligible runoff last night.
1900: Measure Runoff
- Amount: [ negligible, ml]
- EC: [ ? , mS/cm]
- [x] Harvest Dehu
__
Thu Apr 24, 2025
TH 1Q25 35:F:4:7
- [x] Harvest Dehu
- [x] Refresh Reservoir - 2 Gallons
- [x] EC: 2.3
- [x] Primer A & B: [ 31, ml]
- [x] Silica Skin GEN 3: [ 16, ml]
- [x] Photosynthesis Plus: [ 12, ml]
- [x] SLF-100: [ 10, ml]

Likes
19
Share

@India_Calcoen
Follow
5-10-2025
I harvested my Purplematic CBD and washed the buds with a mixture of baking soda and lemon juice. Some caterpillars 🐛 came out of the buds 😱!! I hung the branches up to dry in a spare dark room with a ventilator. After 10 days of drying the branches still wouldn’t snip. I think the room was too cold and too humid. Next time I’m using a dehumidifier.
Likes
85
Share


@Tropicannibis_Todd
Follow
💩Holy Crap💩
That was so much fun , it's full on winter where I am and it kept me busy , and come on there's nothing like growing your own stuff. I had a blast as it's been at least over 10 years since my last indoor grow , and it was fun , I had used all of my old techniques and equipment and it worked out just fine , so I was glad I had a ruff idea of what to expect......
Final thoughts
Gonna be honest about that grow , it should me just how far Genetics have come, 10 plus years ago before I stopped growing indoors , all we had was like lowrider auto and greenomatic auto and maybe few others but they were horrible...... but this auto produced quite well as expected it should with the size of my medium and my soil base and very little nutrients, which is what I had hoped for from the start , cause I didn't really know where to start in terms of Genetics as I have been out the game for awhile but I'm super glad with the results and some gratitude needs to be sent to CanukSeeds , they came through as it always starts and ends with elite Genetics👌 ...........
I can't wait to start my next grow diary, so keep an eye out , there's gonna be more to come , I'm going to try some really interesting cultivars........
PS. Can anyone tell me this , back in the day like 2003-4-5-6 wasn't growdiaries.com just a private forum cause if memory serves me , I was among those lucky enough to find a community that did complete grow logs, fourm style, which is where I found my growmie and Mentor Franco Loga from Greenhouse seeds , RIP BUDDY 😃
CANT WAIT TO START MY NEXT GROW
👉I HAVE CREATED A PLACE FOR GROWMIES TO VISIT , SHOW OFF THERE GROWS , AND JUST HANG OUT .....👈
👉ALL YOU NEED IS TO JOIN THE GROWDIARIES DISCORD SERVER !!!!!!!!!!!👈
LINK IS 👉
https://discord.gg/zQmTHkbejs

Likes
4
Share


@distant_lights
Follow
first week of flowering ...
vegetation phase done,i think,greatly...
looking forward..
23 january 2019
__________________________________________________


Likes
11
Share


@PanGrower
Follow
It grows well, in principle, nothing more to add. I will add fertilizers later


Likes
14
Share


@Quintall
Follow
Trocken Gewicht folgt
Geschmack 10/10
Wirkung 10/10
Evtl liegt es daran das es mein erster grow ist aber viel entspannter was man sonst so bekommt.
Ich bin jedenfalls zufrieden und freue mich auf den nächsten grow.
Da werden die Fehler dann ausgebessert.
Likes
9
Share

@GoodTimesOrganics
Follow
Welcome Back!💚
Nach der fünften Woche des Wachstums entwickelt sich die THC-V weiterhin wie gewünscht.
Durch das topping und das anwenden der LST Technik wird das Höhenwachstum gut im Zaun gehalten.
Ich habe die Triebe mit Erdnägeln nach unten gedrückt, damit die Pflanze nun besser in die Breite wachsen kann.
Ich denke, das die Pflanze nun noche eine Woche in der Vegetativen Phase bleibt und dann in die Blüte übergeleitet wird, da es sich um eine reine Sativa handelt.
Ich habe die Pflanze zudem die Woche noch mit Orgatrex gegossen
Die Umgebungsgegebenheiten sind OK:
—————
🌞 Temp: 21°C
🌚 Temp: 18°C bis 19°C
💨 RH: 54%
VPD: 0,85 kPa
—————
Viele Grüße 👋

Likes
3
Share


@MyWetPussy
Follow
Day 22 Sunny
Day 23 Rain showers/cloudy
Day 24 Rain showers/cloudy
Day 25 Sunny
Day 26 Rain
Day 27 Rain
Day 28 Sunny
Week review: I did a topping on day 25. I also took off the first set of single bladed leaves and first nodes. What remains on the seedling is the second and third nodes with their sets of leaves. The weather was mild and all over the place. So far there has been no pest issues.
😍
Likes
13
Share


@Hazeberg
Follow
I will update the report after it has dried, to give a number and also later with a smoke report. Stay tuned!
Likes
39
Share


@MariRemediesLLC
Follow
A lot of stretching. All fell over. Dug deeper wholes and replanted all. Notice plants were not growing and added another 600W LED lamp. Did not feed due to FoxFarm soil feeds for 3-4 weeks.
Likes
2
Share


@KeemBboomin
Follow
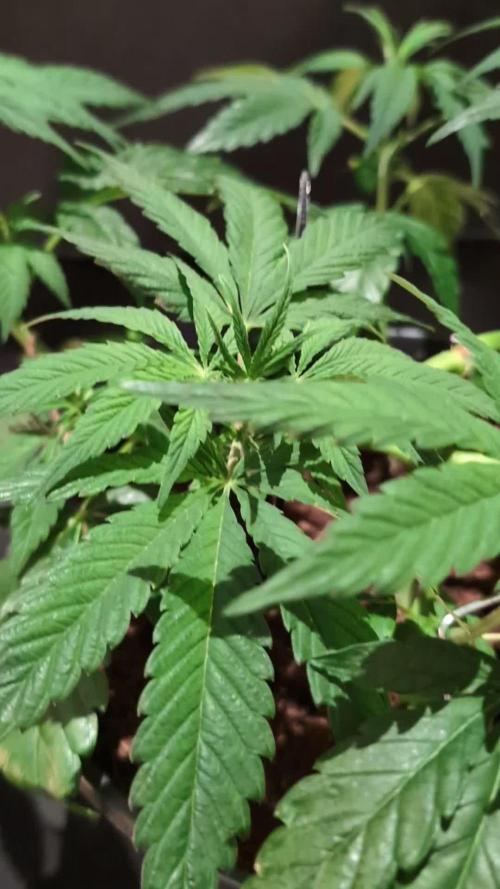
It’s now time to start flower. They are looking amazing and I’m going to go ahead and throw his crocs in there. I have one tent that I have not put in flower yet just for the main fact that one of my seats became a auto flower so I’m letting them run more time to let that auto flower finish and see what that becomes


Likes
15
Share


@420Consinc
Follow
- Week 6 -
----- Day 36 -----
No feeding today as it was tomorrow so nutrient line up isn't up yet. I'll do that tomorrow.
Ladies are perfect, I can't wait. less than 30 days away.
----- Day 37 -----
Today is feeding but back left is behind the other 3 again, gave the other 3 500ml of tap water (10ppm) to prevent turgor pressure loss while back left dries up.
Should be feeding in 3-4 hours. 23L 1100-1500ppm (new feeding, so ppm end is not known atm) 6.4 pH
Plants are insane, big Bertha has become middle Bertha as the other stems have fattened up quickly.
Speaking of which plants are in bulk period, 3~ weeks left so it's an exciting time to watch them fatten up.
**UPDATE** Fed at 1000ppm 23L 6.4pH
The removal of FloraNova Bloom, and letting the chelated Diamond Nectar go to work on the molasses brings down the "accountable" parts by the machine I use. 1000ppm is full strength on all fertilizers being used.
I might add more molassses in the future and bring it up to 2ml/L, and maybe a smidge of epsom salts next feeding via foliar or direct feeding after I do some research.
No more KoolBloom liquid, KoolBloom powder begins and she's a strong one.
----- Day 38 -----
Yesterday back left plant has me unnecessarily anxious. It didn't need watering till 2 hours before lights off.
What I did is fed the other 3 90% of the feeding, and only gave back left 10% (closed the irrigation heads till the end of feeding).
I'm HOPING it was the plant transitioning from pre-bulk flower to bulk-flower stage, and maybe it slowed down photosynthesis to concentrate on hormonal changes. I dont know I'm anxious and just talkin out loud.
I'll know within 72 hours if there's a major issue with back left. Plant looks fine, i'm just paranoid.
Pictures later today around mid light cycle. Buds are getting insanely fat.
**Update**
Was bored. Here's some wicked shots. Still 25-27~ days left and its big bulk time. Can't wait to see them at the end.
----- Day 39 -----
Everything is great.
Feeding late tonight or potentially tomorrow depending on back left plant. I want to make sure bottom center of the root zone has dried out and doesn't begin to mold before I water again.
This will also help prevent fungus gnats in the soil.
I'll keep the other 3 away from turgor pressure loss, but they got 90% of the feeding last time so I expect them to dry by the time back left is.
*** Update ***
Now the other 3 plants who were faster on water intake than back left yesterday have slowed down.
Weed growing knowledge at a Horticultural greenhouse scientific repeatable level is pure fucking garbage.
I have 6~ books and checked dozens of sites and there was major conflicting info on water intake.
That's the problem with cannabis, it was illegal for so damn long horticulture practices and knowledge never molded or were used in the process and now it's anyone's fucking guess as to who is telling truth or is spouting bullshit bro-science.
Don't even get me started on names.
What a stupid god damn naming system "counter-culture" created... I'm growing wedding cake.. WEDDING CAKE? Wtf.
That's stupid as shit. Give weed botanical Latin names based on appearance and technical factors PLEASE!!!!!!
If I could name this plant it would be (Cannibas v. hybrid 'multa-magnum-fragum-gemmae-dulcis') why? It's due to it being a; Cannabis plant, hybrid variety 'multiple big bud strawberry candy' showing off multiple long bud stems smelling of candy,
Is that more convoluted and arrogant than Wedding cake?
YES, it is.
Is it better?
YES fuck your stupid wedding cake name.
That's dumb. And you should feel bad.
Still want to argue? Name it Cannabis v. Hybrid 'crustulam nuptias' THERE! Wedding cake. fuuuck!
99.99% of plant names are Latin.
Anyways... back to the point...
I hypothesize that there is a secondary transition portion of flower where the plant (like in stretch transition) pauses its growth to move the hormone and nutrient production to other sources. This secondary pause happens JUST before bulk session begins.
This hypothesis states roughly that up until final big bulk period (last 3-4 weeks), fan leaves and sugar leaves could still be produced by the plant during a "predator" or "high weather event" situation that would cripple the plants photosynthesis for final bud/seeding production during early to mid stage flowering.
Once the plant has reached adequate nutrient reserves or some other time or light cycle based trigger, it removes the hormonal/internal production/ability of sugar/fan leaves still being potentially produced out of the internode stem cells and fully stops that ability and concentrates 100% of growth on bud structure and protection of bud structures through THC/CBA/CBC/CBD etc. (Im a little tipsy, can't spell cannabinoid leave me alone...) production.
Tonight I will at 30 minutes before lights off be judging the water requirements during sleep of each plant to prevent turgor pressure loss, and to allow each plant to finish this transition and get back to major water intake by feeding tomorrow morning.
It's insanely obvious somethings changed.
I Was worried that leaving back left plant with stagnant water in the bottom saucer (pot doesn't sit directly in the water but is 3 inches above it) had released mold spores and started destroying the root mass of the back left plant but:
1) No obvious plant death signs, weakness or other aspects of it being a slow death from bottom up.
2) The other plants did the same damn thing within 48 hours.... and the back left plant is by far the largest and gets the most "light" due to its size hence it would most likely (HYPOTHESIS) finish its secondary cycle a bit faster due to just volume and weight.
Listen i'm not gonna say this is all 100% correct knowledge, It's based off feeling and "knowing" plant cycles as a greenhouse certified Horticultural Technician.
Repeated efforts to grow and replicating situations that created these things over and over is the real proof and will come in time.
One major benefit is the fact I WILL be re-flowering these for the VERY LEAST 3 full flowering cycles as long as they don't die during flower to veg transition.
I will be getting them THC tested EVERY SINGLE flower cycle to prove without a doubt the "maximum maturity" possible of a weed plant re-veg flower cycling, just like how we know by the 5th or 6th successive clone, the DNA will deteriorate and the grow will be stunted or a lesser bud high and yield.
God I fucking ramble when I'm bored and tipsy.
----- Day 40 -----
Fed at 1350ppm 6.3pH 23L
Plants are doing great.
**Update**
Little fun video from mid light cycle.
Roughly 20-25 days left.
Will finish at 30% amber 70% cloudy and will cut branch by branch as they are done, not in a rush to do 1 single cut and will let them survive to re-veg easier and less stressful.
----- Day 41 -----
Easy day. Here's some pics.
Just basically have to watch the grass grow today.
----- Day 42 -----
Big photo day, used ruler for most shots.
End of beginning of bulk, big bulk starts tomorrow.
Could probably feed late night tonight but I'm going to just give 500-750 ml of water depending on roots needs before lights off.
Tomorrow will be a big feed for first day of week 7.
Tropicanna Glookies tips on back right are beginning to darken and become purple. I am hoping this whole plant turns purple in last 2-3 weeks.
We will see.
**Update**
Back right plant is starting to turn purple and FAST. Pretty awesome.
Likes
78
Share


@Roberts
Follow
Pure Ice cream is doing great, under the Spider Farmer G5000/UVR40 lights. I am afraid she is getting too close to the lights. I may have to hst her. She has been really hungry and starting to stack now. Nothing else to report. Thank you Spider Farmer, Athena, and Pure Instinto Seeds. 🤜🏻🤛🏻🌱🌱🌱
Thank you grow diaries community for the 👇likes👇, follows, comments, and subscriptions on my YouTube channel👇. ❄️🌱🍻
Happy Growing 🌱🌱🌱
https://youtube.com/channel/UCAhN7yRzWLpcaRHhMIQ7X4g
Spider Farmer Official Website Links:
US&Worldwide: https://www.spider-farmer.com
CA: https://spiderfarmer.ca
UK: https://spiderfarmer.co.uk
EU: https://spiderfarmer.eu
AU: https://spiderfarmer.com.au
G5000 Light Amazon Link:
amzn.to/4643esa
UVR 40:
https://www.amazon.com/dp/B0BR7SGTHS
Discount code: saveurcash (Stackable)
