


Likes
Comments
Share


@German_GrowLab
Follow
Einen wunderschönen guten Tag, liebe Grow-Community, und herzlich willkommen zur neunten Woche meines kleinen Outdoorprojekts!
Heute dann doch mal wieder an einem Montag :). Ich habe es nach dem Mary-Jane-Wachenden leider noch nicht nach Hause geschafft. Allerdings habe ich paar Bilder vorproduziert, um hier nicht mit leeren Händen aufzutauchen.
Ich bin die letzte Woche ein wenig durch die heimischen Wälder flaniert und habe den ein oder anderen Schatz bergen können. Aber alles der Reihe nach …
Da ich messbedingt nicht bei den Pflanzen sein konnte und das mit dem Gießdienst an Dritte abgeben mal so, mal so funktioniert. Dachte ich mir, man muss der Verdunstung und der damit einhergehenden Trockenheit etwas entgegensetzen.
Ich habe mich als kurz und knapp für eine Mulchschicht entschieden. Diese schützt nicht nur vor Austrocknung, sondern macht ebenso die obere Erdschicht für die Durchwurzelung brauchbar. Sie ist obendrein ein weiterer Schritt zu einem gesunden Bodennahrungsnetzwerk. Dieses wird durch die in dem auf dem Grünschnitt/Waldlaub enthaltenen Mikroorganismen (Protozonen, Wimperntierchen), welche durch das Belüften im Tank nochmals gefördert werden, noch einmal gestärkt. Last but not least führt der Mulch dazu, dass Schadorganismen das Einfallen in die obere Erdschicht erschwert wird.
Aber was ist drin?
Ähnlich wie schon beim Komposttee wird bakterienreiches organisches Material in einen Tank mit vorzugsweise Regenwasser gegeben und anschließend über einen gewissen Zeitraum belüftet (siehe Woche 5). Der wohl größte Unterschied zum Komposttee ist, dass wir eher auf das Material und nicht auf die Flüssigkeit aus sind. Dieses besteht zu ca. 90 % aus Grünschnitt (in meinem Fall eine Biokleintiermischung) und zu ca. 10 % aus Laub, welches ich in einem wenig bis gar nicht bewanderten Waldstück gesammelt habe.
Die richtige Platzwahl:
Bei der Platzwahl war mir wichtig, einen möglichst naturbelassenen Teil des Waldes auszusuchen, um eine Kontaminierung von bspw. Müll oder Hundeurin zu vermeiden. Ebenso habe ich nach Material Ausschau gehalten, welches schon Kontakt mit einem Pilzmyzel und dem ein oder anderen Regenwurm aufwies. Beides sind Indikatoren für ein gesundes Bodenleben.
Zum Schluss …
Nun einfach alles in einen großen Tank, Wasser drauf und Pumpe an. Belüftet wurde das Ganze für drei Tage. Danach das Material entfernen und luftig um die Pflanzen aus Ringen (leicht in den Boden einarbeiten). Um mit so wenig Waste wie möglich zu arbeiten, habe ich dann noch das Wasser gegossen. Dieses ist sehr reich an Mikroorganismen.
Aber nun (besser spät als nie) noch ein paar Credits:
Und zwar an Flo von Florganics, von dem ich das meiste Wissen um den Komposttee, die Erdmischung sowie auch das Mulchen bezogen habe. All die genannten Themen sind nochmal deutlich detaillierter auf seinem Yt-Kanal (Florganics) zu finden.
Noch ein kurzes Wort zu den Damen:
Soweit sehen alle sehr saftig und grün aus. Mit dem Toppen warte ich noch, bis ich wieder da bin. Alles in allem sollte am Ende doch ein wenig herauskommen (im Optimalfall 50 g/Person).
Das war’s für diese Woche. Euch nun einen schönen Restmontag und einen guten Wochenstart.
Peace




Likes
13
Share

@All_our_small_plants
Follow
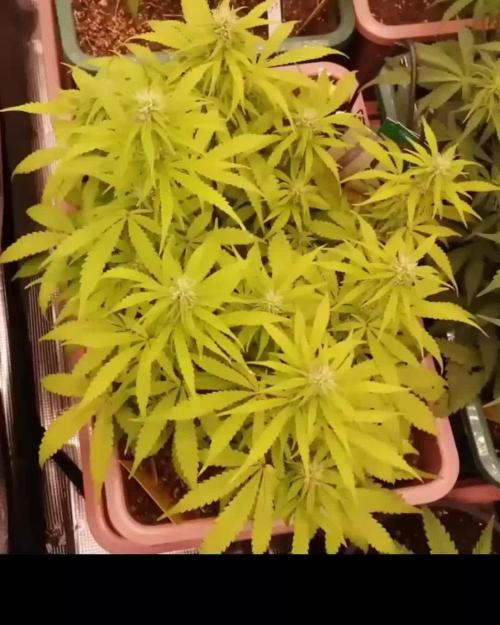
Bewässerung: 1000 ml alle 2 Tage
pH-Wert: 6,1
EC-Wert: 1,2
Temperatur: 22ºC
Luftfeuchtigkeit 62%
Schädlingsbekämpfung:
PPFD: 500 µmol/m²/s
DLI: 33
Düngemittel: Mineralischer Dünger 3.5-6-6 PK 13/14
Besonderheiten: Wurden direkt in die erde gepflanzt in einer Kokos-Quelltabletten.
-Tag 51 Heute haben wir sie wieder gegossen und Dünger gegeben
-Tag 53 Heute haben wir mit effektiven Mikroorganismen und mit Plagron Power Buds gegossen 😜
-Tag 55 Heute haben wir sie mit Wasser und Dünger gegossen, sie entwickelt so langsam ihre Blüten und sieht sehr gut bis jetzt aus 😍




Likes
29
Share


@TonyTrichomes
Follow
Not an overly impressive strain and I would say she was not that hard to grow. If I even grew this one again I would let it go naturally with some LST. Wanted more grape flavours but they don't really come through in the smoke. There's a bit of a sharp fruity smell that's sort of piney with a hint of fuel at the end. The smoke is not too flavourful in my opinion but that just means I didn't grow it well. Super tight nugs so be careful with humidity as stated above. Also she's a bit of a light feeder so be careful with your nutes. As you can see I burnt her tips and over fed her a lot. Not a bad yield though! I've only really smoked the lowers on this one so far so that gave me a bit of a racey high, just slightly racey. I would accredit that to the lowers not being mature enough at chop. The plant is super dense and since I mainlined it the lowers didn't receive enough light. I tried to let the lowers mature more but the plant stopped maturing when I chopped the tops, this caused stress and the plant just shut down basically. Not sure if I would grow Blimburn's GDP again until I grow the real GDP.


Likes
7
Share


@eldruida_lamota
Follow
Que pasa familia, vamos con la cosecha de estas Black Muffin F1 de Sweetseeds.
Esta variedad me resultó bastante sencilla de cultivary es bastante resistente, si no la maltratáis crece mucho y bien sana, la flor se ve increíble, tiene una cantidad de resina considerable y unos tonos rojos oscuros muy peculiares, se ven genial.
El olor que desprende es bastante frutal con toques cítricos, no pinta nada mal, las flores están prietas.
No da mayores problemas, el ciclo no es largo, cuiden con la altura ya que se desmadran un poco.
IMPORTANTE destacar: En las fotos comprobaréis que ya no hay botes de cristal con sobres de bóveda, ahora hay Grovebags.
Que son una especie de sobres o bolsas que retienen el peso, previene la aparición de moho y mantiene intacto el terpeno, para que el curado sea más óptimo.
Hasta aquí todo, Buenos humos 💨💨💨
Likes
5
Share

@Satax
Follow
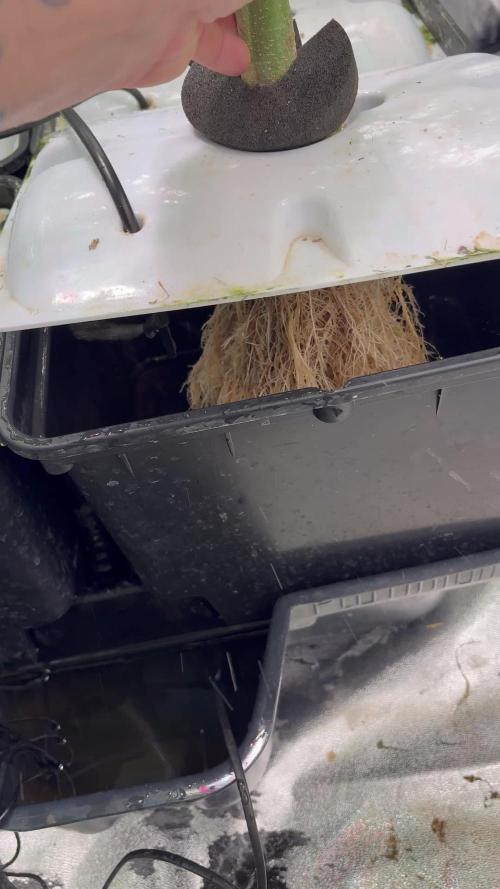
Everything is still going well overall. I’ve always had an issue with a Cal/Mag deficiency that I had to monitor for some of the plants. Otherwise, they’re swelling nicely — the Green Poison is starting to look really good and is showing signs of maturity, earlier than the others. I’m starting the flush on all the plants since I’ve fed them well during the grow, and I think they still have enough nutrients left in their systems.
The smell is very strong, and the buds are dense and resinous — it’s looking promising..
I’m going to start applying my stress technique on the plants by inserting screws into the stems and using a small scalpel to remove some bark along the trunks, in order to push the resin production even further.


Likes
14
Share


@Quintall
Follow
Trocken Gewicht folgt
Geschmack 10/10
Wirkung 10/10
Evtl liegt es daran das es mein erster grow ist aber viel entspannter was man sonst so bekommt.
Ich bin jedenfalls zufrieden und freue mich auf den nächsten grow.
Da werden die Fehler dann ausgebessert.


Likes
30
Share


@XperencdGmanXG
Follow
another week of no rain right after a 100mm storm. Plants are in full bloom now and need a regular supply of water. I hope mother nature starts to co operate here.
Likes
3
Share

@ElCapo420
Follow
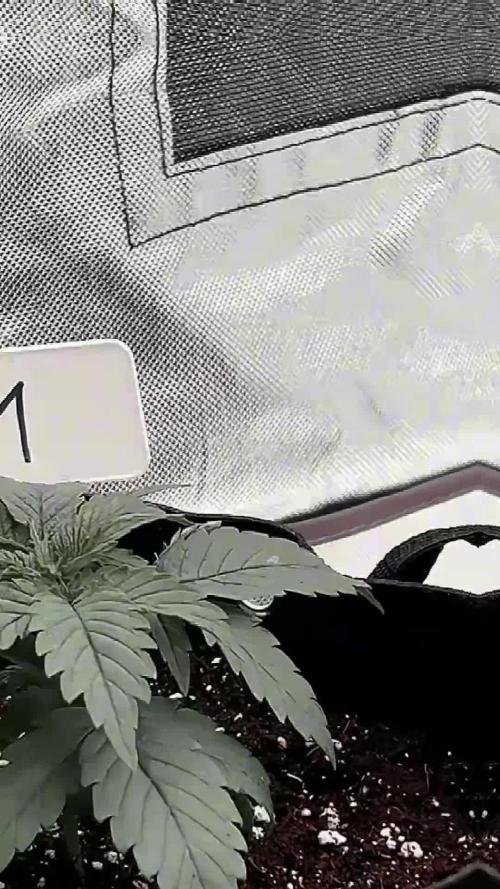
Sie haben eigentlich alle Veränderungen durch den Umzug gut weggesteckt und sind schon ein ganzes Stück gewachsen. Ich habe sie diese Woche einmal mit dem „Wurzeldünger“ gegossen und heute mit Mycotrex ziemlich tief in 8L Stofftöpfe umgetopft, weil Sie mir am Anfang gespargelt sind. Mit dem Aussehen der Wurzeln bin ich auch sehr zufrieden. Insgesamt geben meine Ladies auf jeden Fall Gas.

Likes
109
Share


@ButtersStotch
Follow
-Growing well, but as I was watering my White Widow Autos and had these behind me on the floor my dog took a big bite of the big WW Twin. I hope it survives.
-Think I mat have to transplant by the end of next week
-I'm going to introduce nutes next week.

Likes
1
Share


@wildmanjs25
Follow
2/13: Stem still seems stretched from the shell being stuck on the leaves.
2/16: Decent heat stress observed an afternoon. Temperature was 80° and the light has been at 100%. Move the light to 26 in and open more events in the tent and window in the room to let in cold air overnight. Time to temperature got down to 62°.
2/18: Heat stress is improving. Keeping her well watered.

Likes
16
Share

@BushDoctor740
Follow
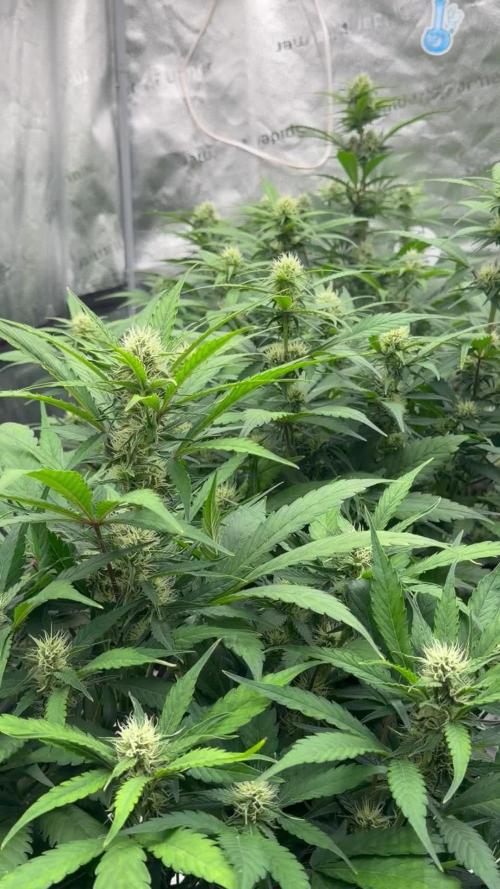
Frostbangers are doing really well as the buds are thickening up she smells so good.They are starting to produce some heavy trichomes.I have begun to add 2ml Plagron green sensation every feeding now.The light intensity is set at 70 percent on the Se7000 which they are taking well.
Likes
10
Share


@BodyByVio
Follow
This week I top all 8 Green Poison ( 4dwc and 4 coco ) clones. They look healthy and happy and few days later I already start to low stress training (LST) them.
Likes
8
Share
@eldruida_lamota
Follow
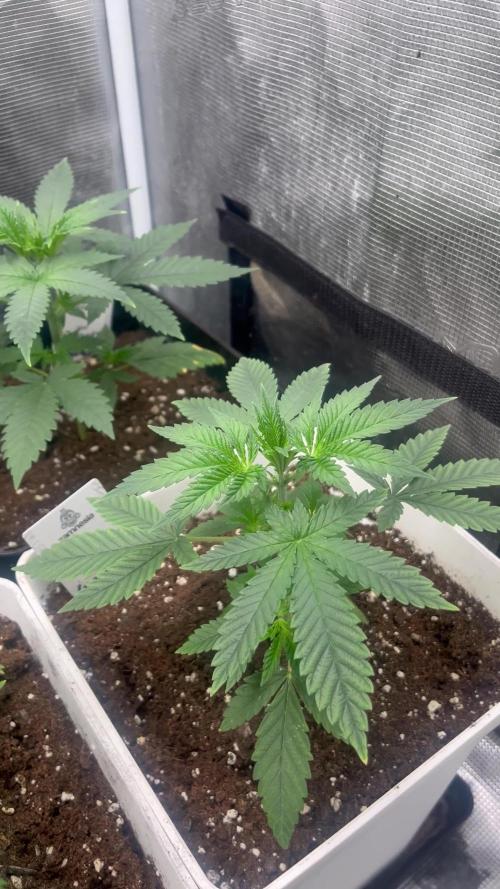
Que pasa familia, vamos con la cuarta semana de vida de estas Purple Lemonade FF de Fastbuds.
Vamos al lío, las plantas se trasplantaron en macetas de 7 Litros, con tierra top crop y plagron mezclada con un poco de coco.
El ph se controla en 6.5, la temperatura la tenemos entre 24/22 grados y la humedad ronda el 70%.
El ciclo de crecimiento puse 20h de luz, el foco está al 50% de potencia.
- os dejo por aquí un CÓDIGO: Eldruida
Descuento para la tienda de MARS HYDRO.
https://www.mars-hydro.com
Hasta aquí todo, Buenos humos 💨💨💨
Likes
7
Share

@DaedalusGrow
Follow
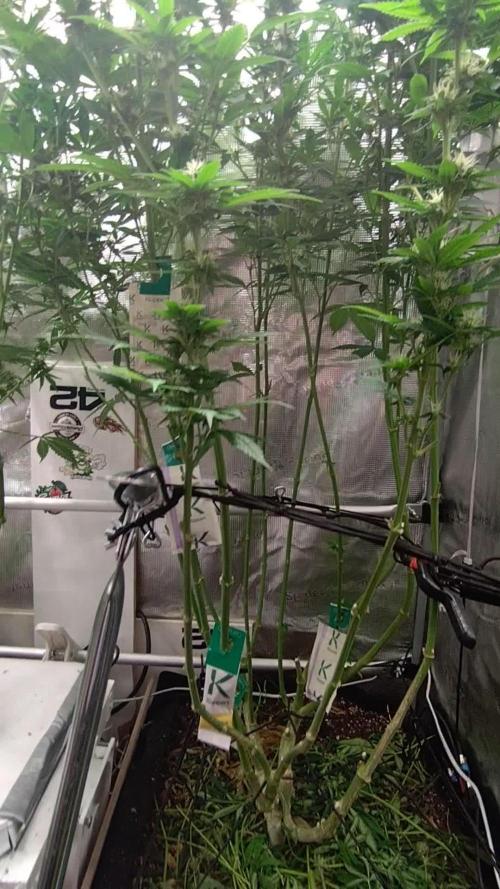
Ist sehr schön geworden habe mittlerweile eine reißen größere erreicht ?🌱😜💪 mal sehen wie sich noch schlägt ☕


Likes
3
Share


@Superfly0303
Follow
The video is probably the quickest update 😄
My next run; i plan to be less of a Variety King and finally use my SCROG net. The beans I'll be running to scrog are Royal Cookies and El Patron (both RQS), if anyone has any experience with those strains? I'll be running a smaller Apple Fritter and Blue Cheese auto too... hey, I have very discerning terp-buds, ok?!
Likes
4
Share

@MandaleApical
Follow
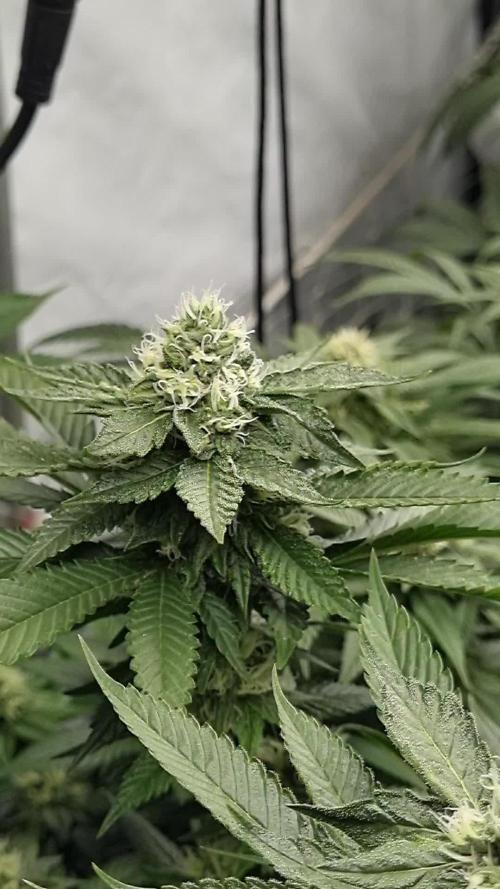
1 mes de flora. Cogollos dulces todos. De izquierda a derecha se mezclan con, mas dulce, incienso, limoncito dulce, uva.
