


Likes
Comments
Share


@Growing_Spartan
Follow
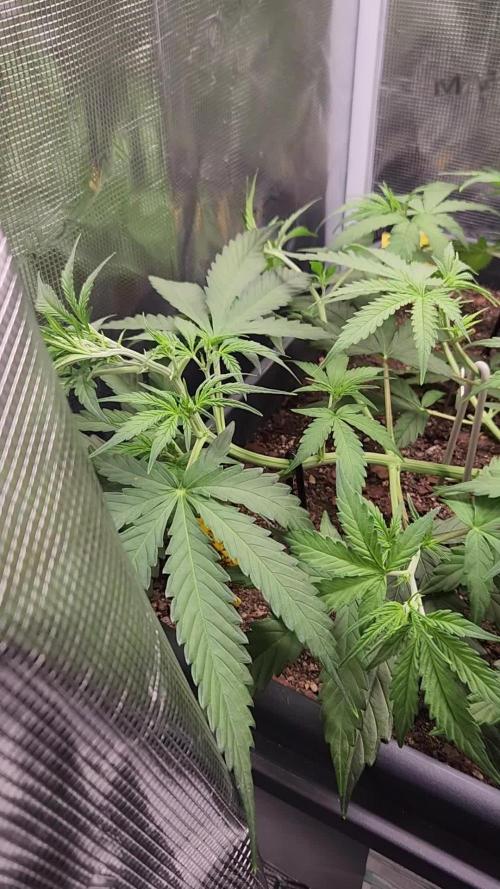
Today’s date is June 11th, it has been 6 days since my last update.
So far the Dolomite lime seemed to have helped with the yellowing of my fan leaves and the only “yellow” ones left look like they have a fade to them but I’m not sure if it’s due to proximity of the harvest or from the magnesium deficiency I had earlier. Either way I have to be more on top of my nutrients and my macros too.
They chunked up a decent size and the branches are even toppling over from their density! Trellis was definitely needed for this one.
Nothing special but watering when needed, temps have been as high as 84 and as low as 67, I’m really trying to master the environment but due to my location it’s getting harder to do so without hoping I don’t blow a fuse with all my equipment running, haha.
Overall I’m happy so far and hopefully next run I’ll dial in more perfectly, if you have any tips for me please share!



Likes
24
Share


@Leeyum
Follow
I feel like I really identify with this strain. This is only the second one I've grown but I can read her well. If you think you've got a green pheno, try dropping your nitrogen and your temps to trigger her genetics (epigenetics) to influence her phenotype. This girl is almost done. She's right on schedule. Her trichomes are about 90% cloudy. I'll let her hit up to 20% oxidized. She's fattening up nicely. Her bud structure is much different than the first Blackberry, she's much more solid/ dense.

Likes
11
Share


@SintrexGrow
Follow
The plant is growing very healty and fast. Very happy with the results so far. Will keep documenting as this is a DIY project 😀

Likes
16
Share


@nonick123
Follow
Día 43 (24/02) Riego con 400 ml H2O EC 0,45
Está reaccionando muy bien al Lollipopping y poda de bajos 😁
Día 44 (25/02) Riego con 350 ml H2O EC 0,45
Se empieza a formar los tricomas! 😍
Día 45 (26/02) La altura está sobre 60 cm.
¿Debería haber reducido en 1 una semana el vegetativo? Yo quería plantas pequeñas en SOG 😂
Riego con 400 ml H2O EC 0,45
Elimino algunos brotes de la mitad inferior de la planta que no van a formar buenos cogollos
Día 46 (27/02) Riego con 350 ml H2O EC 0,45
Floración a todo tren formando los erizos 💥💨😁
Día 47 (28/02) Riego con 350 ml H2O EC 0,45
Día 48 (01/03) Riego con 350 ml H2O EC 0,45
Preparación del PK Booster Compost Tea
Día 49 (02/03) Damos el stretch por terminado ya que estamos en día 21 de floración
Lollipopping y defoliación del día 21 para potenciar la floración!
Aplicación de 0,5 Litros de PK Booster Compost Tea de nuestros increíbles amigos de BIOTABS
🚀 FastBuds 15% DISCOUNT code "NONICK" 2fast4buds.com @fastbuds.official
💦 BioTabs 15% DISCOUNT code "GDBT420" biotabs.nl/en/shop/ @biotabs_official
🌱Substrate PRO-MIX HP BACILLUS + MYCORRHIZAE @promixmitch @promixgrowers_unfiltered
💡2 x Mars Hydro FC1500 EVO Led Grow Light (2024 NEW FC 1500-EVO Samsung LM301H 150W LED) - https://marshydro.eu/products/fc1500-evo-led-grow-lights/ - https://www.amazon.de/dp/B0CSSGN5D8?ref=myi_title_dp


Likes
14
Share


@TeaTime
Follow
One of those pot I’m already doing the flush. Tomorrow I’m going to do the flush with cold water and leave for 2 day in the dark before to cut.
After normal flush, 3 day before I did the flush with cold and ice. And I going to leave for 72 hours in the dark.remember that it’s one of 3 pot of speed + , another pots I’m leaving for one more week .

Likes
19
Share


@GoldenWeedGrower
Follow
I'm not sure why, but I don't like the way she's growing :(
I supposed that my plant problem is the over watering. So no I inserted an air pipe directly in the rockwool cube to give more oxygen to the roots and let they get more nutrients.
👍👍👍👍👍👍👍👍👍👍👍👍👍👍👍👍👍👍
Lesson Learned:
IN THE NEXT SET UP ADD A STONE WITH AIR PUMP DIRECTLY IN THE BASKET
👍👍👍👍👍👍👍👍👍👍👍👍👍👍👍👍👍👍
I will leave the pipe all night and see how the plant will look tomorrow.
Cross fingers.

Likes
21
Share


@NG420
Follow
Unfortunately one Cfl lamp burned a part of a leaf on the FIM.Pistils are visible in all plants🌱. A part of them turned a bit darker. Girls are now growing a bit faster.Lst seems to work fine.


Likes
7
Share


@OwlGang_Uk
Follow
Gorilla Glue #1 - Harvest Comment - I Am Very Satisfied With What I Got, I got 3 ounce 7 grams - I Uses Advance Nutrients PH perfect In veg then I switch to the iguana juice organic juice for the flowering stage. I notice a much more slower growth when I switch to organic nutrients.00
Processing
Likes
27
Share


@LockDownGrow
Follow
ok so everything has gone fantastic , no nutrient burns at all , and have been slowly creeping up the base nutrients , i have stopped the cal mag and now adding house and gardens bud XL at full strength these girls are now in full swing of flower and i bought a new ph stick this week ,
i have found when PHing the feed bucket that its best too have air stones in the bucket , add all nuts and then ph but do not use the feed that day as if you check the next day the ph is off again so i left it 24 hours after i add more ph down , and it seems too make the measurements alot easier and stable , i have bent down the main stems " without damaging them onto my netting too A keep the canopy all the same high so my lighting is covering all plants at the same distance and also it allowed the side stems too reach up too ,
i also was sponsored another new led light by kingbo this week so have added another 600watt led too the grow , so now have two 600's and one 900watt , and temps are still fine sitting at 24c lights on and 19-20 off , so am pleased with that , this lady is nice and compact and tight lots of leaves that I had too remove too open up her bud sites , stretch was also minimal ,
Likes
14
Share


@Fullmeltalchemist
Follow
d43 - 9.26 - Recovering quite nicely. Was able do just about all the training and trimming I want to before I switch to flower around the end of week 8. My Fast White Widows are definitely more ground hugging, while the Black Sugars are reachers, but still manageable. They have all been trained to best fit the recovery of each individual plant, so my canopy definitely isn't going to be even 😅Nonetheless, grateful they have been resilient little buggers and happy for the chance to take them flower, regardless of whether I'll have the picture perfect tent. 🙏
D47 - 9.30 - I lied. I had to train a little more. One BS cola was really outgrowing the rest, and the opposite side of plant had taken for damage from bug treatment two weeks ago so i HST'd it back and spread the other. Still planning to flower them in 7-14 days!

Likes
9
Share


@GrowPassionItalyChris
Follow
Sono felice di queste varietà, impressionanti come si adattano ai cambiamenti climatici italiani e soprattutto resistono ai parassiti tipo afidi e lepidotteri. Sono tante piante,diverse varietà da 4 banche dei semi mondiali quindi descriverle tutte sarebbe assurdo. Ogni varietà cresce abbondantemente, iniziano tutte a riempirsi di infiorescenze resinose,profumate e abbastanza appiccicose alcune. Sono rimasto sorpreso per la dimensione di alcune varietà, sono tipo di taglia XXL e non si fermano, continuano ad allungarsi e ad allargarsi nonostante sono poco distanti una dall'altra. Sembra una piccola foresta di autofiorenti felici e con il caldo estivo in arrivo non faranno che migliorare! Prevedo tanta abbondanza di qualità! Complimenti a tutte le banche semi che ho scelto! Un abbraccio


Likes
14
Share


@FourVentiFarms
Follow
28th week for critical
the critical was very resistant, very strong but had like 50 seeds maybe for stress or defected seed
Likes
1
Share


Likes
35
Share


@Reyden
Follow
Chiedo scusa anche ad AMS per non essere stato presente nei diari ma anche questa settimana è stata piena di trasferte e ho lasciato a mia mamma il compito di dare da bere alle ragazze ma purtroppo come sempre devo stare attento perché è rimasta acqua nei sottovasi per una notte e spero che non abbia fatto danni…..
Spero di riuscire a fare qualche foto e qualche video che caricherò poi appena avrò tempo
Le piante sembrano stare bene e L odore che emettono inizia a farsi sentire pungente e questo mi fa felice 😀
Grazie per la comprensione e speriamo di finire presto con raccolto di qualità 😛

Likes
4
Share


@DatGuyGrows
Follow
Grown out this week and got them ready for the early flower growth. Trimmed heavy and wired all branches away from each other. LST in full effect. Hoping it’s not too much trauma for them.. they proved me wrong. Bounced back with vigor and bright excitement! Eager to see these buds start forming 👀

Processing
Likes
4
Share


@Stick
Follow
She drinks a lot and drives all her energy to the buds, they are getting really huge 😎 I noticed some slight foxtailing on the upper colas but this is probably due to my QB being too close so I'll dim the driver down to 75% to end the flowering cycle of this GoldBarKush because I have no more vertical space left. The orange smell is delicious! Can't wait!


Processing
Likes
4
Share


@Green_Thumb
Follow
Noticed some slight yellowing and the white blemishes on a couple of the older plant's leaves were getting bigger. I believed the white blemishes were do to a cal-mag deficiency and added that to my feed. Also was using 1/4 nute strength and now bumped up to full to counter the yellowing. Started LST this week too.