


Likes
Comments
Share


@KonstantinUKR
Follow
Показала пол в срок.
С третей недели пошел компот , по 1мл/л базы.
Компот малышке очень даже нравится.
Идёт стабильный и быстрый набор массы. Запах просто бомба, что же будет дальше...
26.12 Прошло 2е суток после полива компотом, результат на лица по фото

Processing
Likes
10
Share


@Drtomb
Follow
Just hit day 10 of flower.this net has about 20% touching the 2nd trellis. And about 70% almost touching.
One plant has a very big node spacing. Over all plants are healthy and have been given a second scarecrow method trim.

Likes
5
Share


@mobbly
Follow
"Hi, I received my pH meter this week, so from week 6 onwards, I'm aiming for a pH value of 6.0 - 6.5. This week, I noticed that the plant in the small pot received too much fertilizer. The other two 7.5-liter fabric pots also received double the recommended amount according to the feeding schedule, but they don't show any signs of over-fertilization."

Likes
7
Share


@ROY4L_GU4RD
Follow
Day 61 of flower 🌼 today. On Day 59 I used koolbloom one last time along with a dose of recharge. Going forward I'll only use the Ripen this week and allow the flushing out to continue.
Rainbow cake is almost finished and looking great. The listed flower time is 68 days, so we're definitely getting close. The fan leaves are really green still so there's definitely some more flushing needed.
Pineapple express is flushing at a faster rate than the other 2 plants. I recon it's the size difference. Flower time is listed at 56 days but it's not showing finished yet. Buds still have a lot of white pistols and a lot of clear tri. Hopefully she'll be good in around 10 days.
London mint cake is doing well. Flower time is listed at 60 days. Tri is 50 percent cloudy and 10 days of flushing out will put her ready right on time.
Thanks for checking my diary everyone. See ya next week!


Likes
92
Share


@DogDoctorOfficial
Follow
Week 9 - First Week of Flowering 🌸
The dark period has ended, and these ladies came back into the light fully energized and ready for action! It’s just the first week of flower, and they’re all praying, stretching, and absolutely thriving—filling up every inch of the tent. This grow space is officially packed from wall to wall, with each plant competing for its share of light and showing off some of the biggest, healthiest leaves I’ve seen yet! 🌱
A few strategic plucks here and there have kept airflow smooth and light penetration balanced. Those big leaves? They’re a sign of happy, healthy growth. Large leaves help the plant capture maximum light energy, essential during this stage, especially as they start focusing on developing those flowers. When plants grow huge, vibrant leaves like these, it means they’re well-nourished and content in their environment—a true testament to the well-balanced conditions we’ve got going in the tent!
Flowering Parameters 🌡️
Room Environment:
• Temperature: 26.7°C
• Humidity: 63.3%
• CO2: 960 ppm
• VPD: 1.29 kPa (prime zone for flowering health!)
Lighting:
• Light Intensity: 835 PPFD (ideal for boosting flower growth)
• Solution: pH 5.96, TDS 460 ppm, temp 21.1°C
• Medium: Moisture: 100%, TDS: 520 ppm, Temp: 21.6°C
Carbon Filter Installation & Smell Management 🌬️🌱
With the transition to flower, the scent profile is already starting to kick in—crazy for the first week, right? 🌸 To keep everything fresh and under wraps, I’ve set up a carbon filter system. Here’s how it’s working: I’ve connected the filter to my Aerofan, which pulls air directly from the tent. This air is cleaned by the filter and released into the main room, where it then passes through another filter before exiting my space. This dual-filter setup means no scent escapes into the wild, keeping things stealthy and the grow room a peaceful, scent-contained environment. Perfect for anyone concerned about keeping their home free from that telltale aroma! 🕶️🌬️
Enhanced Lighting with Emerson Effect 🌞
This week, I’ve introduced an extra 15 minutes of red light at the beginning and end of each light cycle. Why? Well, this red boost taps into the Emerson effect, enhancing photosynthesis efficiency, especially during the flowering stage. By stimulating a little extra wake-up and wind-down light, we’re mimicking the natural sunrise and sunset experience for these plants, which can help reduce flowering time. Not only does it encourage smoother transitions into day and night, but in theory, it’ll help these ladies finish a bit faster, while giving them a little nudge to build more substantial, quality flowers. 🌇
Nutrient Adjustments 🌱
Now that we’re in flower, I’ve swapped out the Start Booster for P-Boost and TopBooster to specifically support flowering needs. Here’s why:
• P-Boost brings in additional phosphorus, vital for energy transfer and cell division as the plant channels more resources into budding sites.
• TopBooster supports the flowering phase by improving flower quality and density, helping to build those big, aromatic buds we’re after.
These changes bring the nutrient mix in line with what’s most beneficial at this stage. All this precise dialing in is easy to manage thanks to the TrolMaster system. From pH to nutrient scheduling, the TrolMaster ecosystem and ThinkGrow LEDs have been the ultimate teammates in this grow journey, giving me real-time data, fine control, and peace of mind. 💯
(Not introducing UV light just yet, but stay tuned as that’s coming soon for an added boost!)
Looking Forward 🌟
Next week, we’ll be upping the reds, giving us an even greater chance of activating those flowering signals for a smoother, faster transition through the cycle. I’ll keep tweaking and fine-tuning every parameter to make sure these ladies get exactly what they need to thrive.
Big thanks to the TrolMaster system for keeping everything in balance and optimized, along with the supportive Grow Fam following this journey! Your enthusiasm, advice, and support are a huge part of this grow’s success. Keep following for more updates, and stay tuned for what’s next! 🌿✨
P.S. Deep Dive: TrolMaster’s MBS-S8 CO₂ Sensor & Smoke Detector 🚨
The MBS-S8 CO₂ Sensor from TrolMaster is a powerhouse for growers, especially when it comes to optimizing plant growth and efficiency in a controlled environment. This sensor continuously monitors CO₂ levels and integrates directly with the TrolMaster ecosystem, giving you real-time data on CO₂ concentration. Ideal levels of CO₂ can significantly boost growth and yield during certain stages, so understanding and managing CO₂ is key. With the MBS-S8, I can control CO₂ levels precisely, keeping them within the optimal range for photosynthesis. This sensor is a game-changer because it adjusts CO₂ delivery automatically, giving plants exactly what they need without any extra monitoring from me.
Meanwhile, TrolMaster’s Smoke Detector is an essential safety device, especially in spaces with electrical equipment, lights, and heat-generating components. This detector can be set up to alert me instantly via the TrolMaster app if any smoke is detected, allowing me to respond immediately to any potential issues. Fires and smoke are rare in controlled grow setups but having this safety measure provides peace of mind and lets me focus on the plants without constant worry. It’s an incredible tool for any grower prioritizing safety and proactive monitoring.
Discount Codes so you can save big on your next check out 💚💚💚
Kannabia - DOGDOCTOR 30% off
SeedsmanSeeds - DOGDOCTOR 10% off
CannaKan- DOGDOCTOR 15% off
terpyz.eu - DOCTOR 15% off
The Neutralizer - PORKIT5-DOG 15% off
As always thank you all for stopping by, for the love and for it all , this journey of mine wold just not be the same without you guys, the love and support is very much appreciated and i fell honored and so joyful with you all in my life 🙏
With true love comes happiness 💚🙏 Always believe in your self and always do things expecting nothing and with an open heart , be a giver and the universe will give back to you in ways you could not even imagine so 💚
Friendly reminder all you see here is pure research and for educational purposes only
Growers Love to you all 💚💚💚


Likes
44
Share


@RakonGrow
Follow
Note : jegliches Zubehör wird in der GermniationsWoche aufgelistet .
Day 29:
+ PPFD 550 * 20h = DLI 39.6
+ Flaschenwasser mit Canna-Boost 1.5Liter
Die war komplett Trocken ... kaum zu glauben lol
Day 30:
Sie alles recht normal aus . Es entfaltet sich noch .
Day 31:
+ Flaschenwasse 2L EC 0.26 PH 7.3
+ + mit Dünger EC 0.7 PH 5.7
+ Drain 0.25L mit EC 0.9 PH 6.8
Fazit : ich übe noch mit dem Dünger und dem "zuviel" an Urgesteinsmehl :))
Day 32:
Das Wetter ist eine Katastrophe . Draussen ist es 21°C mit 90%rH . Hier drinnen sind es im Zelt 26°C und 67%. Im GrowRoom ,also praktisch meine 1 Zimmer Wohnung mit 2x2m Niesche hat so 25.5°C und 60%rH. Luftentfeuchter läuft , sonst geht hier gar nichts, aber der produziert Abwärme .
Will ich nun kalte Luft von draussen wirds hier mit 77%rH geantwortet aber die Temperaturen gehen runter :)) Lass ich es bleiben und entfeuchte , ich habe eine undichte Hütte was die Luftfeuchtigkeit betrifft , dann steigt die Wärme wieder . ES IST EIN TEUFELSKREIS :)) Aber wie gut das ich weiss das auch die ganzen CSC's und auch die Profis ihre liebe mühe haben die Temp und Luftfeuchtigkeit zu regeln . Und nein , ich werde mir keine Klimanalage einauen die beides regeln kann. Ich wollte nicht ewig viel Geld für das Gras ausgeben :))
Also liebe Brüder und Schwester des gepflegten Ganja komsumes und Produzenten , wir sitzen alle im selben Boot . Und jeder versucht der beste Kaptain zu werden :))
P.S. ich weiss, ein neues Bott wäre gut :) Aber dadurch ändert sich nicht das Meer :))
Day 33 :
Das Spiderfarmer Zelt 70x70x140x200cm ist fertig und Einsatzbereit . Meine kleinen Zwerge ziehen um . Im großen Zelt läßt sich die Luftfeuchtigkeit und Temperatur besser regeln. Klingt komisch , ist es auch :)) Aber Ihr müsst auch nicht in denkbar schlechtester Bausubstanz leben und gärtnern :))
Day 34 :
+ Flaschenwasse 2L EC 0.26 PH 7.3
+ + mit Dünger (Terra Vega 3.8ml/l , Rhizotonic 2.0ml/l , Boost 2.0ml/l , CannaZym 2.5ml/l ) = EC 0.7 PH 6.5
+ + Final PH 6.1
Nach einigen Problemen mit der Abluft und der Umluft und die Luftfeuchtigkeit , versuchen die Zwerge sich jetzt im neuem Zelt zu aklimatisieren . Ich drück die Daumen .
Day 35:
Die Düngung war genau richtig . Meine Luftfeuchtigkeit geht auch . Temperaturen sind etwas hoch . Aber Sie entfaltet sich . Videos gibts heute Nacht.
P.S. Da ich mal wieder zu schusselig bin eine Zeitschaltuhr und das Sanlight DIM System richtig zu nutzen , haben wir ein paar Lichtaussetzer gehabt , somit sind nicht an allen Tagen 20h Licht . In der nächsten Woche kommen 18h * PPFD 750 + 1h sonnenaufgang und + sonnenuntergang wird zu DLI 46.29 was etwas über das Limit von 45.00 geht . Schauen wir was passieren wird :))
Likes
31
Share


@MadeInGermany
Follow
Info:
Unfortunately, I had to find out that my account is used for fake pages in social media.
I am only active here on growdiaries.
I am not on facebook instagram twitter etc All accounts except this one are fake.
Harvest day 60
since the time
change to 12/12 hrs.
Hey guys :-)
Finally the time has come .
The lady was harvested.
After the trichomes have been checked (70% milky 30% amber) as always, it was left in complete darkness for 48 hours before it was neatly trimmed by hand.
After trimming, she was put back in the drying tent on nets.
There they are allowed to dry for the next 8-12 days at 62% humidity before they are put into the jar to ferment with 62% boveda packs.
After about 4-6 weeks in the jar I will swap the 62% boveda pack for a 58% boveda pack where it can be ready for another 4-6 weeks to enjoy :-).
As always, the remains of the leaves are used to make Ice o Lator and oil.
Of course, as always, there is a final update during the fermentation process.
Until then, I wish you all a lot of fun with this update.
Stay healthy 🙏🏻 and let it grow 👍.
You can buy this Strain at :
https://www.royalqueenseeds.de/feminisierte-hanfsamen/220-pineapple-kush.html
Type:
Pineapple Kush
☝️🏼
Genetics:
Pineapple x O.G. Kush
👍
Vega lamp:
2 x Todogrow Led
Quantum Board 100 W
💡
Bloom Lamp :
2 x Todogrow Led
Cxb 3590 COB 3500 K 205W
💡💡☝️🏼
Soil :
Canna Coco Professional +
☝️🏼
Fertilizer:
GHSC Powder Feeding Bio
☝️🏼🌱
Water:
Osmosis water mixed with normal water (24 hours stale that the chlorine evaporates) to 0.2 EC. Add Cal / Mag to 0.4 Ec Ph with Organic Ph - to 5.5 - 5.8 .
Likes
10
Share

@Chubbs
Follow
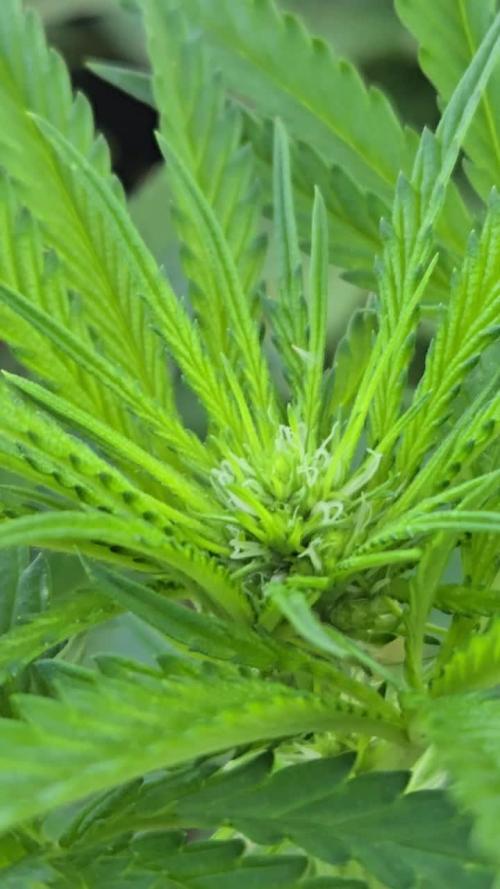
Weekly update fam. We got preflowers, so we all know what that means. The flower stage of the plant cycle has started. I'm extremely happy the way these have grown requiring no special treatment what so ever. They're getting attacked by some pest but I'll spay and hopefully get that under control before to late into flower. I generally don't like to spray past week 3 of flower. All in all Happy Growing
Likes
20
Share


@Boomdrawfyah
Follow
Dia 134 y semana 6 de floración,ultimo dia de vida de las plantas.
Este año ha sido un poco raro las plantas han crecido como monstruos tuvieron un crecimiento espectacular un tallo muy grande y junto con sus ramas flexibles y muy resistentes. Pero al llegar el engorde de floración no se porque les falto el empujon final para hinchar el cogollo, tiene muy buena pinta , mucha resina y muy fuerte buen olor pero me esperaba mas en la fase final. Cortamos ya que tambien habian orugas y no terminaba de eliminarlas por completo, la semana que viene era entera de lluvias así que decidi cortar un poco mas temprano para poder prevenir cualquier mal mayor, hay mucha gente que le gusta cortar antes de tiempo ya que el efecto es muy diferente, este año probaremos que tal.

Likes
35
Share


@ReinDeer
Follow
I started the week with watering the plants, new buds are developing nicely and they’ve got some mass since last week. I am a little worried for the plants at the edges of a groow room beacuse tey are still small and not as bushy as I hoped they would be.
Day two: Yesterday’s nut feed turns out to put extra fuel to the plants and buds grew in size significantly:) upper leaves got a little purplish color which looks amazing but I hope it is not some kind of deficiency 🤘
Day three: I thought centered plants were too near to the light source so I bended every plant in a way so the light would be evenly exposed to the whole growing area and I am happy with the results so far. Hopefully it will have a final effect for the harvest quantity😺💪
Likes
35
Share


@FreshCoastOrganics
Follow
These girls are just days away from harvest! I will closely monitor their pistils, calyxes & trichomes throughout the week so I can determine exactly when to give these girls their two days darkness before chop!
They are all starting to fade out really nice and the smell just keeps getting stronger each and every day!
After this last feed/flush I will only give these girls R/O-Distilled Water with nothing added whatsoever.
Please enjoy the videos I posted of the girls! Thought I’d add some music to the videos vs loud condenser microphone picking up fans 🤣 Only videos for now, I will post actual pictures and macro shots throughout the week before harvest.
Update: 9/7
The pistils and trichomes are about right where I want them. I’d say I have about 90% Cloudy, 7% Clear & 3% Amber Trichomes. A majority of pistils have gone from white to amber and have retracted. The girls have stopped drinking water so I transferred them to my darkroom to finish off for two days. After the two days I will chop and hang at 67°F @ 55%RH for 8-10 days until the stems begin to snap.
Processing
Likes
12
Share


@Csmithch
Follow
Felt like growing was slow going this week. I know they’re only 7 days from breaking ground so they’re establishing their roots but there was two days I felt like they didn’t grow at all.
I germinated two more seeds, was going to have a total of 5 in my 4x4 but I somehow managed to kill both my master kush seeds despite having a beautiful tap root when I planted them into the soil. (Any advice/methods for getting seedlings going from germination to 🌱 is welcome and appreciated)
My two Gorilla Breath plants struggled for the last 3 days of this week and went pretty yellow, which I presumed was a lack of nutrients since they’re only in solo cups right now with Fox Farm soil. They most likely used up all those nutrients and thus began showing signs of nutrient deficiency.
I plan to make the next transplant into pro mix with added perlite so I have Advanced Nutrients Micro, Grow, Bloom on standby with RO water for that process. I ended up giving the two gorilla breath a 1/3 dose of micro, grow, bloom in 1L of water for one of their feedings to attempt to get some color back. It seemed to start working as you can see on the pictures.
I was into my local hydro store today to buy some perlite to add to my pro mix next week and the guy talked me into some foliar spray (see attached image) to address the nutrient deficiency. I sprayed it on the leaves right before lights out on day 7 (February 6th)
Hopefully that helps them out. Time will tell.
I also struggled with humidity this week, ended up using a wet towel temporarily to keep humidity levels around 50% but I ended up ordering a humidifier on amazon and got that set up today. Super happy with the results from that 😁
Stay blessed and happy growing!


Likes
11
Share


@weeditin
Follow
DAY29 - IDK what is happening to the plant tbh...
DAY30 - SH$%!!! Its the broadmites!
DAY31 - looking for methods to fix it.
DAY32 - Bought this little bottle of some antibug(its for spidermites and other pests, but works for broadmites too) type of chemical gave here a full shower with it, the plant looks bad, and im not going post pictures dailly of her, i will just focus on saving her for now.
PLAN OF STRATEGY
1 Give the mites sugar, so they get sticky and slow down.
2 Spray down with anti mite chemical.
3 Give time for the plant to over come the pain (2days) also, broad mite eggs are harder to get rid of than the mites them self, so if there will be any left they will hatch, mybe wash once with ALCOHOL
4 NO REPRODUCTION ON MY WATCH! - Give the plant another full shower, and if the plant will make it through i will UPDATE yall😤 #SaveSpecialKush
Likes
43
Share


@Sabac
Follow
Plantitas en su semana 12.
Crecen y crecen espero dejarlas entre 13 y 14 semanas.


Likes
1
Share

@LIPANJA
Follow
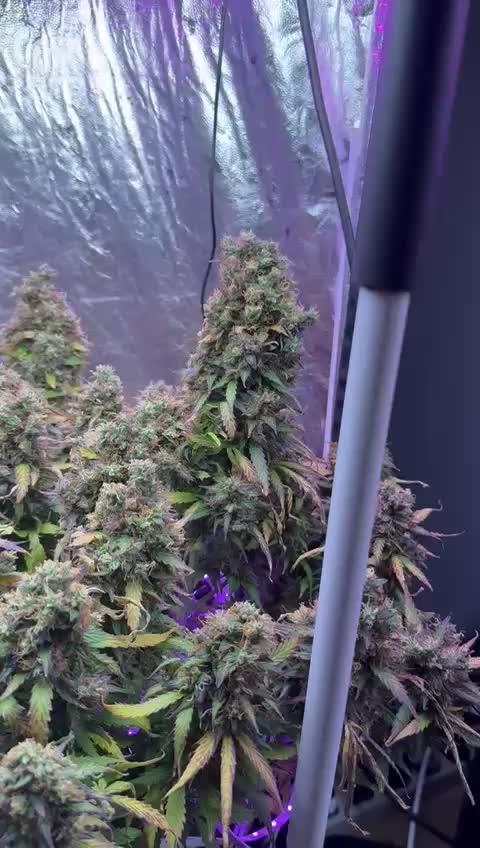
This plant is an autoflower and was under a 12/12 light schedule because the other plants in the grow tent were photoperiods that were already flowering, and that was bothering me. I felt like it was extending the flowering period too much, and its size is already great, so I moved it to a separate tent. Now I'm giving it 18 hours of light with 3 different lights:
- one 150W LED,
- one 150W flowering LED,
- one 5m LED strip with 60W at 3000K to help the center of the plant ripen faster.
I'm keeping the watering schedule at every other day with 2 liters, following the Advanced Nutrients feeding chart.
I imagine about one more week with fertilizer and another week of flush before harvesting
I also preferred to cut some ties that were too tight. (lst)

Likes
9
Share

@Zeven_Xero_Phive
Follow
-
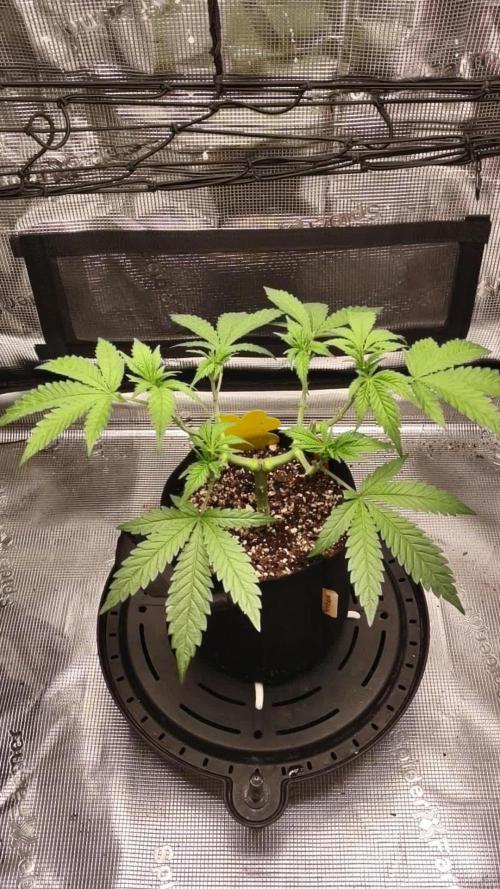
It's Wednesday, so that means it's haircut day. 😁 Not a moment too soon, she was getting shaggy really fast.
Anyhow, she's in the bigger tent for the moment while I sort out seedlings in the smaller tent, but I'll move her back in another week or two once she's ready for the trellis.
Likes
3
Share

@KannaGrowing
Follow
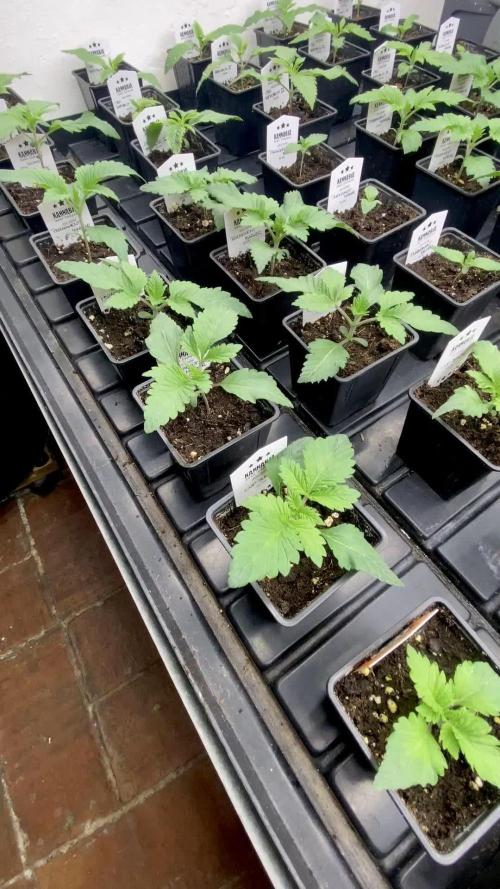
VARIEDAD EN FASE DE TEST. NO DISPONIBLE COMERCIALMENTE. RESULTADOS EN EVALUACIÓN POR KANNABIA.
Empezamos a fertilizar nuestras plantas con abonos líquidos BIO.
Ya se pueden apreciar diferencias significativas entre las distintas cepas.
Alturas diferenciadas entre las variedades, anchura de las hojas etc...
La potencia de las luminarias está ajustada al mínimo.
Likes
7
Share


@Nassmou
Follow
Hello everyone,
we are therefore at 67 days of flowering, the booster is having an effect, the buds have grown well, the plants will now remain in water only.
Regarding the trichomes, it begins to be mostly opaque.
I hope that the senescence will now advance.
the lamp went from 470w to 360w.
I'll tell you next week.
bye


Likes
46
Share


@Seedler
Follow
She is just growing, and growing, started to pre flower and already smelling a bit.
I will grow it up a few cm, and if i think i can train an even canopy i will start to flower her (:
very resistant to heat, it got up to 34 Celsius inside the tent 💀
But training her is REALLY fun and easy to do!
Cheers!

Likes
6
Share


@Exoticfarm99
Follow
Se acerca campaña de corte
Las demás las seguimos cada 10 días con tes

