


Likes
Comments
Share

@BalconyBoy
Follow
02.06. the previous week I took to cutting back everything except 8-10 branches per plant. Each arm remains with sprouts at the top only (like lollipoping but with the leaves still on). I contemplated for a while before doing this an compared with last year's growth. Definitely want less little stuff in the lower region and a cleaner structure overall. TMV on the Quick Sherbet leaves looks contained. White clover growing along well, gave 1g / L of greenhouse feeding bio enhancer. This week is mostly cloudy and rainy so expect slower growth but good progress.


Likes
3
Share


@Akisan
Follow
The stealth bucket seems to have scarred a few of the leaves that’s been trying to grow out on the sides.

Likes
6
Share


@I_Identify_As_A_Dan
Follow
Week 6 For Space Panda by Atlasseeds,
End of week 6 for this cultivar, after the transplant the new growth fixed right up👌
This Strain has got some crazy root vigour was only 3 days since being transplanted.

Likes
54
Share


@MrJones
Follow
MrJones Cream Mandeiran Auto XL - ViparSpectra XS2000 240W Infrared Full Spectrum LED Grow Light
´🍪⊱╮🍪╰⊰🍪 WEEKLY GOALS 🍪╰⊰´🍪⊱╮🍪
🏡Indoor - 3"x4"x8" Custom Built Grow Closet
🌞Environment - 80F and 50%Humidity - using Humidfyer as needed.
🌾LST and Defoliation - this strain likes to stretch!
🗓️Week 2 Seedlings
⚱️5-Gallon 📊6.2 PH
💧 Feeding / Using Dr. Earth Dry Organic Amendments - Home Grown & Bud / Bloom Booster
🌞ViparSpectra XS2000 240W x2 Infrared Full Spectrum LED Grow Light
🕷️ IPM - Will be using Green Cleaner" 1 OZ per Gallon, and CannControl from Mammoth alternating between products each month for Integrated Pest Management.
´🍪⊱╮🍪╰⊰🍪 PLANT UPDATES 🍪╰⊰´🍪⊱╮🍪
📝 Notes - Girls are just blowing up, they have doubled in size and started producing their second and third nodes, the leaves look perfectly healthy! The ViparSpectra XS2000's are just killing it!
╰⊰🍪╰⊰´🍪⊱╮🍪╰⊰🍪╰⊰🍪╰⊰´🍪⊱╮🍪╰⊰🍪╰⊰🍪╰⊰🍪⊱╮
🔶Sunday 06.20.21/ Continuing feeding just H20 PHed to around 6.0/6.5
🔶Monday 06.21.21/ Continuing feeding just H20 PHed to around 6.0/6.5
🔶Tuesday 06.22.21/ Continuing feeding just H20 PHed to around 6.0/6.5
🔶Wednesday 06.23.21/ Continuing feeding just H20 PHed to around 6.0/6.5
🔶Thursday 06.24.21/ Continuing feeding just H20 PHed to around 6.0/6.5
🔶Friday 06.25.21/ Continuing feeding just H20 PHed to around 6.0/6.5
🔶Saturday 06.26.21/ Continuing feeding just H20 PHed to around 6.0/6.5
╰⊰🍪╰⊰´🍪⊱╮🍪╰⊰🍪╰⊰🍪╰⊰´🍪⊱╮🍪╰⊰🍪╰⊰🍪╰⊰🍪⊱╮
Cream Mandarine XL Auto®️ Information
Tall-stemmed auto-flowering strain. This high-yielding 4th generation auto-flowering strain is the resulting hybrid from the cross between selected specimens of our Cream Mandarine Auto®️ (SWS29)) and a Super Tai’98 elite clone.
The genetic coming from the Super Tai’98 elite clone contributes with interesting Sativa characteristics to this hybrid, such as bigger size, but also subtle aromatic and spicy tones with hints of wood and nuts. The so much appreciated Cream Mandarine Auto®️ genetic contributes with traits from the Indica side, such as high flower and resin production, but also sweet and fresh aromas with tones of citric fruits of the mandarin orange type.
DATA SHEET
Variety SWS55
Indica: 35% / Sativa: 63,4% / Ruderalis: 1,6%
THC: 18-23% · CBD: 0,6%
Indoor Yield: 450-650 g/m2
Outdoor Yield: 50-300 g/plant
Indoor/Outdoor Harvest: 9 weeks from germination
Height: 110-150 cm


Likes
4
Share


@AustinRon
Follow
OG 4Q24 Flower Week 9
Orangegasm (Fem) [ IRIE Genetics ]
12/12 @ Bolt (Day 21)
Germination: 20 November 2024
#3A Earliest Harvest Date: 9 February 2025
#3B Latest Harvest Date: 19 February 2025
_________________________________________
Start of Week: [Wed Feb 5, 2024 CR2 4Q24 57:F:8:1]
End of Week: [Tue Feb 11, 2024 CR2 4Q24 63:F:8:7]
OrangeGasm Fertigation:
- MAX: EC: [ 2.4, mS] #Ramping Down
- LightIntensity MAX: [ 850, µMol/m2/s]
______________________________________
OBJECTIVES
- Ramp EC from 2.4 - 1.0
- Start rolling off Primer A&B/Silica Skin to Resin Bloom . . .
__
Wed Feb 5, 2025
OG 4Q24 57:F:8:1
EC: 2.3
Notes:
#5 looks like a 60 day plant, if so - consider Saturday Harvest …
Runoff
- [x] Amount: [ 0.125 , gal]
- [x] EC: [ 4.4 , mS/cm]
- [x] EC∆: [ 2.5 , mS/cm] # Fried Yet? ;-}
Harvest Dehu
- [x] Amount: [ 1.5 , g]
__
Thu Feb 6, 2025
OG 4Q24 58:F:8:2
EC: 2.3
Refresh Reservoir
- [x] Amount: [ 2 , g]
- [x] EC: [ 2.3, mS/cm]
- [x] Primer A&B: [ 31, ml]
- [x] Silica Skin: [ 15 , ml]
__
Fri Feb 7, 2025
OG 4Q24 59:F:8:3
EC: 2.3
__
Sat Feb 8, 2025
OG 4Q24 60:F:8:4
- [x] Disassemble, Clean Reservoir and Pumps, Reassemble
Refresh Reservoir
- [ ] Silica Skin: [ 15 , ml]
- Dropping Silica Skin due to (sparse to medium) granular precipitate
- [x] Amount: [ 6 , g]
- [x] EC: [ 2.1, mS/cm]
- [x] Primer A&B: [ 100, ml]
EC: 2.1
@1900 - Clear Manifold Filter. (Mainline should be cleared on 1845 feed
__
Sun Feb 9, 2025
OG 4Q24 61:F:8:5
- [x] Dilute to EC 2.0
- Flooded Tent, 2 Gallons PLUS of Runoff. Happy Plants.
- Shout Out Shop-vac. ;-}
EC: 2.0
__
Mon Feb 10, 2025
OG 4Q24 62:F:8:6
EC: 1.8
HAND APPLICATION
Prepped One Gallon of 12-8-7-5 @ 1.8 mS/cm w/ PhotoSynthesis Plus, SLF-100
Reclaimed Dehu Water, ~2 Gallons
Refreshed Reservoir, 2 Gallons Rooted Leaf Hydro no Silica Skin, EC: 1.8 mS/cm
Reduced watering to 5 min, then 1 - 1 -1 -1 -1 -1 -1 -1
(It’s not like they’ve been under-fertigated)
__
Tue Feb 11, 2025
OG 4Q24 63:F:8:7
EC: 1.7
- [x] EC: [ 1.7, mS/cm2]
- [x] Refresh Reservoir
- [x] amount: [ 2.5, gal]
Runoff
- [x] Amount: [ 0.5, gal]
- [x] EC: [ 3.6, mS/cm2]
- [x] EC∆: [ 0.9, mS/cm2] # Better than 2.5!
PLANT POSITIONS
3 5 1 7
4 2 6 8

Likes
65
Share


@Fibro_Witch
Follow
I'm a couple days late on updating, but everyone is in the ground! They spent almost a week outside hardening off. One night despite the forecast it got down to 38F and I was very worried, but it didn't phase them much.
I stuck them in with my tomatoes as camouflage and added seaweed as mulch which I need to finish.
We finally got rain yesterday, the first we've had in weeks so I'm sure the garden is grateful.
I'm using tomato cages again this year because last year they worked great. I think everything is in the video.


Likes
65
Share


@nonick123
Follow
Día 92 (14/04) Riego con 500 ml H2O EC 0,45
Ha bajado algo la temperatura promedio
Día 93 (15/04) Riego con 500 ml H2O EC 0,45
Reviso los tricomas y aún le faltan unos días...
Día 94 (16/04) Riego con 500 ml H2O EC 0,45
Día 95 (17/04) Riego con 750 ml H2O EC 0,45
Tiene mucha sed! El tiempo está loco por aquí! Picos de 27 ºC en abril... 😵💫
Día 96 (18/04) Riego con 1.000 ml H2O EC 0,45
Día 97 (19/04) Riego con 500 ml H2O EC 0,45
Día 98 (20/04) Fiesta de la Cosecha!
Reviso los tricomas y están un 10% ambar, 85% nublados y 5% transparentes
Perfecta!

Likes
7
Share


@Treesus01
Follow
Just started flush, will be cut and hung in 2 weeks
its snowing here in the mountains of Colorado so I am filling the top of the pot with snow since this does increase trichome production and I did half way cut it down about 1/4 deep both sides of the stalk

Likes
4
Share

@GERGrowDesigns
Follow
Dear Growers ,
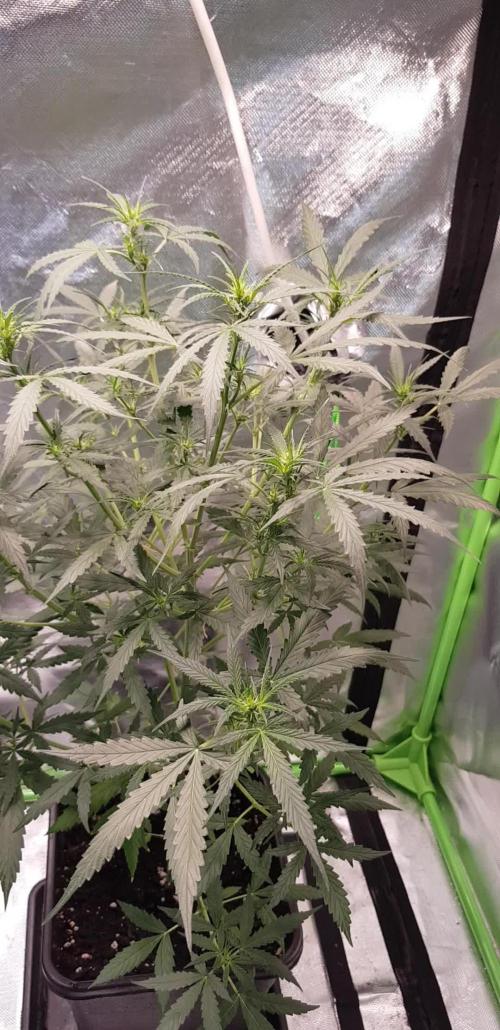
Over the next weeks, we’re excited to share a very special project with you: Sensi Seeds Supreme Jack F1 Automatic 2025 Release
With dedication, knowledge, and hands-on practice, we’ll guide you step by step through the journey—watch with us as growth, development, and small wonders unfold before your eyes.
Whether you're a beginner or an expert, you are warmly invited to join, ask questions, and share your own experiences along the way!
Project Setup & Conditions:
• Brand/Manufacturer: Sensi Seeds
• Tent: 120cmx60cmx80cm
• Light: 2x 200 Watt Full Spectrum
• Humidity: 90%
• Soil: Narcos Organix Mix
• Nutrients: Narcos Products
• pH Value: 6
A Special Thanks To
Sensi Seeds
for the amazing collaboration, trust, and generous support in making this project possible. Your contribution is truly appreciated!
Congratulations on Your Own Projects!
We celebrate your growth, your creativity, and the passion you bring to the table. It’s truly inspiring to witness at Each visit .
Stay curious and keep up Growing —we look forward to welcoming you back for the next chapter soon!


Likes
16
Share


@SeshHouseCannabis
Follow
Got the filter that could be used to clean the tap water, so we changed the water in the system to be filtered water and make some upgrade on the system.


Likes
16
Share


@MountainFlowers
Follow
Final Report:
Grow:
The plants has grown very beautiful and healty without pests and diseases. They grown bushy and with medium height during all the life cycle.
I had try to use LST in third veg week but i did't made correctly and after that i dicided to return to grown normally without any particolar tecnique.
I used a littel more fertilizer then mine usual and that made the plants grown fast with only a littel bit of leaf margin burn which I solved by decreasing the quantity.
In the first two weeks of flowering stage the plants started grow not to very tall (except for one) and the number of the branches increase, in this phase i only defoliated when the fan leaves turn yellow in late stage.
During all flowering stage the flowers grown but they remained very soft, they turned dense and bigger in the last weeks and this time i waited until almost all of them were mature before harvest the plants(I waited a littel more respect OG Kush CBD).
I changed the taller plant from one grow room to another(in the sixth week) when she became too high and she couldn't stay more in the smaller grow box(nothing changed in the enviroment between the two boxes).
Equipment and grow box:
The enviorment of grow box has been optimized every stage with the right temperature, umidity and air flow.
Vegetative temp/umidity --> 23-29 °C/45-55%
Flowering temp/umidity --> 20-26 °C/40-50%
The air flow was created by two pc fans and one big fan.
Harvest:
This time the plants were full of dense buds but the lower branches had many fluffy flowers(i used them to make some hash) but the result not change too much .
The result of this grow is amezing compared to my old expiriences.
I harvested the flower and i made a fast curing process after i washed the crop and i let them to dry with a fan on it.
After five days a take the branches which were to dry and i did the final trimmig before put all the harvest in a open jar for finishing to dry.
I collected all the leaves, fluffy buds and trimming scraps in a bag and i let them dry.
I harvested the taller plant before the other two because she had matured earlier(with the OG Kush ladies).
Later i put the bag in the freezer and when i collect and dried all the scraps from OG Kush and Dandoverde Haze i did some Ice-O-Lator hash.
I used 250g of trimming stuff and i made 11.50 g of hash, I had use a set of 5 bag and i take the resin from the 160µ - 120µ - 73µ- 25µ bags.
I pressed all the resin in a great block of tasty strong hash.
Always better every time 😊💪
Total harvest ---> 126g only of dense buds and 11.50g of hash.


Likes
31
Share


@SkunkyDog420
Follow
Hallo zusammen 🤙.
Habe sie heute geerntet.
Lassse sie jetzt 3 Wochen trocknen und komme dann mit dem Erntebericht zurück.
Bis in 3 Wochen 🤙
https://seedsmafia.com/de/

Likes
2
Share

@Borberad
Follow
Blütewoche 2
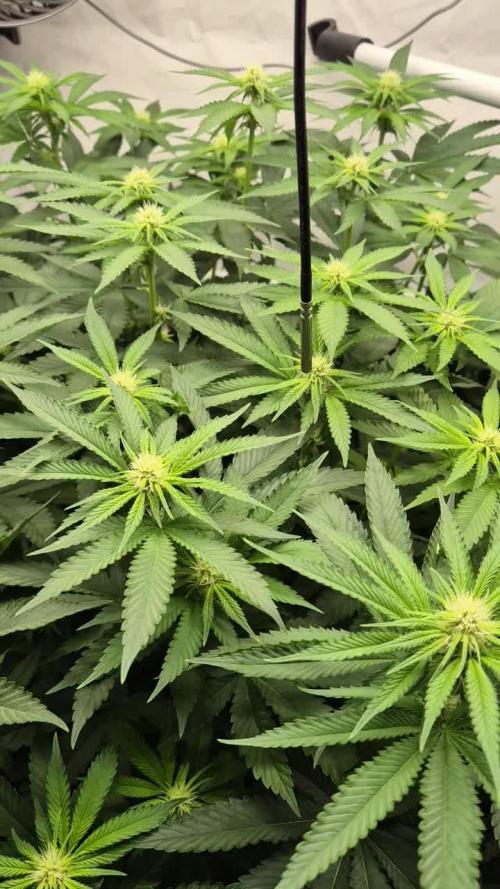
Die Blüte startet durch
Die Pflanze streckt sich kräftig und entwickelt schöne helle Blütenstände. Der DLI wurde sukzessive auf 40-45 angehoben. Der Düngeplan bleibt unverändert.
* Zustand der Pflanze: Kräftiger Blütestretch, erste Blütenstände sichtbar.
* Wichtige Ereignisse: Anhebung des DLI.
* Düngung & Messwerte:
* Gießwasser: pH ca. 6,3. Leitwert 1,4 bis 2 S.
* Drain: Wir stellen sicher, dass der pH-Wert nicht unter 5,5 und nicht über 6,8 liegt und der Leitwert die +/- 500 S Abweichung einhält.
* Anpassungen: keine
Likes
7
Share


@Stickygreens420
Follow
1/8/2023: chop day for the Newberry! Like the other plants, I will be drying the whole plant, along with the Orange Bubblegum in a 2x2 AC Infinity tent, with the temp and humidity as close as I can get to 60° F
and 60% humidity. The portable AC unit and humidifier do a good job keeping me in range. This was very easy plant to grow. Other than a few nanners the last week in flow, I had no problems with her. Smells amazing and looks amazing too. Can't wait to try growing this one again.

Likes
9
Share


@datrobspeoria
Follow
I grew all of my plants the same and with 3 strains and only being allowed to have 5 plants total I have to pick the strongest growers and hope they stay strong and this time for me the gamble payed off nicely with a good harvest.
I would recommend this strain as it grows fast and did not seem to be a picky eater and took in a lot of heavy feedings...
Thanks for checking out my harvest and If you have any questions I will do my best to quickly answer them..


Likes
4
Share


@Ninjabuds
Follow
My OG Kush seedling is looking fantastic! It's branching out really well, with strong, sturdy stems and vibrant deep green leaves. There's a sweet, almost creamy scent coming from it that reminds me of an Oreos plant I grew a while back. It's got that classic OG Kush vigor, and I'm excited to see how it develops!
The weather has been absolutely gorgeous this past week! We've been hitting that sweet spot of 70 degrees during the day, perfect for getting outside and soaking up some sun. Then, it cools down to a comfy 50 degrees at night, which is ideal for sleeping with the windows open. I've been loving all the fresh air!
I finally got around to building that little wooden planter for my windowsill. It was a fun project, and now my regular plants have a nice new home. It really brightens up the room, and I'm thinking of adding some herbs to it soon. Maybe I'll even try growing some basil!
Likes
38
Share


@Cariboo_OG
Follow
Utopia Haze is a rare heavily sativa dominant hybrid (90% sativa/10% indica) strain created through back crossing Brazilian Sativa strains. This tasty little bud took home 1st Place for Best Sativa in the 2008 High Times’ Cannabis Cup and for good reason – with its potent 18-22% average THC level and long lasting cerebral effects, Utopia Haze is one powerhouse smoke. The Utopia Haze high comes on soon after you finish your first toke, hitting you with a strong cerebral lift that infuses you with a sense of hazy relaxation.
Type: Feminised/Photoperiod
Cultivation: Indoor/Outdoor
Flowering Time (days): 70-75
Indoor Yield (g): Up to 650
Feminised Outdoor Harvest Month: October
Feminised Outdoor Harvest Month Week: 3rd-4th week
Aroma: Citrus, Woody, Pungent, Mint
Effect: Cerebral Lift, Hazy Relaxation, Sleepy
Welcome Everyone to the Final Entry of my Utopia Haze Grow !
There is so much to discuss ! I have been extremely busy as of late trying to get this Harvest together, but i am happy to have it here for you now !
I Seriously under estimated the amount of time, help from others, and my own necessary skills to pull this off.. and i still kind of screwed it up lol !
But its worth noting i have never actually done this before and trying to document it during....was extremely hard.
It is next to impossible to work an iPhone with rubber gloves on !
First I want to discuss everything step by step so before you jump straight into the comments on how the end product is so small in "quantity"
Rest assured i am happy with its"quality"...and thats all that matters to me because Life is a journey not a destination! and i have learned so much from this grow that I couldn't be any happy even if i messed some things up :)
But at the very least I hope you read through this entry in its entirety with an open mind and focus more on the process, rather than just the outcome!
I ran out of Ice & i was only able to wash three times..(normally I've heard you should go sometimes 5-6 washes)
Preparation is Key & things will be much better next round :)
Photos 1-22
These are pretty self explanatory but for those of you just tuning in now.. this is what happens to a very happy plant when you don't have the necessary tools to monitor key components of growing cannabis.. Ph, as well as EC levels play a very key role in the outcome of your grow lol that being said I was just able to save this plant by purchasing both tools but that doesn't mean the plant didn't suffer because of the prior events.. This was a Huge reason behind me choosing to turn this harvest into what i would consider
"Solventless Hash Rosin" from "Ice water extracted Bubble hash".
Pictures 23
The idea here is the process of using "fresh Frozen Cannabis" this has been discussed many a time online on such sites as instagram and here on grow diaries as well.. I personally have Never tried the process so i decided to try it out and make a judgement for myself..
Video 24
The Cannabis has now been in the freezer for 72 hours making it very well frozen.. as you can tell i struggled getting it all into the 25u Screen Wash Bag. One thing of note i would do differently is i will de-stem my next batch as i also believe this played a part in the amount of plant matter that escaped through the sieves.
Photo/Video's 25-28
The idea here is "ice water Seiving" & especially with the bags that I am using here that are only have screen material on the bottom portion of the bag it is very important to have spaces in-between the screens to allow the water to pass directly through the screens into the bottom bucket with the least amount of resistance.. because the hash is so extremely temperature dependant if it gets warm on the side of the bag.. it will stick there and not make it to the bottom to become use able product..
29
You do not need to use as much Ice as i used here lol... the idea is to keep everything very cold..i certainly achieved that but at the sacrifice of using so much that i ended up grinding product and producing "contaminants" but in the end they are just plant matter that i would be smoking when i rolled up my joint either way so.. I'm not super disappointed..
But it should be noted that what you want to achieve here is a Layering effect where you have the wash bag between two small layers of ice while the "water current" washes the Trichomes away allowing them to be separated by the screens setup below :)
Before Starting the machine you should allow some time (i.e.;10-12minutes pre soak to allow the product to become saturated) before the first cycle.
By video 32 I have just ran out of ice lol..
Video 33-34
Here I have a tip for you.. to separate the screens that you sieve through.. cut 5 gallon buckets to stretch them across nice and tight.. it'll make scooping your Bubble that much easier ! i learned this from the many "Frenchy" videos I have watched :)
Picture 35
Here in lays the problem for most people.. drying your hash without loosing vast amounts of "Terpenes" whilst also stay ever vigilant against mold !
Thanks to all those videos I've watched on youtube.. id like to think this was one of my most successful parts of this process..
Things to Note; Terpenes start to seriously evaporate at temperatures 68F or 20C
you need to stay as cold as possible whilst bringing the Relative Humidity in the space down into the 40-30% to stay away from that nasty mold !
I used my cold storage room in the basement.. with a dehumidifier running to keep the space at 45% RH & staying at a constant 15c.
All while spreading the hash as thin as possible across parchment paper, on top of the white screens with a fan moving air across both sides of the paper.
Pictures 36-38
These are some macros i took in the middle of my drying session I fell in love with the colour.
Yes i know the black spots are plant material but they will get caught when i bag the hash & squish the oil out.
Thing to Note; at this stage it is important to ensure you 'micro plane" the hash down as fine as you can whilst staying weary of the temperature... any "chunks" will hold pockets of moisture.. that lead to potential problems..ie; mold ...
Picture/Video 39-41
Successfully planed bubble hash ready to be bagged and Squished !
Picture 42
Ive decided to follow Pedro.. from Pedros Grow Room and double bag to be on the safe side so i don't have any blow outs.
So thats One 25u bag inside one 160u bag ! :)
Pictures 43
This is almost 3 grams of the bubble hash from above, already melting in the bag.. this is where i ran into trouble again lol things started getting to warm in the house and i was only able to get one of the three squish's i did on video :( things started getting sticky.
Picture 44
This is basically just a photo of the equipment I'm using; 3x5 LowTemp Cage in the frame I built myself, with a 20Ton bottle jack.
Something to note here is this is an older Lowtemp model with only a single heating zone which is which i have it closed here heating Both sides of the press :)
As well as the importance of having adequate pressure on your plates.. my rig is very overkill for the size of hash bags..lol
Video 45
Here is the lovely press video.. its didn't quite work the way i wanted either lol my directional folding wasn't quite tight enough for a big "drip" :)
&the Press was set to 65°c
Photo's 46-50 are pretty self explanatory :) I had a blow out.. but still managed to pull an 80% return from the hash once squished...& yes it tasted amazing :)
Was it worth it in the end... that could be debated.. for some..i understand..its not your thing, but for those of us that are interested in making our own concentrates.. free from Solvents...
I wouldn't make it any other way :)
If even ONE of you reading this diary finds it helpful to reference for ANYTHING.....even if its "what not to do" ill consider it a success !
Thanks again for tagging along on this garden adventure.. its been one heck of a journey !
Much Love from B.C. Canada,
Until Next time,
Cariboo
