


Likes
Comments
Share


@Cupboardgrowuk
Follow
blueberryz as harvest this weekend. Limoncello be coming down next weekend cannot wait

Likes
20
Share


@ukterpdoc
Follow
Been going so well plants looking amazing they're going to find bigger pots by next weeks update and be in the veg room under there new lights and out of the tent lots more space and lots more light

Likes
Comments
Share

@SolitudeCorners
Follow
Dedicated to Poy Chaysiththi, the owner of this Alien Mints cut.
We may have stood on different sides politically, but I deeply respect the fact that he consistently spoke out to protect the Thai cannabis community and preserve opportunities for Thai growers. Few people were willing to publicly call out illegal foreign-operated grows and confront the influence of unlawful capital.
Whether one agreed with him or not, his courage to stand by what he believed in was undeniable.
No one deserves to meet such a tragic end.
Rest in peace, Poy. May your passion, your convictions, and the genetics you shared continue to live on through the community.
📓 Cultivation Diary: The 12/12 Flip & Transition Week
📅 June 5, 2026 (Veg Day 17)
Irrigation/Reservoir: Prepared a full 100L reservoir refresh.
Nutrients: Kept the feeding aggressive with a double dose of vegetative nutrition (x2 Nutrient formula) to ensure the root zones and plant tissues are fully stocked with elements before the transition.
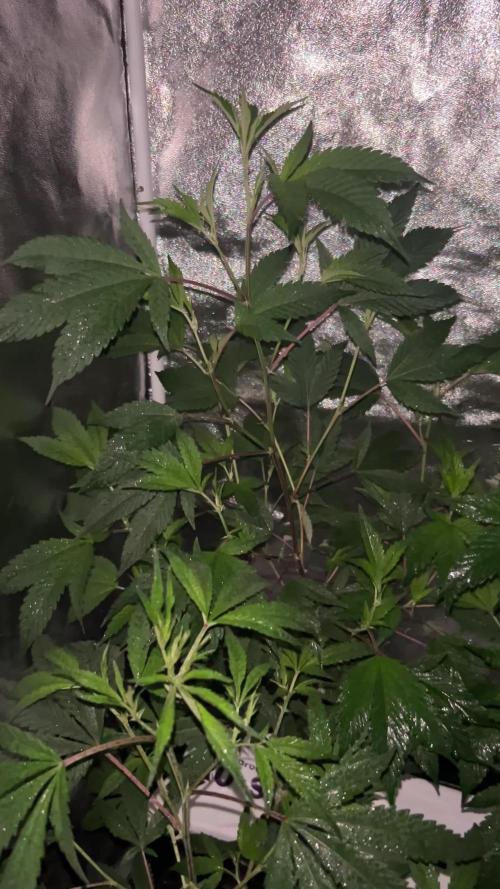
Canopy Observation:the canopy is thick, uniform, and fully occupying the table space. The trellis net is officially filled out, and the lower branches are strong and rigid.
📅 June 6, 2026 (Day 1 of Flower / Bloom Week 1)
The Flip: Officially switched the timers to a 12/12 photoperiod (Lights ON at 6:00 PM / Lights OFF at 6:00 AM).
Schedule: First irrigation shot triggers exactly 1 hour after lights on (7:00 PM), followed by a shot every 1.5 hours.
Volume: Configured the drip stakes to run for 1 minute per shot, delivering 5 shots total per day. This provides roughly 450ml per plant per day, creating excellent target dry-backs overnight to force vigorous root searching.
📅 June 11, 2026 (Day 6 of Flower / Bloom Week 1)
Irrigation/Reservoir: Bumped reservoir capacity up to 110–120L to keep up with increased transpiration as the plants begin their post-flip stretch.
Nutrient Recipe (TargetingpH 6.0 EC 2.5
Water: 110–120L
Athena Cleanse: 120ml
Silica: 220ml (Essential for stem strength during the stretch)
CalMag: 10ml
Athena Bloom: 600ml (Adjusting base to target 1.2–1.3 EC from Bloom component)
Athena Core: 400ml
Irrigation Adjustments: Increased the shot duration slightly to 1 minute and 15 seconds to match the accelerating growth pace.
The early flowering stretch has officially begun. The tops are noticeably pushing past the trellis net layers, and the node spacing remains tight and stacked. Leaf color is an excellent dark green with healthy, bright yellow-green shoots driving upward at the growth tips. No signs of stress or stalling from the schedule shift.

Likes
Comments
Share

@Topshelf_only
Follow
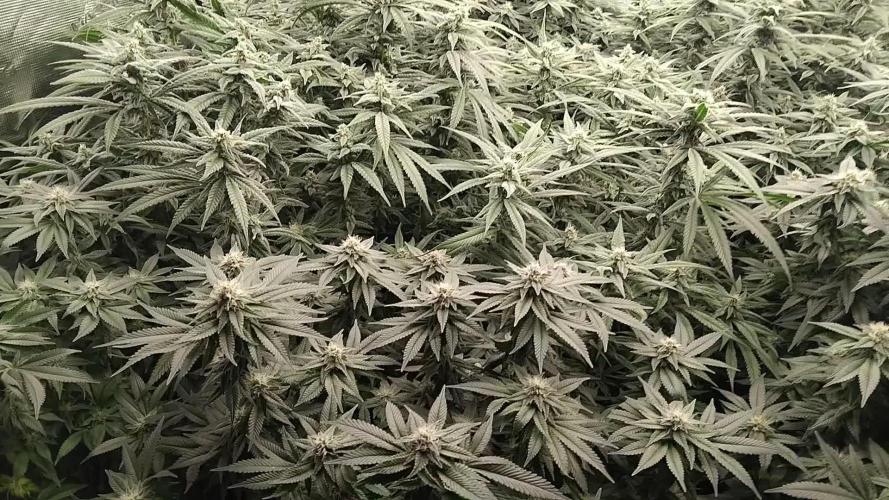
Another straight forward week. Biggest problem i am having is clean my arms every time i do anything. She's a frosty tent. The smell is kicking in too. The grandmommy just smells so good . Been smoking only this pretty much for the last year, packs a punch and tastes amazing. But looking forward to the gelato nice and frosty as well just not quite as much as the gmp

Likes
2
Share


@EtnoGrow
Follow
we improvised with threads the mesh was badly placed but everything served and fulfilled its function, now the leaves have grown again and the mini jungle is re-formed, we really liked how the previous pruning turned out although aggressive to the plants it did not affect them they recovered almost instantly, and it works in our favor because of the space, so this is already the end of the second or the beginning of the third week, in the next one I will upload the pruning and everything as it is already at the end of almost the 3rd week of flowering, at least of the larger, the others, as you know, are 2 to 3 weeks apart, so for them it is 1 or 2 weeks of flowering, which is noticeable in their development. the risks that are written down in the diary are the fertilizer once a week, and 1 3.5-liter drum or a gallon is used, which is divided into the 2 largest and another equal gallon with a different proportion for the 5 smallest , in the newspaper it is written down of the great ones.
Processing
Likes
77
Share


@MissFlowerPower420
Follow
Delilah is doing good , lil bit cockeyed but I can forgive her due to all that she has battled thru .

Likes
10
Share


@StonedFarm
Follow
09/28/24 - Purple Punch 👊 & Green Crack 💚
Both these girls will have the ☀️ today, and tomorrow will get a feeding with the
09/29/24 - Purple Punch 👊 - Green Crack 💚
Both these girls got the dunk, and runoffs are perfect. 1000-1100 PPM runoffs, with 6.4 Green Crack, and 6.5 Purple Punch

Likes
6
Share


@shasam
Follow
Started off bad with serious calcium deficiency. I was applying the nutrient schedule built on a 500 basis while my measurement device is based on 700. I was starving the plants without realizing it - Trimmed off the damage, upped the nutes and looking good as new.

Likes
4
Share


@LittleBigTrees
Follow
Second week of flower and I defoliated again.
There are small bud sites starting to form at the end of week two flower.
The apple fritter has fascination which is making the stems grow interestingly with lots of bud sites.


Likes
5
Share


@btcywtsitw
Follow
This 3 of these seem to be doing fine. I actually accidentally threw away 2 of the other seeds by misplacing the proper germination paper towel. That's OK though all 3 of these popped so can't complain. Hoping to see a lot of stretching and a more leaf growth.

Likes
18
Share


@EaRtH
Follow
28.11. - Watered and added Bio Grow back to the mix. I've learned that Bio Bloom works best simultaneously with Grow.
30.11. - Seems like the problem is still present and at this point I'm not sure what the problem really is. I guess I will have to flush and prepare for harvesting earlier than expected.
2.12. - Watered and flushed the plant that has most yellow leaves. I gave other the last dose of nutrient mix before flushing.
4.12. - Finally starting to see some amber trichomes 🍊
28.11. - 4.12.2023
Likes
25
Share


@Master_weeda
Follow
Stretch 10 centimètres
Jour52 légère defolliation et arrosage avec deux litres d'eau ph6.3
Petit rappel sur le meilleur cycle de lumière pour les autofloraisons
QUEL EST LE PLANNING LUMINEUX OPTIMAL ?
Le cannabis à autofloraison peut survivre avec à peine 5 heures de lumière du soleil par jour. Mais si vous voulez que vos plants s’épanouissent, atteignent le pic de leur puissance et produisent une lourde récolte, ils ont besoin d’au moins 18 heures de lumière par jour. Le planning optimal de lumière pour la culture en intérieur du cannabis à autofloraison est un 20-4 constant pendant tout le cycle de vie. Bien entendu, des plannings de 18-6, 20-2 et 24 heures non-stop ont tous leurs avantages, mais nous avons obtenu les meilleurs résultats avec le planning 20-4.
Les cultivateurs en extérieur peuvent potentiellement lancer la culture dès le printemps. Cependant, nous recommandons toujours de faire germer les graines et de cultiver les jeunes pousses en intérieur sous des lampes artificielles pendant une semaine ou deux pour obtenir les meilleurs résultats. Nous parlerons des options en extérieur plus en détail un peu plus bas.
LE CYCLE DE VIE DU CANNABIS À AUTOFLORAISON
La plus grande différence entre le cannabis à photopériode et à autofloraison est que l’horloge tourne pour une auto dès le moment où la coque de la graine s’ouvre. Le cycle de vie post-germination de la grande majorité des variétés à autofloraison modernes est de 8-12 semaines au total. Au contraire des variétés à photopériode, les autos n’ont pas besoin du planning lumineux courant 12-12 pour faire la transition vers la floraison. Une variété à autofloraison progressera dans son cycle de vie indifféremment du cycle jour-nuit.
CROISSANCE VÉGÉTATIVE ACCÉLÉRÉE
Il est presque impossible de délimiter la phase de la jeune pousse de la croissance végétale avec les variétés à autofloraison de nos jours. De plus, en 30 jours, la plupart exploseront soudainement en phase de floraison. Donner aux autos un bon départ, solide et sain est un facteur critique pour une culture réussie. Beaucoup de choses peuvent se passer pendant une semaine avec un hybride à autofloraison vigoureux en culture. Il n’y a pas non plus beaucoup de temps pour la transplantation. Nous recommandons d’utiliser notre kit de germination ou de planter directement dans les premiers et derniers récipients dès le début. Des pots/récipients en plastique de 10-20 L avec de nombreux trous de drainage au fond sont parfaits. Les Air-Pots sont encore mieux. Beaucoup de cultivateur découvrent à leurs dépens que les petits pots ne sont pas durables pour les hybrides autos modernes plus grands.
Préparez-vous à devoir ajuster quotidiennement votre lampe de culture pour éviter de brûler le feuillage. De plus, tout comme les variétés à photopériode, les conditions environnementales optimales pour les jeunes plants à autofloraison sont des températures entre 20 et 25 °C et une HR dans une fourchette de 50-70 %. En outre, les besoins en nutriments seront considérablement plus faibles que les variétés à photopériode. Il n’y a donc aucune bonne raison de ne pas cultiver bio. Généralement, les autos préfèrent avoir un milieu de culture légèrement fertilisé et bien aéré. Les terreaux légers et/ou le coco sont des substrats fortement recommandés.
La plupart des cultivateurs préfèrent des lampes CFL blanc chaud, LED et MH pour la courte période végétative. Cependant, les lampes HPS à double spectre sont tout aussi efficaces et probablement plus pratiques à utiliser.
FLORAISON RAPIDE ET FÉROCE
Dès que vous pouvez voir les pistils pousser à partir des premières fleurs, vous pouvez vous dire qu’en 45-60 jours, les plants finiront le cycle de floraison et seront prêts à la récolte. Que vous soyez prêt ou non. Mais vous serez prêt, car vous aurez fait les ajustements nécessaires en temps et en heure.
Les apports en engrais de croissance végétative à un dosage faible à moyen seront remplacés par des nutriments pour la floraison et des doses appropriés de compléments et boosters de floraison. Une fois de plus, un régime alimentaire spartiate est recommandé. Pas besoin de changer le planning des lampes, car vous allez suivre votre planning originel jusqu’à la récolte. Mais il faudra vous assurer que les températures ne dépassent pas les 28 °C et vous devez réduire votre HR vers une fourchette plus basse de 40-60 %. Les plants vont s’étirer à des degrés divers. Quoi qu’il en soit, vous devez faire attention et toujours maintenir une distance optimale entre la lampe et la canopée. Un ensemble de cordages ou de crochets réglables rendront la tâche bien plus aisée.
Ne vous imaginez pas que toutes les autos développeront une structure courte de buisson, à moins que le sélectionneur ne donne des données qui le suggèrent.
Naturellement, les deux dernières semaines de floraison devraient être réservées à un rinçage en profondeur du milieu. De l’eau pure, ou une solution de rinçage légère fonctionneront très bien. Quand la majorité des poils ou pistils sur les fleurs auront changé du blanc à l’orange/rouge, vous devriez passer au rinçage. Ne sautez pas cette étape finale critique. Vous méritez les fleurs les plus savoureuses, sans contamination.
COMMENT LES AUTOS RÉPONDRONT AUX TECHNIQUES DE TAILLE ET DE PALISSAGE ?
La réponse courte : très bien ! La plupart des variétés à autofloraison de nouvelle génération répondront très positivement au LST. Et tant que vous taillez tôt, l’étêtage et le fimming peuvent multiplier les tiges de têtes et en plus booster les rendements. De plus, la méthode ScrOG peut être combinée avec toutes ces techniques pour un rendement maximum. Cependant, la culture à grand volume utilisant la méthode SOG est probablement le style de culture le plus populaire à présent. Un nombre croissant de cultivateurs d’autos expérimentent avec les mêmes pratiques courantes de taille et de palissage à haut rendement que les cultivateurs de cannabis à photopériode utilisent.
Les cultivateurs débutants ne devraient probablement pas se lancer dans une taille ou un palissage intensif ou excessif avant d’avoir de l’expérience.
Cependant, plier un peu les pointes de croissance pour créer une canopée plus plate ne peut pas nuire aux rendements. De même, une défoliation minimale pour augmenter la pénétration lumineuse ne stressera probablement pas des plants en bonne santé, tant que vous vous limitez à l’élimination des grosses feuilles nourricières qui font de l’ombre aux sites de floraison.
May the force be with you 💪
Likes
Comments
Share


@SGCFarms
Follow
Not topped, only supercropped and lst. I should have did an actual scrog, but I didn’t and will probably regret it later. Still developing pistils, haven’t started really releasing any smells. No growth issues, though will probably defoliate at some point to help with light penetration. Loving her so far!

Likes
4
Share


@SamDo
Follow
Vegetative Week 6 – Pineapple Upside Down (Round 2)
This week confirms a full recovery in vegetative growth.
The plant clearly regained vigor and momentum.
Growth is strong, foliage is dense, and overall structure looks healthy.
Internodal spacing is noticeably tight, resulting in a very compact and bushy plant.
This could be influenced by the full-spectrum lighting, which appears to promote dense vegetative development.
Although topping or defoliation was considered, no structural work was done this week.
The priority is to let the plant continue growing naturally and fully stabilize before any training or shaping.
Nutrition remains unchanged from the previous week.
The nutrient solution is maintained around EC 1.4–1.5, with pH close to 6.0.
The plant is responding well, showing no signs of deficiency or stress.
While some time was lost earlier in the cycle due to initial issues, the delay is clearly less significant than in the previous run.
Progress has improved, and this recovery phase highlights areas to refine in future germination and early-stage management.
This week ends on a positive note.
The plant looks healthy again, and the focus moving forward is simply to let her grow and maintain consistency.
See you next week. Take care.
-Update: 04/02/26-
•Structural work update:
Today, a full structural intervention was carried out on the plant.
Defoliation, topping, and pruning were all done in one session.
The plant had become too bushy and overly dense, with poor airflow and excessive humidity trapped inside the canopy.
To correct this, the structure was reset: four lateral branches were selected and kept, while the main apexes were topped to start defining the future shape of the plant.
At this stage, the goal was not refinement but foundation.
This intervention marks the beginning of the plant’s final structure, or at least the first clear step toward it.
A significant amount of foliage was removed, leaving the plant with much less leaf mass than before.
The work is now finished, and no further cutting is planned for the moment.
From here, the plant will simply be left to recover from the stress of this heavy intervention.
The focus now shifts to recovery, stability, and healthy regrowth.


Likes
3
Share

@tony_kiffton
Follow
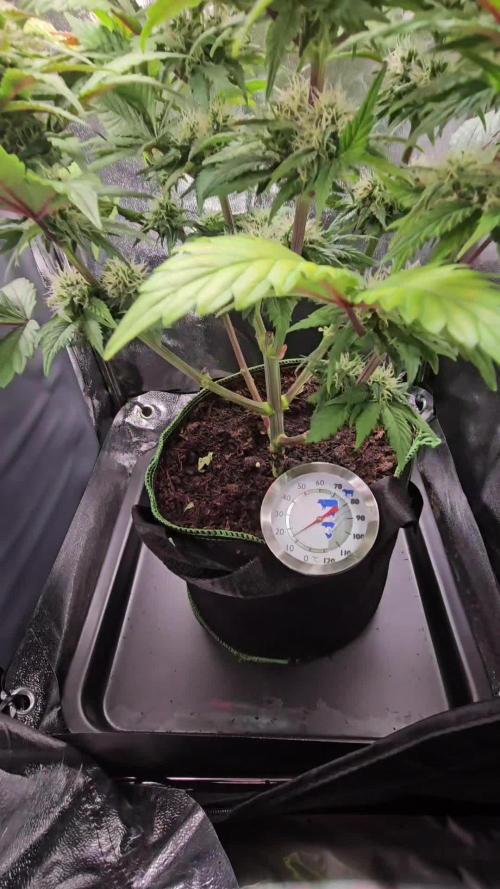
Es ist ist richtig kalt in der Garage ... die oberen Blätter sind immer noch hell - für mich aber kein kein unnötig zu düngen - die Aufnahme ist durch die niedrigen Temperaturen einfach nur gehemmt.
Likes
Comments
Share


@BudBrewerz
Follow
She packing up buds pretty good
She is still on same diet and looks to be doing great
If she thickens up she will become muy bien 🙌😎
Likes
24
Share


@Ginger_gnome
Follow
So she had some nice growth this last week. I'm hoping this next week is its last bit of growth, can only move the light up another 3 to 4 inchs. I've got to clean up the lower section A bit more, more growth there then I'd like. So far it's growing a lot nicer then the last plant I did in this tent with a SCRog set up. The size of the squares on the last grows netting were 6" and this one is 4". Way easier to get a proper looking SCRog plant then with the 6" that's for sure.
Now that the temperature outside has warmed up the night time temperature has been better then earlier weeks. The humidity has also gotten a lot better. Especially after I add a 4" muffin fan to the lower 4" duct hole. The humidity went up but the temperature went down a bit during lights on. Ive had to lower my temperature switch just to get the 4" duct fan to turn on to suck out the stail air. Think what I'll do is add a second plug to the temperature switch so I can add the 4" muffin fan to it so that itll only turn on when the temperature goes up instead of running 24/7.
I've increased the feed up to 1000ppm and am give it 1.5L of water a day with 250ml max run off. My run off ppm is only 1080ppm so that's a great sign so far. I've been trying my best to keep the ppm levels equal every feed but itf luctuates a bit but no more then 60-80ppm. Same with my Ph, because I'm using the Jungle Juice base nutrients it's not part of Advanced Nutrients Ph perfect line so I have to adjust it. I usually try to have it swing back and forth between 5.9 and 6.1 and the plant seems to be liking it.
Tho I'm not done this grow yet this light is doing a lot better in this tent then the last light. Only downside is that one burnt out diode. Because I always try to plan a grow ahead, I'm already planning on trying that last light out again (Phlizon PH-1000 125w that they apparently don't make anymore). But this time it's going to be in my 2x3x5 fusion hut tent with Royal Queen Seeds Fast Eddy CBD AUTO strain. Also going to add a ex hale bag to it.
Well that's all for now growmies. Keep growing!!!
Likes
10
Share


@IndoorNewb
Follow
Began week picking off yellowing foliage. Started her on a PK booster. I know I'm late to the PK party but only just hearing about it. Details in video.

Likes
Comments
Share


@Cultivandomedicinanatural
Follow
En esta semana ya cortamos algunas de las pequeñas que tenemos fotografiadas arriba. Ahora subiré sus cosechas y el resto de las pequeñas empezamos a regarlas sólo con agua, pure zym y Sugar royal de nuestros amigos de Plagron para que den el último estrujón y pasarlas por peluquería. Es una auténtica pasada los resultados de estas preciosidades 😍😍😍😎😎😎😋😋😊😊