


Likes
Comments
Share


@Gembel94
Follow
Grow-Report – Blütewoche 1 (Tag 1–7)
Strain: Neon Runtz (Wizard Trees)
Medium: Coco, 15 L Stofftöpfe
Lichtsystem: Spider Farmer G4500 + UV/IR-Supplement Bars
Steuerung: Spider Farmer Controller + Meross WLAN-Steckdosenleiste
Lichtzyklus: 12/12 (18:00 – 06:00 Uhr)
Grow-Philosophie:
• Die ersten 2 Wochen der Blüte werden als Stretch-Phase betrachtet
• Trichomen-Beurteilung ab Woche 10
• Ab Woche 8 kein Dünger mehr bzw. nur noch in minimaler Dosierung
⸻
Düngung
Basisdünger:
• Emerald Harvest Grow/Bloom + Cal-Mag
• Dosierung: +0,25 ml/L über Schema
Zusätze:
• PowerZym (Hesi, enzymatisch): Unterstützt Wurzelhygiene & Substratabbau
Gießverhalten:
• Tägliches Gießen mit ca. 30 % Drain
• pH Gießwasser: 5,8 / Drain: 6,1
• EC Gießwasser: 2,0 / Drain EC: konstant bei 1,3 → sehr gute Aufnahme
⸻
Lichtsteuerung – Supplement Bars
IR-Licht (Spider Farmer Bar):
• Aktiv: täglich 06:00–06:30 Uhr (30 Min nach Hauptlicht-Aus)
• Funktion: End-of-Day-Treatment zur Unterstützung der Phytochrom-Umstellung → gezielter Stretch
• Beobachtung: Erste Anzeichen von Internodienstreckung ab Tag 4, keine Überdehnung
UVB-Licht:
• Aktuell deaktiviert
• Geplanter Einsatz ab Blütewoche 6 zur Steigerung der Trichomenproduktion
• Steuerung erfolgt getrennt über Steckplatz mit Zeitschaltung (z. B. 20:00–22:00 Uhr später)
⸻
Pflanzenzustand & Entwicklung
• Pflanzen zeigen aktives Wachstum, Aufrichtung nach Lichtstart
• Keine Mängel oder Blockaden erkennbar
• Drainwasser ist klar, Wurzeln vital (unterstützt durch PowerZym)
• Geruchsentwicklung gering, aber sichtbar beginnender hormoneller Umschwung
⸻
Ausblick auf Woche 2
• IR-Licht leicht reduziert (z. B. auf 15 Min gegen Ende der Woche)
• Vorblütenentwicklung und Struktur der Seitentriebe im Fokus
• Düngeschema bleibt stabil
• UVB bleibt weiter deaktiviert
• Beginnende Wuchsberuhigung wird beobachtet → Übergang zur generativen Phase

Likes
2
Share

@Bear_Grows_Green
Follow
12/05Gave the cover crop a light watering this morning to keep the bed happy. The girls are looking a little hungry gonna give light feed next watering probably tomorrow. Temps have dropped some due to winter weather
12/06 gave light feed with this watering and a little more water per plant now that roots are established.. IPM sprayed at lights out with lost coast plant Therapy gave a light spray with some wdg3000 to pots and about a gallon of it into the cover crop.
12/08 watered em well. Topped em all again.... Sadly got DNA back today and only 4 out of 10 are Female.. was hoping for 6. Glad I have plenty more of these seeds to hunt in the future.
12/10 gave light feed dropped light intensity and raised vpd they aren't looking happy the last day. Definitely ready to get out in the bed
Likes
11
Share


Likes
6
Share


@ReggaeShark_420
Follow
Day 99 for this girl. Finished her fourth flush session today and is real close to harvesting. Will give this girl one more day of light before putting her in the dark. She is super sticky and the tricones is on point.

Likes
28
Share


@Blackbox
Follow
So, that’s it. :-) Hemprietta is no longer among the living. After an 8-day drying phase at 45 to 53% humidity, she’s now chopped up and curing in two jars. The yield is pretty big. Due to local legal restrictions, I’m not keeping everything—I got rid of all the small stuff. What a luxury to have a selection… and how ridiculous not to be able to keep it all. :-) Oh well, it was still a joy… I kept the best buds. And damn—are they beautiful!
Final thoughts: Main-lining works extremely well for a sativa in a small grow tent, even with the extra 2 to 3 weeks of training. It’s great for height control and gives the plant a solid structure, resulting in almost exclusively fat, dense main buds. I’d say the yield-to-effort ratio isn’t compromised at all. If I had kept all the solid buds (no popcorn buds), the dry weight would have been around 110 to 120 grams—which would be perfect for a two-person household. ;-) One thing I’ve learned: a 95-watt lamp might be slightly overkill for a 40x40 cm tent…
Update after curing an tasting:
After about three weeks in the jar, I finally had the chance to try Hemprietta. Yay!
I’m really impressed with the effects—this is some seriously fine herb. I can’t decide whether it takes first or second place in my personal top 10.
The high is pretty strong, which I don’t usually love as an occasional smoker, but since there’s no real couchlock, the intensity is totally fine for me. After a long, stressful day, just a few puffs completely wipe out any tiredness and make you want to be social again.
A light euphoria and good mood set in. You feel focused and receptive—though whether you actually are focused is another question. At least while playing FIFA, there were no mediocre results: either a crushing 7-1 victory or a humiliating 1-7 defeat—nothing in between. Conversations are fun and quickly get silly to downright goofy. At higher doses, you get properly stoned and suddenly feel an overwhelming urge to inhale obscene amounts of potato chips and gummy bears. Great for the soul, not so great for the waistline. But hey, it works. It’s crazy how even then, you don’t feel stuck to the couch.
Overall, a fantastic experience. I can fully recommend Laughing Buddha—it’s perfect for social occasions!
-----
So das war's wohl. :-) Hemprietta weilt nicht mehr unter den Lebenden. Nach einer Trocknungsphase von 8 Tagen bei 45 bis 53 % Luftfeuchtigkeit ist sie jetzt zum Härten zerstückelt in zwei Gläser verteilt. Der Ertrag ist ziemlich groß. Auf Grund der hiesigen gesetzlichen Bestimmungen behalte ich also nicht alles - sondern habe den ganzen Kleinkram beseitigt. Was für ein Luxus eine Auswahl zu haben. Und wie bekloppt nicht alles behalten zu können. :-) egal, war dennoch eine Freude... Die schönsten Buds habe ich behalten. Und meine Fresse - die sind aber auch schön!
Als Resümee: Main Lining funktioniert bei einer Sativa in einem kleinen Growzelt mit ca 2 bis 3 Wochen Mehraufwand extrem gut, um die Höhe zu kontrollieren und der Pflanze eine sinnvolle Struktur zu geben. So entstehen eigentlich nur fette / harte Main-Buds. Ich würde Mal behaupten, dass der Ertrag im Verhältnis Aufwand-Nutzen keineswegs geschmälert ist. Wenn ich alle ordentlichen Buds (keine Popcornbuds) aufgehoben hätte, wäre sicherlich ein Trockengewicht von ungefähr 110 bis 120 Gramm herausgekommen - was für einen Zweipersonenhaushalt perfekt wäre ;-) ich lerne daraus, dass eine 95 Watt Lampe für ein Zelt 40x40 offensichtlich etwas überdimensioniert sein könnte...
Update nach Curing und Verkostung:
Nach etwa drei Wochen im Glas habe ich die Gelegenheit gehabt Hemprietta zu verkosten. Jay! Ich bin sehr angetan von der Wirkung. Aus meiner Sicht ein richtig feines Gras. Ich bin unentschieden, ob es auf Platz 1 oder 2 meiner Top 10 landet. Die Wirkung ist ziemlich stark - eigentlich finde ich das als Gelegenheitskonsument nicht sooo geil, aber da kein wirklicher Couchlock eintritt ist die Stärke voll okay für mich. Nach einem langen stressigen Tag ist die Müdigkeit nach wenigen Zügen vertrieben und man bekommt (wieder) Lust auf sozialen Kontakt. Eine leichte Euphorie und gute Laune macht sich breit. Man fühlt sich ziemlich fokussiert und aufnahmefähig. Ist man auch wirklich fokussiert? Schwer zu sagen :-) zumindest beim FIFA zocken gab es keine mittelmäßigen Ergebnisse mehr. Entweder Sieg 7:1 oder Niederlage 1:7 - aber nichts dazwischen... Gespräche machen Spaß und sind schnell ziemlich lustig bis albern. Bei höherer Dosierung ist man schon ziemlich breit und hat Bock obszön viele Kartoffelchips und Gummibärchen in sich zu stopfen. Gut für die Seele, schlecht für die Figur. Passt also. Verrückt, dass man auch dann noch nicht das Gefühl bekommt an der Couch zu kleben.
Also insgesamt ein großartiges Erlebnis. Ich kann Laughing Buddha voll und ganz empfehlen. Sehr gut geeignet für soziale Anlässe.

Likes
Comments
Share


Processing
Likes
4
Share


@ReeferKeefer
Follow
The weather has been gorgeous here on the West coast. After 2.5 weeks of veg in the Stealth Box, the Strawberry Cough Auto was showing signs of pre-flower. I planted this girl 04/16 into a 50 gallon pot in full sun. The Purple Grizzly Auto seedling is growing quickly. She’ll be ready for transplanting outside into the sunshine by next week.


Likes
7
Share

@DaedalusGrow
Follow
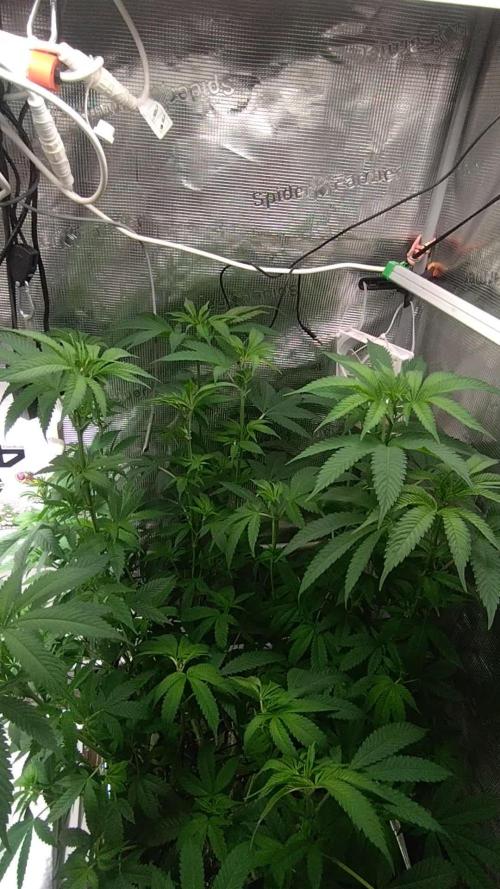
Ist noch ein Ganzes Stück gewachsen in zwei Wochen jetzt🌱💪 mal sehen wie lange das noch so geht 👌😅🍃

Processing
Likes
25
Share


@EelGrows
Follow
Week 9:
Day 57-60: Seemed to have gotten the deficiencies(rather PH fluctuations causing them) under control. 4AM#3 took a while to recover but it has stopped progressing for the time being and the buds have continued to bulk up while the pistols start to orange out. 4#1 and #2 are doing good. They recovered faster and started to really bulk up. I'd say 4AM#1 has about 50-70% orange pistils while 4AM#2 and #3 are at about 10% by day 60. Damn like I said last week 4AM#2's buds are gona get huge! One of them tipped over on day 60, had to add support, but quite hard to find a spot when half the branch is the bud...
Day 61-63: Continuing to bulk up, the 1.25x Calmg dose on day 60 seemed to do them well! 4AM#3 hasn't been showing any new signs of deficiencies, so that's good! Hoping she won't be too premature when I chop the plants(I am chopping days 73-74, only days I have time), but the pistils are starting to go crazy! Around 50% orange pistols now on 4AM#2 and #3! And 4AM#1 has about 90-95% orange pistils. When I used the handheld microscope, which is hard, the trichomes are almost all milky and some 5% amber on 4AM#1 and about 30-50% milky and a few amber on #2 and #3, seems like it will be just right! Can't wait! Gave em their last big feed of blume nutes on Dy 63, will be giving them plain PH'd water with Regulator till harvest.
10 Days left! almost there! 4AM#3 might look ugly but she still frosty and thicc as hell! Oh and they smell delicious!!! 😵
EDIT: Oh and just wanted to say thank you for all the help you all have given me so far! Oh and shout out to FastBuds, which sent me a message last week saying they were interested in me growing their genetics! They're sending me some free seeds for my next grow! How awesome is that!

Likes
103
Share


@Schnabeldino
Follow
_____ Week 8 | Day 56 - 63 ______
I give her 25% less fertilizer than indicated by Advanced...
Day 57 🌞
- install the other 2 Spider-farmer light bars | 4 / 160 Watt = 40 Watt each bar
Day 59 🌞
- each Plant 3 Liter, with small drain
Day 62 🌞
- I have changed the light for 1 week now and so far there are only small signs of flowering to be seen... Since then, they have grown about 5-10 cm
____________________________________________________________________________________________
Light - 12/12 h - 560 Watt
- 2x 200 Watt Toplight
- 4 x 40 Watt Lightbars
PPFD - 900 - 1000 µmol
Temp. avg. - 22,1°
Hum. avg. - 65 % RLH

Likes
62
Share


@Roberts
Follow
Do-Si-dos auto has grew well. She has a strong fruity, citrus aroma. Smells really good. The colas didn't get super big, but looked to be very frosty and dense. This is my first time trying this famous strain. It looks like it will be really good. I never had any huge issues during the grow. I also didn't juice her with nutes like I normally do to others in flowering. I am curious to test the results once I get her processed. Thank you Zamnesia seeds, Athena, and Medic Grow. 🤜🏻🤛🏻🌱❄️
Thank you grow diaries community for the 👇likes👇, follows, comments, and subscriptions on my YouTube channel👇.
❄️🌱🍻 Happy Growing 🌱🌱🌱
https://youtube.com/channel/UCAhN7yRzWLpcaRHhMIQ7X4g
Likes
17
Share


@DudeGrowsWeed
Follow
6’-4” & 5’-8” as of today, 6’-0” average height.
These ladies are beautiful! Everyone who comes by the house just stops and stares when they get near my garden. So do I 👍🤣
I had to move some plants outdoors from my indoor grow due to losing the battle to high heat and humidity. Two are super close to harvest, one might get cut over the weekend. Feel free to comment and let me know what you would do. Thanks!
Likes
14
Share


@ThatoneAKguy
Follow
this is almost the end of week 6. Hoping to see some bulking soon. Lower sites are still producing pistils and the top site pistils are starting to curl over.

Likes
28
Share

@DudeGrowsWeed
Follow
Nice growth out of these girls in their first 9 days above soil. The Dinafem Critical+ is larger out of the gate, but the Blackberry is showing signs of catching up towards the end of the week. I also notice twisted/wrinkled looking leaves on the Blackberry, but that seems to be common with purple strains at this age. They did need a little water near the end of the week, I added some Recharge to the water and the next day I saw noticeable growth in both girls. It could be coincidence since rapid growth at this age is expected, but I've never had any bad experiences with Recharge. Looking forward to the progress this upcoming week!
Keep on growing!!!
Processing
Likes
4
Share


@UK420hydrogrow
Follow
Had a bit of a bad week with the girls in flower tent also had few issues with the ph @6.3 been to high causing a few problems had to defoliate all affected leaves hopefully they will bounce back

Likes
33
Share


@microgrowshow
Follow
Week 3 of flowering is in the books for the Auto Gelato girl from Fast Buds Genetics <3 ... this week I did some minor cleanup with dying leaves, and the lower branches that were being blocked out by the top colas. This girl has recovered exceptionally well after being supercropped the previous week, so excited to see how she'll continue to grow and stack up in the coming weeks! Considering I snapped the stalk while cropping, I was really surprised to see just how well the wound healed up over the week. These plants are awesome! Anyway, be sure to check back next week for more updates! Happy growing 💪


Likes
9
Share


@Krautbauern
Follow
The clone is in the same height as the rainbow triangle. we set the Forbidden Nectar a little bit up because she is the smallest one…indica dominant
After 25 days of flowering we recognized that the forbidden nectar is already starting to purple a little bit (last picture)

Likes
2
Share


@Saintvicious
Follow
Not much to do with Autos. I take a handful of leaves everytime I'm in the tent. Veg thru 2-3 weeks of flower.
Likes
4
Share

@Fabroking
Follow
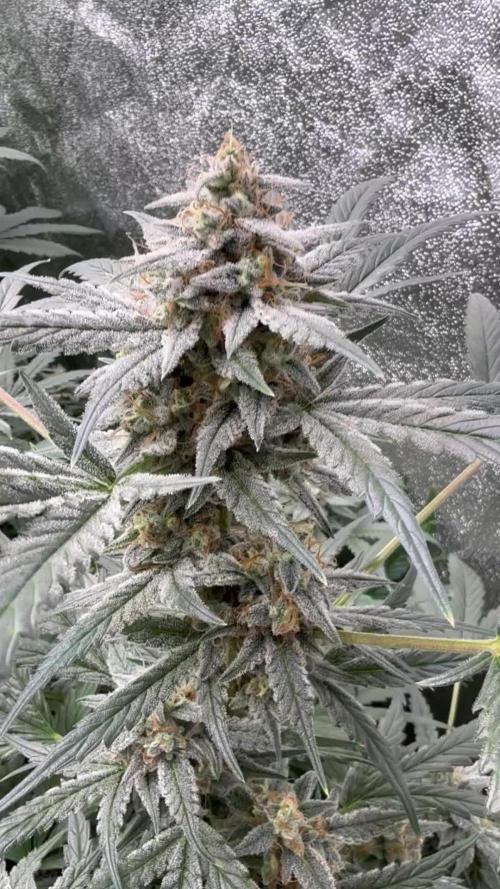
Queste 3 che avevano una settimana indietro iniziano a maturare al meglio tra le 5 piante solo una ha mostrato una predominanza meno forte per il resto le altre 4 una più gas dell’altra⛽️🔝

Likes
101
Share


@FrontRowAG_BrianG
Follow
Finally transplanted using Azos and Mykos. 7 gallon pots of pure coco. Decided to go with only 8 plants instead of the 12 allowed by law where I live. 3 lights, end to end, and the room is 6x12. There is a pickle barrel outside the room for the nutrient reservoir. By next weekend the first net will go up across the entire room. Gonna fill the net and flip the lights in the next 3 to 4 weeks.
