


Likes
Comments
Share


Likes
6
Share


@k0nz1
Follow
Already there
5 days till harvest
No more watering - let them dry out in the pot
Hervested after 10 weeks bloom

Likes
46
Share


@Chubbs
Follow
420 Fastbuds Week 8
Gorilla Punch Auto
What up GrowFam. Hopefully everyone had an amazing Thanksgiving. This week has been exciting after leaving for a camping trip and returning to super smelly tent. Low and behold they made it fine I think I was more worried I'd come back to soggy plants from my drip system over watering. Everything worked as it should and the plants are thriving. I'd say probably another week or two left is all before they'll get the chop. All in all
Happy Growing

Likes
2
Share

@Phaleg
Follow
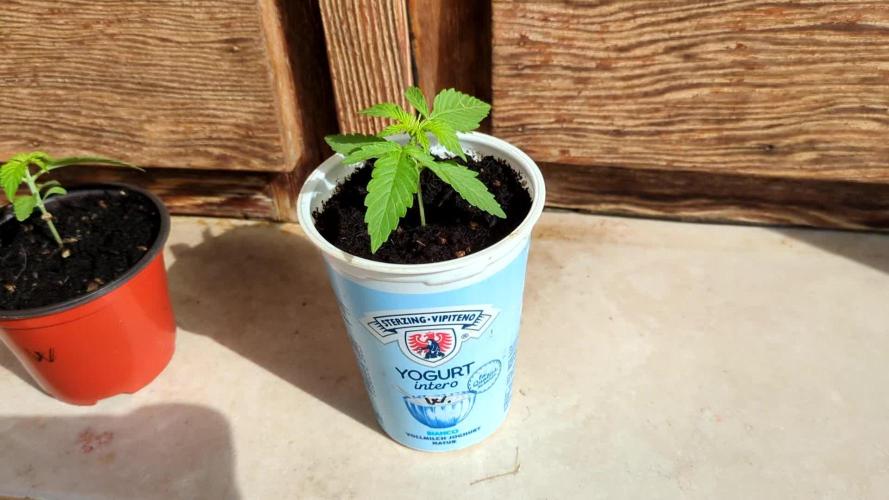
This week spaced among different types of weather, from rain and hail storms, to sunny and heat
(I took the plants indoors for the hail)
Height looks the same, because I added some ground, so they grew but it looks they did not.
They get water once a day and the point leaf count is increasing.
Soon they will be moved to 14 liters pots, what do you think? I normally wait that they have 5 points (or more) per each whole leaf
Thanks for following me and in case you want to share anything, feel free to text me or comment
PEACE

Likes
30
Share


@RakonGrow
Follow
Note :
+ jegliches Zubehör wird in der GermniationsWoche aufgelistet .
Ich hab keine Ahnung was es wiegt , da ich keine Zugwage hatte. Warten wir also ab was es an trockengewicht wirklich wird. Aber da ist viel Drann , bei 116cm größe ist selbst der kleinste Bud noch groß :))
Es sind nach 5 Tagen Trocknung bei 22°C und 55%rH genau 204g
Likes
31
Share


@Lukush
Follow
Hey growmies all is good and mi baby girls are loving life!!
Gonna start giving them some nuts in a couple days 👍
Thanks for passing along have a good one growmies.
Check out this led on website 💪👍💪
https://marshydro.eu/products/mars-hydro-sp-6500-led-grow-light/
SP6500, as one of the huge single bar LED grow lights, installed with top quality Samsung LM301B diodes, designed with enhanced red in broad-spectrum light, emits the highest central PPF and has the superb penetration that its major applications are for high-wire plants and greenhouses.
Wattage – 650w
Veg Coverage – 4×5 ft
Flower Coverage – 3×5 ft
Featuring a thick aluminium passive heat sink and densely arranged chips, the SP Series provides high efficacy but low heat output while minimizing obstruction to natural LIGHT!

Likes
42
Share


@Dunk_Junk
Follow
She dried out a little too much during the week.
Lots of leaves turned brown too.
I think she is done anyway, trichomes are all milky and the pistils are mostly brown.
Based on that = harvest in 24h 💪


Processing
Likes
33
Share


@Darksoul
Follow
Week 6 - Maybe the last vegetative week. Everyone is topped and LST. I think I will let them grow in peace this week (Ill just fix the lst, no more toppings or cutting fan leaves) and install my scrog net
Likes
117
Share


@BigDaddyK
Follow
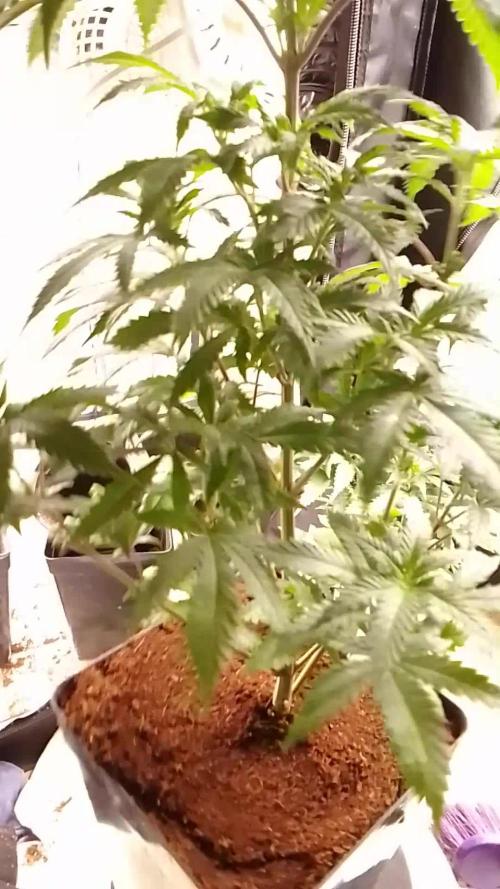
Ok this is my Full guide with pictures on how to setup a Deep Water Culture grow, items you will need for this grow -
Firstly a TENT or ROOM i use a tent
REMEMBER stuff you buy NUTRIENTS off eBay and Amazon could be decanted (watered down) , or cheap chinese fakes (Ph Meters, PPM meters) you should really buy these things from you local hydroponics store,as they are guaranteed , i ve dropped a few into the bucket and they are fked,its been a sunday night with a bank holiday monday and i m fked,
1) Ph Down - makes the ph of water LOWER - this is VERY STRONG SHIT , wear gloves and googles if you are messing with it, i drop a bit into my main reservoir Ph 6.9 ( maybe 10ml per 200L)
2) Ph up - makes the Ph go higher - also STRONG SHIT -only needed in Emergencies
3) Ph meter
4) PPM Meter or EC meter
5) 20L Bucket + moulded lid netpot
6) Air Pump ,air hose 3m ,air stone x2,
7) Pebbles to fill to top of netpot,
8) ROOT IT cubes , i use these and ONLY these, by that brand,i know why,and so im telling you,
9) Seeds - I prefer Fast_Buds ,autos ready in 10 weeks of 18/6 - top quality
10) Nutrients, I use Canna as they are the easiest, they have a way of filling the one side , if you take the top off you can squeeze into the measuring side - I would also recommend Advanced Nutrients,but they are more expensive - so you will need 1L Canna Aqua Vega A+B ( it comes as two parts that you cannot mix together , when you put this into the water you MUST stir it well before putting each one in seperately otherwise you will get salts formed and crystals floating around,10 ml per 10L week 1-2 ,15ml per 10L week 3, 20ml per 10L in week 4)
1L Canna Aqua Flores A+B (as above) 25ml per 10L week 5, 30ml per 10L week 6 ,30 ml per 10L week 7 , 25ml per 10L week 8,15ml per 10L week 9, 0 per 10L week 10
250 ml Canna Rhizotonic (roots love this use this from start 20 ml per 10L and cut down after 4 weeks to 5ml per 10L up until week 9
250 ml Canna Cannazym ( breaks down dead roots, enzyme of some sort) 15ml per 10L from week 3 through to week 9
250 ml CannaBoost - (quite expensive but worth it, DWC will show you why) 15ml per 10L week 3 to 4 , 25ml per 10L week 5-9
250 ml Canna PK 13/14 (bud booster) this is optional because you only add it once,personally i add 15 ml per 10L in week 7 so its stays in for 10 days
I leave my water for at least 24 hrs before using it, in a big old olive container i bought , i think its 225 L i might be wrong, but it was cheap , solid and had a top :)
I check my water levels ,my PH and PPM daily
11) Jubilee clips x3 - to secure the fan ,filter and outlet.( 5 clips if using air cooled hood )
12) Fans - i have 2 little fans and 1 big one = think about it, outside there is always good air flow -
13) Extractor fan -mine is 6 inch
14) Carbon Filter - mine is 6 inch im not overly impressed with any brand.
15) Ducting- 5m of 6 inch easy enough,well for me...
16) Ballast - LUMATEK -i found this one amazing and switchable.
17) Lightbulb -600w HPS ALL THE WAY but i would use 1000w HPS if i could keep the heat down, they both fit in same fitting
18) Air hood - i have a MAGNUM superXXXL it has screw in holders for glass , they are quite tight
19) Timer for lights , must be good quality , I do 17 hrs on 7 off as it's more natural
20) Syringes for measuring accurately
21) Bucket to mix solutions
THE GOLDEN RULE - you can always put in but never take out - never put in too much or undiluted into the reservoir unless you really know what you are doing, less is better than too much .
Ppm v EC - you may well buy an EC meter instead of ppm meter there is an easy way to convert between the two ~ 1.0 ec = 500 ppm
EC multiply by 1000 then divide by 2 to get ppm
This diary will start shortly but as so many people ask me how to setup HERE YOU GO :)


Likes
22
Share


@Stork
Follow
Day 86
PH 5.8
EC 0.2
DLI /11h/
PPFD/
Water 20c
Day 88 Wed
PH 5.8
EC 0.2
DLI /11h/
PPFD/
Water 19c
Day 89 Thu
PH 5.4/6.0
EC 0.2/0.2
DLI /11h/
PPFD/
Water 19c
Day 90 Fri
PH 6.6/6.0
EC 0.3
DLI /11h/
PPFD/
Water 19c
Day 91 Sat
PH 5.6
EC 0.2
DLI /11h/
PPFD/
Water 19c
Day 92 Sun
PH 5.8
EC 0.2
DLI /11h/
PPFD/
Water 19c
Likes
12
Share


@Fleetwood
Follow
Still fighting with pH. It was 5.5 when I add the plants, but when I check a few hours later, it's already above 6.5
Days 2: I trimmed the bottom fan leaves from Purple Kush to keep them off the ground. I also topped Purple Maroc. pH was still below 6
Day 4: Veg is gone wild..... I have been shoving the large fan leaves on the Autos underneath other branches to allow light in. Red Purps may get topped yet again.
Day 6:. Switched autos to bloom nutrients. Added Purpanator to them. pH set to 5.5.
Topped bottom and mid branches of Red Purps to keep canopy more even.
Day 7: replaced CO2 generator.


Likes
8
Share


@BuzzingHighAbove
Follow
Critical Purple Kush was an effortless grow. The plant beside her got spider kites but they didn't like that CPK so much. She had a few show up on lower leaves, never any webs. I treated for them twice and they never resurfaced.
Likes
14
Share


@Slippery
Follow
The Sweet Gelatos are almost there still waiting on the trichomes to ripen. I expect I'll harvest them this weekend.
The Gorillas have still a way to go, possibly another 2 weeks or more. They both have produced large thick dense colas but the ZkittleZ are by far the largest and thickest easily as thick as a woman's thigh!
I've procured a new light so I've added it as side lighting for now... 800watt led side light! 🙈 Begone popcorn buds and larf!🤭


Likes
127
Share


@DutchFarmer
Follow
Week 2
Started feedig the full plagron range according to the custom feeding chart i generated on the Plagron website
https://plagron.com/en/tools/grow-schedule-calculator
Also topped her, as i think this is perfect time to top her
Likes
3
Share


@French__flair
Follow
N'hésitez pas à me contacter si vous avez des questions!
Pour préparer votre solution, dans votre réservoir ou arrosoir :
Mettre en premier la base (Iguana)
Ensuite Ancient Earth
Et enfin les bactéries
ASSUREZ-VOUS D'UTILISER UNE EAU DE BONNE QUALITE (EC < 0,2) POUR DE MEILLEURS RESULTATS.
J'utilise un substrat non enrichi pour permettre le meilleur départ à mes plantes.
Il s'agit du Promix de Plagron, il a une EC proche de 0, c'est pour cette raison que je commence les engrais assez fort dès le début. Les plantes sont très gourmande sous LED haute intensité et l'enracinement est rapide.
J'arrose tous les 3 jours environ avec 2 arrosages à l'engrais et 1 à l'eau par semaine. Je n'attend pas que le substrat sèche complétement sinon ça réduit l'efficacité de l'arrosage, ça détruit la faune et éventuellement facilite la cristallisation des minéraux.
Au niveau du volume d'arrosage, il faut prendre en compte 1/3 de la taille du pot. Pour un pot de 1L je vais donc arroser environ 300ml. Pour un Pot de 10L je vais arroser environ 3L.
Il est important d'arroser doucement pour éviter que l'eau ne coule tout de suite au fond.
Il est important d'avoir au moins 15% de drain pour s'assurer d'évacuer tous les nutriments non consommé et faire la place aux nouveaux.
IL EST PRIMORDIALE D'EVACUER L'EAU AU FOND DES COUPELLES, c'est une eau qui est chargée en nutriments non consommé et on ne veut pas qu'elle remonte dans les pots car cela risquerait de créer des blocages.
Au niveau de la technique de taille de formation, je réalise tout de suite une FIM que je reproduirai dès que l'apex aura repoussé. La première FIM est la plus longue mais les suivantes sont très rapide car la plante s'habitue à la technique et cela la stress beaucoup moins. En général il faut reproduire la FIM tous les 3 à 4 jours en fonction de la vigueur. C'est une technique très facile à mettre en œuvre et ne demande aucun matériel. C'est aussi la plus rapide pour obtenir des buissons.
N'hésitez pas à me contacter si vous avez des questions concernant la FIM!
Je retire également les feuilles supérieur (pas toute pour éviter de ralentir la plante) qui cache les secondaires pour augmenter l'efficacité de la FIM sur la croissance des secondaires.
Likes
5
Share


@CuriosityWebster
Follow
Did the heavy defoliation open up most of the bud sites
Slight smell starting, Tropicana cookies is mild but semi sweet, absolutely insane colors to show this early on IMO, can’t wait for and result!
B.P.P is more gassy and a stronger smell, having good trichome production on this plant
Likes
36
Share


@wolfvb
Follow
RS11 "B" - Building a Solid Foundation! ?☀️
Welcome to Week 12! While her sister might be the tallest on the balcony, RS11 "B" is proving she is an absolute powerhouse in her own right. She is looking incredibly robust this week, and we finally got a great look at her base!
📈 The Details / Progress Report:
Sturdy Foundation: Looking at the soil you can see just how thick and woody that main stalk is getting. She is building a heavy-duty structural foundation to handle the outdoor winds. The medium also looks perfectly hydrated dark, rich, and happily sitting in that breathable fabric pot. ?
Flawless Canopy: her health is absolutely pristine. Those fan leaves are massive, displaying a vibrant, lush green with beautifully sharp serrations and deep texture. There are zero signs of deficiencies, pests, or environmental stress. 🍃
Bushy Structure: She is continuing to fill out her lateral space wonderfully. She is prioritizing a dense, wide structure that is going to be capable of supporting a lot of heavy colas once she fully transitions into flower. 🌳
💧 Next Steps:
Whatever you are feeding her right now, don't change a thing she is in the absolute sweet spot! The main goal this week is to maintain that consistent watering schedule (that soil looks perfect) and to keep a watchful eye out for any stray balcony pests as she bushes out.
She is looking beautiful! Let's keep it growing! 🌱💨

Likes
27
Share


@AbroCadabro
Follow
Very difficult for me to grow. So much foliage. This plant bushes out like crazy. She was also a real pain in the ass to harvest. You should strip her of every god damn leaf except for the top nodes right before flower or she will fill out to the point of cover up all the bud. I had to throw out a bunch of under developed flower because it was so bushy..