


Likes
Comments
Share


@Appoldro420
Follow
Title: 100% ChatGPT-Guided Grow – 12/12 Fast Flower Test (With Supervision)
Hey growers!
This grow is an experiment: I'm letting ChatGPT guide my entire grow cycle, from lighting to nutrients to environmental tweaks. It’s all based on AI suggestions.
Of course, I’ll still be keeping a close eye on things — if I see something going wrong or the plants aren’t vibing with the plan, I’ll step in. But the idea is to test how far AI can take a grow under controlled conditions.
Strains – All from @Sweet_Seeds (F1 Fast Version):
Mental Rainbow F1 Fast Version
Tropicanna Poison F1 Fast Version
S.A.D. Sweet Afgani Delicious F1 Fast Version
Gorilla Girl F1 Fast Version
Setup:
Coco in 20L @MarsHydroLED SmartPots
Grow tent: @SecretJardin DR240W
Lighting: 2x 720W LM301H EVO LEDs
12/12 from seed
Germination: May 14th / Main grow starts May 20th
Nutrients: Hy-Pro Coco A/B CalMag Pro, @BAC Silica Power, F1 Extreme Booster
Irrigation: Week 1 hand watering, then Blumat
pH starts at 5.8
CO₂ supplementation via natural gas system (Spider Farmer GGS)
Goal: Complete a full grow cycle in 10 weeks or less, from seed to harvest.
Updates will be posted in a personal yet informative style — a hybrid of stoner chill and data-driven grow logs.
Let’s see what AI can do in the grow tent. Stay tuned! 🤖🌿
🌱 Weeks 1–3 (May 20 – June 9) – Seedling to Early Flower (Stretch Phase)
Goals: Strong root development, firm stem structure, controlled stretch
Light: 12/12, start at ~500 PPFD → ramp up to 800 PPFD (day 14–21)
CO₂: 1500 ppm (only active when lights are on and temps 26°C)
Temperature: 26–28°C day / 22–24°C night
RH: Start at 70% → gradually lower to 60%
Nutrients (EC ramp-up):
Start EC: 1.0 → increase to 1.4
Plagron Cocos A+B + CalMag Pro (0.2 EC tap water)
Always mix Silica Power first (0.1 ml/L)
Actions:
Week 2: Start light defoliation on lower leaves
Week 3: Begin LST if desired
pH: 5.8 throughout the veg phase
🌸 Weeks 4–5 (June 10 – June 23) – Flowering Phase 2 (Bud Set)
Goals: Initiate flower formation, maintain healthy leaf mass, stimulate bloom
EC: 1.5–1.7 (monitor Blumat watering rate carefully)
RH: 55–60%
Nutrients:
Plagron Cocos A+B
CalMag Pro
Silica Power (0.1 ml/L – only until end of week 5)
Start B.A.C. F1 Extreme Booster at half dose, watered manually twice a week
Light: 900–1000 PPFD if plants can handle it
🌼 Weeks 6–7 (June 24 – July 7) – Flowering Phase 3 (Bud Building)
Goals: Develop dense flower structure, maximize flowering potential
EC: Up to 1.8 max
RH: 45–50%
Nutrients:
@Plagron Cocos A+B + CalMag Pro
@BAC. F1 Extreme Booster at full strength
Actions:
Final defoliation at beginning of week 6
Inspect leaves regularly for airflow and mold prevention
💧 Weeks 8–9 (July 8 – July 21) – Ripening Phase
Goals: Maximize terpenes, trichome maturity, flush medium
Week 8:
EC: taper down to 1.4
Stop using booster
Optional single flush with enzymes (manual watering)
Week 9:
Only plain tap water through Blumat (~0.2 EC)
Temperature: 24–26°C
Dim lights to ~600 PPFD for final 3–4 days
✂️ Week 10 (July 22 – July 28) – Harvest
Trichome check: Aim for 10–20% amber with a loupe
Optional: 48 hours darkness before harvest
Temperature: Keep low (20–22°C) to preserve terpenes
Deadline: Harvest no later than July 28
Powered by the new 2025 @SpiderFarmerLED GGS system..
Detailed setup (only SF parts mentioned here):
SF GGS Grow Light Controller (1x)
SF GGS AC10 Kit (1x)
SF GGS 6 Inch Clip Fans (2x)
SF GGS 6 Inch Inline Duct Fan (1x)
SF GGS SensorPro Kit
SF Ultrasonic Humidifier
May 20 – CO₂ moved outside, lighting dilemma, and a warm future ahead
Moved the CO₂ generator outside the tent today. Immediate win: steady 700 PPM from just the pilot light, no active burn needed. When turned off, it drops neatly to 400 PPM, matching the calibration point. Double-checked with the Dimlux CO₂ sensor—readings line up perfectly.
Still no tracking info for the originally ordered lights, so out of impatience I grabbed two new 720W LM281B fixtures from Germany this afternoon. Should arrive Friday/Saturday. It's a Trade Assurance order, so in theory, I'm covered.
Now the question: let the seedlings coast at 259 µmol for two more days, or hang the old lights to boost them to 500 µmol? Eight out of twelve are already above soil, and honestly, I’d rather not mess with the current vibe. Leaning toward leaving them be—low stress, happy sprouts.
Best part: temps dropped to 27.9˚C inside the tent now that the CO₂ generator’s out. Room itself is 24˚C, so all in all pretty chill. Curious what’ll happen once those dual 720W monsters fire up… it’s gonna get toasty, no doubt.
24/05: Stocked up on new Plagron nutes—finally. Now I can lock back into the full 10-week feeding plan (Plagron Cocos + B.A.C.). Flushing the res tonight and going full reset. Mixing fresh soup right after, dialed in to match this schedule:
Week 1:
Plagron Cocos A/B: 2 ml/L
B.A.C. Silica Power: 0.2 ml/L
Plagron CalMag Pro: 0.5 ml/L
B.A.C. F1 Extreme Booster: 0 ml/L
EC: 0.9–1.0
pH: 5.8
PPFD: 500
DLI: 22
RH Day: 70%
RH Night: 65%
CO₂: 700 ppm

Likes
7
Share

@Ninjabuds
Follow
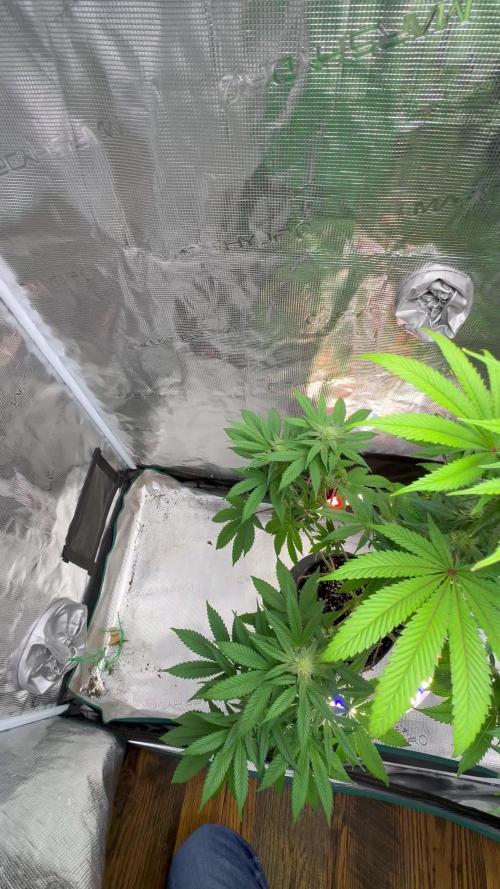
My ELUFAH UAP 1500 test grow is showing excellent results, with the plant thriving under my care. The addition of the ELUFAH Saturn Ring under canopy light has been a game-changer, significantly boosting growth. It's clear that the supplemental lighting is providing the plants with the extra energy they need for robust development and impressive yields.

Likes
20
Share


@MoGrow
Follow
This week was a bit of a struggle. Plant was moved to 5 gallon container and into a tent. It took me a few days to get the humidity under control but all is well now that I've got a little better ventilation. The only thing I'm very concerned with now is bringing the ph down to a 6.5 -7. I'm going to use distilled water instead of nutrient mix for the next week and likely will heavily dilute the nutrient mix before next feeding.

Likes
23
Share


@TheOtherSide
Follow
This was my first photoperiod grow. It was a great experience. I kept the veg cycle short to keep it more manageable and so it wouldn't be as terrible if I screwed something up toward the end and needed to trash it. I'll grow MANY more photo plants in the future. Some of the autos have small yields. I doubt that's an issue with these babies! 💪 This girl got so big that even with added supplements to help keep her stem strong, almost all her branches bent. They were HUGE. The color got very light toward the end and the leaves got a little stress because I didn't manage the humidity well. *I think* It got down in the 20s a lot. It had a fairly strong aroma toward the end of the grow but nothing compared to it's tent partner. She looks like she started fox tailing a little toward the end. Also, most likely due to temp and humidity. Closets are hard to control. All in all, this was an enjoyable grow and I look forward to trying it again and hopefully growing an even better one!! 😁

Likes
1
Share


@Bthumb
Follow
I think the big swings in temperature have stunted her a little. I trimmed away some under vegetation, but not much. She's incredibly steady, hoping she stacks some big, dense buds.

Likes
10
Share


@InnerCityGardens
Follow
Week 12, pre flowers everywhere! Can’t wait to see how she finishes but for now my job is to try and maintain an even canopy 🙌🏽💚
Likes
422
Share


@Crashoverite
Follow
Hi all,
Welcome to my 🍌💜👊 week update.
Thank you so much for your all support on this bananas journey 💜💚💜💚
Week 12
Jan 1 - Jan 7
I am so happy seeing how my girls are developing. All it's going great. 2 waterings of 8ltr on 03/01 no runoff and second on 06/01 9.5ltr! Runoffs PH at 6.2. Purchased larger dehumidifier and installed on 03/01 instantly humidity decreaseed from 55-59 to 50-55 on avg. and at night from 62-69 to 54-60. Light from 01/01 on max power output 110 watts. Nutes slightly adjusted. Buds on both girls gaining size, weight. Trichomes on Athena mostly milky and clear with only very few ambers. Xena mostly 50/50 clear and milky,
They are smelling gorgeously, not sure if I should smoke or eat them first.
Next week will still feed with nutes and keep an eye on trichomes development but it seems that girls are not in a hurry at all. That's okay me neither 😁
Stay tuned for next week entry very soon!
Peace and love brothers and sisters ✌️💚
Links
https://2fast4buds.com/seeds/banana-purple-punch-auto
https://plagron.com
https://www.biobizz.com/
https://fishheadfarms.com/
Likes
22
Share


@Damonkey
Follow
Steady progress from last weeks update. Although I may have mixed two of the plants up and the one I think is red dragon could actually be Zombie Kush, but I’m sure that’ll show in the next couple of weeks, there are actually 2 Zombie Kush in there, the mix around came at the time of repotting, if a mix around there was, ah the mystery of it all😜 smelling great in there. The purple strawberry really does have an amazing aroma, and the blue fire og has a super stench, I thought it might be a bit more fruity but I’m not complaining. The gorilla Zkittles is just pouring oil, the leaves and buds are covered, it’s been sticky for a while now the smell not so intense. The Zombie Kush are looking great (1 especially but this as aforementioned may be red dragon🙃) The red Dragon is also looking really good and filling up space along the stems with bud, not so much of a show of trichomes as far as this one goes but theyre there🤤 the critical orange punch is also doing well but isn’t that great to look at, I’m hoping as the buds fatten they’ll tighten up a bit. The smell from this one is gorgeous though and no doubt it will make great smoke. April is looking like a good month for flavours🤤🤤🤤🙏🏻🙏🏻🙏🏻


Likes
12
Share


@Lushbloomz
Follow
She's a mess! Her buds are sooo heavy, they are falling over. She suffered from nute lockout and ph issues, but I see her leaves greening up again, so maybe she's getting better. I don't know what it means, but her stems are purple. She also has some foxtailing that I think the environment contributed to. It gets very hot in my make shift tent.
These are her last weeks. No more nutes, just water from now on. I will be harvesting her on Sunday due to personal time constraints. I hope she's good!
Thanks for stopping by and stay tuned.


Likes
9
Share


@Mr_nugs_lover_David
Follow
Man oh man,without noticing I just found a new favorite strain man.Love the strong fruity and floral aroma coming from these flowers I can't wait to grow her Photoperiod version,it's been a pleasure to grow her,unfortunately I lost her four sisters,I would love to get a lot of full jars of this amazing haze 👃🔝🔝💚
Likes
157
Share

@GreenHobbit
Follow
Laughing Buddha – Wochenbericht #21 | Blütewoche 6
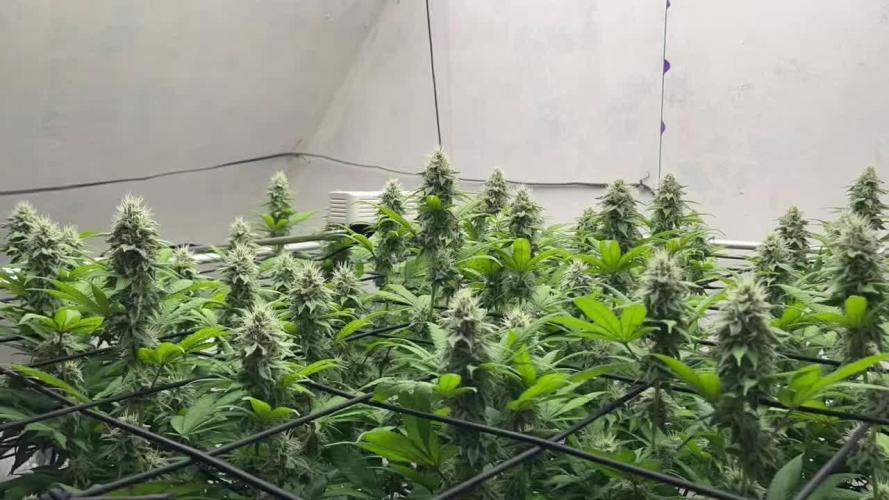
Blütewoche 6 ist geschafft und trotz der bekannten Blattprobleme entwickelt sich die Laughing Buddha bei den Blüten weiterhin richtig stark.
Der Unterschied zur vergangenen Woche wird besonders im Zeitraffer deutlich. Ohne die Dunkelphasen lässt sich die Entwicklung diesmal sehr schön verfolgen: Die einzelnen Buds haben sichtbar an Masse gewonnen, mehrere Blütenstände beginnen immer stärker zusammenzuwachsen und die größeren Colas werden zunehmend kompakt. Gleichzeitig produziert sie weiterhin sehr viele frische, helle Blütenfäden – hier ist also noch lange nicht Schluss.
Auch die Harzproduktion macht richtig Spaß. Die Zuckerblätter sind inzwischen stark mit Trichomen überzogen und einige Buds sehen schon jetzt ordentlich „frostig“ aus. ❄️
🍃 Blattentwicklung
Weniger schön bleibt der Zustand des Laubes. Die bereits vorhandene Aufhellung ist weiterhin deutlich sichtbar und an einigen Blättern haben die nekrotischen bzw. rostfarbenen Stellen zugenommen.
Nachdem in der vergangenen Woche bereits verschiedene mögliche Ursachen überprüft und die Bedingungen angepasst wurden, möchte ich momentan nicht mit weiteren großen Veränderungen reagieren. Boden-pH und EC waren bei der Kontrolle unauffällig. Gleichzeitig wurden die zuvor sehr hohen Temperaturen bzw. der hohe VPD entschärft und der Abstand bzw. die Lichtbelastung angepasst.
Die alten Schäden werden natürlich nicht verschwinden. Entscheidend ist jetzt, ob sich die weitere Verschlechterung verlangsamen bzw. stoppen lässt. Trotz des angeschlagenen Laubes zeigt die sichtbare Entwicklung der Blüten momentan jedenfalls, dass die Pflanze weiterhin ordentlich arbeitet.
💧 Bewässerung
Zwischendurch wurde überwiegend Regenwasser verwendet, da kein vorbereitetes Leitungswasser zur Verfügung stand. Künftig werde ich wieder hauptsächlich Leitungswasser verwenden und eventuell einen Teil Regenwasser beimischen, um die hohe Kalkbelastung meines Leitungswassers etwas abzumildern.
Nach dem versehentlichen Verschieben eines Bodensensors wurde dieser außerdem wieder korrekt eingesetzt. Dadurch waren die vorherigen Feuchtigkeitswerte teilweise irreführend – nach dem erneuten Einsetzen zeigte der Sensor wieder plausible Werte.
💡 Licht & Technik
Diese Woche gab es noch zwei kleine technische Geschichten. 😅
Einmal wurde das Licht morgens manuell eingeschaltet, damit ich vor der Arbeit gießen konnte. Abends habe ich leider zu spät daran gedacht, sodass sie an diesem Tag ungefähr 13 statt 12 Stunden Licht bekommen hat. Ein einmaliger Ausrutscher – danach ging es wieder normal mit 12/12 weiter.
Außerdem hatte der Spider-Farmer-Controller seit einiger Zeit seine Netzwerkverbindung verloren. Lokal funktionierte die Steuerung weiterhin, in der App wurden allerdings keine aktuellen Daten mehr übertragen. Ich habe den Controller schließlich auf Werkseinstellungen zurückgesetzt und sämtliche Geräte neu verbunden – seitdem funktioniert wieder alles wie vorgesehen. 👍
🌸 Fazit Blütewoche 6
Die Blattgesundheit bleibt ganz klar der Punkt, den ich in den kommenden Wochen am genauesten beobachten werde. Dafür gibt es nichts schönzureden: Für die noch verbleibende Blütezeit hätte ich natürlich lieber deutlich mehr gesundes, sattgrünes Laub.
Auf der anderen Seite steht eine Blütenentwicklung, mit der ich wirklich zufrieden bin. Die Buds haben innerhalb dieser Woche sichtbar zugelegt, die Harzproduktion läuft auf Hochtouren und über die gesamte Fläche stehen inzwischen zahlreiche ordentliche Colas.
BW6 war damit eine etwas widersprüchliche Woche: oben werden die Buds immer schöner, darunter macht mir das Laub weiterhin Sorgen. 😅
Jetzt heißt es möglichst stabile Bedingungen halten, genau beobachten und ihr die Ruhe geben, ihre Arbeit zu machen.
Auf in Blütewoche 7. 🌿✌️

Likes
10
Share


Likes
4
Share

@Grower_Boris
Follow
🌿 Grow 🤝 Freunde 🌱
15. Blütetag | DWC-Grow-Update
Hallo Growfreunde,
heute gibt's wieder ein Update aus meinem ersten DWC Grow – wir sind jetzt am 15. Tag der Blüte ! Die Pflanzen machen weiterhin einen richtig starken Eindruck: Das Blattwerk ist satt und vital, das Wachstum stabil und die ersten Blütenansätze sind schon zu erkennen. Die Höhe passt, die Verzweigung gefällt mir sehr und der Gesamteindruck ist einfach top – genau so hatte ich es mir vorgestellt!
Dank optimalem Klima und der Farmlite-Beleuchtung gibt es keine Ausfälle, alle Lady's entwickeln sich gleichmäßig und zeigen ein schönes, kräftiges Grün. Für meinen ersten DWC-Versuch bin ich wirklich zufrieden – das System läuft wie geplant, Wurzelmasse und Blütendichte weiter zu. Jetzt bin ich gespannt, wie sich das Aroma und die Buds Woche für Woche weiterentwickeln.

Likes
22
Share


@Jwjoh
Follow
This was an interesting harvest. Everything was going great and the buds/trichomes were still piling on, when suddenly almost overnight plant "C" shifted to about 20% amber trichomes. So I harvested it, and because the other plant wasn't ready yet I decided to try water curing the first one for 7 days. Then at the end of the 7 days, I figured I'd hack down plant "D" and dry them both on the racks in the tent at the same time before moving into jars.
The water curing was a huge success! After the first day, the water was cloudy with a slight green tinge. Second day was about the same. Then the water was just a little cloudy each change, no green tinge. Compare it to the diary I just opened around water re-curing some cannabis I bought from the government store, where the water is diarrhea brown :O On day 7 of my water cure, the water was perfectly clear so I decided to hack down plant "D" and get them both drying on racks in the tent together.
While water-curing plant "C", I had its trim sitting in a bowl in the freezer. When I hacked down plant "D", I put its trim in the same bowl. After my typical wet-trimming, I hung up Plant "C"'s water-cured buds on the top rack, plant "D"'s buds on the 2nd rack for an old fashioned cure, and random trim from both plants spread out on the bottom 2 racks.
The water-cured buds dried within about 24 hours and went into a jar with a 58% humidipack. The buds are SUPER dense and potent! Nice clean high, doesn't kill my throat. The downside is that the taste is really weak and not that great. But everything has pros and cons. Almost no trichome loss in the bucket during the water curing as well -- I was really worried about that!
The other buds dried in about 36 hours and went into a jar with a 58% humidipack, where I burped it many times a day for a week. The smell and flavour are much more potent than the water-cured bud and it's a little harsher on my throat, but otherwise I'm not sure there's a detectable difference.
However, you can SEE there's a sharp visual difference between the water-cured buds and the jar-cured :) Of course the jar-cured will mature more with time as well.
Once the trim was completely dry, I put it in a bag in the deep freezer and dropped it to about -20. I didn't need to use a grinder this way -- I could just mash it all up in the bag with extreme ease! Sifted it through the kief screen, and pressed down 17 grams of lazy-man's hash!
After processing the trim through the kief screen, I decarbed in the oven at 200F for 1 hour (this converts THC-A into THC or something to that effect -- if you don't do this, the edibles won't get you very high). I put the trim into a big mason jar and back into the freezer along with my bottle of Everclear. Once they dropped somewhere down around -20, I poured in the Everclear, put the lid on, and shook as hard as I could, as often as I could, for 5 minutes or so. I noticed that as I shook it around, the contents inside would alternate between solid and liquid which was kinda cool :) Shake it one way and it freezes, shake it the other way and it thaws... or something to that effect, anyway. I was able to use a double-coffee-filter to extract about 2 cups of dragon tincture!
I threw everything in the coffee filter out -- next time I'm going to do a better job of it as there's a little pile of trichomes that forms at the bottom of the filter which I could put to use. Once I get that down next harvest, I'll have around 99% efficiency milking every last drop out of my harvests!
White chocolate is so yummy, as are candy canes... I wanted to combine the two to make some edibles. Looking around for candy cane crush, I decided to check out Amazon. They had the same candy cane crush I was looking at from popular stores, for only a couple dollars more, so I figured sure why not have it delivered. I was planning to get some white Baker's chocolate, but on checkout of the candy cane crush I got a deal for adding on white chocolate Lindt bars for $1.25 a piece LOL! So I bought 10 of those.
When the Amazon package arrived, I slowly boiled down 1/2 cup of my dragon tincture in a pot, then used a double-boiler setup to melt down 4 of the Lindt bars in the same pot. Once it was mixed well with the hash oil, I set it aside to cool for about 3 minutes before stirring in 1/8 cup of candy cane crush (plus I ended up adding maybe like a tablespoon more), pouring into a pan lined with parchment paper, and putting in the freezer for 30 minutes.
So now I have a nice big chunk of white chocolate candy cane crunch stuff where a piece the size of my thumb gets me super high for like 8+ hours; 17 grams of lazy-man's hash; and 88 grams of bud :) And still enough dragon tincture left over to make 3 more rounds of edibles -- not sure what I'll make next!
From now on I'm going to water cure a large portion of all my buds -- not just the ones I grow myself, but ones I buy from the Gummint too!

Processing
Likes
6
Share


@iMeus
Follow
This was a good week, just starting to see bud sites pop up and now flower has officially begun.
I noticed that the Primal Punch still looked a tad under fed so I blasted everyone with 1 scoop of Grow and 2 scoops of bloom (age old nutrients)
I never used dry nutes before so here's hoping that I can stay on top of this grow and produce some sweet buds! Depending on when I harvest there may be another 9-12 weeks of flower.
I'll pop in some more details after I get some shut eye, much love, Meus <3
Likes
14
Share


@ao_grows1978
Follow
Well, not the biggest yield from my little mainline...28g of keeper buds and 28 grams of trim and little buds for RSO. The smell from the buds is hard to pinpoint. A little pine, a little sweet, a little chicken soup. Very much on the earthy side and affects are smooth and sedating. 100% some chill, social smoke or great for anxiety.


Likes
44
Share


@PEAKYPLANTERS
Follow
Hi guys, Welcome back to Queen Peaky's Grasslands
We're into week two of rinsing off these gorgeous little girls covered in strawberry Frosting
You can already perceive some excellent smells👻
Follow us and always support us to always be on top
Kiss kiss
Peakyplanter La Reina
Processing
Likes
26
Share


@eldruida_lamota
Follow
Esa familia, de nuevo volvemos actualizar las skunk, y es que me encanta es una variedad que crece con un gran tallo y corta distancia entre nudos, muy vigorosa, 2/3 crecen bastante guay, pero hay una que aunque también crezca bien se quedo algo más pequeña.
Ph en 6,5 temperatura y humedad controlada, con muchas ganas de ver cómo empiezan a formarse las flores y todo su progreso.


