
Likes
Comments
Share


@Wiffz_CBD
Follow
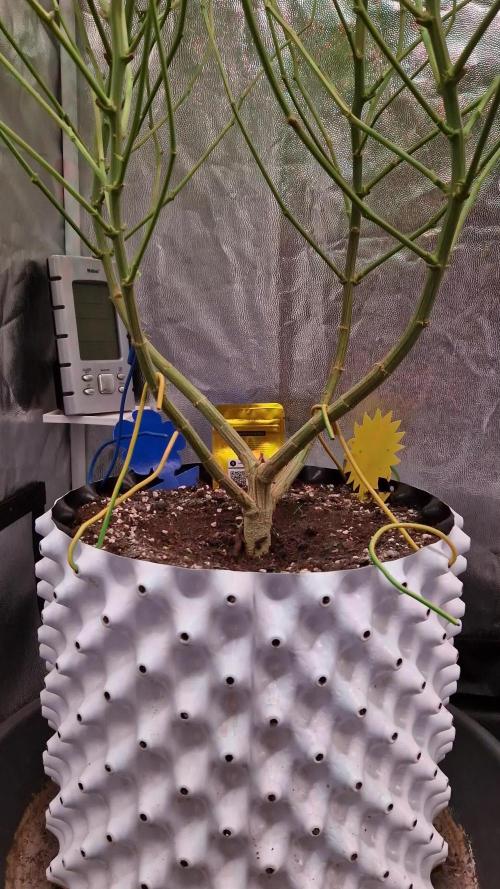
Recharge .5tsp/gal
-1L feed
Added grow dots at the beginning of grow.

Likes
157
Share


@Qutro
Follow
Hi Growmies,
This was her last week, as she was cut down at the end of the week;) I fed her Final Part another 3 days and then changed the reservoir to PH-ed tap water with Flash Clean for 5 days. Dimmed back the light to 50%.
I took out her from the tent for an inspection and I saw more and more milky trichomes turning to amber. This is a clear sign of her maturing beautifully.
After she went with another girl from for 48 hours of darkness before she was chopped.🌱⚔️
Her root ball was looking healthy and much better after the flushing process so next time, I'm sure I won't be using powder silicate because it only made the roots tangled.
The total number of flowering days was 65 since we changed the light cycle to 12/12.
I moved her to the drying tent with 55% RH. She is sharing it with the Dos-si-dos’33 girls. They will remain there as long as needed.
Will come with a longer report next week as I have a lot of thoughts in my mind about this journey to Japan with her.💚🇯🇵
Have a lovely weekend fellow cultivators!
Peace🏻

Likes
18
Share


@emanresU
Follow
16th June
More info on that day in week 8.
18th June
👉[550W @ 28C @ 58%]👈
550W seems pretty good. Safer option then 600W.
I don't see the shroomy to grow bigger so I'm watching closely. When the veil gonna start to break, Im gonna cut the shroomy, leave the mycelium and repeat if needed. The plant where the shroomy is, lookin crazy good.
SHOUT OUT TO T-KIEF FOR SHOUT OUTING ME AT STREAM! 3NT PRODUCTION OFFICIAL (follow them on YT motherTrufkcers!)
Some pics for those who likes
19th June
[HOT @ HOT AF]
Fuck those who discriminate.
Likes
3
Share


@Willy_Balls
Follow
Very interesting strain from Barney’s. Let’s see what kind of pheno can we pin from this batch. I have seen some crazy colorful ones. Terpene profile should also be super complex. Just think about it Gelato, zkittlez, layer cake, crazy mix.

Likes
20
Share

@TrickzGrowz
Follow
Heute ging es rund. Der Massive Busch wurde ausgedünnt und gelollipoppt. Das Netz habe ich ca. 5 cm höher gemacht.

Likes
44
Share


@RakonGrow
Follow
Note : Jegliches Equipment aufgelistet welches ich nutze findet Ihr in der Germinations Woche !!!
Day 15 :
ich weiss noch nicht ob der mineralische dünger wirklich sofort etwas gebracht hat . schauen wir was die zeitraffer so vermitteln. ist es seit gestern schneller am wachsen ?
Day 16 :
PPFD 275 * 20h = DLI 19.8
Day 17:
+ 0.5L Flaschenwasser (EC 0.26)
+ + Canna Rizothonic
+ + Canna Terrar Vega
+ = Total EC 0.68 (PH 7.2)
+ Final PH 6.15
Day 18:
es wächst
Day 19:
es wächst immer noch
ventilation übern blätterdach angemacht. ich glaub daher kommt das ruckeln im video
Day 20:
+ 0.5L Flaschenwasser (EC 0.26)
+ + Canna Rizothonic
+ + Canna Terrar Vega
+ = Total EC 0.68 (PH 7.2)
+ Final PH 6.15
+ 0.5L Leitungswasser (PH 8.0)
Der Stamm hat sich in den letzten 3 Tagen verdreifacht vom Volumen. Jetzt hat er so Bleistift dicke erreicht.
Day 21:
die temps und relative luftfeuchte sind hier zwischen 58%-68% und 23.5°-25.5°C . reguliert sich aber immer zu den höheren werten . ist hier halt so :))
Likes
9
Share


@NONSENSE
Follow
Hi there,
Flushing time, I changed DWC to clean water with PH 6.2.
After 2-3 days the Pineapple Express will be harvested.
It is very sweat smelling plant.
Likes
7
Share


@Stickygreens420
Follow
1/23/2023 - Day 21 Veg: Transplanted all 6 into 1 gallon pots. Still using BuildASoil Light soil and watered in with a compost tea. Gave them a foliar feed with the teas as well. They all look good so far, but we will have to see what they look like tomorrow. Dropped the intensity on the light to about 50%, and I plan to increase it again tomorrow if they are all looking healthy.
1/24/2023 - Day 22: First day after transplant and all the plants are looking good.
1/26/2023 - Day 24 veg: got the genetic test back today and ended up with 2 male and 2 female Grand Prix, which is perfect. Number 1 and 4 are males, and 2 and 3 are females. I was a little bummed #1 was male, because it was already getting some funk, but what can you do. Giving it to a friend who might use it for some breeding, so I'll still get to see how he turns out.
1/27/2023 - Day 25 veg: watered the 4 remaining plants with ThermX-70, FishShit, Fermented Comfrey Extract,Yah-Whey, and fresh aloe juice. Gave them a foliar feed with this as well. Also, lowered the light to about 26 in away from the plants to bring the ppfd to about 500. They are really starting to pick up speed now that they are in the new 1 gallon pots.
1/28/2023 - Day 26 veg: Topped all four today.


Likes
24
Share


@Samsemilla
Follow
Die fünfte Blütewoche hat begonnen.
Das Höhenwachstum scheint nun endlich vorbei zu sein und die Pflanzen konzentrieren ihre Energie auf die Blüten.
Ich hoffe sie kommen mit dem Abstand zur Lampe einigermaßen zurecht und bekommen keinen zu starken Lichtstress.

Likes
14
Share


@TOMI08
Follow
47.nap
A elkezdtem finomat adni nekik
Hesi tnt 10ml 10l víz
Hesi supervit 2csep 10l víz
Plagorn alga bloom 2.5ml 10l víz
Ph 5.8
Mint este esövizzel premezem őket imádják!
Ezek a tápok hihetetlenül működnek kis mértékben is!
2hetente fogom 0.7ml növelti a tápanyagokat
Holnap kapnak neem olajat permetezve 2ml 0.5l víz

Likes
42
Share


@Ukfarmer420
Follow
Hey guys
I'm doing 1 more week of shogun on the large pheno of the strawberry chemdawg og as it is a bit behind the other strawberry chemdawg og and blackberry moonrocks. I started the flush on those 2 plants so I think another week or 2 until I harvest those. The smells are amazing really smelling the strawberries and fruits.
There really packing on the frost now too.


Processing
Likes
9
Share


@YD_59
Follow
one of the plants is flowering and the buds on it look nice so far but like said last week, it also has some seeds/pollen sacs, so I'm hoping there'll still be some buds on it by harvest, the other two haven't started flowering much yet, I've only taken videos because I don't have a light and I couldn't see what I was taking a photo of


Likes
300
Share


@Ju_Bps
Follow
Hello growmies 👩🌾👨🌾🌲🌲,
👋 Still looking good, since transplanted, look growing fast, I guess they're happy to be in biggest pot 😀.
💪 Continuing Defoliation, Topping, lst
💧 Give water each 2/3 day
And vaporise plant with water + Plagron Roots (1ml/l)
1.5 l Water + Roots + Grow + Zym + Sugar Royal (1 + 5 + 1 + 1 ml/l)
1.5 l Water + Roots + Grow + Zym (1 + 5 + 1 ml/l)
PH @6
💡Mars Hydro - FC 3000
37% 45 cm
Mars Hydro Fan kit
Setting 4
Have a good week and see you next week 👋
Thanks community for follow, likes, comments, always a pleasure 👩🌾👨🌾❤️🌲
Mars Hydro - Smart FC3000 300W Samsung LM301B LED Grow Light💡💡
https://www.mars-hydro.com/fc-3000-samsung-lm301b-led-grow-light
Mars Hydro - 6 Inch Inline Fan And Carbon Filter Combo With Thermostat Controller 💨💨
https://www.mars-hydro.com/6-inch-inline-duct-fan-and-carbon-filter-combo-with-thermostat-controller
Fast Buds - Tropicana Cookies FF🌲🌲
https://2fast4buds.com/us/seeds/tropicana-cookies-fast-flowering
Likes
7
Share


@Specialkaos
Follow
So happy 😀 with the ES180 and mephisto think I’m gonna give ethos “inzane in the membrane” a shot next or try 4 autos next just got to flip a coin

Likes
34
Share


@MadeInGermany
Follow
Info:
Unfortunately, I had to find out that my account is used for fake pages in social media.
I am only active here on growdiaries.
I am not on facebook instagram twitter etc All accounts except this one are fake.
Have fun with the update.
Hey everyone ☺️.
This week she has developed beautifully 😍👍.
No training was done this week but next week all drives will be topped :-).
It was poured once with 1 l, which is enough at the beginning because the humidity is very high 👍.
I wish you all the best and have fun 🙏🏻
You can buy this Strain at :
https://www.exoticseed.eu/
Type:
Quick Sherbet
☝️🏼
Genetics:
75% Indica / 25% Sativa
Sunset Sherbet X Black Lemon
👍
Vega lamp:
2 x Todogrow Led
Quantum Board 100 W
💡
Bloom Lamp :
2 x Todogrow Led
Cxb 3590 COB 3500 K 205W
💡💡☝️🏼
Soil :
Canna Coco Professional +
☝️🏼
Fertilizer:
Green House Powder Feeding
☝️🏼🌱
Water:
Osmosis water mixed with normal water (24 hours stale that the chlorine evaporates) to 0.2 EC. Add Cal / Mag to 0.4 Ec Ph with Organic Ph - to 5.5 - 5.8 .

Likes
3
Share


@MotherNaturesSon
Follow
hardy sativa, good taste profile with notes of peach and pink starburst, good yield, does in fact finish fast. likes training and grows robustly, yielding large buds that are quite dense given this strain’s sativa predominance. overdried a bit this time around, by overcorrecting for the summer humidity.


Likes
11
Share


@Captain_Jack
Follow
Day 63 - 1st day of week 10
1) fastbuds-Orange president
2) Inseedious-highribo
Likes
35
Share

@Cauli
Follow
Passion Fruitz was chopped after 81 Days.
The separated branches were hung into a tent to dry for around ten days at 18°C and around 45-55% percent humidity.
After that they were put into a jar and dry trimmed.
Vape Review will follow :)


