




Likes
6
Share


@Kannamar
Follow
Apologies, I hadn't time to report and share my experience on the 3rd year of indoor grow.
I even didn't took photos from the beginnings, shame on me!
I finally decide to post the few I did to share with a friend... and I began last week to keep records.
So, this is week 6. but I'm currently on week endig week 9.
Almost the same setup as the previous indoor.
- MyPot (a mix between hydro & areo)
- small tent 60x60x160
- Lumatek ATS 200 PRO, but at 75% or 50%
- Nutrients TA Tripart
- 3 autos from Sweet Seeds,
I changed some part of the setup, I'll explain later on.
Now, I'll prefer to post the next weeks...

Likes
Comments
Share



Likes
6
Share

@McChi
Follow
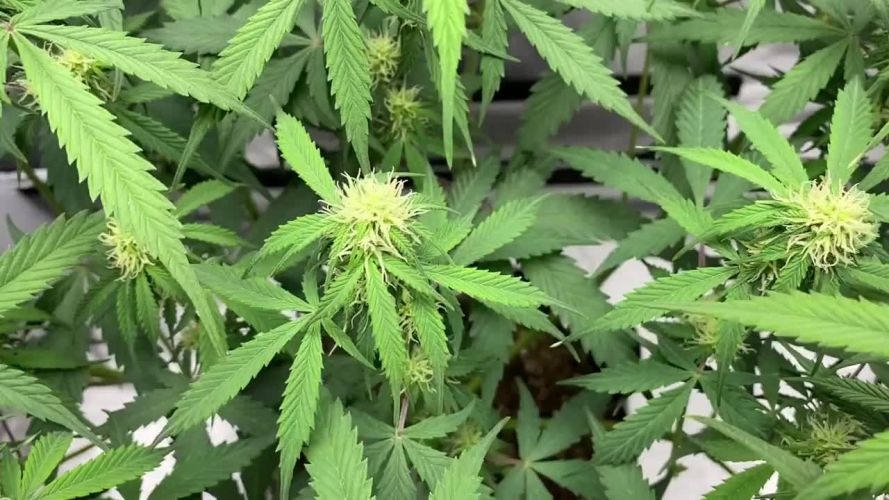
Solid week!! Fed her bloom nutrients on day 50. Responding nicely. I pulled down the main 8 to allow for better light and airflow throughout. Once I did that she really started to fill in again. This also seems to help stop the stretch, or maybe it was just timing and stretch was coming to an end anyways. Either way, glad it did as I am am running out of room to raise the lights and have no more options for setup. Bud sites are all starting to fill in good and fatten up a tiny bit. Looking forward to seeing how these shape up!!!

Likes
101
Share


@Papablob
Follow
05/04 petit nettoyage du bas pour avoir des têtes durs. (Ci possible avec la grosse qui bouffe la place au soleil) 🙏

Likes
44
Share


@RastaMouse
Follow
Well she is down. Smells so dam good. Proper zesty smell. Can’t wait to sample her in a week before she goes in to cure. Will update next week with harvest ect. Happy growing all and be safe 😎

Likes
7
Share

@XxWald0
Follow
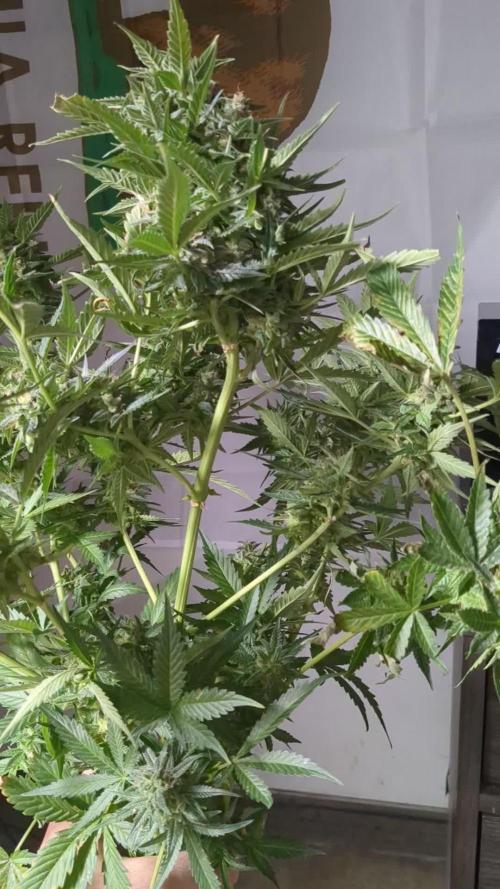
The Do-Si-Dos Auto has some huge heavy buds and it definitely could've benefited from more LST but I'm I didn't have the room

Likes
7
Share

@420DeepGrow
Follow
📆 Semana 5
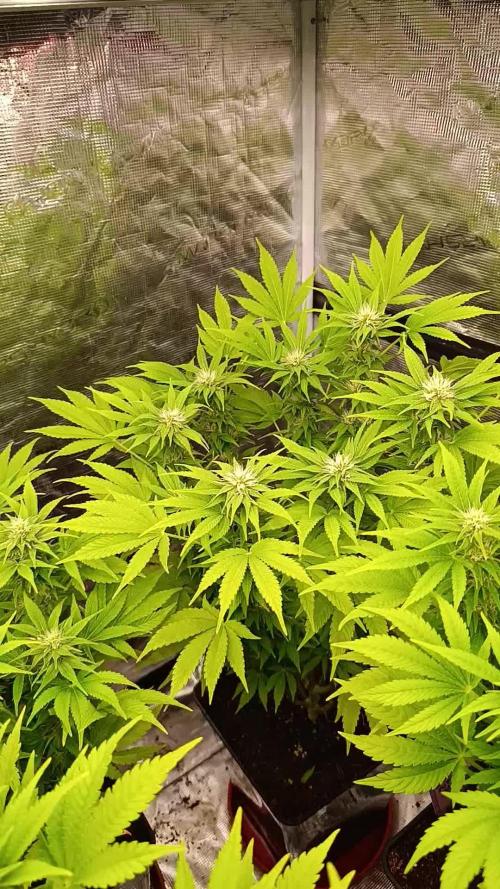
La absorción ya es estable y el pH se mantiene controlado tras el reajuste. El coco vuelve a estar en equilibrio y el drenaje lo confirma.
El stretch ha terminado y la planta centra su energía en formar y compactar flores. Los cogollos empiezan a apilar con más densidad y el verde se ve más uniforme, aunque quedan leves marcas del exceso anterior.
Consolidando base para el engorde.
Seguimos creciendo fuerte 💪!

Likes
13
Share


@Megaprezoni
Follow
Day 14 from planting directly in substrate.
Do my plants look healthy? i don't know cause this is my first grow.
Likes
9
Share


@Grow_for_Happiness
Follow
Well it finally happened, the girls have outgrown the 4x4! Was mid week and was having a hard time keeping humidity below 65%. Thought of defoliating, but can't keep doing that weekly or it will shock them sooner than later. So I decided to move the front left plant to the 3x3 under the Photontek SQ300W, giving the girls in the 4x4 some much needed breathing room. Set about retraining the plants to maximise space in the big tent, and then flattened out the lonely girl in the 3x3. Crazy enough the 4x4 still looks full by end of week, and the one by itself is getting close to filling the 3x3! This could be a pretty big grow by the time we finish 🤞.
Have the solo plant running on the older Autopot valves with 6mm hose, and already had one clogging issue. Seems really early on, in past would take 2-3 weeks so thinking maybe I didn't have the lines 100% clean to start. Either way easy fix just blow out the clog and flush the lines with a liter or so and back in business. Always remember to flush the on/off valve as well as the main valve in the tray.
Otherwise raised the lights in 4x4 to their max height (5" from roof) and took all the slack out of the cables to keep them off the lights. Adjusted the ties on last day of the week, but things seem pretty set now in the big tent so will just be widening out the lone girl once she grows a bit more. I'm sure by end of week that tent will be packed as well!

Processing
Likes
24
Share


Likes
13
Share


@PopsFarm
Follow
Day 52
Here you can see the Runtz Auto from @kannabiaglobal / @kannabiaseedsfr / @kannabiaseedsde / @kannabiaseedsint @kannabiaseedsus
Nutrients: @atami_deutschland / @atami.international / @stefan_atami / @daniel_atami
Soil: @promixgrowers_eur / @promixgrowers_global / @promixgrowers_unfiltered / @promixmitch
LED: @powerlux_spain
Tent: @secretjardin_
Thank you to everyone who follows and supports my work 🙏🏻💚
This means a lot to me and you should know you are a part of it and only with you all this is possible, you are the best community 😎
Growers love, love for everyone

Likes
11
Share


@Andre3001
Follow
Hi everyone. This week has been easy, shes in autopilot now. The nuggets are definitely getting bigger with nice density. I gave the main cola a little squeeze and shes was very sticky and smelled amazing. The citrus smell is strong but right behind it comes a nice soothing pine smell, if you like outdoors that is. Thanks for the advice @budxs💪🏾, I've adjusted my temps accordingly.


Likes
10
Share


@Cannabot
Follow
Transplants been done into final containers(20l)and started LST.They doing really well,they've started sexing so I reckon from next week I'd say week 1 flower.Havent fully saturated the medium as yet with fertigation ,want that stem thicker before I do that. Weathers been decent but the wind has been strong on 1 or 2 days.


Likes
10
Share


Likes
45
Share


@masterofsmeagol
Follow
8/14 Everything looked beautiful this morning. Seems like I've got the watering schedule down better. I do have one gmo that looks hungry so I need to increase nutes. At least on that plant. Toasted toffy has little spits that could be water marks, pests or septoria. I don't think it's septoria. In the pastvi lost far more leaves when I had septoria. I've been crazy busy. I'm surprised things are going this well. I need to put up the final supports so I can add to them once I've got big heavy buds. I was really stoked to see everything doing so well. The plant in the 50gallon is the furthest in flower. I'm so grateful to have the ability to grow high quality cannabis for myself amd my wife. There's nothing quite like it. That hash I made turned out great. I think I'll press it today. Supports will be done this week. Saw a few aphids on the plant I cut down. Earwigs aren't here this summer or there would be NO aphids. Plus when I cleaned out the insides this morning I found some dead leaves WAY in the middle by the stalk. They would've eaten that shit if they were here. Birds and other predators seem to be keeping pillars at bay. I'm not seeing the damage and when I do sfind one it's absolutely tiny like a newborn. I'll think about whether I need to spray BT.
8/15 That fucking cancel button always fucks everything out. I was done no I need to start over. Didn't water last night. Found pm on my gmo in the 30. Interior of the plant. Should've defoliated better and earlier. Oh well. I'll treat with k bicarb or plant doctor. I'll have to think about it. Other plants are looking good. Well they all are. I just hate pm. I can't isolate it due to local laws so it is what it is. Nothing I haven't dealt with before. Watered today. The middle gmo in the 30 got 1.5 gallons. The other plants each got a gallon. Including the one in the 10gal and 50 gal. Its supposed to rain but only like .1. I also chose to feed today. All plants got a gallon. I DID NOT WATER THE EVENT HORIZON IN THE MIDDLE AND THE SHERB PIE AS THEY WERE PRAYING AND HEAVY. I need to get these supports up. I'll update as I go.
Oh and one thing I remembered is that, I didn't properly sanitize the trellis nets I installed on the plant that has pm (non visible today but still). I harvested the plant that used that bet last year was harvested in two stages. The bottom I let go way later and ended up with a little pm on the stuff I left for hash material and it got some pm. I wonder if that's whete this came from.
8/16 Death in the family this morning. I couldn't decide if I should use organocide plant doctor or not. It's a systemic It's been discontinued and reformulated. It's a systemic fungicide. Instead I mixed two tsp potassium bicarbonate with a little dawn in a half gallon mister. I used gloves and defoliated everything that had pm on it. I checked the plants next to it and luckily it hasn't spread yet....but it will. I feel safer using the k bicarb. I'll do more research and try to find the best way to tackle this. I don't want to get rid of the plant and due to local ordinance I can't isolate it. If I can keep it to this one plantvthat would be fine. I'd just use it for extracts. So glad I didn't use all that netting and put up tjosr supports. I'll need to disinfect them if I decide to use them. We'll see. Plants are coming right along flowering.
WENT BACK OVER AND DEFOLIATED A BUNCH OF fan leaves and interior stuff to promote airflow. Still saw pm on that plant u had treated earlier with k bicarb. I can't isolate due to laws and I'm not willing to discard this massive monster cropped plant. So I'm going to treat it. I started by removing everything infected and improving airflow on that plant and all the others. I didn't make it to one event horizon. I plan to treat the infected plant with Organocide Plant Doctor since its what I have on hand and I've had good luck. It's a systemic. After I treat the one plant and see that it didn't hurt the plant I'll use a preventative dosage on the other plants. I've battled wpm several times. This is something I'm very familiar with. What sucks is it's totally my fault it happened due to grower error. This has set back me puttingvup my supports as well. Plants look good woth a haircut. Also the toasted toffy had some leaves removed with spots that looked like septoria. I think nutes havecreally kicked things in gear. Now there are little buds on plants.
8/17 BAGS still seemed heavy so I didn't water. It's been MUCH cooler. It's 63 at 9am. It would normally be 80 by now so maybe they aren't using as much water. I watered the the toasted toffy I missed last round but the Sherb Pie still had weight to it. I also watered the GMO on the far side and the one in the 30 as the seemed a little lighter. I looked in and I couldn't find a SPOT of powder mildew on the plant! I know it will come back but on this 100% rh day there isn't a spot I can find! I'm going to go check on them later today. Do some more defoliation and treat the plants with Plant Doctor to try to mitigate the spread of the P.M. Very suprised the k bicarb worked like that.
WENT BACK OVER AROUND 11. I WATERED THE TWO THAT DIDNT GET WATERED LAST TIME. THE EVENT HORIZON AND THE SHERB PIE. IT WAS COLD AND OVERCAST. TEMPS HAVE BEEN MUCH COOLER. SOON AS I WATERED THE SUN CAME OHT AND THE TEMP WENT UP. I WENT THROUGH THE PLANTS I MISSED AND SEFOLIATED LEAVES AND INTERIOR BRANCHES TO INCREASE AIRFLOW. SURPRISED TO STILL SEE NO PM WITH 100% HUMIDITY. I WENT THROUGH EVERY PLANT. ILL NEED TO GO TJROUGH AGAIN BUT TJIS IS MUCH BETTER. THE TOASTED TOFFY THAT MAY HAVE SEPTORIA I WILL TREAT TONOGHT WITH PLANT DOCTOR. I REMOVED ANYTHING LOOKING INFECTED. I LSTed THE BIGGEST BRANCHES WITH CLIPS TO THE BAG AMD TWINE. SO AIRFLOW IS MUCH BETTER. I THEN REMOVED A BU CH OF THE MIDDLE. I COULD TAKE MORE BUT ON OUTDOOR HARVESTS THAT LITTLE STUFF GOES IN EXTRACTS. I PUT A FEW HOURS IN TODAY. IM GOING BACK AND ILL TEST THE PLANT DOCTOR ON THE TOASTED TOFFY. BUT IF THE K BICARB WORKS THIS GOOD ILL JUST KEEP USING THAT.
8/18 It started sprinkling when I left this morning. I did more defoliation on a few different plants. Including the healthiest GMO. It seems like things should be further in flower but it is what it is. I'm not doing clones again. Only reason I did is because I lost my 72 seedlings and depleted my seed supply. I hate treating pm. Lost Coast Plant Therapy I'd really whete its at when it comes to treating pm. I might just order that. My commercial buddy told me that he wouldn't use the plant doctor and not to "spray shot all over my plants". He's probably right. I see something small and try to overcurrent. I dont see any more septoria looking leaves on the toasted toffy since I lsted it and removed damaged leaves. I was going to use the fungicide plant doctor on that and then use it ad a preventative. He's probably right. I've put a lot of work in defoliation and such. It WILL spread but it hasn't yet. I removed what I saw. I was going to hit it again with k bicarb but it said it should be weekly treatments.i hope I'm doing things right. I shouldn't be this worried about pm but I've got am anxiety disorder. I'll fully sterilize (AGAIN) my posts and trellis netting before I instal it. I'll probably go check on them later. It's hard to avoid pm with 100% humidity and 30° temp swings. I've got a few lights so maybe this winter I'll do indoor. I'll try to keep this updated. LOOKING BACK AT PRIOR DIARIES I GUESS IM RIGHT WHERE I SHOULD BE FLOWERING WISE. I JUST HAD A COUPLE REALLY EARLY PHENOS A COUPLE TIMES.
8/19 Defoliated some more stuff amd tried to improve airflow. Humidity is high and it was sprinkling earlier. I think we'll have showers. Not seeing much pm. MAYBE a little in the middle of that middle gmo but it could just be residue. I'll treat it again with potassium bicarbonate soon. If that doesn't work I'll switch up treatments. I've got citric acid amd some other stuff too. I almost ordered lost coast last night but decided I'd wait to try it out. The toasted toffy has SOME spots that look like septoria. It's the second furthest in flower and very indica leaning. It seems to be flowering vigorously so I don't want to fuck with it too much. I could use plant doctor on it and see what happens but I'm going to monitor for a few days after defoliating.
WENT BACK OVER AROUND 4 AND SHOOK OFFCTHE PLANTS. HADNT RAINED MUCH. BAGS ARE STILL HEAVY. THE TEN WAS LIGHT AND THE EVENT HORIZON BESIDE IT SEEMED A LITTLE LGHT AS WELL. I THINK IT MIGHT BE ME COMPARING THEM TO OTHER PLANTS THAT ARE SATURATED. SEEING HOW THEY BOTH LOOKED THE BEST IVE EVER SEEN THEM I HELD OFF WATERING. ITS ALSO SPRINKL9NG AMD GOING TO RAIN TONIGHT. ILL REASSESS IN THE MORNING. PLANNED ON USING PLANT DOCTOR ON TOASTED TOFFY BUT DECIDED AGAINST IT PARTIALLY DUE TO THE RAIN. PARTIALLY BECAUSE I PUSSED OUT. I WANTED TO FEED. IVE NOTICED SOME FADE AND PLANTS PUSHING AND TRYING TO GET OVER THE FENXE INTO FLOWER. THE TOASTED TOFFY AND THE UNKNOWN IN THE 50 ATE THE FURTHEST ALONG AND DEVELOPING ROCK HARD BUDS. GMO HAS A MASSIVE STRETCH. THINGS CHANGE DAILY. I WANTED TO GET A GOOD DOSE OF NUTES IN SO AFTER THIS LITTLE BIT OF RAIN WHEN WE GET THAT NICE SUNSHINE MY PLANTS WILL TAKE OFF!! THEY'VE BEEN PROGRESSING FAST DESPITE THE SHITTY WEATHER.
8/20 It's still sprinkling. It SAYS WE got zero rain yesterday but that's just not true. Today is supposed to be light showers with like .02 in 9f rain. I mixed up some water to check the plants. I figured a few would he light. The event horizon on the back SEEMED a little light. So did the one invthe ten. I realized it was just comparing it to the bags that were saturated. Still I ended up giving the event horizon in the back a half gallon and split the other half with the one in the 10 that dries out super fast. It's crazy. The weather just abruptly changed one day and I go from watering twice a day to hardly at all! Everything but the sherb pie and the seedling in the 10gal are vigorously flowering. Upping the nutes was a smart move. The seemed to like it. I'm gonna check later and as soon as I can I'll hit that toasted toffy with plant doctor. That's tied for furthest along in flower. I've done a bunch of research and I think this is the right move. I'll keep this updated. After this small patch of shitty weather we are goingvto get some sun amd these girls will EXPLODE!
WENT BACK OVER A FEW TIMES. LAST AT SIX. I DID SOME DEFOLIATION AND PRUNING OF PLANT INTERIORS. ITS ABOUT TIME TO TREAT THE TOASTED TOFFY AGAIN WITH PLANT DOCTOR. I CAN SEE SOME SEPTORIA SPOTS. I TREATED THE EVENT HORIZON THIS MORNING. IT GOT A FEW HOURS BEFORE A LITTPE RAIN WND THEN SUNNY AND 80. I USED BETWEEN A QUARTER AND HALF GALLON ON THE INE PLANT. I MAY NOT HAVE USED ENOUGH OF THE MIXED UP SOLUTION ONVTHE TOASTED TOFFY. IT HAD BEEN WORKING AWESOME AND NOW THAT ITS TIME TO REAPPLY I NOTICE A FEW LEAVES THAT LOOK INFECTED. OVER THE NEXT WEEK ILL BE MONITORING THE RESPONS FROM THE PLANT DOCTOR. I'M CONSIDERING APPLYING PLANT DOCTOR TO THE REST OF THE GARDEN. I THIBJ THE K BICARB HAS BEEN DOING GOOD KEEPING THE PM DOWN ON THE MIDDLE GMO. I HATE THAT I HAVE TO FIGHT DISEASES. IM NOT DOING CLONES AGAIN. AND IM GOING TO BE MUCH CLEANER. THE SHERB PIE LOOKS A LITTLE OVERWATERED AND HAS SOME YELLOW LEAVES BUT MANY HAVE TURNED PURPLE AND OTHER FALL COLORS. THE PLANTS ARE AGGRESSIVELY FLOWERING AND TEMPS ARE CHANGING. STILL IN EARLY FLOWER. IVE GOT A GOOD FEELING. IVE DEALT WITH MUCH WORSE AND CAME OUT GOOD.
Likes
5
Share


@BombBuds
Follow
Erntezeit!
Getrocknet wurde 9 Tage bei ~55% Luftfeuchtigkeit und 20 grad.
Trocken getrimmt.
Alle Popcorn nugs und Verschnitt zu Hash weiterverarbeitet.

Likes
Comments
Share


@PLUMEBUSH
Follow
Растишка очень хорошо кушает удобрения для цветения, с каждым днем шишки набухают. Начал давать калий чтобы с фосфором усваивался и растение давало более крупные соцветия.Сделал дефолиацию и растянул ветви для доступа света ко всем шишкам.
